
1. Introduction
Dart 3 introduces patterns to the language, a major new category of grammar. Beyond this new way to write Dart code, there are several other language enhancements, including
- records for bundling data of different types,
- class modifiers for controlling access, and
- new switch expressions and if-case statements.
These features expand the choices you have when writing Dart code. In this codelab, you learn how to use them to make your code more compact, streamlined, and flexible.
This codelab assumes you have some familiarity with Flutter and Dart. If you feel a little rusty, consider brushing up on the basics with the following resources:
What you'll build
This codelab creates an application that displays a JSON document in Flutter. The application simulates JSON coming from an external source. The JSON contains document data such as the modification date, title, headers, and paragraphs. You write code to neatly pack data into records so that it can be transferred and unpacked wherever your Flutter widgets need it.
You then use patterns to build the appropriate widget when the value matches that pattern. You also see how to use patterns to destructure data into local variables.
What you'll learn
- How to create a record that stores multiple values with different types.
- How to return multiple values from a function using a record.
- How to use patterns to match, validate, and destructure data from records and other objects.
- How to bind pattern-matched values to new or existing variables.
- How to use new switch statement capabilities, switch expressions, and if-case statements.
- How to take advantage of exhaustiveness checking to ensure that every case is handled in a switch statement or switch expression.
2. Set up your environment
- Install the Flutter SDK.
- Set up an editor such as Visual Studio Code (VS Code).
- Go through the Platform setup steps for at least one target platform (iOS, Android, Desktop, or a web browser).
3. Create the project
Before diving into patterns, records, and other new features, take a moment to create a Flutter project for which you write all your code.
Create a Flutter project
- Use the
flutter createcommand to create a new project namedpatterns_codelab. The--emptyflag prevents the creation of the standard counter app in thelib/main.dartfile, which you'd have to remove anyway.
flutter create --empty patterns_codelab
- Then, open the
patterns_codelabdirectory using VS Code.
code patterns_codelab
Set the minimum SDK version
- Set the SDK version constraint for your project to depend on Dart 3 or above.
pubspec.yaml
environment:
  sdk: ^3.0.0
4. Set up the project
In this step, you create or update two Dart files:
- The
main.dartfile that contains widgets for the app, and - The
data.dartfile that provides the app's data.
You will continue modifying both of these files in the subsequent steps.
Define the data for the app
- Create a new file,
lib/data.dart, and add the following code to it:
lib/data.dart
import 'dart:convert';

class Document {
  final Map<String, Object?> _json;
  Document() : _json = jsonDecode(documentJson);
}

const documentJson = '''
{
  "metadata": {
    "title": "My Document",
    "modified": "2023-05-10"
  },
  "blocks": [
    {
      "type": "h1",
      "text": "Chapter 1"
    },
    {
      "type": "p",
      "text": "Lorem ipsum dolor sit amet, consectetur adipiscing elit."
    },
    {
      "type": "checkbox",
      "checked": false,
      "text": "Learn Dart 3"
    }
  ]
}
''';
Imagine a program receiving data from an external source, like an I/O stream or HTTP request. In this codelab, you simplify that more-realistic use case by mocking incoming JSON data with a multi-line string in the documentJson variable.
The JSON data is defined in the Document class. Later in this codelab, you add functions that return data from the parsed JSON. This class defines and initializes the _json field in its constructor.
Run the app
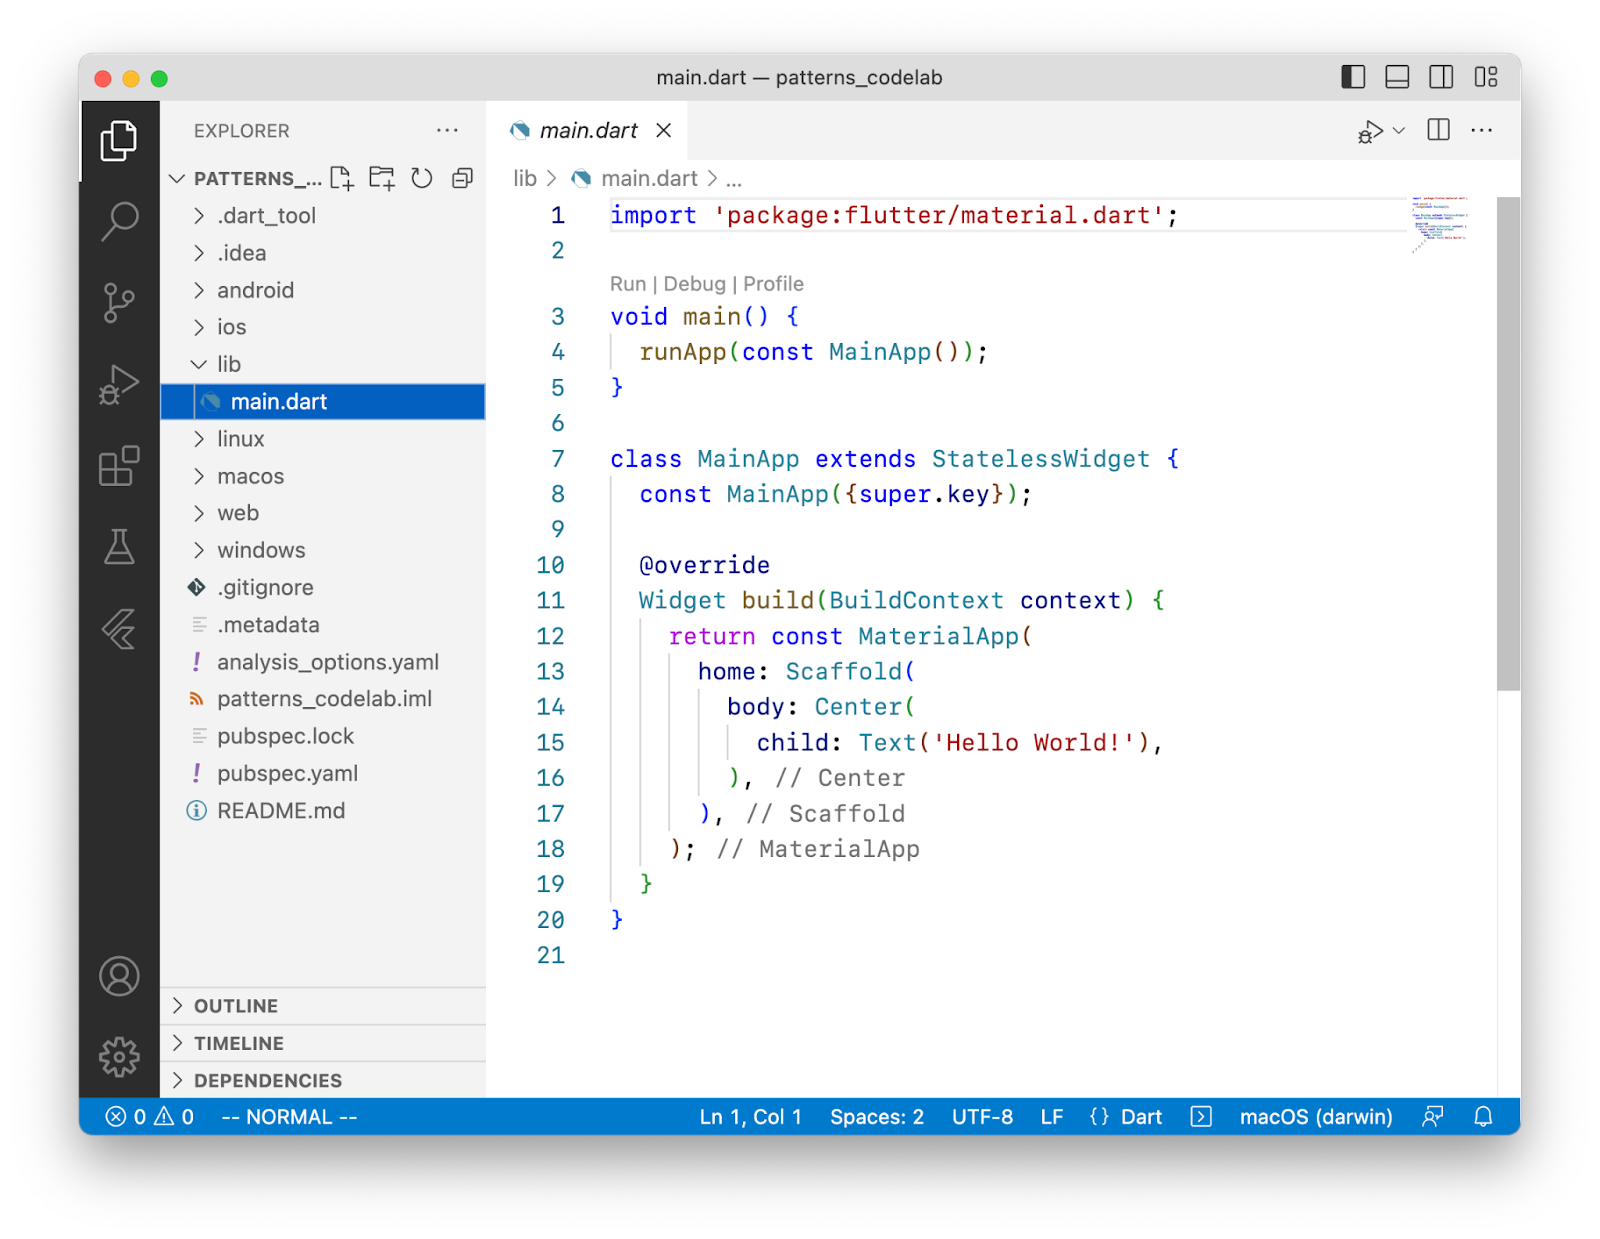
The flutter create command creates the lib/main.dart file as part of the default Flutter file structure.
- To create a starting point for the application, replace the contents of
main.dartwith the following code:
lib/main.dart
import 'package:flutter/material.dart';

import 'data.dart';

void main() {
  runApp(const DocumentApp());
}

class DocumentApp extends StatelessWidget {
  const DocumentApp({super.key});

  @override
  Widget build(BuildContext context) {
    return MaterialApp(
      theme: ThemeData(),
      home: DocumentScreen(document: Document()),
    );
  }
}

class DocumentScreen extends StatelessWidget {
  final Document document;

  const DocumentScreen({required this.document, super.key});

  @override
  Widget build(BuildContext context) {
    return Scaffold(
      appBar: AppBar(title: const Text('Title goes here')),
      body: const Column(children: [Center(child: Text('Body goes here'))]),
    );
  }
}
You added the following two widgets to the app:
DocumentAppsets up the latest version of Material Design for theming the UI.DocumentScreenprovides the visual layout of the page using theScaffoldwidget.
- To make sure everything is running smoothly, run the app on your host machine by clicking Run and Debug:

- By default, Flutter chooses whichever target platform is available. To change the target platform, select the current platform on the Status Bar:

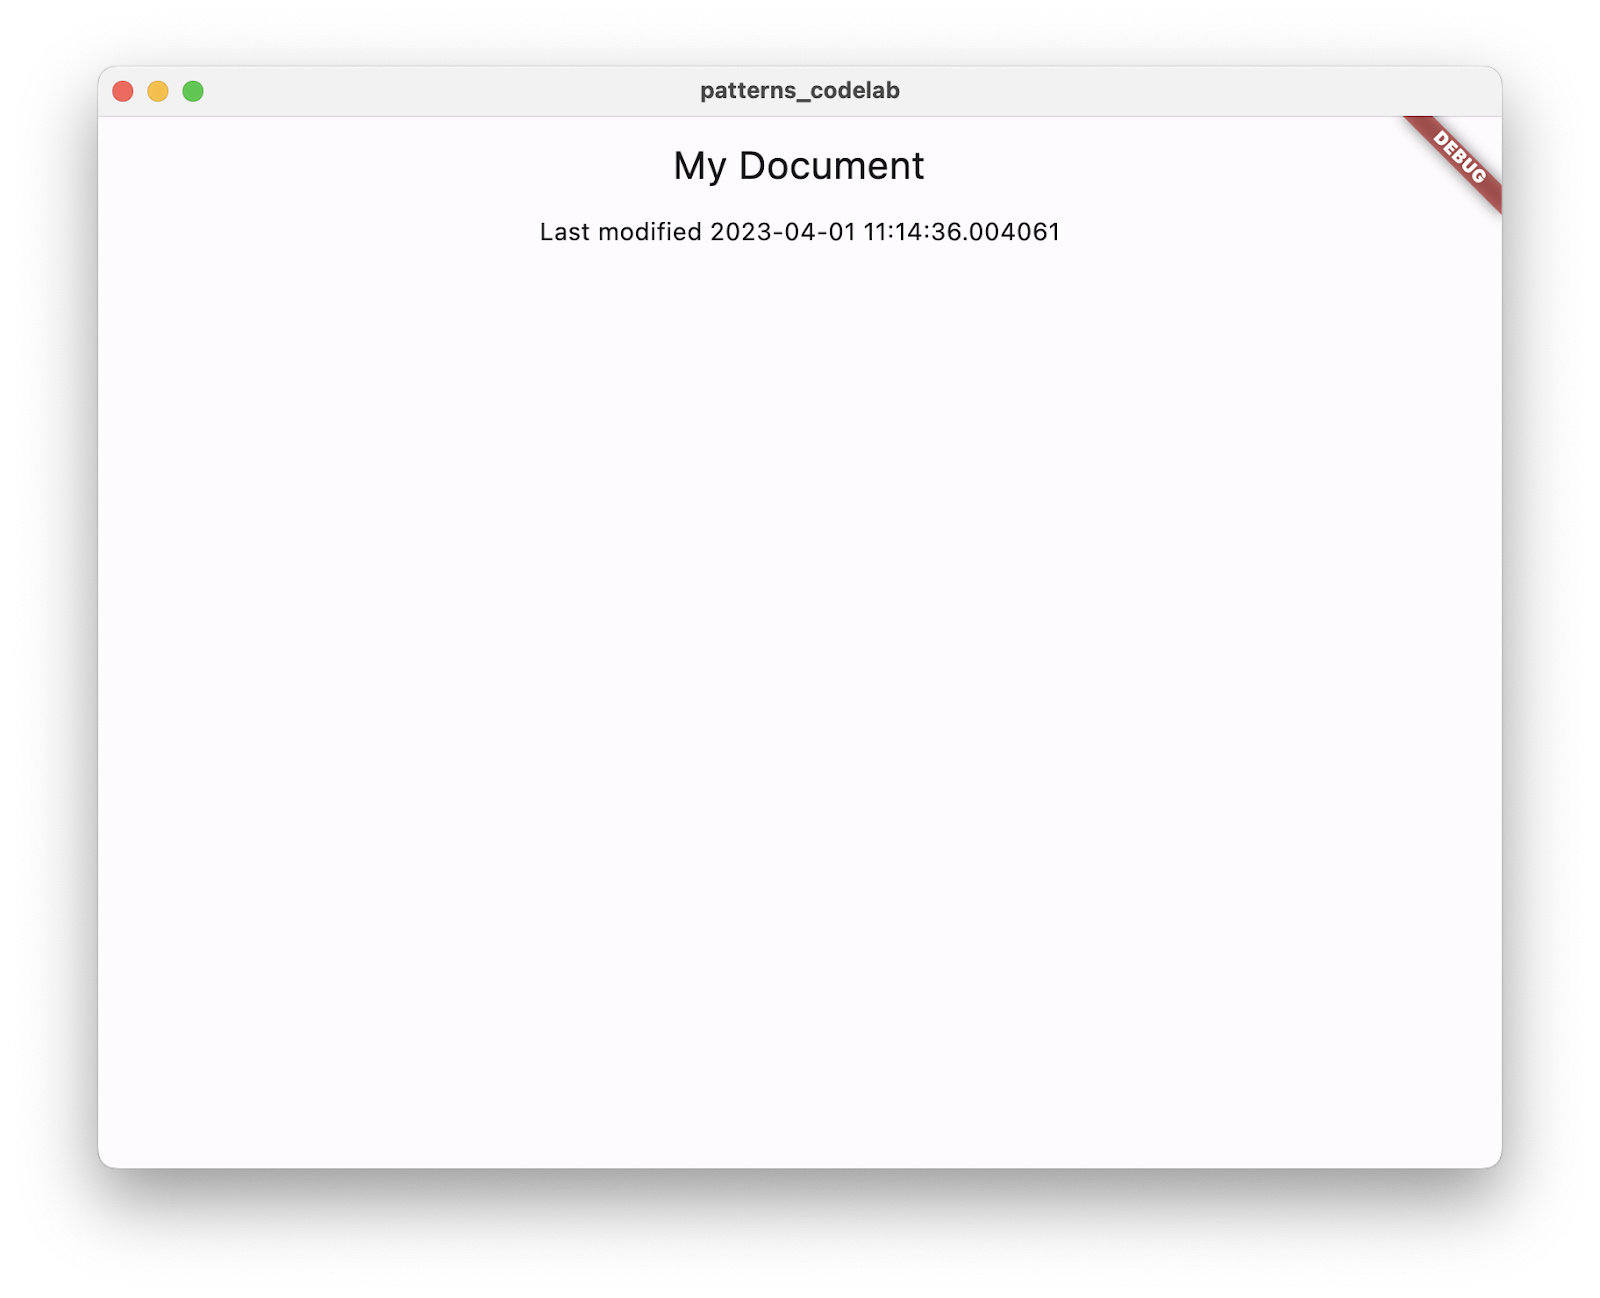
You should see an empty frame with the title and body elements defined in the DocumentScreen widget:

5. Create and return records
In this step, you use records to return multiple values from a function call. Then, you call that function in the DocumentScreen widget to access the values and reflect them in the UI.
Create and return a record
- In
data.dart, add a new getter method to the Document class calledmetadatathat returns a record:
lib/data.dart
import 'dart:convert';

class Document {
  final Map<String, Object?> _json;
  Document() : _json = jsonDecode(documentJson);

  (String, {DateTime modified}) get metadata {           // Add from here...
    const title = 'My Document';
    final now = DateTime.now();

    return (title, modified: now);
  }                                                      // to here.
}
The return type for this function is a record with two fields, one with the type String, and the other with the type DateTime.
The return statement constructs a new record by enclosing the two values in parenthesis, (title, modified: now).
The first field is positional and unnamed, and the second field is named modified.
Access record fields
- In the
DocumentScreenwidget, call themetadatagetter method in thebuildmethod so that you can get your record and access its values:
lib/main.dart
class DocumentScreen extends StatelessWidget {
  final Document document;

  const DocumentScreen({required this.document, super.key});

  @override
  Widget build(BuildContext context) {
    final metadataRecord = document.metadata;              // Add this line.

    return Scaffold(
      appBar: AppBar(title: Text(metadataRecord.$1)),      // Modify this line,
      body: Column(
        children: [                                        // And the following line.
          Center(child: Text('Last modified ${metadataRecord.modified}')),
        ],
      ),
    );
  }
}
The metadata getter method returns a record, which is assigned to the local variable metadataRecord. Records are a light and easy way to return multiple values from a single function call and assign them to a variable.
To access the individual fields composed in that record, you can use records built-in getter syntax.
- To get a positional field (a field without a name, like
title), use the getter - Named fields like
modifieddon't have a positional getter, so you can use its name directly, likemetadataRecord.modified.
To determine the name of a getter for a positional field, start at $1 and skip named fields. For example:
var record = (named: 'v', 'y', named2: 'x', 'z');
print(record.$1);                               // prints y
print(record.$2);                               // prints z
- Hot reload to see the JSON values displayed in the app. The VS Code Dart plugin hot-reloads every time you save a file.
You can see that each field did, in fact, maintain its type.
- The
Text()method takes a String as its first argument. - The
modifiedfield is a DateTime, and is converted into aStringusing string interpolation.
The other type-safe way to return different types of data is to define a class, which is more verbose.
6. Match and destructure with patterns
Records can efficiently collect different types of data and easily pass it around. Now, improve your code using patterns.
A pattern represents a structure that one or more values can take, like a blueprint. Patterns compare against actual values to determine if they match.
Some patterns, when they match, destructure the matched value by pulling data out of it. Destructuring lets you unpack values from an object to assign them to local variables, or perform further matching on them.
Destructure a record into local variables
- Refactor the
buildmethod ofDocumentScreento callmetadataand use it to initialize a pattern variable declaration:
lib/main.dart
class DocumentScreen extends StatelessWidget {
  final Document document;

  const DocumentScreen({required this.document, super.key});

  @override
  Widget build(BuildContext context) {
    final (title, modified: modified) = document.metadata;   // Modify

    return Scaffold(
      appBar: AppBar(title: Text(title)),                    // Modify from here...
      body: Column(children: [Center(child: Text('Last modified $modified'))]),
    );                                                       // To here.
  }
}
The record pattern (title, modified: modified) contains two variable patterns that match against the fields of the record returned by metadata.
- The expression matches the subpattern because the result is a record with two fields, one of which is named
modified. - Because they match, the variable declaration pattern destructures the expression, accessing its values and binding them to new local variables of the same types and names,
String titleandDateTime modified.
There is a shorthand for when the name of a field and the variable populating it are the same. Refactor the build method of DocumentScreen as follows.
lib/main.dart
class DocumentScreen extends StatelessWidget {
  final Document document;

  const DocumentScreen({required this.document, super.key});

  @override
  Widget build(BuildContext context) {
    final (title, :modified) = document.metadata;            // Modify

    return Scaffold(
      appBar: AppBar(title: Text(title)),
      body: Column(children: [Center(child: Text('Last modified $modified'))]),
    );
  }
}
The syntax of the variable pattern :modified is shorthand for modified: modified. If you want a new local variable of a different name, you can write modified: localModified instead.
- Hot reload to see the same result as in the previous step. The behavior is exactly the same; you just made your code more concise.
7. Use patterns to extract data
In certain contexts, patterns don't only match and destructure but can also make a decision about what the code does, based on whether or not the pattern matches. These are called refutable patterns.
The variable declaration pattern you used in the last step is an irrefutable pattern: the value must match the pattern or it's an error and destructuring won't happen. Think of any variable declaration or assignment; you can't assign a value to a variable if they're not the same type.
Refutable patterns, on the other hand, are used in control flow contexts:
- They expect that some values they compare against will not match.
- They are meant to influence the control flow, based on whether or not the value matches.
- They don't interrupt execution with an error if they don't match, they just move to the next statement.
- They can destructure and bind variables that are only usable when they match
Read JSON values without patterns
In this section, you read data without pattern matching to see how patterns can help you work with JSON data.
- Replace the previous version of
metadatawith one that reads values from the_jsonmap. Copy and paste this version ofmetadatainto theDocumentclass:
lib/data.dart
class Document {
  final Map<String, Object?> _json;
  Document() : _json = jsonDecode(documentJson);

  (String, {DateTime modified}) get metadata {
    if (_json.containsKey('metadata')) {                     // Modify from here...
      final metadataJson = _json['metadata'];
      if (metadataJson is Map) {
        final title = metadataJson['title'] as String;
        final localModified = DateTime.parse(
          metadataJson['modified'] as String,
        );
        return (title, modified: localModified);
      }
    }
    throw const FormatException('Unexpected JSON');          // to here.
  }
}
This code validates that the data is structured correctly without using patterns. In a later step, you use pattern matching to perform the same validation using less code. It performs three checks before doing anything else:
- The JSON contains the data structure you expect:
if (_json.containsKey('metadata')) - The data has the type you expect:
if (metadataJson is Map) - That the data is not null, which is implicitly confirmed in the previous check.
Read JSON values using a map pattern
With a refutable pattern, you can verify that the JSON has the expected structure using a map pattern.
- Replace the previous version of
metadatawith this code:
lib/data.dart
class Document {
  final Map<String, Object?> _json;
  Document() : _json = jsonDecode(documentJson);

  (String, {DateTime modified}) get metadata {
    if (_json case {                                         // Modify from here...
      'metadata': {'title': String title, 'modified': String localModified},
    }) {
      return (title, modified: DateTime.parse(localModified));
    } else {
      throw const FormatException('Unexpected JSON');
    }                                                        // to here.
  }
}
Here, you see a new kind of if-statement (introduced in Dart 3), the if-case. The case body only executes if the case pattern matches the data in _json. This match accomplishes the same checks you wrote in the first version of metadata to validate the incoming JSON. This code validates the following:
_jsonis a Map type._jsoncontains ametadatakey._jsonis not null._json['metadata']is also a Map type._json['metadata']contains the keystitleandmodified.titleandlocalModifiedare strings and aren't null.
If the value doesn't match, the pattern refutes (refuses to continue execution) and proceeds to the else clause. If the match is successful, the pattern destructures the values of title and modified from the map and binds them to new local variables.
For a full list of patterns, see the table in the Patterns section of the feature specification.
8. Prepare the app for more patterns
So far, you address the metadata part of the JSON data. In this step, you refine your business logic a bit more in order to handle the data in the blocks list and render it into your app.
{
  "metadata": {
    // ...
  },
  "blocks": [
    {
      "type": "h1",
      "text": "Chapter 1"
    },
    // ...
  ]
}
Create a class that stores data
- Add a new class,
Block, todata.dart, which is used to read and store the data for one of the blocks in the JSON data.
lib/data.dart
class Block {
  final String type;
  final String text;
  Block(this.type, this.text);

  factory Block.fromJson(Map<String, dynamic> json) {
    if (json case {'type': final type, 'text': final text}) {
      return Block(type, text);
    } else {
      throw const FormatException('Unexpected JSON format');
    }
  }
}
The factory constructor fromJson() uses the same if-case with a map pattern that you've seen before.
You'll see that the JSON data looks like the expected pattern, even though it has an extra piece of information called checked that isn't in the pattern. This is because when you're using these kinds of patterns (called "map patterns"), they only care about the specific things you've defined in the pattern and ignore anything else in the data.
Return a list of Block objects
- Next, add a new function,
getBlocks(), to theDocumentclass.getBlocks()parses the JSON into instances of theBlockclass and returns a list of blocks to render in your UI:
lib/data.dart
class Document {
  final Map<String, Object?> _json;
  Document() : _json = jsonDecode(documentJson);

  (String, {DateTime modified}) get metadata {
    if (_json case {
      'metadata': {'title': String title, 'modified': String localModified},
    }) {
      return (title, modified: DateTime.parse(localModified));
    } else {
      throw const FormatException('Unexpected JSON');
    }
  }

  List<Block> getBlocks() {                                  // Add from here...
    if (_json case {'blocks': List blocksJson}) {
      return [for (final blockJson in blocksJson) Block.fromJson(blockJson)];
    } else {
      throw const FormatException('Unexpected JSON format');
    }
  }                                                          // to here.
}
The getBlocks() function returns a list of Block objects, which you use later to build the UI. A familiar if-case statement performs validation and casts the value of the blocks metadata into a new List named blocksJson (without patterns, you'd need the toList() method to cast).
The list literal contains a collection for in order to fill the new list with Block objects.
This section doesn't introduce any pattern-related features you haven't already tried in this codelab. In the next step, you prepare to render the list items in your UI.
9. Use patterns to display the document
You now successfully destructure and recompose your JSON data, using an if-case statement and refutable patterns. But if-case is only one of the enhancements to control flow structures that come with patterns. Now, you apply your knowledge of refutable patterns to switch statements.
Control what's rendered using patterns with switch statements
- In
main.dart, create a new widget,BlockWidget, that determines the styling of each block based on itstypefield.
lib/main.dart
class BlockWidget extends StatelessWidget {
  final Block block;

  const BlockWidget({required this.block, super.key});

  @override
  Widget build(BuildContext context) {
    TextStyle? textStyle;
    switch (block.type) {
      case 'h1':
        textStyle = Theme.of(context).textTheme.displayMedium;
      case 'p' || 'checkbox':
        textStyle = Theme.of(context).textTheme.bodyMedium;
      case _:
        textStyle = Theme.of(context).textTheme.bodySmall;
    }

    return Container(
      margin: const EdgeInsets.all(8),
      child: Text(block.text, style: textStyle),
    );
  }
}
The switch statement in the build method switches on the type field of the block object.
- The first case statement uses a constant string pattern. The pattern matches if
block.typeis equal to the constant valueh1. - The second case statement uses a logical-or pattern with two constant string patterns as its subpatterns. The pattern matches if
block.typematches either of the subpatternsporcheckbox.
- The final case is a wildcard pattern,
_. Wildcards in switch cases match everything else. They behave the same asdefaultclauses, which are still allowed in switch statements (they're just a little more verbose).
Wildcard patterns can be used wherever a pattern is allowed—for example, in a variable declaration pattern: var (title, _) = document.metadata;
In this context, the wildcard doesn't bind any variable. It discards the second field.
In the next section, you learn about more switch features after displaying the Block objects.
Display the document content
Create a local variable that contains the list of Block objects by calling getBlocks() in the DocumentScreen widget's build method.
- Replace the existing
buildmethod inDocumentationScreenwith this version:
lib/main.dart
class DocumentScreen extends StatelessWidget {
  final Document document;

  const DocumentScreen({required this.document, super.key});

  @override
  Widget build(BuildContext context) {
    final (title, :modified) = document.metadata;
    final blocks = document.getBlocks();                           // Add this line

    return Scaffold(
      appBar: AppBar(title: Text(title)),
      body: Column(
        children: [
          Text('Last modified: $modified'),                        // Modify from here
          Expanded(
            child: ListView.builder(
              itemCount: blocks.length,
              itemBuilder: (context, index) {
                return BlockWidget(block: blocks[index]);
              },
            ),
          ),                                                       // to here.
        ],
      ),
    );
  }
}
The line BlockWidget(block: blocks[index]) constructs a BlockWidget widget for each item in the list of blocks returned from the getBlocks() method.
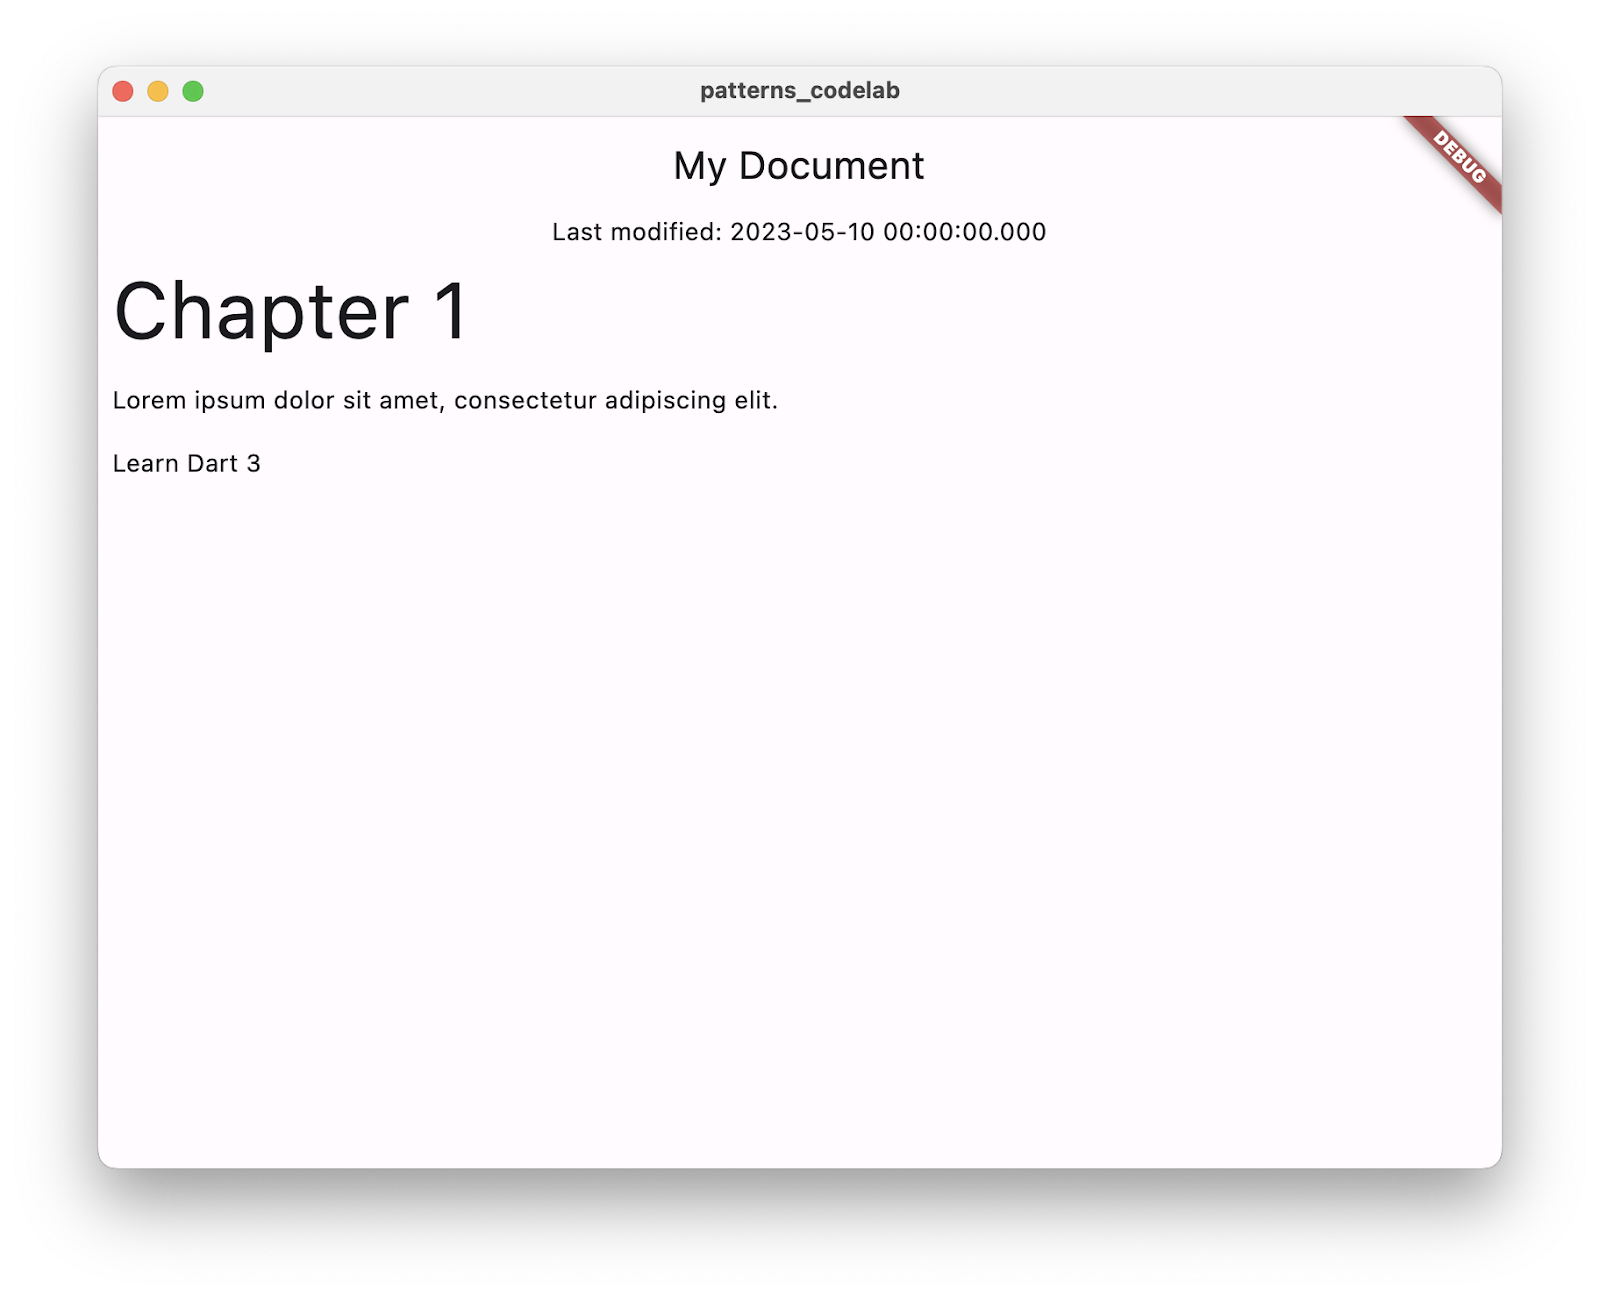
- Run the application, and then you should see the blocks appearing on screen:
10. Use switch expressions
Patterns add a lot of capabilities to switch and case. To make them usable in more places, Dart has switch expressions. A series of cases can provide a value directly to a variable assignment or return statement.
Convert the switch statement into a switch expression
The Dart analyzer provides assists to help you make changes to your code.
- Move your cursor to the switch statement from the previous section.
- Click on the lightbulb to view the available assists.
- Select the Convert to switch expression assist.

The new version of this code looks like this:
lib/main.dart
class BlockWidget extends StatelessWidget {
  final Block block;

  const BlockWidget({required this.block, super.key});

  @override
  Widget build(BuildContext context) {
    TextStyle? textStyle;                                          // Modify from here
    textStyle = switch (block.type) {
      'h1' => Theme.of(context).textTheme.displayMedium,
      'p' || 'checkbox' => Theme.of(context).textTheme.bodyMedium,
      _ => Theme.of(context).textTheme.bodySmall,
    };                                                             // to here.

    return Container(
      margin: const EdgeInsets.all(8),
      child: Text(block.text, style: textStyle),
    );
  }
}
A switch expression looks similar to a switch statement, but it eliminates the case keyword and uses => to separate the pattern from the case body. Unlike switch statements, switch expressions return a value and can be used anywhere an expression can be used.
11. Use object patterns
Dart is an object-oriented language, so patterns apply to all objects. In this step, you switch on an object pattern and destructure object properties to enhance the date rendering logic of your UI.
Extract properties from object patterns
In this section, you improve how the last modified date is displayed using patterns.
- Add the
formatDatemethod tomain.dart:
lib/main.dart
String formatDate(DateTime dateTime) {
  final today = DateTime.now();
  final difference = dateTime.difference(today);

  return switch (difference) {
    Duration(inDays: 0) => 'today',
    Duration(inDays: 1) => 'tomorrow',
    Duration(inDays: -1) => 'yesterday',
    Duration(inDays: final days, isNegative: true) => '${days.abs()} days ago',
    Duration(inDays: final days) => '$days days from now',
  };
}
This method returns a switch expression that switches on the value difference, a Duration object. It represents the span of time between today and the modified value from the JSON data.
Each case of the switch expression is using an object pattern that matches by calling getters on the object's properties inDays and isNegative. The syntax looks like it might be constructing a Duration object, but it's actually accessing fields on the difference object.
The first three cases use constant subpatterns 0, 1, and -1 to match the object property inDays and return the corresponding string.
The last two cases handle durations beyond today, yesterday, and tomorrow:
- If the
isNegativeproperty matches the boolean constant patterntrue, meaning the modification date was in the past, it displays days ago. - If that case doesn't catch the difference, then duration must be a positive number of days (no need to explicitly verify with
isNegative: false), so the modification date is in the future and displays days from now.
Add formatting logic for weeks
- Add two new cases to your formatting function in order to identify durations longer than 7 days so that the UI can display them as weeks:
lib/main.dart
String formatDate(DateTime dateTime) {
  final today = DateTime.now();
  final difference = dateTime.difference(today);

  return switch (difference) {
    Duration(inDays: 0) => 'today',
    Duration(inDays: 1) => 'tomorrow',
    Duration(inDays: -1) => 'yesterday',
    Duration(inDays: final days) when days > 7 => '${days ~/ 7} weeks from now', // Add from here
    Duration(inDays: final days) when days < -7 =>
      '${days.abs() ~/ 7} weeks ago',                                            // to here.
    Duration(inDays: final days, isNegative: true) => '${days.abs()} days ago',
    Duration(inDays: final days) => '$days days from now',
  };
}
This code introduces guard clauses:
- A guard clause uses the
whenkeyword after a case pattern. - They can be used in if-cases, switch statements, and switch expressions.
- They only add a condition to a pattern after it's matched.
- If the guard clause evaluates to false, the entire pattern is refuted, and execution proceeds to the next case.
Add the newly formatted date to the UI
- Finally, update the
buildmethod inDocumentScreento use theformatDatefunction:
lib/main.dart
class DocumentScreen extends StatelessWidget {
  final Document document;

  const DocumentScreen({required this.document, super.key});

  @override
  Widget build(BuildContext context) {
    final (title, :modified) = document.metadata;
    final formattedModifiedDate = formatDate(modified);            // Add this line
    final blocks = document.getBlocks();

    return Scaffold(
      appBar: AppBar(title: Text(title)),
      body: Column(
        children: [
          Text('Last modified: $formattedModifiedDate'),           // Modify this line
          Expanded(
            child: ListView.builder(
              itemCount: blocks.length,
              itemBuilder: (context, index) {
                return BlockWidget(block: blocks[index]);
              },
            ),
          ),
        ],
      ),
    );
  }
}
- Hot reload to see the changes in your app:

12. Seal a class for exhaustive switching
Notice that you didn't use a wildcard or default case at the end of the last switch. Though it's good practice to always include a case for values that might fall through, it's ok in a simple example like this since you know the cases you defined account for all of the possible values inDays could potentially take.
When every case in a switch is handled, it's called an exhaustive switch. For example, switching on a bool type is exhaustive when it has cases for true and false. Switching on an enum type is exhaustive when there are cases for each of the enum's values, too, because enums represent a fixed number of constant values.
Dart 3 extended exhaustiveness checking to objects and class hierarchies with the new class modifier sealed. Refactor your Block class as a sealed superclass.
Create the subclasses
- In
data.dart, create three new classes—HeaderBlock,ParagraphBlock, andCheckboxBlock—that extendBlock:
lib/data.dart
class HeaderBlock extends Block {
  final String text;
  HeaderBlock(this.text);
}

class ParagraphBlock extends Block {
  final String text;
  ParagraphBlock(this.text);
}

class CheckboxBlock extends Block {
  final String text;
  final bool isChecked;
  CheckboxBlock(this.text, this.isChecked);
}
Each of these classes corresponds to the different type values from the original JSON: 'h1', 'p', and 'checkbox'.
Seal the superclass
- Mark the
Blockclass assealed. Then, refactor the if-case as a switch expression that returns the subclass corresponding to thetypespecified in the JSON:
lib/data.dart
sealed class Block {
  Block();

  factory Block.fromJson(Map<String, Object?> json) {
    return switch (json) {
      {'type': 'h1', 'text': String text} => HeaderBlock(text),
      {'type': 'p', 'text': String text} => ParagraphBlock(text),
      {'type': 'checkbox', 'text': String text, 'checked': bool checked} =>
        CheckboxBlock(text, checked),
      _ => throw const FormatException('Unexpected JSON format'),
    };
  }
}
The sealed keyword is a class modifier that means you can only extend or implement this class in the same library. Since the analyzer knows the subtypes of this class, it reports an error if a switch fails to cover one of them and isn't exhaustive.
Use a switch expression in order to display widgets
- Update the
BlockWidgetclass inmain.dartwith a switch expression that uses object patterns for each case:
lib/main.dart
class BlockWidget extends StatelessWidget {
  final Block block;

  const BlockWidget({required this.block, super.key});

  @override
  Widget build(BuildContext context) {
    return Container(
      margin: const EdgeInsets.all(8),
      child: switch (block) {
        HeaderBlock(:final text) => Text(
          text,
          style: Theme.of(context).textTheme.displayMedium,
        ),
        ParagraphBlock(:final text) => Text(text),
        CheckboxBlock(:final text, :final isChecked) => Row(
          children: [
            Checkbox(value: isChecked, onChanged: (_) {}),
            Text(text),
          ],
        ),
      },
    );
  }
}
In your first version of BlockWidget, you switched on a field of a Block object to return a TextStyle. Now, you switch an instance of the Block object itself and match against object patterns that represent its subclasses, extracting the object's properties in the process.
The Dart analyzer can check that each subclass is handled in the switch expression because you made Block a sealed class.
Also note that using a switch expression here lets you pass the result directly to the child element, as opposed to the separate return statement needed before.
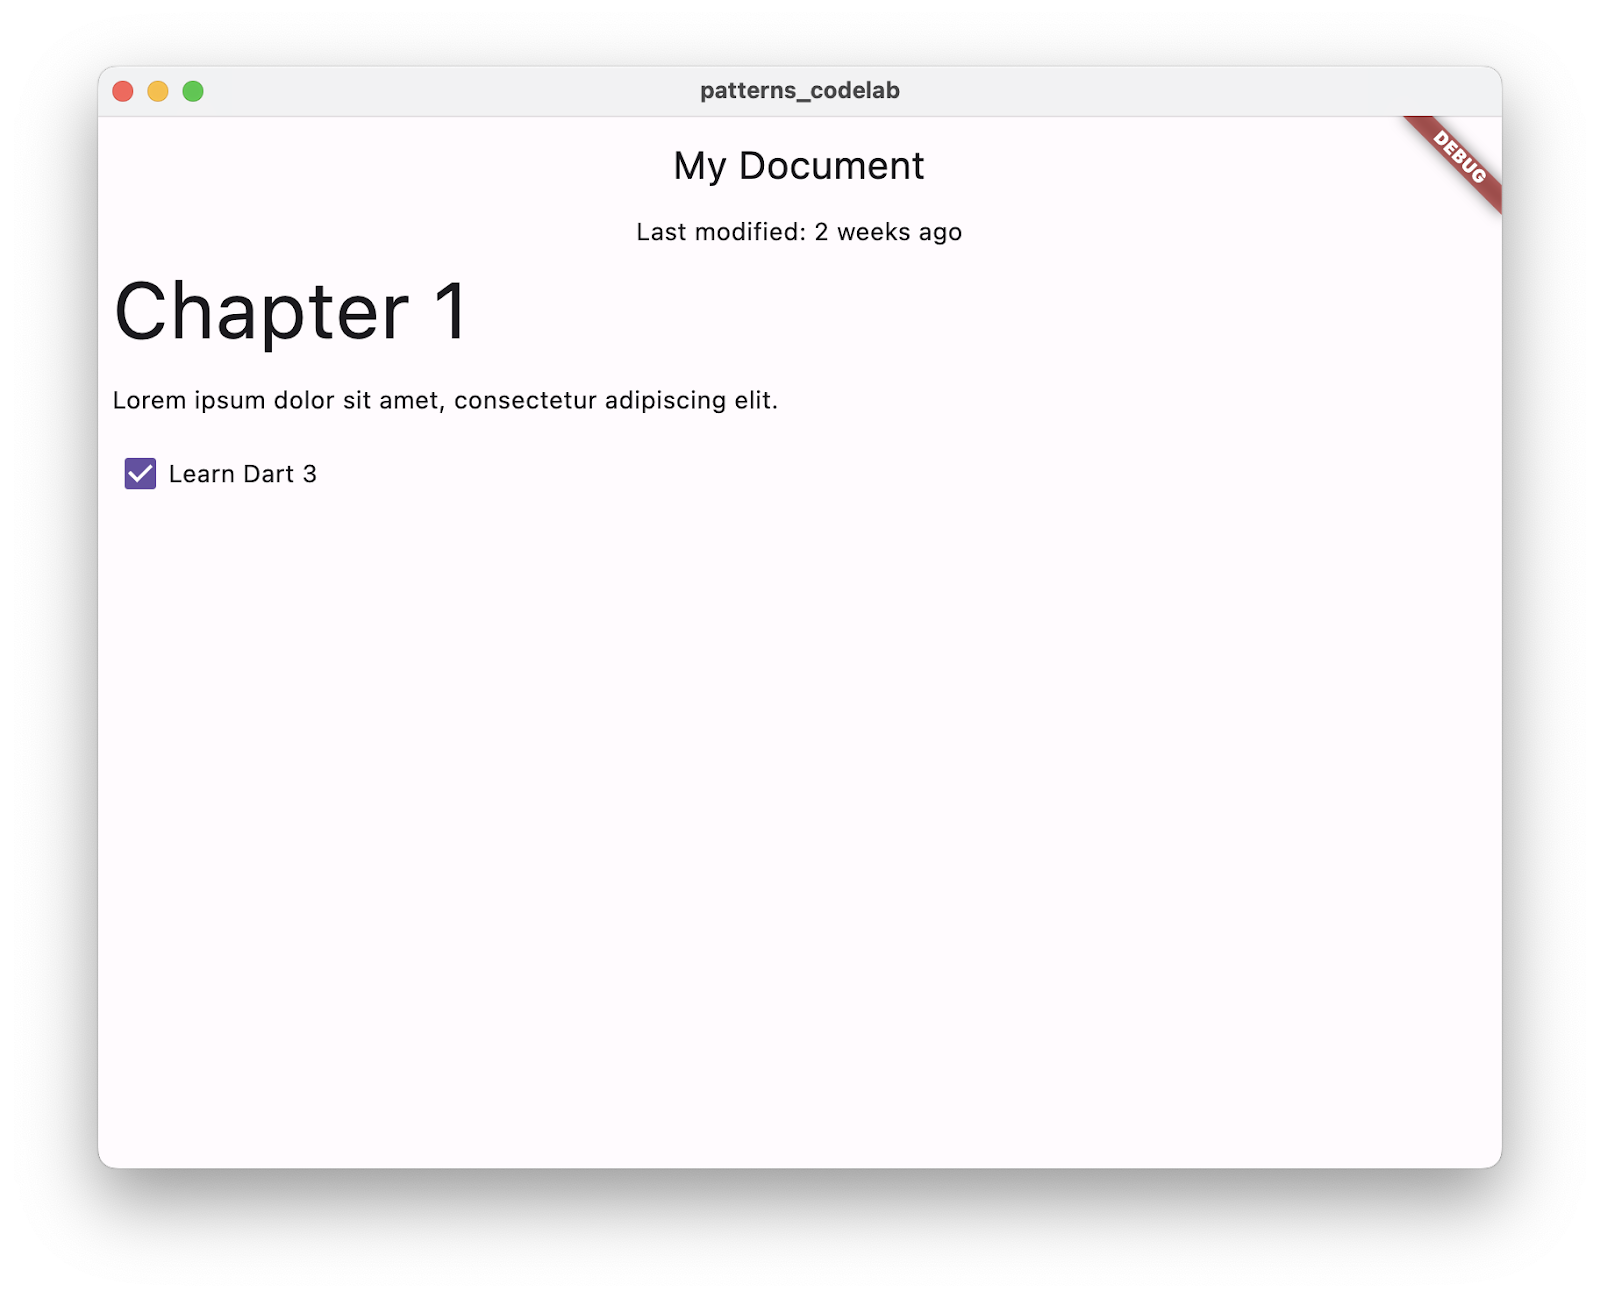
- Hot reload to see the checkbox JSON data rendered for the first time:

13. Congratulations
You successfully experimented with patterns, records, enhanced switch and case, and sealed classes. You covered a lot of information—but only barely scratched the surface of these features. For more information on patterns, see the feature specification.
The different pattern types, different contexts in which they can appear, and the potential nesting of subpatterns make the possibilities in behavior seemingly endless. But they're easy to see.
You can imagine all kinds of ways to display content in Flutter using patterns. Using patterns, you can safely extract data in order to build your UI in a few lines of code.
What's next?
- Check out the documentation on patterns, records, enhanced switch and cases, and class modifiers in the Language section of the Dart documentation.
Reference docs
See the full sample code, step by step, in the flutter/codelabs repository.
For in-depth specifications for each new feature, check out the original design docs: