
About this codelab
1. Introduction
Flame is a Flutter-based 2D game engine. In this codelab, you will build a game inspired by one of the classics of '70s video games, Steve Wozniak's Breakout. You will use Flame's Components, to draw the bat, ball, and bricks. You will utilize Flame's Effects to animate the bat's movement and see how to integrate Flame with Flutter's state management system.
When complete, your game should look like this animated gif, albeit a tad slower.
What you'll learn
- How the basics of Flame work, starting with
GameWidget. - How to use a game loop.
- How Flame's
Components work. They are akin to Flutter'sWidgets. - How to handle collisions.
- How to use
Effects to animateComponents. - How to overlay Flutter
Widgets on top of a Flame game. - How to integrate Flame with Flutter's state management.
What you'll build
In this codelab, you're going to build a 2D game using Flutter and Flame. When complete, your game should meet the following requirements:
- Function on all six platforms that Flutter supports: Android, iOS, Linux, macOS, Windows, and the web
- Maintain at least 60 fps using Flame's game loop.
- Use Flutter capabilities like the
google_fontspackage andflutter_animateto recreate the feel of 80s arcade gaming.
2. Set up your Flutter environment
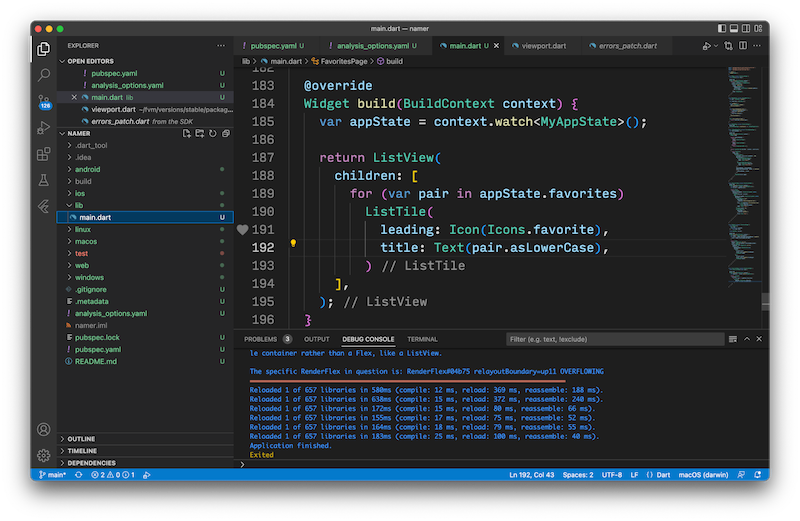
Editor
To simplify this codelab, it presumes that Visual Studio Code (VS Code) is your development environment. VS Code is free and works on all major platforms. We use VS Code for this codelab because the instructions default to VS Code-specific shortcuts. The tasks become more straightforward: "click this button" or "press this key to do X" rather than "do the appropriateaction in your editor to do X".
You can use any editor you like: Android Studio, other IntelliJ IDEs, Emacs, Vim, or Notepad++. They all work with Flutter.
Choose a development target
Flutter produces apps for multiple platforms. Your app can run on any of the following operating systems:
- iOS
- Android
- Windows
- macOS
- Linux
- web
It's common practice to choose one operating system as your development target. This is the operating system that your app runs on during development.
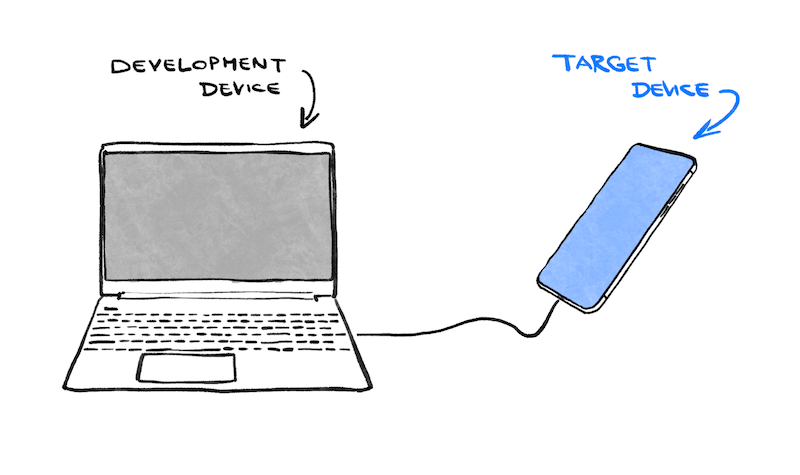
For example: say you're using a Windows laptop to develop your Flutter app. You then choose Android as your development target. To preview your app, you attach an Android device to your Windows laptop with a USB cable and your app-in-development runs on that attached Android device, or in an Android emulator. You could have chosen Windows as the development target, which runs your app-in-development as a Windows app alongside your editor.
You might be tempted to choose the web as your development target. This has a downside during development: you lose Flutter's Stateful Hot Reload capability. Flutter can't currently hot-reload web applications.
Make your choice before continuing. You can always run your app on other operating systems later. Choosing a development target makes the next step smoother.
Install Flutter
The most up-to-date instructions on installing the Flutter SDK can be found on docs.flutter.dev.
The instructions on the Flutter website cover the installation of the SDK and the development target-related tools and the editor plugins. For this codelab, install the following software:
- Flutter SDK
- Visual Studio Code with the Flutter plugin
- Compiler software for your chosen development target. (You need Visual Studio to target Windows or Xcode to target macOS or iOS)
In the next section, you'll create your first Flutter project.
If you need to troubleshoot any problems, you might find some of these questions and answers (from StackOverflow) helpful for troubleshooting.
Frequently Asked Questions
- How do I find the Flutter SDK path?
- What do I do when the Flutter command is not found?
- How do I fix the "Waiting for another flutter command to release the startup lock" issue?
- How do I tell Flutter where my Android SDK installation is?
- How do I deal with the Java error when running
flutter doctor --android-licenses? - How do I deal with Android
sdkmanagertool not found? - How do I deal with the "
cmdline-toolscomponent is missing" error? - How do I run CocoaPods on Apple Silicon (M1)?
- How do I disable auto formatting on save in VS Code?
3. Create a project
Create your first Flutter project
This involves opening VS Code and creating the Flutter app template in a directory you choose.
- Launch Visual Studio Code.
- Open the command palette (
F1orCtrl+Shift+PorShift+Cmd+P) then type "flutter new". When it appears, select the Flutter: New Project command.

- Select Empty Application. Choose a directory in which to create your project. This should be any directory that doesn't require elevated privileges or have a space in its path. Examples include your home directory or
C:\src\.

- Name your project
brick_breaker. The remainder of this codelab presumes you named your appbrick_breaker.

Flutter now creates your project folder and VS Code opens it. You'll now overwrite the contents of two files with a basic scaffold of the app.
Copy & Paste the initial app
This adds the example code provided in this codelab to your app.
- In the left pane of VS Code, click Explorer and open the
pubspec.yamlfile.

- Replace the contents of this file with the following:
pubspec.yaml
name: brick_breaker
description: "Re-implementing Woz's Breakout"
publish_to: 'none'
version: 0.1.0

environment:
  sdk: ^3.8.0

dependencies:
  flutter:
    sdk: flutter
  flame: ^1.28.1
  flutter_animate: ^4.5.2
  google_fonts: ^6.2.1

dev_dependencies:
  flutter_test:
    sdk: flutter
  flutter_lints: ^5.0.0

flutter:
  uses-material-design: true
The pubspec.yaml file specifies basic information about your app, such as its current version, its dependencies, and the assets with which it will ship.
- Open
main.dartfile inlib/directory.
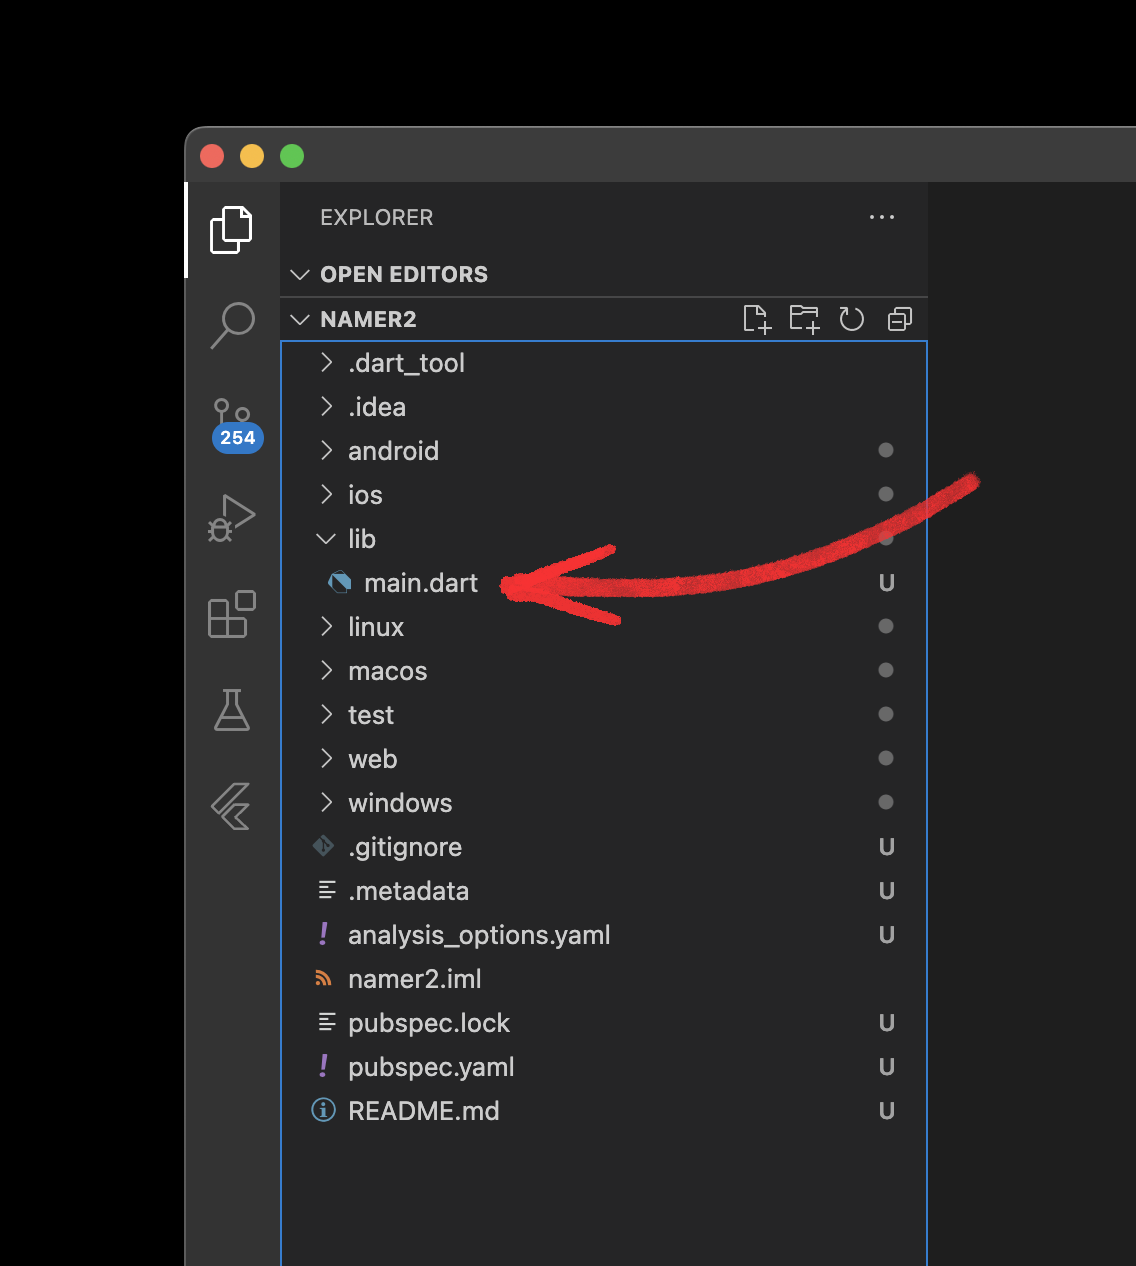
- Replace the contents of this file with the following:
lib/main.dart
import 'package:flame/game.dart';
import 'package:flutter/material.dart';

void main() {
  final game = FlameGame();
  runApp(GameWidget(game: game));
}
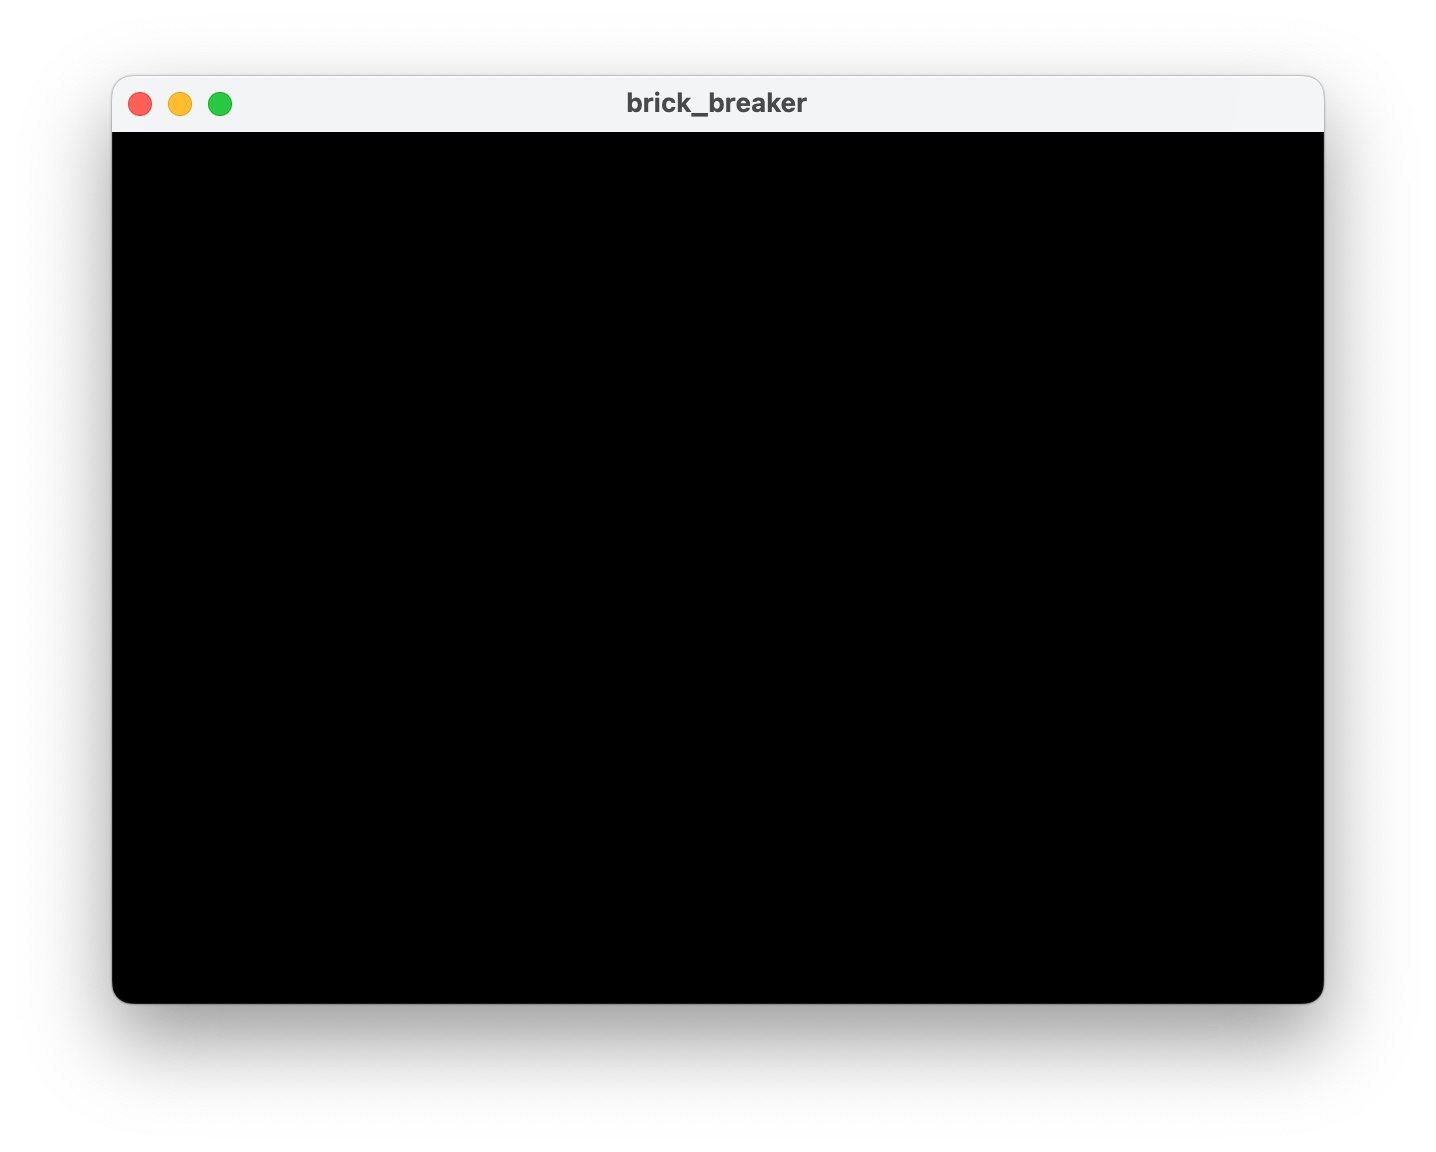
- Run this code to verify everything is working. It should display a new window with only a blank black background. The world's worst video game is now rendering at 60fps!
4. Create the game
Size up the game
A game played in two dimensions (2D) needs a play area. You will construct an area of specific dimensions, and then use these dimensions to size other aspects of the game.
There are various ways to lay out coordinates in the playing area. By one convention you can measure direction from the center of the screen with the origin (0,0)at the center of the screen, the positive values move items to the right along the x axis and up along the y axis. This standard applies to most current games these days, especially when games that involve three dimensions.
The convention when the original Breakout game was created was to set the origin in the top left corner. The positive x direction remained the same, however y was flipped. The x positive x direction was right and y was down. To stay true to the era, this game sets the origin to the top left corner.
Create a file called config.dart in a new directory called lib/src. This file will gain more constants in the following steps.
lib/src/config.dart
const gameWidth = 820.0;
const gameHeight = 1600.0;
This game will be 820 pixels wide and 1600 pixels high. The game area scales to fit the window in which it is displayed, but all the components added to the screen conform to this height and width.
Create a PlayArea
In the game of Breakout, the ball bounces off the walls of the play area. To accommodate collisions, you need a PlayArea component first.
- Create a file called
play_area.dartin a new directory calledlib/src/components. - Add the following to this file.
lib/src/components/play_area.dart
import 'dart:async';

import 'package:flame/components.dart';
import 'package:flutter/material.dart';

import '../brick_breaker.dart';

class PlayArea extends RectangleComponent with HasGameReference<BrickBreaker> {
  PlayArea() : super(paint: Paint()..color = const Color(0xfff2e8cf));

  @override
  FutureOr<void> onLoad() async {
    super.onLoad();
    size = Vector2(game.width, game.height);
  }
}
Where Flutter has Widgets, Flame has Components. Where Flutter apps consist of creating trees of widgets, Flame games consist of maintaining trees of components.
Therein lies an interesting difference between Flutter and Flame. Flutter's widget tree is an ephemeral description that is built to be used to update the persistent and mutable RenderObject layer. Flame's components are persistent and mutable, with an expectation that the developer will use these components as part of a simulation system.
Flame's components are optimized for expressing game mechanics. This codelab will start with the game loop, featured in the next step.
- To control clutter, add a file containing all the components in this project. Create a
components.dartfile inlib/src/componentsand add the following content.
lib/src/components/components.dart
export 'play_area.dart';
The export directive plays the inverse role of import. It declares what functionality this file exposes when imported into another file. This file will grow more entries as you add new components in the following steps.
Create a Flame game
To extinguish the red squiggles from the previous step, derive a new subclass for Flame's FlameGame.
- Create a file named
brick_breaker.dartinlib/srcand add the following code.
lib/src/brick_breaker.dart
import 'dart:async';

import 'package:flame/components.dart';
import 'package:flame/game.dart';

import 'components/components.dart';
import 'config.dart';

class BrickBreaker extends FlameGame {
  BrickBreaker()
    : super(
        camera: CameraComponent.withFixedResolution(
          width: gameWidth,
          height: gameHeight,
        ),
      );

  double get width => size.x;
  double get height => size.y;

  @override
  FutureOr<void> onLoad() async {
    super.onLoad();

    camera.viewfinder.anchor = Anchor.topLeft;

    world.add(PlayArea());
  }
}
This file coordinates the game's actions. During construction of the game instance, this code configures the game to use fixed resolution rendering. The game resizes to fill the screen that contains it and adds letterboxing as required.
You expose the width and height of the game so that the children components, like PlayArea, can set themselves to the appropriate size.
In the onLoad overridden method, your code performs two actions.
- Configures the top left as the anchor for the viewfinder. By default, the
viewfinderuses the middle of the area as the anchor for(0,0). - Adds the
PlayAreato theworld. The world represents the game world. It projects all of its children through theCameraComponents view transformation.
Get the game on screen
To see all the changes you have made in this step, update your lib/main.dart file with the following changes.
lib/main.dart
import 'package:flame/game.dart';
import 'package:flutter/material.dart';

import 'src/brick_breaker.dart';                                // Add this import

void main() {
  final game = BrickBreaker();                                  // Modify this line
  runApp(GameWidget(game: game));
}
After you make these changes, restart the game. The game should resemble the following figure.

In the next step, you will add a ball to the world, and get it moving!
5. Display the ball
Create the ball component
Putting a moving ball on the screen involves creating another component and adding it to the game world.
- Edit the contents of
lib/src/config.dartfile as follows.
lib/src/config.dart
const gameWidth = 820.0;
const gameHeight = 1600.0;
const ballRadius = gameWidth * 0.02;                            // Add this constant
The design pattern of defining named constants as derived values will return many times in this codelab. This lets you modify the top level gameWidth and gameHeight to explore how the game look and feel changes as result.
- Create the
Ballcomponent in a file calledball.dartinlib/src/components.
lib/src/components/ball.dart
import 'package:flame/components.dart';
import 'package:flutter/material.dart';

class Ball extends CircleComponent {
  Ball({
    required this.velocity,
    required super.position,
    required double radius,
  }) : super(
         radius: radius,
         anchor: Anchor.center,
         paint: Paint()
           ..color = const Color(0xff1e6091)
           ..style = PaintingStyle.fill,
       );

  final Vector2 velocity;

  @override
  void update(double dt) {
    super.update(dt);
    position += velocity * dt;
  }
}
Earlier, you defined the PlayArea using the RectangleComponent, so it stands to reason that more shapes exist. CircleComponent, like RectangleComponent, derives from PositionedComponent, so you can position the ball on the screen. More importantly, its position can be updated.
This component introduces the concept of velocity, or change in position over time. Velocity is a Vector2 object as velocity is both speed and direction. To update position, override the update method, which the game engine calls for every frame. The dt is the duration between the previous frame and this frame. This lets you adapt to factors like different frame rates (60hz or 120hz) or long frames due to excessive computation.
Pay close attention to the position += velocity * dt update. This is how you implement updating a discrete simulation of motion over time.
- To include the
Ballcomponent in the list of components, edit thelib/src/components/components.dartfile as follows.
lib/src/components/components.dart
export 'ball.dart';                           // Add this export
export 'play_area.dart';
Adding the ball to the world
You have a ball. Place it in the world and set it up to move around the play area.
Edit the lib/src/brick_breaker.dart file as follows.
lib/src/brick_breaker.dart
import 'dart:async';
import 'dart:math' as math;                                     // Add this import

import 'package:flame/components.dart';
import 'package:flame/game.dart';

import 'components/components.dart';
import 'config.dart';

class BrickBreaker extends FlameGame {
  BrickBreaker()
    : super(
        camera: CameraComponent.withFixedResolution(
          width: gameWidth,
          height: gameHeight,
        ),
      );

  final rand = math.Random();                                   // Add this variable
  double get width => size.x;
  double get height => size.y;

  @override
  FutureOr<void> onLoad() async {
    super.onLoad();

    camera.viewfinder.anchor = Anchor.topLeft;

    world.add(PlayArea());

    world.add(
      Ball(                                                     // Add from here...
        radius: ballRadius,
        position: size / 2,
        velocity: Vector2(
          (rand.nextDouble() - 0.5) * width,
          height * 0.2,
        ).normalized()..scale(height / 4),
      ),
    );

    debugMode = true;                                           // To here.
  }
}
This change adds the Ball component to the world. To set the ball's position to the center of the display area, the code first halves the size of the game, as Vector2 has operator overloads (* and /) to scale a Vector2 by a scalar value.
To set the ball's velocity involves more complexity. The intent is to move the ball down the screen in a random direction at a reasonable speed. The call to the normalized method creates a Vector2 object set to the same direction as the original Vector2, but scaled down to a distance of 1. This keeps the speed of the ball consistent no matter which direction the ball goes. The ball's velocity is then scaled up to be a 1/4 of the height of the game.
Getting these various values right involves some iteration, also known as playtesting in the industry.
The last line turns on the debugging display, which adds additional information to the display to help with debugging.
When you now run the game, it should resemble the following display.

Both the PlayArea component and the Ball component both have debugging information, but the background mattes crop the PlayArea's numbers. The reason everything has debugging information displayed is because you turned on debugMode for the entire component tree. You could also turn on debugging for only selected components, if that is more useful.
If you restart your game a few times, you might notice that the ball doesn't interact with the walls quite as expected. To accomplish that effect, you need to add collision detection, which you will do in the next step.
6. Bounce around
Add collision detection
Collision detection adds a behavior where your game recognizes when two objects came into contact with each other.
To add collision detection to the game, add the HasCollisionDetection mixin to the BrickBreaker game as shown in the following code.
lib/src/brick_breaker.dart
import 'dart:async';
import 'dart:math' as math;

import 'package:flame/components.dart';
import 'package:flame/game.dart';

import 'components/components.dart';
import 'config.dart';

class BrickBreaker extends FlameGame with HasCollisionDetection { // Modify this line
  BrickBreaker()
    : super(
        camera: CameraComponent.withFixedResolution(
          width: gameWidth,
          height: gameHeight,
        ),
      );

  final rand = math.Random();
  double get width => size.x;
  double get height => size.y;

  @override
  FutureOr<void> onLoad() async {
    super.onLoad();

    camera.viewfinder.anchor = Anchor.topLeft;

    world.add(PlayArea());

    world.add(
      Ball(
        radius: ballRadius,
        position: size / 2,
        velocity: Vector2(
          (rand.nextDouble() - 0.5) * width,
          height * 0.2,
        ).normalized()..scale(height / 4),
      ),
    );

    debugMode = true;
  }
}
This tracks the hitboxes of components and triggers collision callbacks on every game tick.
To start populating the game's hitboxes, modify the PlayArea component as shown below.
lib/src/components/play_area.dart
import 'dart:async';

import 'package:flame/collisions.dart';                         // Add this import
import 'package:flame/components.dart';
import 'package:flutter/material.dart';

import '../brick_breaker.dart';

class PlayArea extends RectangleComponent with HasGameReference<BrickBreaker> {
  PlayArea()
    : super(
        paint: Paint()..color = const Color(0xfff2e8cf),
        children: [RectangleHitbox()],                          // Add this parameter
      );

  @override
  FutureOr<void> onLoad() async {
    super.onLoad();
    size = Vector2(game.width, game.height);
  }
}
Adding a RectangleHitbox component as a child of the RectangleComponent will construct a hit box for collision detection that matches the size of the parent component. There is a factory constructor for RectangleHitbox called relative for times when you want a hitbox that is smaller, or larger, than the parent component.
Bounce the ball
So far, adding collision detection has made no difference to the gameplay. It does change once you modify the Ball component. It's the ball's behavior that has to change when it collides with the PlayArea.
Modify the Ball component as follows.
lib/src/components/ball.dart
import 'package:flame/collisions.dart';                         // Add this import
import 'package:flame/components.dart';
import 'package:flutter/material.dart';

import '../brick_breaker.dart';                                 // And this import
import 'play_area.dart';                                        // And this one too

class Ball extends CircleComponent
    with CollisionCallbacks, HasGameReference<BrickBreaker> {   // Add these mixins
  Ball({
    required this.velocity,
    required super.position,
    required double radius,
  }) : super(
         radius: radius,
         anchor: Anchor.center,
         paint: Paint()
           ..color = const Color(0xff1e6091)
           ..style = PaintingStyle.fill,
         children: [CircleHitbox()],                            // Add this parameter
       );

  final Vector2 velocity;

  @override
  void update(double dt) {
    super.update(dt);
    position += velocity * dt;
  }

  @override                                                     // Add from here...
  void onCollisionStart(
    Set<Vector2> intersectionPoints,
    PositionComponent other,
  ) {
    super.onCollisionStart(intersectionPoints, other);
    if (other is PlayArea) {
      if (intersectionPoints.first.y <= 0) {
        velocity.y = -velocity.y;
      } else if (intersectionPoints.first.x <= 0) {
        velocity.x = -velocity.x;
      } else if (intersectionPoints.first.x >= game.width) {
        velocity.x = -velocity.x;
      } else if (intersectionPoints.first.y >= game.height) {
        removeFromParent();
      }
    } else {
      debugPrint('collision with $other');
    }
  }                                                             // To here.
}
This example makes a major change with the addition of the onCollisionStart callback. The collision detection system added to BrickBreaker in the prior example calls this callback.
First, the code tests if the Ball collided with PlayArea. This seems redundant for now, as there are no other components in the game world. That will change in the next step, when you add a bat to the world. Then, it also adds an else condition to handle when the ball collides with things that aren't the bat. A gentle reminder to implement remaining logic, if you will.
When the ball collides with the bottom wall, it just disappears from the playing surface while still very much in view. You handle this artifact in a future step, using the power of Flame's Effects.
Now that you have the ball colliding with the walls of the game, it sure would be useful to give the player a bat to hit the ball with...
7. Get bat on ball
Create the bat
To add a bat to keep the ball in play within the game,
- Insert some constants in
lib/src/config.dartfile as follows.
lib/src/config.dart
const gameWidth = 820.0;
const gameHeight = 1600.0;
const ballRadius = gameWidth * 0.02;
const batWidth = gameWidth * 0.2;                               // Add from here...
const batHeight = ballRadius * 2;
const batStep = gameWidth * 0.05;                               // To here.
The batHeight and batWidth constants are self explanatory. The batStep constant, on the other hand, needs a touch of explanation. To interact with the ball in this game, the player can drag the bat with the mouse or finger, depending on the platform, or use the keyboard. The batStep constant configures how far the bat steps for each left or right arrow key press.
- Define the
Batcomponent class as follows.
lib/src/components/bat.dart
import 'package:flame/collisions.dart';
import 'package:flame/components.dart';
import 'package:flame/effects.dart';
import 'package:flame/events.dart';
import 'package:flutter/material.dart';

import '../brick_breaker.dart';

class Bat extends PositionComponent
    with DragCallbacks, HasGameReference<BrickBreaker> {
  Bat({
    required this.cornerRadius,
    required super.position,
    required super.size,
  }) : super(anchor: Anchor.center, children: [RectangleHitbox()]);

  final Radius cornerRadius;

  final _paint = Paint()
    ..color = const Color(0xff1e6091)
    ..style = PaintingStyle.fill;

  @override
  void render(Canvas canvas) {
    super.render(canvas);
    canvas.drawRRect(
      RRect.fromRectAndRadius(Offset.zero & size.toSize(), cornerRadius),
      _paint,
    );
  }

  @override
  void onDragUpdate(DragUpdateEvent event) {
    super.onDragUpdate(event);
    position.x = (position.x + event.localDelta.x).clamp(0, game.width);
  }

  void moveBy(double dx) {
    add(
      MoveToEffect(
        Vector2((position.x + dx).clamp(0, game.width), position.y),
        EffectController(duration: 0.1),
      ),
    );
  }
}
This component introduces a few new capabilities.
First, the Bat component is a PositionComponent, not a RectangleComponent nor a CircleComponent. This means this code needs to render the Bat on screen. To accomplish this, it overrides the render callback.
Looking closely at the canvas.drawRRect (draw rounded rectangle) call, and you might ask yourself, "where is the rectangle?" The Offset.zero & size.toSize() leverages an operator & overload on the dart:ui Offset class that creates Rects. This shorthand might confuse you at first, but you will see it frequently in lower level Flutter and Flame code.
Second, this Bat component is draggable using either finger or mouse depending on platform. To implement this functionality, you add the DragCallbacks mixin and override the onDragUpdate event.
Last, the Bat component needs to respond to keyboard control. The moveBy function allows other code to tell this bat to move left or right by a certain number of virtual pixels. This function introduces a new capability of the Flame game engine: Effects. By adding the MoveToEffect object as a child of this component, the player sees the bat animated to a new position. There are a collection of Effects available in Flame to perform a variety of effects.
The Effect's constructor arguments include a reference to the game getter. This is why you include the HasGameReference mixin on this class. This mixin adds a type-safe game accessor to this component to access the BrickBreaker instance at the top of the component tree.
- To make the
Batavailable toBrickBreaker, update thelib/src/components/components.dartfile as follows.
lib/src/components/components.dart
export 'ball.dart';
export 'bat.dart';                                              // Add this export
export 'play_area.dart';
Add the bat to the world
To add the Bat component to the game world, update BrickBreaker as follows.
lib/src/brick_breaker.dart
import 'dart:async';
import 'dart:math' as math;

import 'package:flame/components.dart';
import 'package:flame/events.dart';                             // Add this import
import 'package:flame/game.dart';
import 'package:flutter/material.dart';                         // And this import
import 'package:flutter/services.dart';                         // And this

import 'components/components.dart';
import 'config.dart';

class BrickBreaker extends FlameGame
    with HasCollisionDetection, KeyboardEvents {                // Modify this line
  BrickBreaker()
    : super(
        camera: CameraComponent.withFixedResolution(
          width: gameWidth,
          height: gameHeight,
        ),
      );

  final rand = math.Random();
  double get width => size.x;
  double get height => size.y;

  @override
  FutureOr<void> onLoad() async {
    super.onLoad();

    camera.viewfinder.anchor = Anchor.topLeft;

    world.add(PlayArea());

    world.add(
      Ball(
        radius: ballRadius,
        position: size / 2,
        velocity: Vector2(
          (rand.nextDouble() - 0.5) * width,
          height * 0.2,
        ).normalized()..scale(height / 4),
      ),
    );

    world.add(                                                  // Add from here...
      Bat(
        size: Vector2(batWidth, batHeight),
        cornerRadius: const Radius.circular(ballRadius / 2),
        position: Vector2(width / 2, height * 0.95),
      ),
    );                                                          // To here.

    debugMode = true;
  }

  @override                                                     // Add from here...
  KeyEventResult onKeyEvent(
    KeyEvent event,
    Set<LogicalKeyboardKey> keysPressed,
  ) {
    super.onKeyEvent(event, keysPressed);
    switch (event.logicalKey) {
      case LogicalKeyboardKey.arrowLeft:
        world.children.query<Bat>().first.moveBy(-batStep);
      case LogicalKeyboardKey.arrowRight:
        world.children.query<Bat>().first.moveBy(batStep);
    }
    return KeyEventResult.handled;
  }                                                             // To here.
}
The addition of the KeyboardEvents mixin and the overridden onKeyEvent method handle the keyboard input. Recall the code you added earlier to move the bat by the appropriate step amount.
The remaining chunk of added code adds the bat to the game world in the appropriate position and with the right proportions. Having all these settings exposed in this file simplifies your ability to tweak the relative size of the bat and the ball to get the right feel for the game.
If you play the game at this point, you see that you can move the bat to intercept the ball, but get no visible response, apart from the debug logging that you left in Ball's collision detection code.
Time to fix that now. Edit the Ball component as follows.
lib/src/components/ball.dart
import 'package:flame/collisions.dart';
import 'package:flame/components.dart';
import 'package:flame/effects.dart';                           // Add this import
import 'package:flutter/material.dart';

import '../brick_breaker.dart';
import 'bat.dart';                                             // And this import
import 'play_area.dart';

class Ball extends CircleComponent
    with CollisionCallbacks, HasGameReference<BrickBreaker> {
  Ball({
    required this.velocity,
    required super.position,
    required double radius,
  }) : super(
         radius: radius,
         anchor: Anchor.center,
         paint: Paint()
           ..color = const Color(0xff1e6091)
           ..style = PaintingStyle.fill,
         children: [CircleHitbox()],
       );

  final Vector2 velocity;

  @override
  void update(double dt) {
    super.update(dt);
    position += velocity * dt;
  }

  @override
  void onCollisionStart(
    Set<Vector2> intersectionPoints,
    PositionComponent other,
  ) {
    super.onCollisionStart(intersectionPoints, other);
    if (other is PlayArea) {
      if (intersectionPoints.first.y <= 0) {
        velocity.y = -velocity.y;
      } else if (intersectionPoints.first.x <= 0) {
        velocity.x = -velocity.x;
      } else if (intersectionPoints.first.x >= game.width) {
        velocity.x = -velocity.x;
      } else if (intersectionPoints.first.y >= game.height) {
        add(RemoveEffect(delay: 0.35));                         // Modify from here...
      }
    } else if (other is Bat) {
      velocity.y = -velocity.y;
      velocity.x =
          velocity.x +
          (position.x - other.position.x) / other.size.x * game.width * 0.3;
    } else {                                                    // To here.
      debugPrint('collision with $other');
    }
  }
}
These code changes fix two separate issues.
First, it fixes the ball popping out of existence the moment it touches the bottom of the screen. To fix this issue, you replace the removeFromParent call with RemoveEffect. The RemoveEffect removes the ball from the game world after letting the ball exit the viewable play area.
Second, these changes fix the handling of collision between bat and ball. This handling code works very much in the player's favor. As long as the player touches the ball with the bat, the ball returns to the top of the screen. If this feels too forgiving and you want something more realistic, then change this handling to better fit how you want your game to feel.
It's worth pointing out the complexity of the velocity update. It doesn't just reversethe y component of the velocity, as was done for the wall collisions. It also updates the x component in a way that depends on the relative position of the bat and ball at the time of contact. This gives the player more control over what the ball does, but exactly how is not communicated to the player in any way except through play.
Now that you have a bat with which to hit the ball, it'd be neat to have some bricks to break with the ball!
8. Break down the wall
Creating the bricks
To add bricks to the game,
- Insert some constants in
lib/src/config.dartfile as follows.
lib/src/config.dart
import 'package:flutter/material.dart';                         // Add this import

const brickColors = [                                           // Add this const
  Color(0xfff94144),
  Color(0xfff3722c),
  Color(0xfff8961e),
  Color(0xfff9844a),
  Color(0xfff9c74f),
  Color(0xff90be6d),
  Color(0xff43aa8b),
  Color(0xff4d908e),
  Color(0xff277da1),
  Color(0xff577590),
];

const gameWidth = 820.0;
const gameHeight = 1600.0;
const ballRadius = gameWidth * 0.02;
const batWidth = gameWidth * 0.2;
const batHeight = ballRadius * 2;
const batStep = gameWidth * 0.05;
const brickGutter = gameWidth * 0.015;                          // Add from here...
final brickWidth =
    (gameWidth - (brickGutter * (brickColors.length + 1))) / brickColors.length;
const brickHeight = gameHeight * 0.03;
const difficultyModifier = 1.03;                                // To here.
- Insert the
Brickcomponent as follows.
lib/src/components/brick.dart
import 'package:flame/collisions.dart';
import 'package:flame/components.dart';
import 'package:flutter/material.dart';

import '../brick_breaker.dart';
import '../config.dart';
import 'ball.dart';
import 'bat.dart';

class Brick extends RectangleComponent
    with CollisionCallbacks, HasGameReference<BrickBreaker> {
  Brick({required super.position, required Color color})
    : super(
        size: Vector2(brickWidth, brickHeight),
        anchor: Anchor.center,
        paint: Paint()
          ..color = color
          ..style = PaintingStyle.fill,
        children: [RectangleHitbox()],
      );

  @override
  void onCollisionStart(
    Set<Vector2> intersectionPoints,
    PositionComponent other,
  ) {
    super.onCollisionStart(intersectionPoints, other);
    removeFromParent();

    if (game.world.children.query<Brick>().length == 1) {
      game.world.removeAll(game.world.children.query<Ball>());
      game.world.removeAll(game.world.children.query<Bat>());
    }
  }
}
By now, most of this code should be familiar. This code uses a RectangleComponent, with both collision detection and a type-safe reference to the BrickBreaker game at the top of the component tree.
The most important new concept this code introduces is how the player achieves the win condition. The win condition check queries the world for bricks, and confirms that only one remains. This might be a bit confusing, because the preceding line removes this brick from its parent.
The key point to understand is that component removal is a queued command. It removes the brick after this code runs, but before the next tick of the game world.
To make the Brick component accessible to BrickBreaker, edit lib/src/components/components.dart as follows.
lib/src/components/components.dart
export 'ball.dart';
export 'bat.dart';
export 'brick.dart';                                            // Add this export
export 'play_area.dart';
Add bricks to the world
Update the Ball component as follows.
lib/src/components/ball.dart
import 'package:flame/collisions.dart';
import 'package:flame/components.dart';
import 'package:flame/effects.dart';
import 'package:flutter/material.dart';

import '../brick_breaker.dart';
import 'bat.dart';
import 'brick.dart';                                            // Add this import
import 'play_area.dart';

class Ball extends CircleComponent
    with CollisionCallbacks, HasGameReference<BrickBreaker> {
  Ball({
    required this.velocity,
    required super.position,
    required double radius,
    required this.difficultyModifier,                           // Add this parameter
  }) : super(
         radius: radius,
         anchor: Anchor.center,
         paint: Paint()
           ..color = const Color(0xff1e6091)
           ..style = PaintingStyle.fill,
         children: [CircleHitbox()],
       );

  final Vector2 velocity;
  final double difficultyModifier;                              // Add this member

  @override
  void update(double dt) {
    super.update(dt);
    position += velocity * dt;
  }

  @override
  void onCollisionStart(
    Set<Vector2> intersectionPoints,
    PositionComponent other,
  ) {
    super.onCollisionStart(intersectionPoints, other);
    if (other is PlayArea) {
      if (intersectionPoints.first.y <= 0) {
        velocity.y = -velocity.y;
      } else if (intersectionPoints.first.x <= 0) {
        velocity.x = -velocity.x;
      } else if (intersectionPoints.first.x >= game.width) {
        velocity.x = -velocity.x;
      } else if (intersectionPoints.first.y >= game.height) {
        add(RemoveEffect(delay: 0.35));
      }
    } else if (other is Bat) {
      velocity.y = -velocity.y;
      velocity.x =
          velocity.x +
          (position.x - other.position.x) / other.size.x * game.width * 0.3;
    } else if (other is Brick) {                                // Modify from here...
      if (position.y < other.position.y - other.size.y / 2) {
        velocity.y = -velocity.y;
      } else if (position.y > other.position.y + other.size.y / 2) {
        velocity.y = -velocity.y;
      } else if (position.x < other.position.x) {
        velocity.x = -velocity.x;
      } else if (position.x > other.position.x) {
        velocity.x = -velocity.x;
      }
      velocity.setFrom(velocity * difficultyModifier);          // To here.
    }
  }
}
This introduces the only new aspect, a difficulty modifier that increases the ball velocity after each brick collision. This tunable parameter needs to be playtested to find the appropriate difficulty curve that is appropriate for your game.
Edit the BrickBreaker game as follows.
lib/src/brick_breaker.dart
import 'dart:async';
import 'dart:math' as math;

import 'package:flame/components.dart';
import 'package:flame/events.dart';
import 'package:flame/game.dart';
import 'package:flutter/material.dart';
import 'package:flutter/services.dart';

import 'components/components.dart';
import 'config.dart';

class BrickBreaker extends FlameGame
    with HasCollisionDetection, KeyboardEvents {
  BrickBreaker()
    : super(
        camera: CameraComponent.withFixedResolution(
          width: gameWidth,
          height: gameHeight,
        ),
      );

  final rand = math.Random();
  double get width => size.x;
  double get height => size.y;

  @override
  FutureOr<void> onLoad() async {
    super.onLoad();

    camera.viewfinder.anchor = Anchor.topLeft;

    world.add(PlayArea());

    world.add(
      Ball(
        difficultyModifier: difficultyModifier,                 // Add this argument
        radius: ballRadius,
        position: size / 2,
        velocity: Vector2(
          (rand.nextDouble() - 0.5) * width,
          height * 0.2,
        ).normalized()..scale(height / 4),
      ),
    );

    world.add(
      Bat(
        size: Vector2(batWidth, batHeight),
        cornerRadius: const Radius.circular(ballRadius / 2),
        position: Vector2(width / 2, height * 0.95),
      ),
    );

    await world.addAll([                                        // Add from here...
      for (var i = 0; i < brickColors.length; i++)
        for (var j = 1; j <= 5; j++)
          Brick(
            position: Vector2(
              (i + 0.5) * brickWidth + (i + 1) * brickGutter,
              (j + 2.0) * brickHeight + j * brickGutter,
            ),
            color: brickColors[i],
          ),
    ]);                                                         // To here.

    debugMode = true;
  }

  @override
  KeyEventResult onKeyEvent(
    KeyEvent event,
    Set<LogicalKeyboardKey> keysPressed,
  ) {
    super.onKeyEvent(event, keysPressed);
    switch (event.logicalKey) {
      case LogicalKeyboardKey.arrowLeft:
        world.children.query<Bat>().first.moveBy(-batStep);
      case LogicalKeyboardKey.arrowRight:
        world.children.query<Bat>().first.moveBy(batStep);
    }
    return KeyEventResult.handled;
  }
}
If you run the game as it currently stands, it displays all the key game mechanics. You could turn off debugging and call it done, but something feels missing.

How about a welcome screen, a game over screen, and maybe a score? Flutter can add these features to the game, and that is where you will turn your attention next.
9. Win the game
Add play states
In this step, you embed the Flame game inside of a Flutter wrapper, and then add Flutter overlays for the welcome, game over, and won screens.
First, you modify the game and component files to implement a play state that reflects whether to show an overlay, and if so, which one.
- Modify the
BrickBreakergame as follows.
lib/src/brick_breaker.dart
import 'dart:async';
import 'dart:math' as math;

import 'package:flame/components.dart';
import 'package:flame/events.dart';
import 'package:flame/game.dart';
import 'package:flutter/material.dart';
import 'package:flutter/services.dart';

import 'components/components.dart';
import 'config.dart';

enum PlayState { welcome, playing, gameOver, won }              // Add this enumeration

class BrickBreaker extends FlameGame
    with HasCollisionDetection, KeyboardEvents, TapDetector {   // Modify this line
  BrickBreaker()
    : super(
        camera: CameraComponent.withFixedResolution(
          width: gameWidth,
          height: gameHeight,
        ),
      );

  final rand = math.Random();
  double get width => size.x;
  double get height => size.y;

  late PlayState _playState;                                    // Add from here...
  PlayState get playState => _playState;
  set playState(PlayState playState) {
    _playState = playState;
    switch (playState) {
      case PlayState.welcome:
      case PlayState.gameOver:
      case PlayState.won:
        overlays.add(playState.name);
      case PlayState.playing:
        overlays.remove(PlayState.welcome.name);
        overlays.remove(PlayState.gameOver.name);
        overlays.remove(PlayState.won.name);
    }
  }                                                             // To here.

  @override
  FutureOr<void> onLoad() async {
    super.onLoad();

    camera.viewfinder.anchor = Anchor.topLeft;

    world.add(PlayArea());

    playState = PlayState.welcome;                              // Add from here...
  }

  void startGame() {
    if (playState == PlayState.playing) return;

    world.removeAll(world.children.query<Ball>());
    world.removeAll(world.children.query<Bat>());
    world.removeAll(world.children.query<Brick>());

    playState = PlayState.playing;                              // To here.

    world.add(
      Ball(
        difficultyModifier: difficultyModifier,
        radius: ballRadius,
        position: size / 2,
        velocity: Vector2(
          (rand.nextDouble() - 0.5) * width,
          height * 0.2,
        ).normalized()..scale(height / 4),
      ),
    );

    world.add(
      Bat(
        size: Vector2(batWidth, batHeight),
        cornerRadius: const Radius.circular(ballRadius / 2),
        position: Vector2(width / 2, height * 0.95),
      ),
    );

    world.addAll([                                              // Drop the await
      for (var i = 0; i < brickColors.length; i++)
        for (var j = 1; j <= 5; j++)
          Brick(
            position: Vector2(
              (i + 0.5) * brickWidth + (i + 1) * brickGutter,
              (j + 2.0) * brickHeight + j * brickGutter,
            ),
            color: brickColors[i],
          ),
    ]);
  }                                                             // Drop the debugMode

  @override                                                     // Add from here...
  void onTap() {
    super.onTap();
    startGame();
  }                                                             // To here.

  @override
  KeyEventResult onKeyEvent(
    KeyEvent event,
    Set<LogicalKeyboardKey> keysPressed,
  ) {
    super.onKeyEvent(event, keysPressed);
    switch (event.logicalKey) {
      case LogicalKeyboardKey.arrowLeft:
        world.children.query<Bat>().first.moveBy(-batStep);
      case LogicalKeyboardKey.arrowRight:
        world.children.query<Bat>().first.moveBy(batStep);
      case LogicalKeyboardKey.space:                            // Add from here...
      case LogicalKeyboardKey.enter:
        startGame();                                            // To here.
    }
    return KeyEventResult.handled;
  }

  @override
  Color backgroundColor() => const Color(0xfff2e8cf);          // Add this override
}
This code changes a good deal of the BrickBreaker game. Adding the playState enumeration takes a lot of work. This captures where the player is in entering, playing, and either losing or winning the game. At the top of the file, you define the enumeration, then instantiate it as a hidden state with matching getters and setters. These getters and setters enable modifying overlays when the various parts of the game trigger play state transitions.
Next, you split the code in onLoad into onLoad and a new startGame method. Before this change, you could only start a new game through restarting the game. With these new additions, the player can now start a new game without such drastic measures.
To permit the player to start a new game, you configured two new handlers for the game. You added a tap handler and extended the keyboard handler to enable the user to start a new game in multiple modalities. With play state modeled, it would make sense to update the components to trigger play state transitions when the player either wins, or loses.
- Modify the
Ballcomponent as follows.
lib/src/components/ball.dart
import 'package:flame/collisions.dart';
import 'package:flame/components.dart';
import 'package:flame/effects.dart';
import 'package:flutter/material.dart';

import '../brick_breaker.dart';
import 'bat.dart';
import 'brick.dart';
import 'play_area.dart';

class Ball extends CircleComponent
    with CollisionCallbacks, HasGameReference<BrickBreaker> {
  Ball({
    required this.velocity,
    required super.position,
    required double radius,
    required this.difficultyModifier,
  }) : super(
         radius: radius,
         anchor: Anchor.center,
         paint: Paint()
           ..color = const Color(0xff1e6091)
           ..style = PaintingStyle.fill,
         children: [CircleHitbox()],
       );

  final Vector2 velocity;
  final double difficultyModifier;

  @override
  void update(double dt) {
    super.update(dt);
    position += velocity * dt;
  }

  @override
  void onCollisionStart(
    Set<Vector2> intersectionPoints,
    PositionComponent other,
  ) {
    super.onCollisionStart(intersectionPoints, other);
    if (other is PlayArea) {
      if (intersectionPoints.first.y <= 0) {
        velocity.y = -velocity.y;
      } else if (intersectionPoints.first.x <= 0) {
        velocity.x = -velocity.x;
      } else if (intersectionPoints.first.x >= game.width) {
        velocity.x = -velocity.x;
      } else if (intersectionPoints.first.y >= game.height) {
        add(
          RemoveEffect(
            delay: 0.35,
            onComplete: () {                                    // Modify from here
              game.playState = PlayState.gameOver;
            },
          ),
        );                                                      // To here.
      }
    } else if (other is Bat) {
      velocity.y = -velocity.y;
      velocity.x =
          velocity.x +
          (position.x - other.position.x) / other.size.x * game.width * 0.3;
    } else if (other is Brick) {
      if (position.y < other.position.y - other.size.y / 2) {
        velocity.y = -velocity.y;
      } else if (position.y > other.position.y + other.size.y / 2) {
        velocity.y = -velocity.y;
      } else if (position.x < other.position.x) {
        velocity.x = -velocity.x;
      } else if (position.x > other.position.x) {
        velocity.x = -velocity.x;
      }
      velocity.setFrom(velocity * difficultyModifier);
    }
  }
}
This small change adds an onComplete callback to the RemoveEffect which triggers the gameOver play state. This should feel about right if the player allows the ball to escape off the bottom of the screen.
- Edit the
Brickcomponent as follows.
lib/src/components/brick.dart
impimport 'package:flame/collisions.dart';
import 'package:flame/components.dart';
import 'package:flutter/material.dart';

import '../brick_breaker.dart';
import '../config.dart';
import 'ball.dart';
import 'bat.dart';

class Brick extends RectangleComponent
    with CollisionCallbacks, HasGameReference<BrickBreaker> {
  Brick({required super.position, required Color color})
    : super(
        size: Vector2(brickWidth, brickHeight),
        anchor: Anchor.center,
        paint: Paint()
          ..color = color
          ..style = PaintingStyle.fill,
        children: [RectangleHitbox()],
      );

  @override
  void onCollisionStart(
    Set<Vector2> intersectionPoints,
    PositionComponent other,
  ) {
    super.onCollisionStart(intersectionPoints, other);
    removeFromParent();

    if (game.world.children.query<Brick>().length == 1) {
      game.playState = PlayState.won;                          // Add this line
      game.world.removeAll(game.world.children.query<Ball>());
      game.world.removeAll(game.world.children.query<Bat>());
    }
  }
}
On the other hand, if the player can break all the bricks, they have earned a "game won" screen. Well done player, well done!
Add the Flutter wrapper
To provide somewhere to embed the game and add play state overlays, add the Flutter shell.
- Create a
widgetsdirectory underlib/src. - Add a
game_app.dartfile and insert the following content to that file.
lib/src/widgets/game_app.dart
import 'package:flame/game.dart';
import 'package:flutter/material.dart';
import 'package:google_fonts/google_fonts.dart';

import '../brick_breaker.dart';
import '../config.dart';

class GameApp extends StatelessWidget {
  const GameApp({super.key});

  @override
  Widget build(BuildContext context) {
    return MaterialApp(
      debugShowCheckedModeBanner: false,
      theme: ThemeData(
        textTheme: GoogleFonts.pressStart2pTextTheme().apply(
          bodyColor: const Color(0xff184e77),
          displayColor: const Color(0xff184e77),
        ),
      ),
      home: Scaffold(
        body: Container(
          decoration: const BoxDecoration(
            gradient: LinearGradient(
              begin: Alignment.topCenter,
              end: Alignment.bottomCenter,
              colors: [Color(0xffa9d6e5), Color(0xfff2e8cf)],
            ),
          ),
          child: SafeArea(
            child: Padding(
              padding: const EdgeInsets.all(16),
              child: Center(
                child: FittedBox(
                  child: SizedBox(
                    width: gameWidth,
                    height: gameHeight,
                    child: GameWidget.controlled(
                      gameFactory: BrickBreaker.new,
                      overlayBuilderMap: {
                        PlayState.welcome.name: (context, game) => Center(
                          child: Text(
                            'TAP TO PLAY',
                            style: Theme.of(context).textTheme.headlineLarge,
                          ),
                        ),
                        PlayState.gameOver.name: (context, game) => Center(
                          child: Text(
                            'G A M E   O V E R',
                            style: Theme.of(context).textTheme.headlineLarge,
                          ),
                        ),
                        PlayState.won.name: (context, game) => Center(
                          child: Text(
                            'Y O U   W O N ! ! !',
                            style: Theme.of(context).textTheme.headlineLarge,
                          ),
                        ),
                      },
                    ),
                  ),
                ),
              ),
            ),
          ),
        ),
      ),
    );
  }
}
Most content in this file follows a standard Flutter widget tree build. The parts specific to Flame include using GameWidget.controlled to construct and manage the BrickBreaker game instance and the new overlayBuilderMap argument to the GameWidget.
This overlayBuilderMap's keys must align with the overlays that the playState setter in BrickBreaker added or removed. Attempting to set an overlay that is not in this map leads to unhappy faces all around.
- To get this new functionality on screen, replace
lib/main.dartfile with the following content.
lib/main.dart
import 'package:flutter/material.dart';

import 'src/widgets/game_app.dart';

void main() {
  runApp(const GameApp());
}
If you run this code on iOS, Linux, Windows or the web, the intended output displays in the game. If you target macOS or Android, you need one last tweak to enable google_fonts to display.
Enabling font access
Add internet permission for Android
For Android, you must add Internet permission. Edit your AndroidManifest.xml as follows.
android/app/src/main/AndroidManifest.xml
<manifest xmlns:android="http://schemas.android.com/apk/res/android">
    <!-- Add the following line -->
    <uses-permission android:name="android.permission.INTERNET" />
    <application
        android:label="brick_breaker"
        android:name="${applicationName}"
        android:icon="@mipmap/ic_launcher">
        <activity
            android:name=".MainActivity"
            android:exported="true"
            android:launchMode="singleTop"
            android:taskAffinity=""
            android:theme="@style/LaunchTheme"
            android:configChanges="orientation|keyboardHidden|keyboard|screenSize|smallestScreenSize|locale|layoutDirection|fontScale|screenLayout|density|uiMode"
            android:hardwareAccelerated="true"
            android:windowSoftInputMode="adjustResize">
            <!-- Specifies an Android theme to apply to this Activity as soon as
                 the Android process has started. This theme is visible to the user
                 while the Flutter UI initializes. After that, this theme continues
                 to determine the Window background behind the Flutter UI. -->
            <meta-data
              android:name="io.flutter.embedding.android.NormalTheme"
              android:resource="@style/NormalTheme"
              />
            <intent-filter>
                <action android:name="android.intent.action.MAIN"/>
                <category android:name="android.intent.category.LAUNCHER"/>
            </intent-filter>
        </activity>
        <!-- Don't delete the meta-data below.
             This is used by the Flutter tool to generate GeneratedPluginRegistrant.java -->
        <meta-data
            android:name="flutterEmbedding"
            android:value="2" />
    </application>
    <!-- Required to query activities that can process text, see:
         https://developer.android.com/training/package-visibility and
         https://developer.android.com/reference/android/content/Intent#ACTION_PROCESS_TEXT.

         In particular, this is used by the Flutter engine in io.flutter.plugin.text.ProcessTextPlugin. -->
    <queries>
        <intent>
            <action android:name="android.intent.action.PROCESS_TEXT"/>
            <data android:mimeType="text/plain"/>
        </intent>
    </queries>
</manifest>
Edit entitlement files for macOS
For macOS, you have two files to edit.
- Edit the
DebugProfile.entitlementsfile to match the following code.
macos/Runner/DebugProfile.entitlements
<?xml version="1.0" encoding="UTF-8"?>
<!DOCTYPE plist PUBLIC "-//Apple//DTD PLIST 1.0//EN" "http://www.apple.com/DTDs/PropertyList-1.0.dtd">
<plist version="1.0">
<dict>
        <key>com.apple.security.app-sandbox</key>
        <true/>
        <key>com.apple.security.cs.allow-jit</key>
        <true/>
        <key>com.apple.security.network.server</key>
        <true/>
        <!-- Add from here... -->
        <key>com.apple.security.network.client</key>
        <true/>
        <!-- to here. -->
</dict>
</plist>
- Edit the
Release.entitlementsfile to match the following code
macos/Runner/Release.entitlements
<?xml version="1.0" encoding="UTF-8"?>
<!DOCTYPE plist PUBLIC "-//Apple//DTD PLIST 1.0//EN" "http://www.apple.com/DTDs/PropertyList-1.0.dtd">
<plist version="1.0">
<dict>
        <key>com.apple.security.app-sandbox</key>
        <true/>
        <!-- Add from here... -->
        <key>com.apple.security.network.client</key>
        <true/>
        <!-- to here. -->
</dict>
</plist>
Running this as is should display a welcome screen and a game over or won screen on all platforms. Those screens might be a little simplistic and it would be nice to have a score. So, guess what you'll be doing in the next step!
10. Keep score
Add score to the game
In this step, you expose the game score to the surrounding Flutter context. In this step you expose state from the Flame game to the surrounding Flutter state management. This enables the game code to update the score every time the player breaks a brick.
- Modify the
BrickBreakergame as follows.
lib/src/brick_breaker.dart
import 'dart:async';
import 'dart:math' as math;

import 'package:flame/components.dart';
import 'package:flame/events.dart';
import 'package:flame/game.dart';
import 'package:flutter/material.dart';
import 'package:flutter/services.dart';

import 'components/components.dart';
import 'config.dart';

enum PlayState { welcome, playing, gameOver, won }

class BrickBreaker extends FlameGame
    with HasCollisionDetection, KeyboardEvents, TapDetector {
  BrickBreaker()
    : super(
        camera: CameraComponent.withFixedResolution(
          width: gameWidth,
          height: gameHeight,
        ),
      );

  final ValueNotifier<int> score = ValueNotifier(0);            // Add this line
  final rand = math.Random();
  double get width => size.x;
  double get height => size.y;

  late PlayState _playState;
  PlayState get playState => _playState;
  set playState(PlayState playState) {
    _playState = playState;
    switch (playState) {
      case PlayState.welcome:
      case PlayState.gameOver:
      case PlayState.won:
        overlays.add(playState.name);
      case PlayState.playing:
        overlays.remove(PlayState.welcome.name);
        overlays.remove(PlayState.gameOver.name);
        overlays.remove(PlayState.won.name);
    }
  }

  @override
  FutureOr<void> onLoad() async {
    super.onLoad();

    camera.viewfinder.anchor = Anchor.topLeft;

    world.add(PlayArea());

    playState = PlayState.welcome;
  }

  void startGame() {
    if (playState == PlayState.playing) return;

    world.removeAll(world.children.query<Ball>());
    world.removeAll(world.children.query<Bat>());
    world.removeAll(world.children.query<Brick>());

    playState = PlayState.playing;
    score.value = 0;                                            // Add this line

    world.add(
      Ball(
        difficultyModifier: difficultyModifier,
        radius: ballRadius,
        position: size / 2,
        velocity: Vector2(
          (rand.nextDouble() - 0.5) * width,
          height * 0.2,
        ).normalized()..scale(height / 4),
      ),
    );

    world.add(
      Bat(
        size: Vector2(batWidth, batHeight),
        cornerRadius: const Radius.circular(ballRadius / 2),
        position: Vector2(width / 2, height * 0.95),
      ),
    );

    world.addAll([
      for (var i = 0; i < brickColors.length; i++)
        for (var j = 1; j <= 5; j++)
          Brick(
            position: Vector2(
              (i + 0.5) * brickWidth + (i + 1) * brickGutter,
              (j + 2.0) * brickHeight + j * brickGutter,
            ),
            color: brickColors[i],
          ),
    ]);
  }

  @override
  void onTap() {
    super.onTap();
    startGame();
  }

  @override
  KeyEventResult onKeyEvent(
    KeyEvent event,
    Set<LogicalKeyboardKey> keysPressed,
  ) {
    super.onKeyEvent(event, keysPressed);
    switch (event.logicalKey) {
      case LogicalKeyboardKey.arrowLeft:
        world.children.query<Bat>().first.moveBy(-batStep);
      case LogicalKeyboardKey.arrowRight:
        world.children.query<Bat>().first.moveBy(batStep);
      case LogicalKeyboardKey.space:
      case LogicalKeyboardKey.enter:
        startGame();
    }
    return KeyEventResult.handled;
  }

  @override
  Color backgroundColor() => const Color(0xfff2e8cf);
}
By adding score to the game, you tie the game's state to Flutter state management.
- Modify the
Brickclass to add a point to the score when the player breaks bricks.
lib/src/components/brick.dart
import 'package:flame/collisions.dart';
import 'package:flame/components.dart';
import 'package:flutter/material.dart';

import '../brick_breaker.dart';
import '../config.dart';
import 'ball.dart';
import 'bat.dart';

class Brick extends RectangleComponent
    with CollisionCallbacks, HasGameReference<BrickBreaker> {
  Brick({required super.position, required Color color})
    : super(
        size: Vector2(brickWidth, brickHeight),
        anchor: Anchor.center,
        paint: Paint()
          ..color = color
          ..style = PaintingStyle.fill,
        children: [RectangleHitbox()],
      );

  @override
  void onCollisionStart(
    Set<Vector2> intersectionPoints,
    PositionComponent other,
  ) {
    super.onCollisionStart(intersectionPoints, other);
    removeFromParent();
    game.score.value++;                                         // Add this line

    if (game.world.children.query<Brick>().length == 1) {
      game.playState = PlayState.won;
      game.world.removeAll(game.world.children.query<Ball>());
      game.world.removeAll(game.world.children.query<Bat>());
    }
  }
}
Make a good-looking game
Now that you can keep score in Flutter, it's time to put together the widgets to make it look good.
- Create
score_card.dartinlib/src/widgetsand add the following.
lib/src/widgets/score_card.dart
import 'package:flutter/material.dart';

class ScoreCard extends StatelessWidget {
  const ScoreCard({super.key, required this.score});

  final ValueNotifier<int> score;

  @override
  Widget build(BuildContext context) {
    return ValueListenableBuilder<int>(
      valueListenable: score,
      builder: (context, score, child) {
        return Padding(
          padding: const EdgeInsets.fromLTRB(12, 6, 12, 18),
          child: Text(
            'Score: $score'.toUpperCase(),
            style: Theme.of(context).textTheme.titleLarge!,
          ),
        );
      },
    );
  }
}
- Create
overlay_screen.dartinlib/src/widgetsand add the following code.
This adds more polish to the overlays using the power of the flutter_animate package to add some movement and style to the overlay screens.
lib/src/widgets/overlay_screen.dart
import 'package:flutter/material.dart';
import 'package:flutter_animate/flutter_animate.dart';

class OverlayScreen extends StatelessWidget {
  const OverlayScreen({super.key, required this.title, required this.subtitle});

  final String title;
  final String subtitle;

  @override
  Widget build(BuildContext context) {
    return Container(
      alignment: const Alignment(0, -0.15),
      child: Column(
        mainAxisSize: MainAxisSize.min,
        children: [
          Text(
            title,
            style: Theme.of(context).textTheme.headlineLarge,
          ).animate().slideY(duration: 750.ms, begin: -3, end: 0),
          const SizedBox(height: 16),
          Text(subtitle, style: Theme.of(context).textTheme.headlineSmall)
              .animate(onPlay: (controller) => controller.repeat())
              .fadeIn(duration: 1.seconds)
              .then()
              .fadeOut(duration: 1.seconds),
        ],
      ),
    );
  }
}
To get a more in-depth look at the power of flutter_animate, check out the Building next generation UIs in Flutter codelab.
This code changed a lot in the GameApp component. First, to enable ScoreCard to access the score , you convert it from a StatelessWidget to StatefulWidget. The addition of the score card requires the addition of a Column to stack the score above the game.
Second, to enhance the welcome, game over, and won experiences, you added the new OverlayScreen widget.
lib/src/widgets/game_app.dart
import 'package:flame/game.dart';
import 'package:flutter/material.dart';
import 'package:google_fonts/google_fonts.dart';

import '../brick_breaker.dart';
import '../config.dart';
import 'overlay_screen.dart';                                   // Add this import
import 'score_card.dart';                                       // And this one too

class GameApp extends StatefulWidget {                          // Modify this line
  const GameApp({super.key});

  @override                                                     // Add from here...
  State<GameApp> createState() => _GameAppState();
}

class _GameAppState extends State<GameApp> {
  late final BrickBreaker game;

  @override
  void initState() {
    super.initState();
    game = BrickBreaker();
  }                                                             // To here.

  @override
  Widget build(BuildContext context) {
    return MaterialApp(
      debugShowCheckedModeBanner: false,
      theme: ThemeData(
        textTheme: GoogleFonts.pressStart2pTextTheme().apply(
          bodyColor: const Color(0xff184e77),
          displayColor: const Color(0xff184e77),
        ),
      ),
      home: Scaffold(
        body: Container(
          decoration: const BoxDecoration(
            gradient: LinearGradient(
              begin: Alignment.topCenter,
              end: Alignment.bottomCenter,
              colors: [Color(0xffa9d6e5), Color(0xfff2e8cf)],
            ),
          ),
          child: SafeArea(
            child: Padding(
              padding: const EdgeInsets.all(16),
              child: Center(
                child: Column(                                  // Modify from here...
                  children: [
                    ScoreCard(score: game.score),
                    Expanded(
                      child: FittedBox(
                        child: SizedBox(
                          width: gameWidth,
                          height: gameHeight,
                          child: GameWidget(
                            game: game,
                            overlayBuilderMap: {
                              PlayState.welcome.name: (context, game) =>
                                  const OverlayScreen(
                                    title: 'TAP TO PLAY',
                                    subtitle: 'Use arrow keys or swipe',
                                  ),
                              PlayState.gameOver.name: (context, game) =>
                                  const OverlayScreen(
                                    title: 'G A M E   O V E R',
                                    subtitle: 'Tap to Play Again',
                                  ),
                              PlayState.won.name: (context, game) =>
                                  const OverlayScreen(
                                    title: 'Y O U   W O N ! ! !',
                                    subtitle: 'Tap to Play Again',
                                  ),
                            },
                          ),
                        ),
                      ),
                    ),
                  ],
                ),                                              // To here.
              ),
            ),
          ),
        ),
      ),
    );
  }
}
With that all in place, you should now be able to run this game on any of the six Flutter target platforms. The game should resemble the following.
|
|


11. Congratulations
Congratulations, you succeeded in building a game with Flutter and Flame!
You built a game using the Flame 2D game engine and embedded it in a Flutter wrapper. You used Flame's Effects to animate and remove components. You used Google Fonts and Flutter Animate packages to make the whole game look well designed.
What's next?
Check out some of these codelabs...
- Building next generation UIs in Flutter
- Take your Flutter app from boring to beautiful
- Adding in-app purchases to your Flutter app