
1. Sebelum memulai
Flutter sangat bagus untuk memungkinkan developer dengan cepat membuat antarmuka pengguna baru secara iteratif menggunakan kombinasi hot reload dan UI deklaratif. Namun, ada saatnya Anda perlu menambahkan interaktivitas tambahan ke antarmuka. Sentuhan ini bisa sederhana seperti menganimasikan tombol saat kursor diarahkan atau sesederhana shader yang melengkungkan antarmuka pengguna menggunakan kecanggihan GPU.
Dalam codelab ini, Anda akan mem-build aplikasi Flutter yang menggunakan kecanggihan animasi, shader, dan kolom partikel untuk membuat antarmuka pengguna yang memunculkan film dan acara TV fiksi ilmiah yang kita semua suka tonton saat kita tidak sedang melakukan coding.
Yang akan Anda build
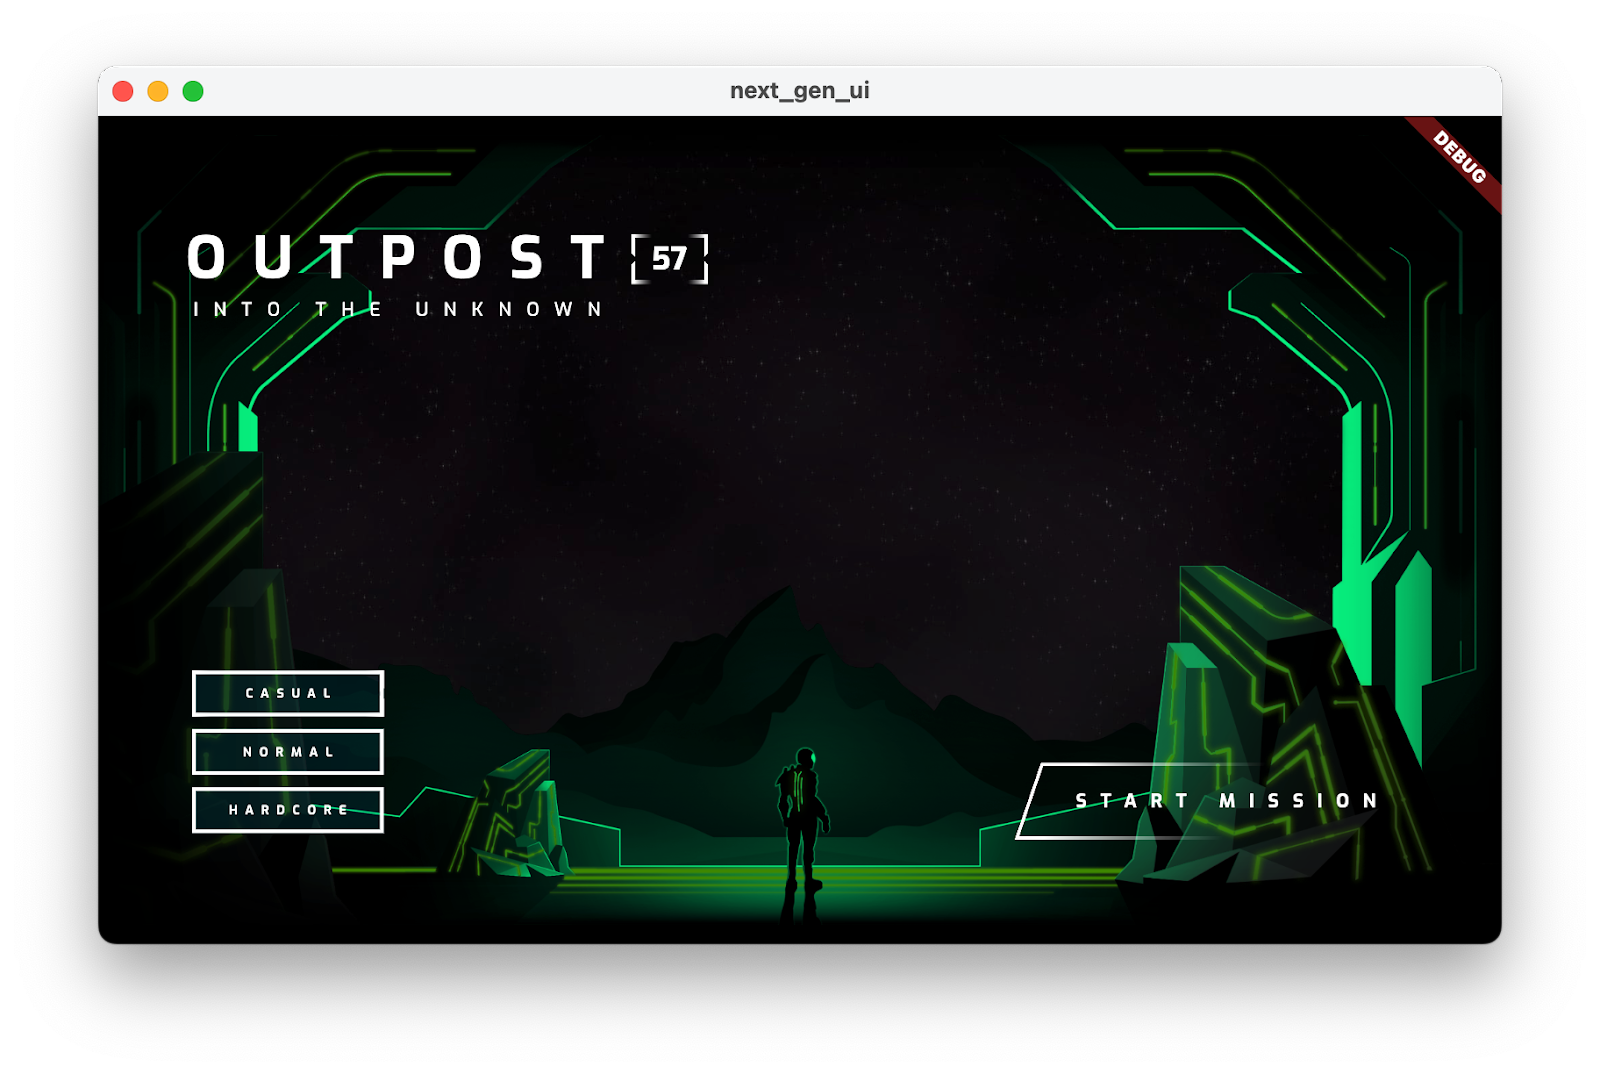
Anda akan mem-build halaman menu awal untuk game bertema sci-fi apokaliptik. Ada judul dengan shader fragmen yang mengambil sampel teks untuk menganimasikannya secara visual, menu tingkat kesulitan yang mengubah tema warna halaman dengan banyak animasi, dan bola animasi yang dilukis dengan shader fragmen kedua. Jika masih belum cukup, di akhir codelab, Anda akan menambahkan efek partikel yang samar untuk menarik perhatian dan menarik halaman.
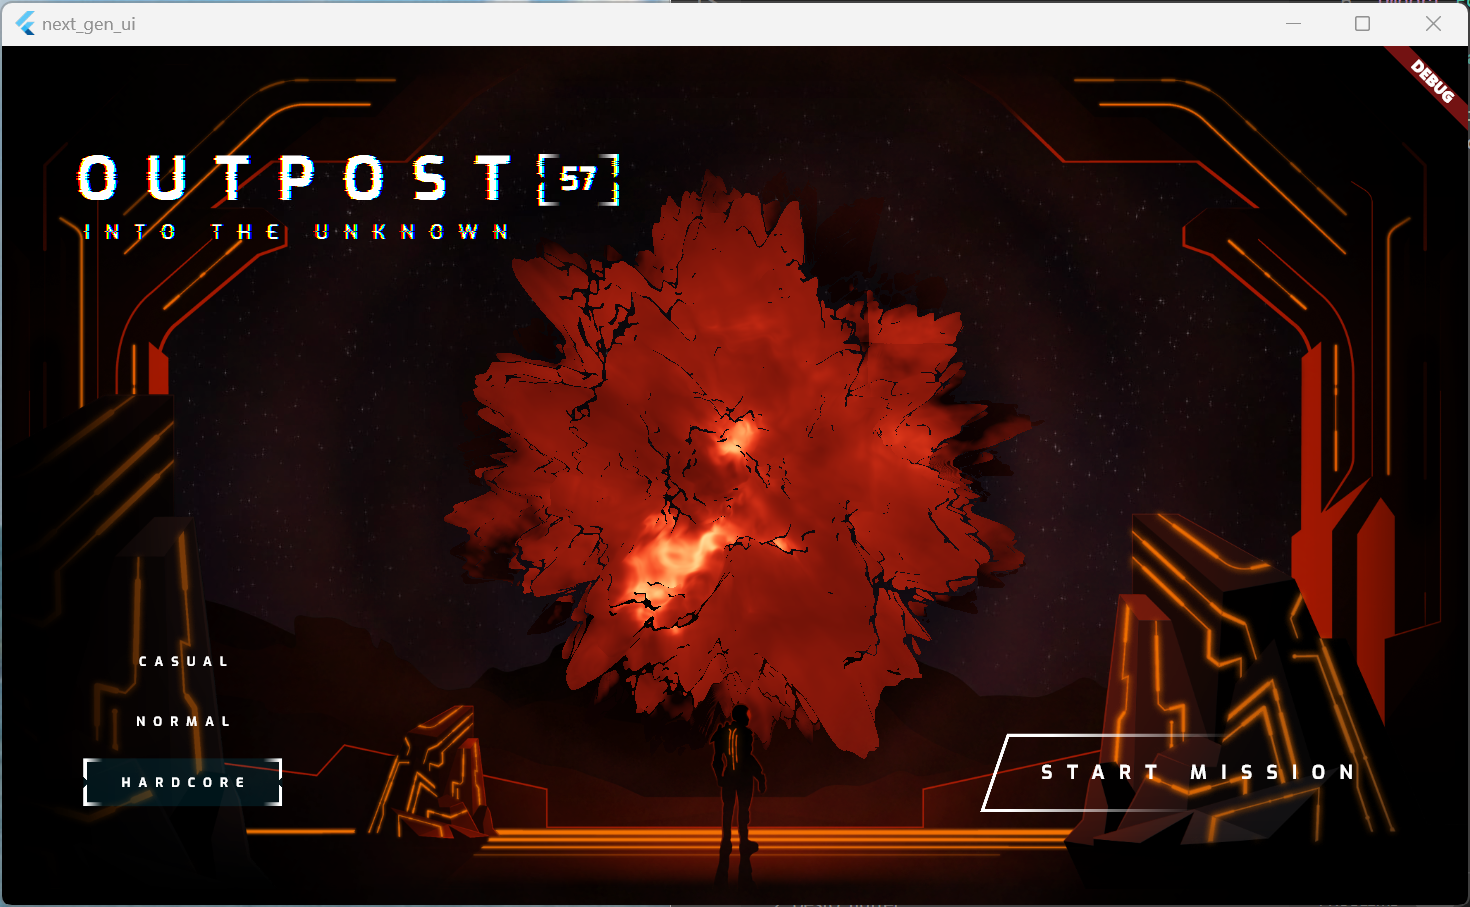
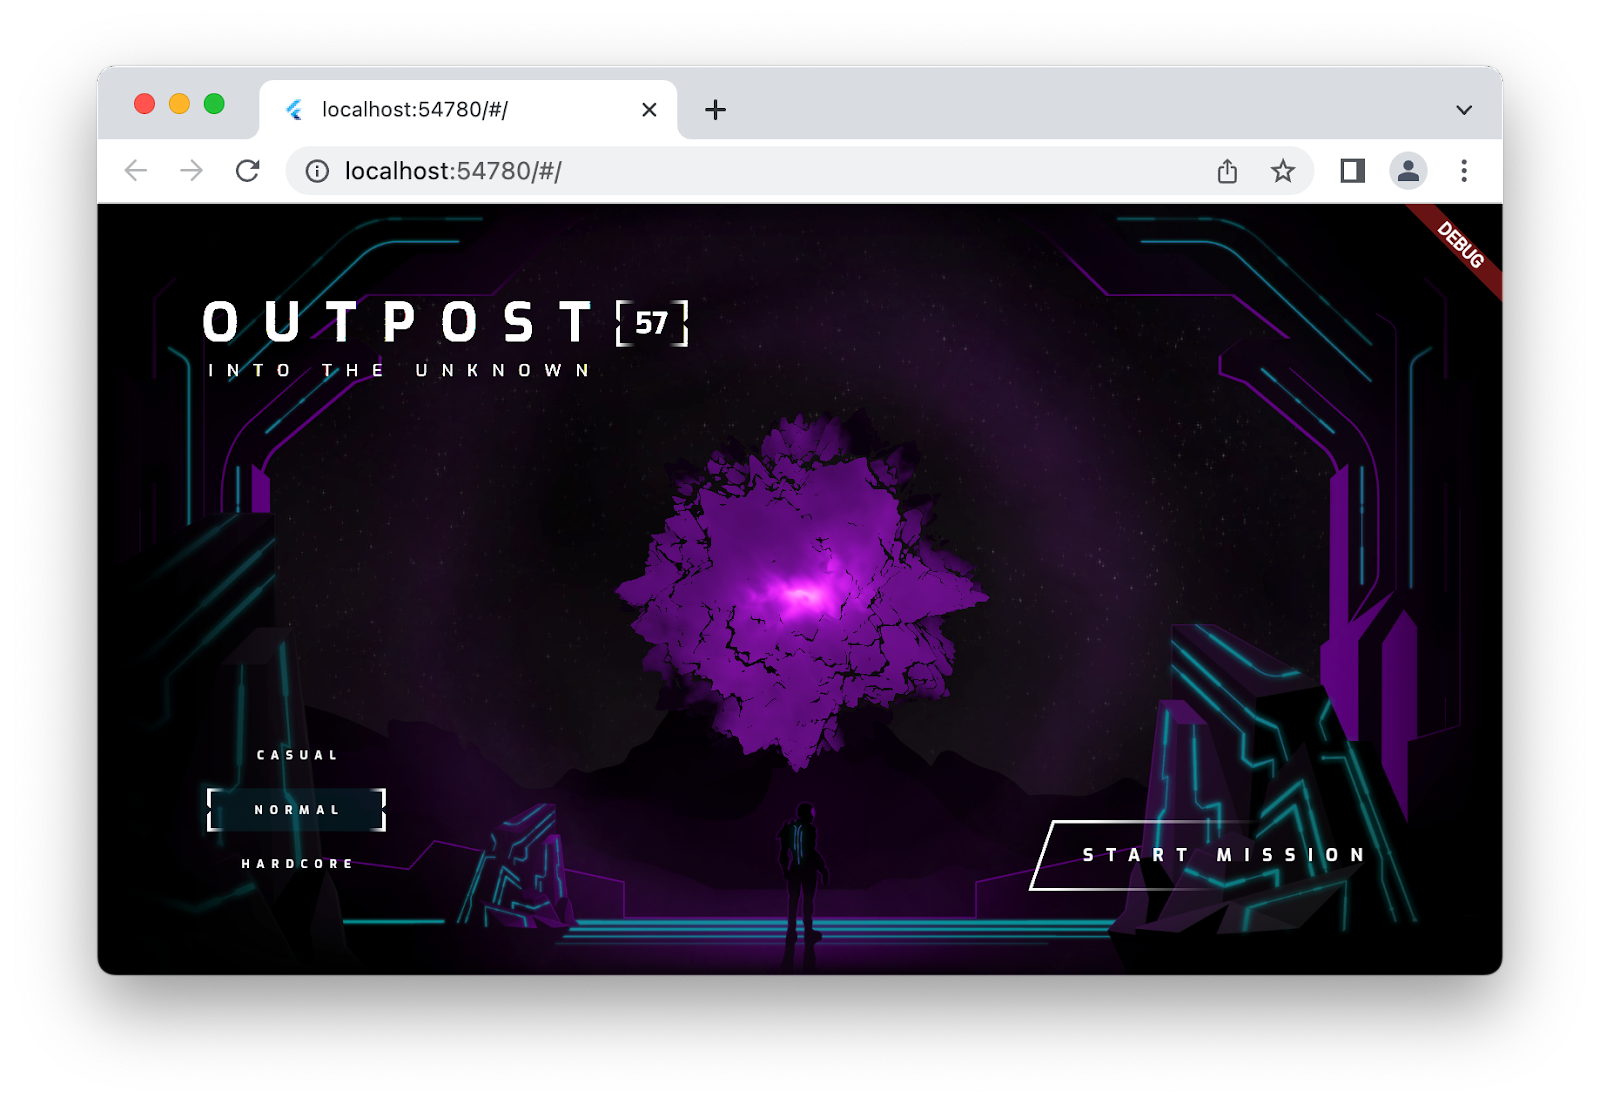
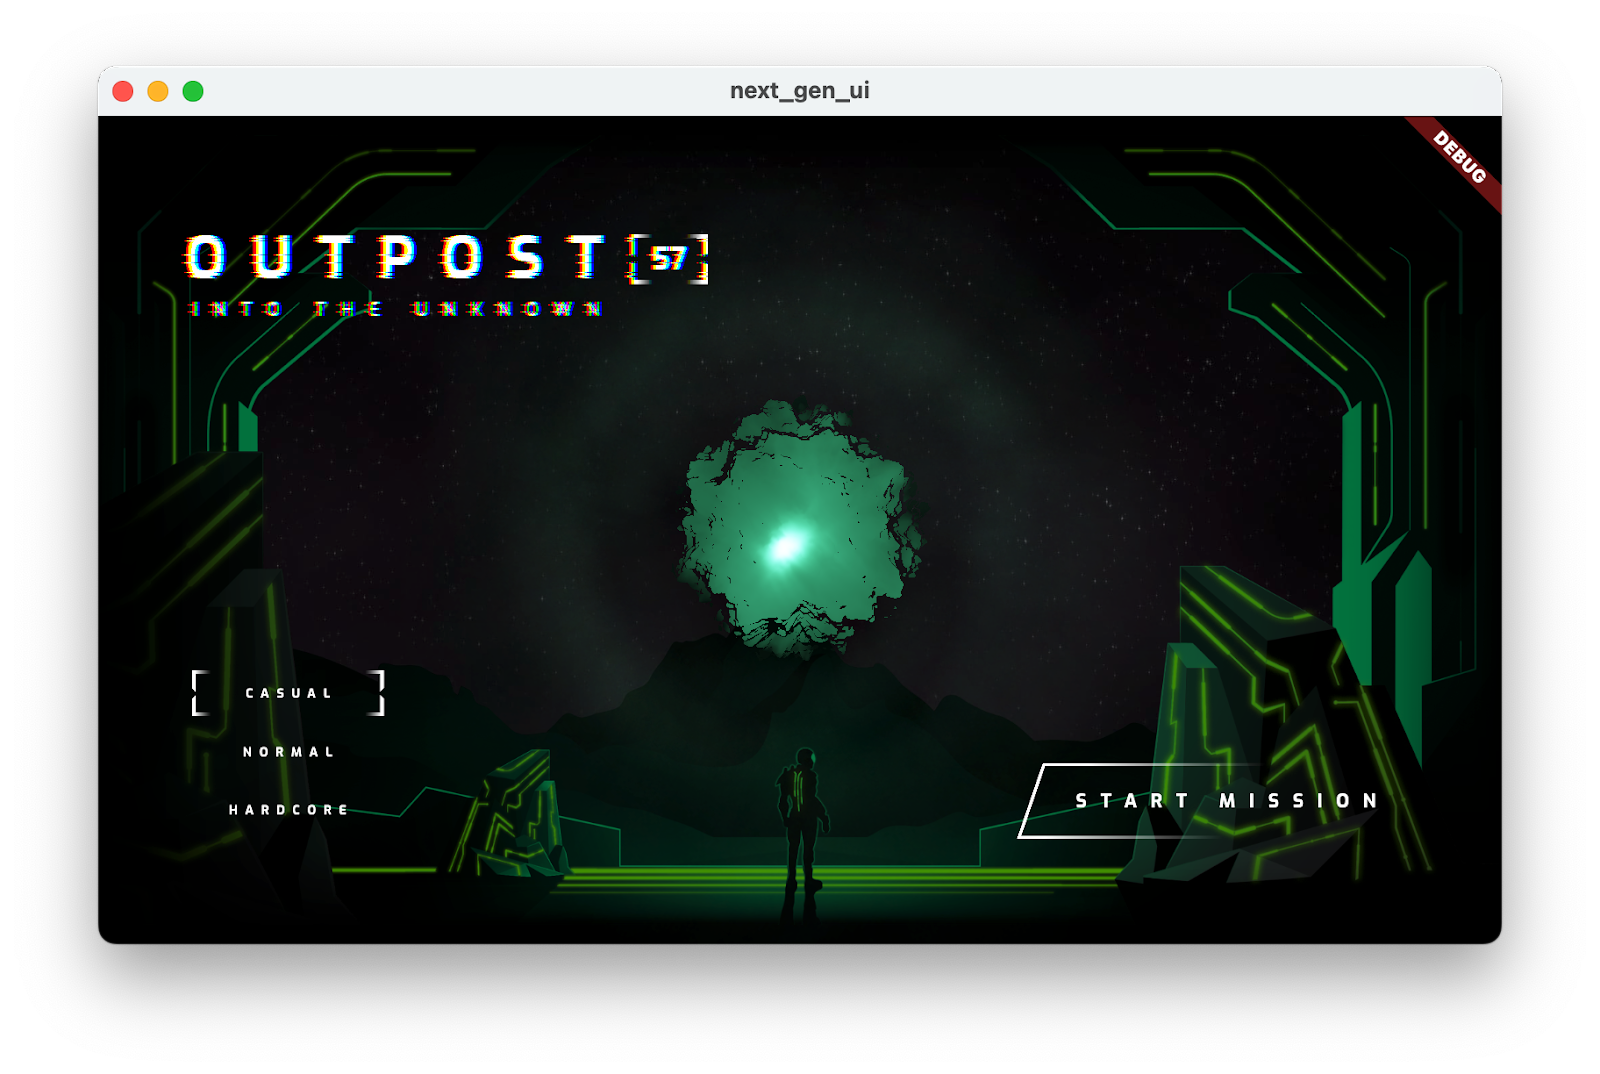
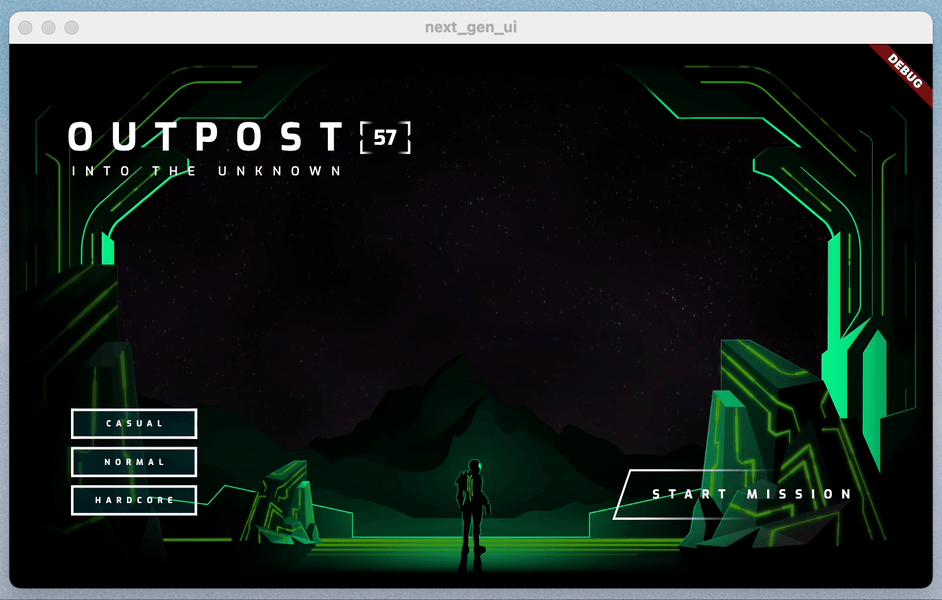
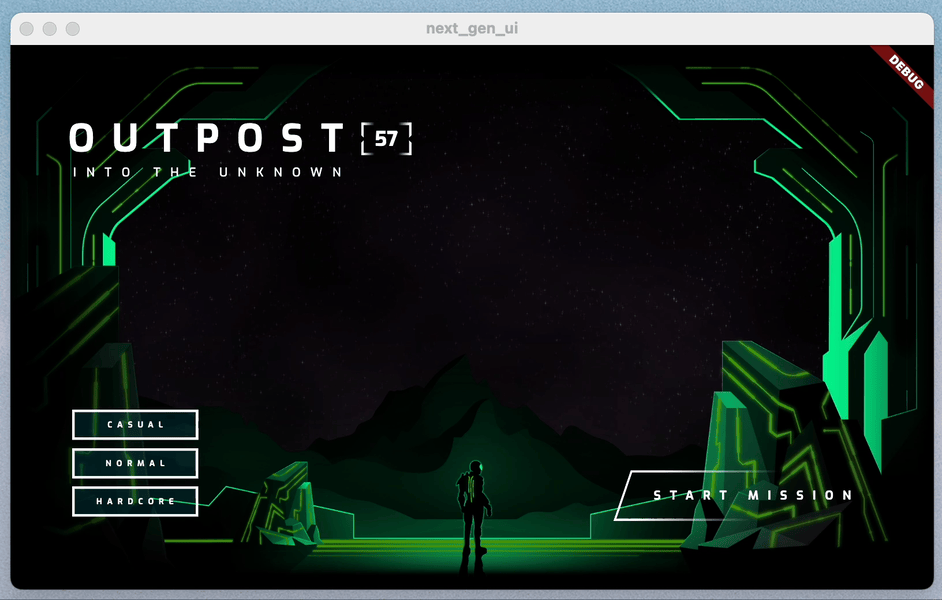
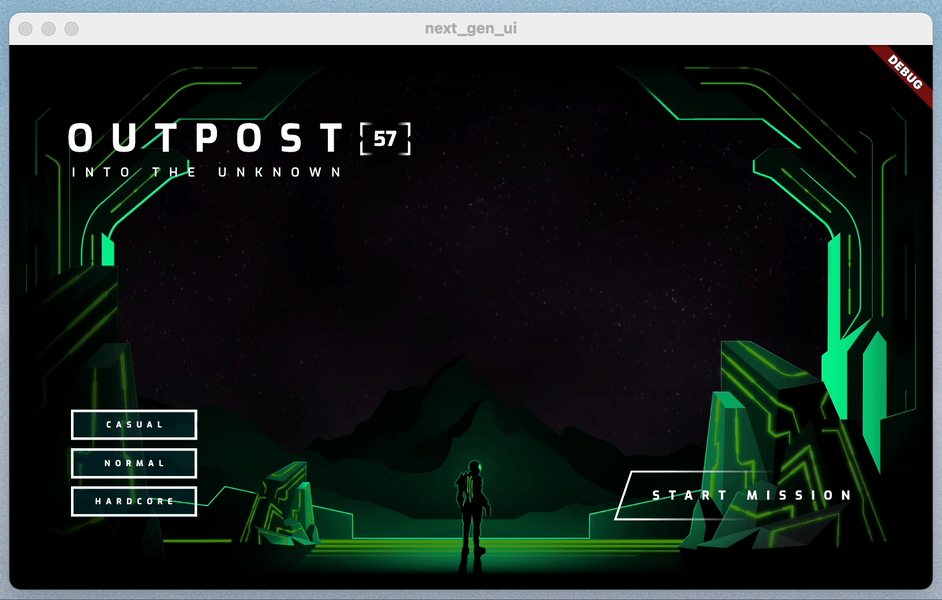
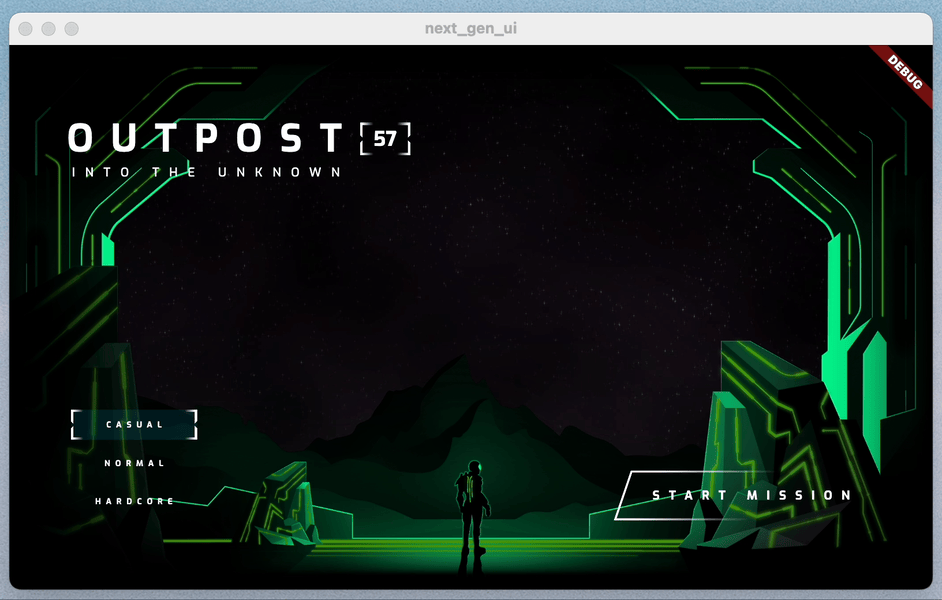
Screenshot berikut menunjukkan aplikasi yang akan Anda buat di tiga sistem operasi desktop yang didukung: Windows, Linux, dan macOS. Untuk kelengkapan, versi browser web (juga didukung) disediakan. Animasi dan shader fragmen di mana saja.
|
|
|
|

Prasyarat
- Pengetahuan dasar tentang pengembangan Flutter dengan Dart, seperti yang dibahas dalam codelab Aplikasi Flutter pertama Anda
Yang akan Anda pelajari
- Cara menggunakan
flutter_animateuntuk membuat animasi ekspresif - Cara menggunakan dukungan Flutter untuk shader fragmen di desktop dan web
- Cara menambahkan animasi partikel ke aplikasi Anda dengan
particle_field
Yang Anda butuhkan
- Flutter SDK
- Penyiapan VS Code untuk Flutter dan Dart
- Penyiapan dukungan desktop untuk Flutter untuk Windows, Linux, atau macOS
- Penyiapan dukungan web untuk Flutter
2. Memulai
Mendownload kode awal
- Buka repositori GitHub ini.
- Klik Code > Download zip guna mendownload semua kode untuk codelab ini.
- Ekstrak file zip yang didownload untuk mengekstrak folder root
codelabs-main. Anda hanya memerlukan subdirektorinext-gen-ui/, yang berisi folderstep_01kestep_06, yang berisi kode sumber yang Anda buat untuk setiap langkah dalam codelab ini.
Mendownload dependensi project
- Di VS Code, klik File > Open folder > codelabs-main > next-gen-uis > step_01 untuk membuka project awal.
- Jika Anda melihat dialog VS Code yang meminta Anda mendownload paket yang diperlukan untuk aplikasi awal, klik Get packages.
- Jika Anda tidak melihat dialog VS Code yang meminta Anda mendownload paket yang diperlukan untuk aplikasi awal, buka terminal Anda, lalu buka folder
step_01dan jalankan perintahflutter pub get.
Menjalankan aplikasi awal
- Di VS Code, pilih sistem operasi desktop yang Anda jalankan atau Chrome jika Anda ingin menguji aplikasi di browser web.
Misalnya, berikut adalah tampilan yang Anda lihat saat menggunakan macOS sebagai target deployment:

Berikut adalah tampilan yang Anda lihat saat menggunakan Chrome sebagai target penerapan:

- Buka file
lib/main.dart, lalu klik Start debugging. Aplikasi diluncurkan di sistem operasi desktop atau di browser Chrome.
Menjelajahi aplikasi awal
Di aplikasi awal, perhatikan hal-hal berikut:
- UI siap untuk Anda build.
- Direktori
assetsmemiliki aset seni dan dua shader fragmen yang akan Anda gunakan. - File
pubspec.yamlsudah mencantumkan aset dan kumpulan paket pub yang akan Anda gunakan. - Direktori
libberisi filemain.dartwajib, fileassets.dartyang mencantumkan jalur aset seni dan shader fragmen, serta filestyles.dartyang mencantumkan TextStyles dan Colors yang akan Anda gunakan. - Direktori
libjuga berisi direktoricommonyang memiliki beberapa utilitas berguna yang akan Anda gunakan dalam codelab ini, dan direktoriorb_shaderyang berisiWidgetyang akan digunakan untuk menampilkan orb dengan shader vertex.
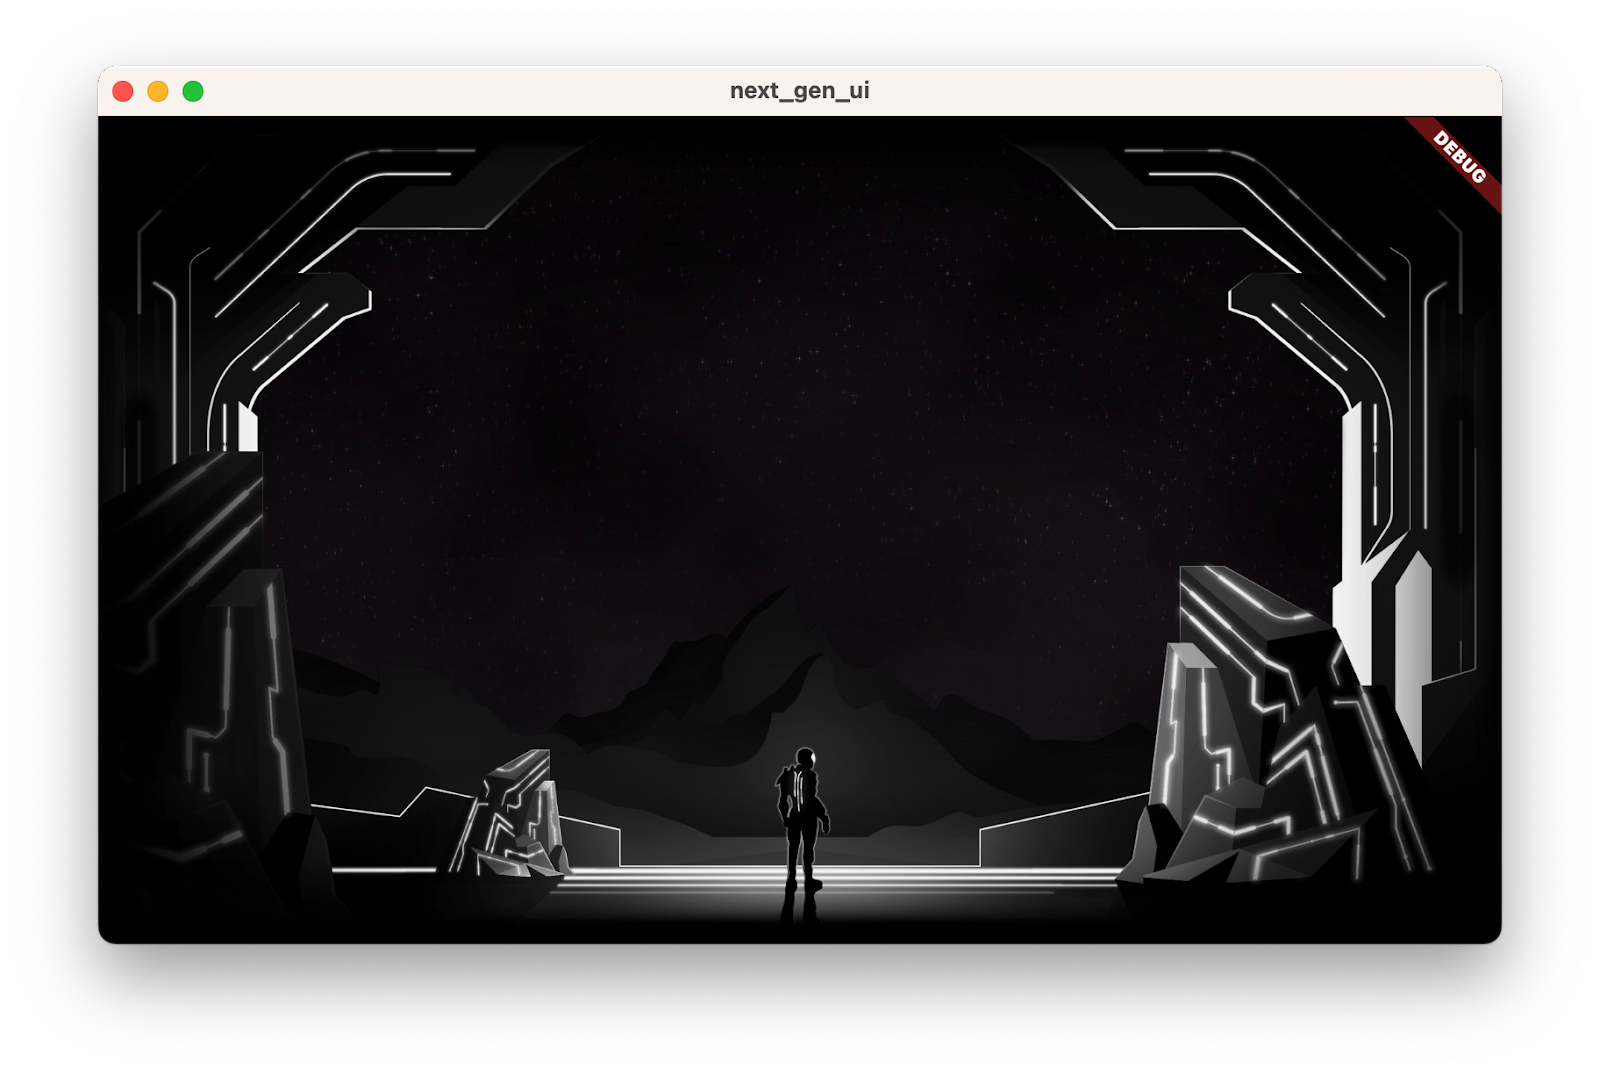
Berikut yang akan Anda lihat setelah memulai aplikasi.
3. Gambarkan adegan
Pada langkah ini, Anda menempatkan semua aset seni latar belakang di layar secara berlapis. Pada awalnya, perkirakan warna tersebut akan tampak monoton, tetapi Anda akan menambahkan warna pada adegan di akhir langkah ini.
Tambahkan aset ke tampilan
- Buat direktori
title_screendi direktorilibAnda, lalu tambahkan filetitle_screen.dart. Tambahkan konten berikut ke file:
lib/title_screen/title_screen.dart
import 'package:flutter/material.dart';

import '../assets.dart';

class TitleScreen extends StatelessWidget {
  const TitleScreen({super.key});

  @override
  Widget build(BuildContext context) {
    return Scaffold(
      backgroundColor: Colors.black,
      body: Center(
        child: Stack(
          children: [
            /// Bg-Base
            Image.asset(AssetPaths.titleBgBase),

            /// Bg-Receive
            Image.asset(AssetPaths.titleBgReceive),

            /// Mg-Base
            Image.asset(AssetPaths.titleMgBase),

            /// Mg-Receive
            Image.asset(AssetPaths.titleMgReceive),

            /// Mg-Emit
            Image.asset(AssetPaths.titleMgEmit),

            /// Fg-Rocks
            Image.asset(AssetPaths.titleFgBase),

            /// Fg-Receive
            Image.asset(AssetPaths.titleFgReceive),

            /// Fg-Emit
            Image.asset(AssetPaths.titleFgEmit),
          ],
        ),
      ),
    );
  }
}
Widget ini berisi scene dengan aset yang ditumpuk berlapis. Lapisan latar belakang, tengah, dan latar depan masing-masing diwakili oleh sekelompok dua atau tiga gambar. Gambar ini akan diterangi dengan warna yang berbeda untuk menangkap bagaimana cahaya bergerak melalui adegan.
- Di file
main.dart, tambahkan konten berikut:
lib/main.dart
import 'dart:io';

import 'package:flutter/foundation.dart';
import 'package:flutter/material.dart';
import 'package:window_size/window_size.dart';
                                                          // Remove 'styles.dart' import
import 'title_screen/title_screen.dart';                  // Add this import

void main() {
  if (!kIsWeb && (Platform.isWindows || Platform.isLinux || Platform.isMacOS)) {
    WidgetsFlutterBinding.ensureInitialized();
    setWindowMinSize(const Size(800, 500));
  }
  runApp(const NextGenApp());
}

class NextGenApp extends StatelessWidget {
  const NextGenApp({super.key});

  @override
  Widget build(BuildContext context) {
    return MaterialApp(
      themeMode: ThemeMode.dark,
      darkTheme: ThemeData(brightness: Brightness.dark),
      home: const TitleScreen(),                          // Replace with this widget
    );
  }
}
Ini menggantikan UI aplikasi dengan scene monokrom yang dibuat aset seni. Selanjutnya, Anda mewarnai setiap lapisan.
Menambahkan utilitas pewarnaan gambar
Tambahkan utilitas pewarnaan gambar dengan menambahkan konten berikut ke file title_screen.dart:
lib/title_screen/title_screen.dart
import 'package:flutter/material.dart';

import '../assets.dart';

class TitleScreen extends StatelessWidget {
  const TitleScreen({super.key});

  @override
  Widget build(BuildContext context) {
    return Scaffold(
      backgroundColor: Colors.black,
      body: Center(
        child: Stack(
          children: [
            /// Bg-Base
            Image.asset(AssetPaths.titleBgBase),

            /// Bg-Receive
            Image.asset(AssetPaths.titleBgReceive),

            /// Mg-Base
            Image.asset(AssetPaths.titleMgBase),

            /// Mg-Receive
            Image.asset(AssetPaths.titleMgReceive),

            /// Mg-Emit
            Image.asset(AssetPaths.titleMgEmit),

            /// Fg-Rocks
            Image.asset(AssetPaths.titleFgBase),

            /// Fg-Receive
            Image.asset(AssetPaths.titleFgReceive),

            /// Fg-Emit
            Image.asset(AssetPaths.titleFgEmit),
          ],
        ),
      ),
    );
  }
}

class _LitImage extends StatelessWidget {                 // Add from here...
  const _LitImage({
    required this.color,
    required this.imgSrc,
    required this.lightAmt,
  });
  final Color color;
  final String imgSrc;
  final double lightAmt;

  @override
  Widget build(BuildContext context) {
    final hsl = HSLColor.fromColor(color);
    return ColorFiltered(
      colorFilter: ColorFilter.mode(
        hsl.withLightness(hsl.lightness * lightAmt).toColor(),
        BlendMode.modulate,
      ),
      child: Image.asset(imgSrc),
    );
  }
}                                                         // to here.
Widget utilitas _LitImage ini mewarnai ulang setiap aset seni, bergantung pada apakah aset tersebut memancarkan atau menerima cahaya. Hal ini dapat memicu peringatan linter, karena Anda belum menggunakan widget baru ini.
Warnai
Warnai dengan mengubah file title_screen.dart, seperti berikut:
lib/title_screen/title_screen.dart
import 'package:flutter/material.dart';

import '../assets.dart';
import '../styles.dart';                                  // Add this import

class TitleScreen extends StatelessWidget {
  const TitleScreen({super.key});

  final _finalReceiveLightAmt = 0.7;                      // Add this attribute
  final _finalEmitLightAmt = 0.5;                         // And this attribute

  @override
  Widget build(BuildContext context) {
    final orbColor = AppColors.orbColors[0];              // Add this final variable
    final emitColor = AppColors.emitColors[0];            // And this one

    return Scaffold(
      backgroundColor: Colors.black,
      body: Center(
        child: Stack(
          children: [
            /// Bg-Base
            Image.asset(AssetPaths.titleBgBase),

            /// Bg-Receive
            _LitImage(                                    // Modify from here...
              color: orbColor,
              imgSrc: AssetPaths.titleBgReceive,
              lightAmt: _finalReceiveLightAmt,
            ),                                            // to here.

            /// Mg-Base
            _LitImage(                                    // Modify from here...
              imgSrc: AssetPaths.titleMgBase,
              color: orbColor,
              lightAmt: _finalReceiveLightAmt,
            ),                                            // to here.

            /// Mg-Receive
            _LitImage(                                    // Modify from here...
              imgSrc: AssetPaths.titleMgReceive,
              color: orbColor,
              lightAmt: _finalReceiveLightAmt,
            ),                                            // to here.

            /// Mg-Emit
            _LitImage(                                    // Modify from here...
              imgSrc: AssetPaths.titleMgEmit,
              color: emitColor,
              lightAmt: _finalEmitLightAmt,
            ),                                            // to here.

            /// Fg-Rocks
            Image.asset(AssetPaths.titleFgBase),

            /// Fg-Receive
            _LitImage(                                    // Modify from here...
              imgSrc: AssetPaths.titleFgReceive,
              color: orbColor,
              lightAmt: _finalReceiveLightAmt,
            ),                                            // to here.

            /// Fg-Emit
            _LitImage(                                    // Modify from here...
              imgSrc: AssetPaths.titleFgEmit,
              color: emitColor,
              lightAmt: _finalEmitLightAmt,
            ),                                            // to here.
          ],
        ),
      ),
    );
  }
}

class _LitImage extends StatelessWidget {
  const _LitImage({
    required this.color,
    required this.imgSrc,
    required this.lightAmt,
  });
  final Color color;
  final String imgSrc;
  final double lightAmt;

  @override
  Widget build(BuildContext context) {
    final hsl = HSLColor.fromColor(color);
    return ColorFiltered(
      colorFilter: ColorFilter.mode(
        hsl.withLightness(hsl.lightness * lightAmt).toColor(),
        BlendMode.modulate,
      ),
      child: Image.asset(imgSrc),
    );
  }
}
Ini adalah aplikasi lagi, kali ini dengan aset seni berwarna hijau.

4. Menambahkan UI
Pada langkah ini, Anda akan menempatkan antarmuka pengguna di atas scene yang dibuat pada langkah sebelumnya. Ini mencakup judul, tombol pemilih kesulitan, dan tombol Mulai yang seluruhnya penting.
Tambahkan judul
- Buat file
title_screen_ui.dartdi dalam direktorilib/title_screendan tambahkan konten berikut ke file:
lib/judul_layar/judul_layar_ui.dart
import 'package:extra_alignments/extra_alignments.dart';
import 'package:flutter/material.dart';
import 'package:gap/gap.dart';

import '../assets.dart';
import '../common/ui_scaler.dart';
import '../styles.dart';

class TitleScreenUi extends StatelessWidget {
  const TitleScreenUi({
    super.key,
  });
  @override
  Widget build(BuildContext context) {
    return const Padding(
      padding: EdgeInsets.symmetric(vertical: 40, horizontal: 50),
      child: Stack(
        children: [
          /// Title Text
          TopLeft(
            child: UiScaler(
              alignment: Alignment.topLeft,
              child: _TitleText(),
            ),
          ),
        ],
      ),
    );
  }
}

class _TitleText extends StatelessWidget {
  const _TitleText();

  @override
  Widget build(BuildContext context) {
    return Column(
      mainAxisSize: MainAxisSize.min,
      crossAxisAlignment: CrossAxisAlignment.start,
      children: [
        const Gap(20),
        Row(
          mainAxisSize: MainAxisSize.min,
          children: [
            Transform.translate(
              offset: Offset(-(TextStyles.h1.letterSpacing! * .5), 0),
              child: Text('OUTPOST', style: TextStyles.h1),
            ),
            Image.asset(AssetPaths.titleSelectedLeft, height: 65),
            Text('57', style: TextStyles.h2),
            Image.asset(AssetPaths.titleSelectedRight, height: 65),
          ],
        ),
        Text('INTO THE UNKNOWN', style: TextStyles.h3),
      ],
    );
  }
}
Widget ini berisi judul dan semua tombol yang membentuk antarmuka pengguna untuk aplikasi ini.
- Update file
lib/title_screen/title_screen.dart, sebagai berikut:
lib/title_screen/title_screen.dart
import 'package:flutter/material.dart';

import '../assets.dart';
import '../styles.dart';
import 'title_screen_ui.dart';                            // Add this import

class TitleScreen extends StatelessWidget {
  const TitleScreen({super.key});

  final _finalReceiveLightAmt = 0.7;
  final _finalEmitLightAmt = 0.5;

  @override
  Widget build(BuildContext context) {
    final orbColor = AppColors.orbColors[0];
    final emitColor = AppColors.emitColors[0];

    return Scaffold(
      backgroundColor: Colors.black,
      body: Center(
        child: Stack(
          children: [
            /// Bg-Base
            Image.asset(AssetPaths.titleBgBase),

            /// Bg-Receive
            _LitImage(
              color: orbColor,
              imgSrc: AssetPaths.titleBgReceive,
              lightAmt: _finalReceiveLightAmt,
            ),

            /// Mg-Base
            _LitImage(
              imgSrc: AssetPaths.titleMgBase,
              color: orbColor,
              lightAmt: _finalReceiveLightAmt,
            ),

            /// Mg-Receive
            _LitImage(
              imgSrc: AssetPaths.titleMgReceive,
              color: orbColor,
              lightAmt: _finalReceiveLightAmt,
            ),

            /// Mg-Emit
            _LitImage(
              imgSrc: AssetPaths.titleMgEmit,
              color: emitColor,
              lightAmt: _finalEmitLightAmt,
            ),

            /// Fg-Rocks
            Image.asset(AssetPaths.titleFgBase),

            /// Fg-Receive
            _LitImage(
              imgSrc: AssetPaths.titleFgReceive,
              color: orbColor,
              lightAmt: _finalReceiveLightAmt,
            ),

            /// Fg-Emit
            _LitImage(
              imgSrc: AssetPaths.titleFgEmit,
              color: emitColor,
              lightAmt: _finalEmitLightAmt,
            ),

            /// UI
            const Positioned.fill(                        // Add from here...
              child: TitleScreenUi(),
            ),                                            // to here.
          ],
        ),
      ),
    );
  }
}

class _LitImage extends StatelessWidget {
  const _LitImage({
    required this.color,
    required this.imgSrc,
    required this.lightAmt,
  });
  final Color color;
  final String imgSrc;
  final double lightAmt;

  @override
  Widget build(BuildContext context) {
    final hsl = HSLColor.fromColor(color);
    return ColorFiltered(
      colorFilter: ColorFilter.mode(
        hsl.withLightness(hsl.lightness * lightAmt).toColor(),
        BlendMode.modulate,
      ),
      child: Image.asset(imgSrc),
    );
  }
}
Menjalankan kode ini akan menampilkan judul, yang merupakan awal antarmuka pengguna.
![Aplikasi codelab dengan judul 'Outpost [57] Into the unknown'](https://codelabs.developers.google.com/static/codelabs/flutter-next-gen-uis/img/8916d68d8a851a1b.png?hl=id)
Menambahkan tombol tingkat kesulitan
- Update
title_screen_ui.dartdengan menambahkan impor baru untuk paketfocusable_control_builder:
lib/judul_layar/judul_layar_ui.dart
import 'package:extra_alignments/extra_alignments.dart';
import 'package:flutter/material.dart';
import 'package:focusable_control_builder/focusable_control_builder.dart'; // Add import
import 'package:gap/gap.dart';

import '../assets.dart';
import '../common/ui_scaler.dart';
import '../styles.dart';
- Tambahkan widget ke
TitleScreenUi:
lib/judul_layar/judul_layar_ui.dart
class TitleScreenUi extends StatelessWidget {
  const TitleScreenUi({
    super.key,
    required this.difficulty,                            // Edit from here...
    required this.onDifficultyPressed,
    required this.onDifficultyFocused,
  });

  final int difficulty;
  final void Function(int difficulty) onDifficultyPressed;
  final void Function(int? difficulty) onDifficultyFocused; // to here.

  @override
  Widget build(BuildContext context) {
    return Padding(                                      // Move this const...
      padding: const EdgeInsets.symmetric(vertical: 40, horizontal: 50), // to here.
      child: Stack(
        children: [
          /// Title Text
          const TopLeft(                                 // Add a const here, as well
            child: UiScaler(
              alignment: Alignment.topLeft,
              child: _TitleText(),
            ),
          ),

          /// Difficulty Btns
          BottomLeft(                                    // Add from here...
            child: UiScaler(
              alignment: Alignment.bottomLeft,
              child: _DifficultyBtns(
                difficulty: difficulty,
                onDifficultyPressed: onDifficultyPressed,
                onDifficultyFocused: onDifficultyFocused,
              ),
            ),
          ),                                             // to here.
        ],
      ),
    );
  }
}
- Tambahkan dua widget berikut untuk menerapkan tombol tingkat kesulitan:
lib/judul_layar/judul_layar_ui.dart
class _DifficultyBtns extends StatelessWidget {
  const _DifficultyBtns({
    required this.difficulty,
    required this.onDifficultyPressed,
    required this.onDifficultyFocused,
  });

  final int difficulty;
  final void Function(int difficulty) onDifficultyPressed;
  final void Function(int? difficulty) onDifficultyFocused;

  @override
  Widget build(BuildContext context) {
    return Column(
      mainAxisSize: MainAxisSize.min,
      children: [
        _DifficultyBtn(
          label: 'Casual',
          selected: difficulty == 0,
          onPressed: () => onDifficultyPressed(0),
          onHover: (over) => onDifficultyFocused(over ? 0 : null),
        ),
        _DifficultyBtn(
          label: 'Normal',
          selected: difficulty == 1,
          onPressed: () => onDifficultyPressed(1),
          onHover: (over) => onDifficultyFocused(over ? 1 : null),
        ),
        _DifficultyBtn(
          label: 'Hardcore',
          selected: difficulty == 2,
          onPressed: () => onDifficultyPressed(2),
          onHover: (over) => onDifficultyFocused(over ? 2 : null),
        ),
        const Gap(20),
      ],
    );
  }
}

class _DifficultyBtn extends StatelessWidget {
  const _DifficultyBtn({
    required this.selected,
    required this.onPressed,
    required this.onHover,
    required this.label,
  });
  final String label;
  final bool selected;
  final VoidCallback onPressed;
  final void Function(bool hasFocus) onHover;

  @override
  Widget build(BuildContext context) {
    return FocusableControlBuilder(
      onPressed: onPressed,
      onHoverChanged: (_, state) => onHover.call(state.isHovered),
      builder: (_, state) {
        return Padding(
          padding: const EdgeInsets.all(8.0),
          child: SizedBox(
            width: 250,
            height: 60,
            child: Stack(
              children: [
                /// Bg with fill and outline
                Container(
                  decoration: BoxDecoration(
                    color: const Color(0xFF00D1FF).withOpacity(.1),
                    border: Border.all(color: Colors.white, width: 5),
                  ),
                ),

                if (state.isHovered || state.isFocused) ...[
                  Container(
                    decoration: BoxDecoration(
                      color: const Color(0xFF00D1FF).withOpacity(.1),
                    ),
                  ),
                ],

                /// cross-hairs (selected state)
                if (selected) ...[
                  CenterLeft(
                    child: Image.asset(AssetPaths.titleSelectedLeft),
                  ),
                  CenterRight(
                    child: Image.asset(AssetPaths.titleSelectedRight),
                  ),
                ],

                /// Label
                Center(
                  child: Text(label.toUpperCase(), style: TextStyles.btn),
                ),
              ],
            ),
          ),
        );
      },
    );
  }
}
- Konversikan widget
TitleScreendari stateless menjadi stateful, dan tambahkan status untuk mengaktifkan perubahan skema warna berdasarkan tingkat kesulitan:
lib/title_screen/title_screen.dart
import 'package:flutter/material.dart';

import '../assets.dart';
import '../styles.dart';
import 'title_screen_ui.dart';

class TitleScreen extends StatefulWidget {
  const TitleScreen({super.key});

  @override
  State<TitleScreen> createState() => _TitleScreenState();
}

class _TitleScreenState extends State<TitleScreen> {
  Color get _emitColor =>
      AppColors.emitColors[_difficultyOverride ?? _difficulty];
  Color get _orbColor =>
      AppColors.orbColors[_difficultyOverride ?? _difficulty];

  /// Currently selected difficulty
  int _difficulty = 0;

  /// Currently focused difficulty (if any)
  int? _difficultyOverride;

  void _handleDifficultyPressed(int value) {
    setState(() => _difficulty = value);
  }

  void _handleDifficultyFocused(int? value) {
    setState(() => _difficultyOverride = value);
  }

  final _finalReceiveLightAmt = 0.7;
  final _finalEmitLightAmt = 0.5;

  @override
  Widget build(BuildContext context) {
    return Scaffold(
      backgroundColor: Colors.black,
      body: Center(
        child: Stack(
          children: [
            /// Bg-Base
            Image.asset(AssetPaths.titleBgBase),

            /// Bg-Receive
            _LitImage(
              color: _orbColor,
              imgSrc: AssetPaths.titleBgReceive,
              lightAmt: _finalReceiveLightAmt,
            ),

            /// Mg-Base
            _LitImage(
              imgSrc: AssetPaths.titleMgBase,
              color: _orbColor,
              lightAmt: _finalReceiveLightAmt,
            ),

            /// Mg-Receive
            _LitImage(
              imgSrc: AssetPaths.titleMgReceive,
              color: _orbColor,
              lightAmt: _finalReceiveLightAmt,
            ),

            /// Mg-Emit
            _LitImage(
              imgSrc: AssetPaths.titleMgEmit,
              color: _emitColor,
              lightAmt: _finalEmitLightAmt,
            ),

            /// Fg-Rocks
            Image.asset(AssetPaths.titleFgBase),

            /// Fg-Receive
            _LitImage(
              imgSrc: AssetPaths.titleFgReceive,
              color: _orbColor,
              lightAmt: _finalReceiveLightAmt,
            ),

            /// Fg-Emit
            _LitImage(
              imgSrc: AssetPaths.titleFgEmit,
              color: _emitColor,
              lightAmt: _finalEmitLightAmt,
            ),

            /// UI
            Positioned.fill(
              child: TitleScreenUi(
                difficulty: _difficulty,
                onDifficultyFocused: _handleDifficultyFocused,
                onDifficultyPressed: _handleDifficultyPressed,
              ),
            ),
          ],
        ),
      ),
    );
  }
}

class _LitImage extends StatelessWidget {
  const _LitImage({
    required this.color,
    required this.imgSrc,
    required this.lightAmt,
  });
  final Color color;
  final String imgSrc;
  final double lightAmt;

  @override
  Widget build(BuildContext context) {
    final hsl = HSLColor.fromColor(color);
    return ColorFiltered(
      colorFilter: ColorFilter.mode(
        hsl.withLightness(hsl.lightness * lightAmt).toColor(),
        BlendMode.modulate,
      ),
      child: Image.asset(imgSrc),
    );
  }
}
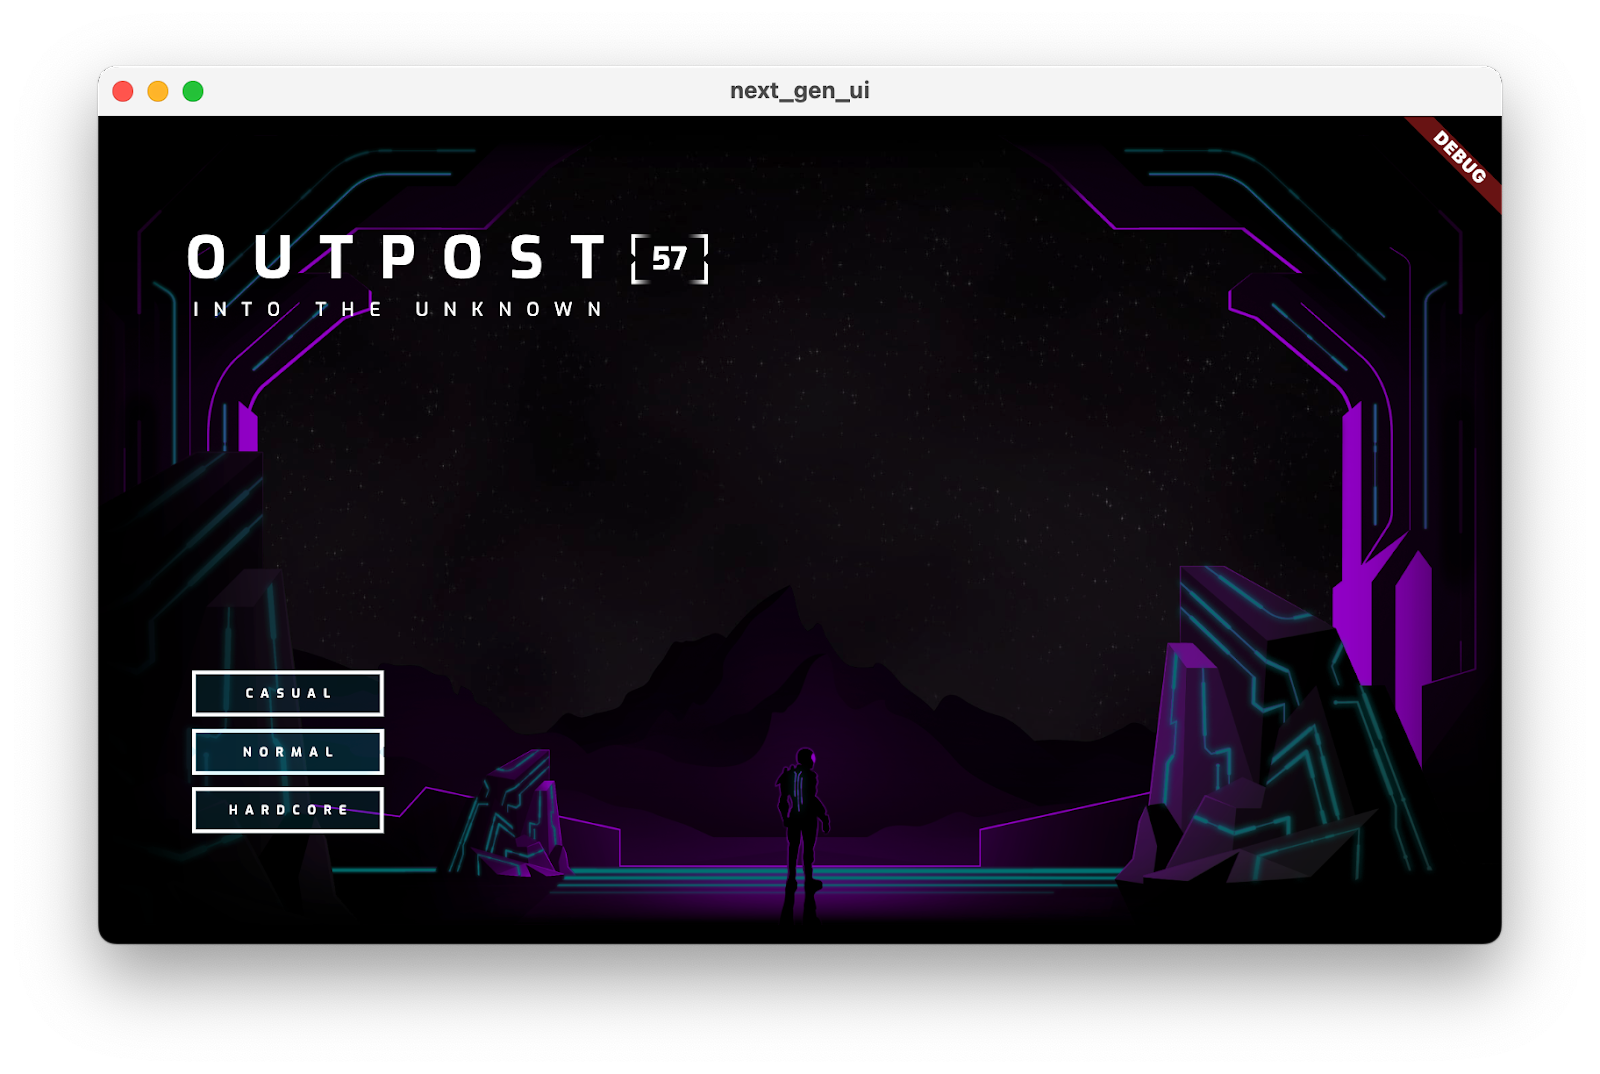
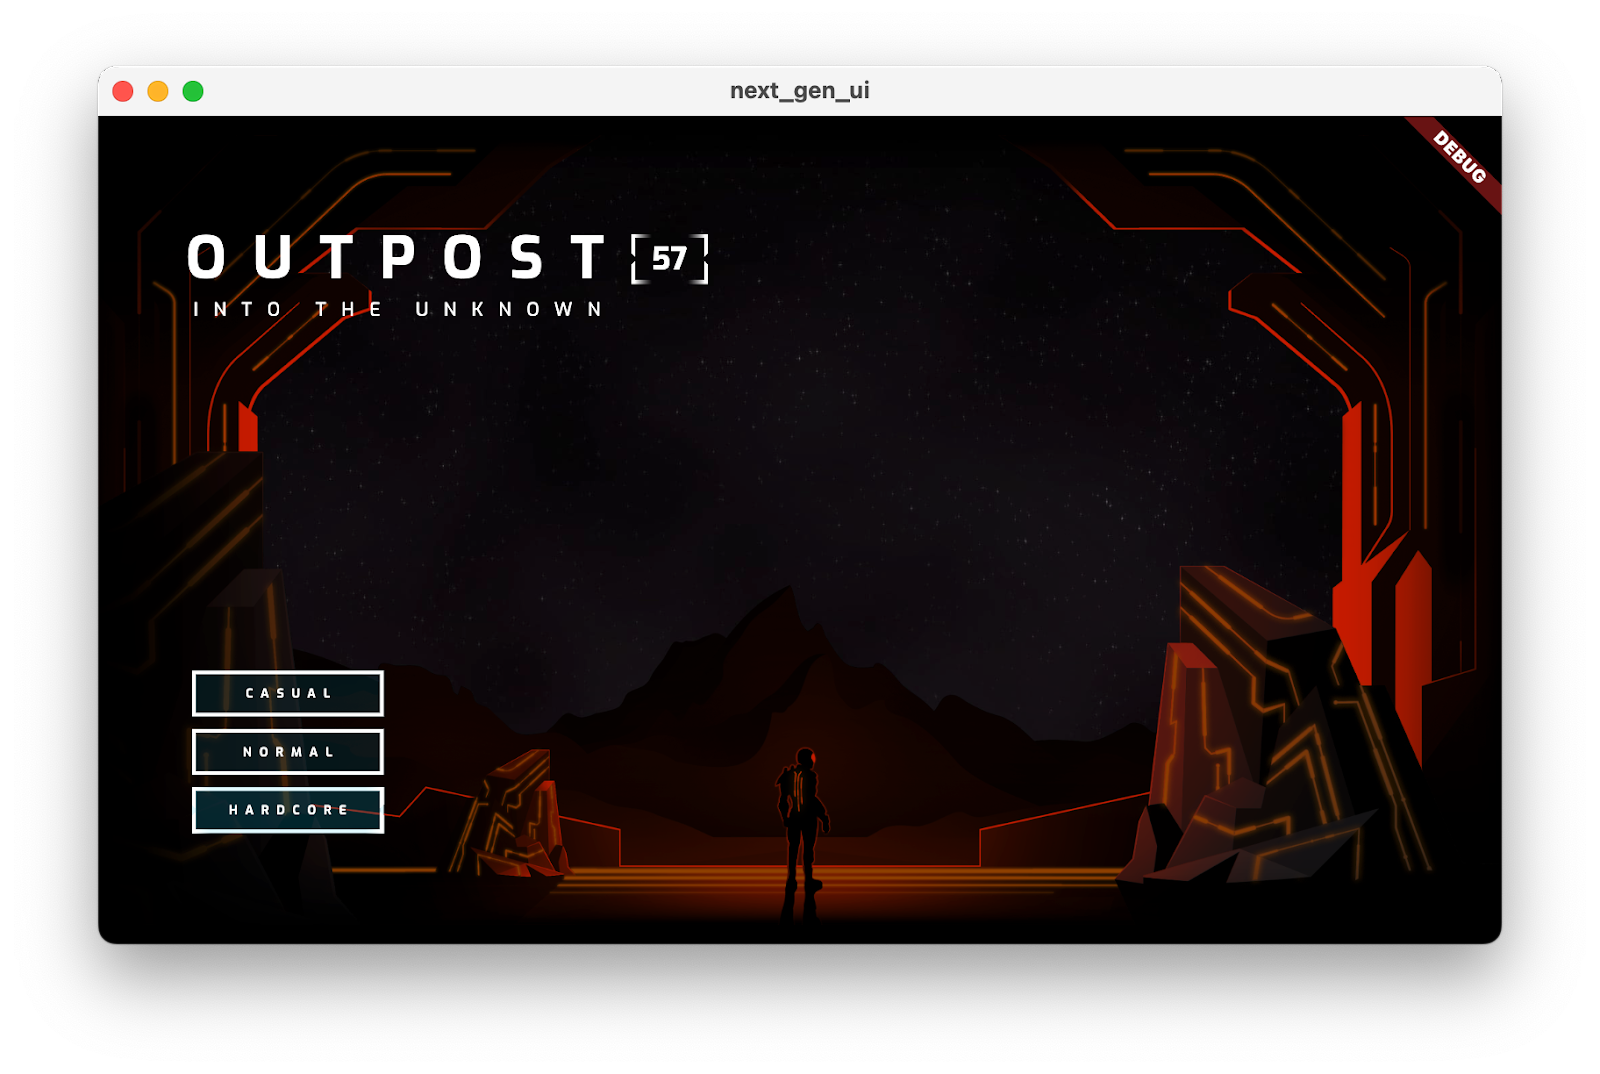
Berikut adalah UI dengan dua setelan tingkat kesulitan yang berbeda. Perhatikan bahwa warna kesulitan yang diterapkan sebagai topeng pada gambar hitam putih menciptakan efek reflektif yang realistis.
|
|
Menambahkan tombol mulai
- Perbarui file
title_screen_ui.dart. Tambahkan widget keTitleScreenUi:
lib/judul_layar/judul_layar_ui.dart
class TitleScreenUi extends StatelessWidget {
  const TitleScreenUi({
    super.key,
    required this.difficulty,
    required this.onDifficultyPressed,
    required this.onDifficultyFocused,
  });

  final int difficulty;
  final void Function(int difficulty) onDifficultyPressed;
  final void Function(int? difficulty) onDifficultyFocused;

  @override
  Widget build(BuildContext context) {
    return Padding(
      padding: const EdgeInsets.symmetric(vertical: 40, horizontal: 50),
      child: Stack(
        children: [
          /// Title Text
          const TopLeft(
            child: UiScaler(
              alignment: Alignment.topLeft,
              child: _TitleText(),
            ),
          ),

          /// Difficulty Btns
          BottomLeft(
            child: UiScaler(
              alignment: Alignment.bottomLeft,
              child: _DifficultyBtns(
                difficulty: difficulty,
                onDifficultyPressed: onDifficultyPressed,
                onDifficultyFocused: onDifficultyFocused,
              ),
            ),
          ),

          /// StartBtn
          BottomRight(                                    // Add from here...
            child: UiScaler(
              alignment: Alignment.bottomRight,
              child: Padding(
                padding: const EdgeInsets.only(bottom: 20, right: 40),
                child: _StartBtn(onPressed: () {}),
              ),
            ),
          ),                                              // to here.
        ],
      ),
    );
  }
}
- Tambahkan widget berikut untuk menerapkan tombol mulai:
lib/judul_layar/judul_layar_ui.dart
class _StartBtn extends StatefulWidget {
  const _StartBtn({required this.onPressed});
  final VoidCallback onPressed;

  @override
  State<_StartBtn> createState() => _StartBtnState();
}

class _StartBtnState extends State<_StartBtn> {
  AnimationController? _btnAnim;
  bool _wasHovered = false;

  @override
  Widget build(BuildContext context) {
    return FocusableControlBuilder(
      cursor: SystemMouseCursors.click,
      onPressed: widget.onPressed,
      builder: (_, state) {
        if ((state.isHovered || state.isFocused) &&
            !_wasHovered &&
            _btnAnim?.status != AnimationStatus.forward) {
          _btnAnim?.forward(from: 0);
        }
        _wasHovered = (state.isHovered || state.isFocused);
        return SizedBox(
          width: 520,
          height: 100,
          child: Stack(
            children: [
              Positioned.fill(child: Image.asset(AssetPaths.titleStartBtn)),
              if (state.isHovered || state.isFocused) ...[
                Positioned.fill(
                    child: Image.asset(AssetPaths.titleStartBtnHover)),
              ],
              Center(
                child: Row(
                  mainAxisAlignment: MainAxisAlignment.end,
                  children: [
                    Text('START MISSION',
                        style: TextStyles.btn
                            .copyWith(fontSize: 24, letterSpacing: 18)),
                  ],
                ),
              ),
            ],
          ),
        );
      },
    );
  }
}
Dan berikut adalah aplikasi yang berjalan dengan koleksi tombol lengkap.
5. Menambahkan animasi
Pada langkah ini, Anda akan menganimasikan antarmuka pengguna dan transisi warna untuk aset seni.
Buram di bagian judul
Pada langkah ini, Anda menggunakan beberapa pendekatan untuk menganimasikan aplikasi Flutter. Salah satu pendekatannya adalah menggunakan flutter_animate. Animasi yang didukung oleh paket ini dapat otomatis diputar ulang setiap kali Anda melakukan hot reload pada aplikasi untuk mempercepat iterasi pengembangan.
- Ubah kode di
lib/main.dart, sebagai berikut:
lib/main.dart
import 'dart:io';

import 'package:flutter/foundation.dart';
import 'package:flutter/material.dart';
import 'package:flutter_animate/flutter_animate.dart';   // Add this import
import 'package:window_size/window_size.dart';

import 'title_screen/title_screen.dart';

void main() {
  if (!kIsWeb && (Platform.isWindows || Platform.isLinux || Platform.isMacOS)) {
    WidgetsFlutterBinding.ensureInitialized();
    setWindowMinSize(const Size(800, 500));
  }
  Animate.restartOnHotReload = true;                     // Add this line
  runApp(const NextGenApp());
}

class NextGenApp extends StatelessWidget {
  const NextGenApp({super.key});

  @override
  Widget build(BuildContext context) {
    return MaterialApp(
      themeMode: ThemeMode.dark,
      darkTheme: ThemeData(brightness: Brightness.dark),
      home: const TitleScreen(),
    );
  }
}
- Untuk memanfaatkan paket
flutter_animate, Anda harus mengimpornya. Tambahkan impor dilib/title_screen/title_screen_ui.dart, sebagai berikut:
lib/judul_layar/judul_layar_ui.dart
import 'package:extra_alignments/extra_alignments.dart';
import 'package:flutter/material.dart';
import 'package:flutter_animate/flutter_animate.dart';   // Add this import
import 'package:focusable_control_builder/focusable_control_builder.dart';
import 'package:gap/gap.dart';

import '../assets.dart';
import '../common/ui_scaler.dart';
import '../styles.dart';

class TitleScreenUi extends StatelessWidget {
- Tambahkan animasi ke judul dengan mengedit widget
_TitleText, sebagai berikut:
lib/judul_layar/judul_layar_ui.dart
class _TitleText extends StatelessWidget {
  const _TitleText();

  @override
  Widget build(BuildContext context) {
    return Column(
      mainAxisSize: MainAxisSize.min,
      crossAxisAlignment: CrossAxisAlignment.start,
      children: [
        const Gap(20),
        Row(
          mainAxisSize: MainAxisSize.min,
          children: [
            Transform.translate(
              offset: Offset(-(TextStyles.h1.letterSpacing! * .5), 0),
              child: Text('OUTPOST', style: TextStyles.h1),
            ),
            Image.asset(AssetPaths.titleSelectedLeft, height: 65),
            Text('57', style: TextStyles.h2),
            Image.asset(AssetPaths.titleSelectedRight, height: 65),
          ],                                             // Edit from here...
        ).animate().fadeIn(delay: .8.seconds, duration: .7.seconds),
        Text('INTO THE UNKNOWN', style: TextStyles.h3)
            .animate()
            .fadeIn(delay: 1.seconds, duration: .7.seconds),
      ],                                                 // to here.
    );
  }
}
- Tekan Muat ulang untuk melihat judul memudar.
Buramkan di tombol kesulitan
- Tambahkan animasi ke tampilan awal tombol tingkat kesulitan dengan mengedit widget
_DifficultyBtns, sebagai berikut:
lib/judul_layar/judul_layar_ui.dart
class _DifficultyBtns extends StatelessWidget {
  const _DifficultyBtns({
    required this.difficulty,
    required this.onDifficultyPressed,
    required this.onDifficultyFocused,
  });

  final int difficulty;
  final void Function(int difficulty) onDifficultyPressed;
  final void Function(int? difficulty) onDifficultyFocused;

  @override
  Widget build(BuildContext context) {
    return Column(
      mainAxisSize: MainAxisSize.min,
      children: [
        _DifficultyBtn(
          label: 'Casual',
          selected: difficulty == 0,
          onPressed: () => onDifficultyPressed(0),
          onHover: (over) => onDifficultyFocused(over ? 0 : null),
        )                                                // Add from here...
            .animate()
            .fadeIn(delay: 1.3.seconds, duration: .35.seconds)
            .slide(begin: const Offset(0, .2)),          // to here
        _DifficultyBtn(
          label: 'Normal',
          selected: difficulty == 1,
          onPressed: () => onDifficultyPressed(1),
          onHover: (over) => onDifficultyFocused(over ? 1 : null),
        )                                                // Add from here...
            .animate()
            .fadeIn(delay: 1.5.seconds, duration: .35.seconds)
            .slide(begin: const Offset(0, .2)),          // to here
        _DifficultyBtn(
          label: 'Hardcore',
          selected: difficulty == 2,
          onPressed: () => onDifficultyPressed(2),
          onHover: (over) => onDifficultyFocused(over ? 2 : null),
        )                                                // Add from here...
            .animate()
            .fadeIn(delay: 1.7.seconds, duration: .35.seconds)
            .slide(begin: const Offset(0, .2)),          // to here
        const Gap(20),
      ],
    );
  }
}
- Tekan Muat ulang untuk melihat tombol tingkat kesulitan muncul dengan slide halus ke atas sebagai bonus.
Buram di tombol mulai
- Tambahkan animasi ke tombol mulai dengan mengedit class status
_StartBtnState, seperti berikut:
lib/judul_layar/judul_layar_ui.dart
class _StartBtnState extends State<_StartBtn> {
  AnimationController? _btnAnim;
  bool _wasHovered = false;

  @override
  Widget build(BuildContext context) {
    return FocusableControlBuilder(
      cursor: SystemMouseCursors.click,
      onPressed: widget.onPressed,
      builder: (_, state) {
        if ((state.isHovered || state.isFocused) &&
            !_wasHovered &&
            _btnAnim?.status != AnimationStatus.forward) {
          _btnAnim?.forward(from: 0);
        }
        _wasHovered = (state.isHovered || state.isFocused);
        return SizedBox(
          width: 520,
          height: 100,
          child: Stack(
            children: [
              Positioned.fill(child: Image.asset(AssetPaths.titleStartBtn)),
              if (state.isHovered || state.isFocused) ...[
                Positioned.fill(
                    child: Image.asset(AssetPaths.titleStartBtnHover)),
              ],
              Center(
                child: Row(
                  mainAxisAlignment: MainAxisAlignment.end,
                  children: [
                    Text('START MISSION',
                        style: TextStyles.btn
                            .copyWith(fontSize: 24, letterSpacing: 18)),
                  ],
                ),
              ),
            ],
          )                                              // Edit from here...
              .animate(autoPlay: false, onInit: (c) => _btnAnim = c)
              .shimmer(duration: .7.seconds, color: Colors.black),
        )
            .animate()
            .fadeIn(delay: 2.3.seconds)
            .slide(begin: const Offset(0, .2));
      },                                                 // to here.
    );
  }
}
- Tekan Muat ulang untuk melihat tombol tingkat kesulitan muncul dengan slide halus ke atas sebagai bonus.
Menganimasikan efek arahkan kursor ke tingkat kesulitan
Tambahkan animasi ke status pengarahan kursor ke tombol tingkat kesulitan dengan mengedit class status _DifficultyBtn, sebagai berikut:
lib/judul_layar/judul_layar_ui.dart
class _DifficultyBtn extends StatelessWidget {
  const _DifficultyBtn({
    required this.selected,
    required this.onPressed,
    required this.onHover,
    required this.label,
  });
  final String label;
  final bool selected;
  final VoidCallback onPressed;
  final void Function(bool hasFocus) onHover;

  @override
  Widget build(BuildContext context) {
    return FocusableControlBuilder(
      onPressed: onPressed,
      onHoverChanged: (_, state) => onHover.call(state.isHovered),
      builder: (_, state) {
        return Padding(
          padding: const EdgeInsets.all(8.0),
          child: SizedBox(
            width: 250,
            height: 60,
            child: Stack(
              children: [
                /// Bg with fill and outline
                AnimatedOpacity(                         // Edit from here
                  opacity: (!selected && (state.isHovered || state.isFocused))
                      ? 1
                      : 0,
                  duration: .3.seconds,
                  child: Container(
                    decoration: BoxDecoration(
                      color: const Color(0xFF00D1FF).withOpacity(.1),
                      border: Border.all(color: Colors.white, width: 5),
                    ),
                  ),
                ),                                       // to here.

                if (state.isHovered || state.isFocused) ...[
                  Container(
                    decoration: BoxDecoration(
                      color: const Color(0xFF00D1FF).withOpacity(.1),
                    ),
                  ),
                ],

                /// cross-hairs (selected state)
                if (selected) ...[
                  CenterLeft(
                    child: Image.asset(AssetPaths.titleSelectedLeft),
                  ),
                  CenterRight(
                    child: Image.asset(AssetPaths.titleSelectedRight),
                  ),
                ],

                /// Label
                Center(
                  child: Text(label.toUpperCase(), style: TextStyles.btn),
                ),
              ],
            ),
          ),
        );
      },
    );
  }
}
Tombol tingkat kesulitan kini menampilkan BoxDecoration saat mouse diarahkan ke tombol yang belum dipilih.

Menganimasikan perubahan warna
- Perubahan warna latar belakang berlangsung seketika dan kasar. Sebaiknya animasikan gambar yang menyala di antara skema warna. Menambahkan
flutter_animatekelib/title_screen/title_screen.dart:
lib/title_screen/title_screen.dart
import 'package:flutter/material.dart';
import 'package:flutter_animate/flutter_animate.dart';    // Add this import

import '../assets.dart';
import '../styles.dart';
import 'title_screen_ui.dart';

class TitleScreen extends StatefulWidget {
- Tambahkan widget
_AnimatedColorsdilib/title_screen/title_screen.dart:
lib/title_screen/title_screen.dart
class _AnimatedColors extends StatelessWidget {
  const _AnimatedColors({
    required this.emitColor,
    required this.orbColor,
    required this.builder,
  });

  final Color emitColor;
  final Color orbColor;

  final Widget Function(BuildContext context, Color orbColor, Color emitColor)
      builder;

  @override
  Widget build(BuildContext context) {
    final duration = .5.seconds;
    return TweenAnimationBuilder(
      tween: ColorTween(begin: emitColor, end: emitColor),
      duration: duration,
      builder: (_, emitColor, __) {
        return TweenAnimationBuilder(
          tween: ColorTween(begin: orbColor, end: orbColor),
          duration: duration,
          builder: (context, orbColor, __) {
            return builder(context, orbColor!, emitColor!);
          },
        );
      },
    );
  }
}
- Gunakan widget yang baru saja Anda buat untuk menganimasikan warna gambar yang menyala dengan memperbarui metode
builddi_TitleScreenState, sebagai berikut:
lib/title_screen/title_screen.dart
class _TitleScreenState extends State<TitleScreen> {
  Color get _emitColor =>
      AppColors.emitColors[_difficultyOverride ?? _difficulty];
  Color get _orbColor =>
      AppColors.orbColors[_difficultyOverride ?? _difficulty];

  /// Currently selected difficulty
  int _difficulty = 0;

  /// Currently focused difficulty (if any)
  int? _difficultyOverride;

  void _handleDifficultyPressed(int value) {
    setState(() => _difficulty = value);
  }

  void _handleDifficultyFocused(int? value) {
    setState(() => _difficultyOverride = value);
  }

  final _finalReceiveLightAmt = 0.7;
  final _finalEmitLightAmt = 0.5;

  @override
  Widget build(BuildContext context) {
    return Scaffold(
      backgroundColor: Colors.black,
      body: Center(
        child: _AnimatedColors(                           // Edit from here...
          orbColor: _orbColor,
          emitColor: _emitColor,
          builder: (_, orbColor, emitColor) {
            return Stack(
              children: [
                /// Bg-Base
                Image.asset(AssetPaths.titleBgBase),

                /// Bg-Receive
                _LitImage(
                  color: orbColor,
                  imgSrc: AssetPaths.titleBgReceive,
                  lightAmt: _finalReceiveLightAmt,
                ),

                /// Mg-Base
                _LitImage(
                  imgSrc: AssetPaths.titleMgBase,
                  color: orbColor,
                  lightAmt: _finalReceiveLightAmt,
                ),

                /// Mg-Receive
                _LitImage(
                  imgSrc: AssetPaths.titleMgReceive,
                  color: orbColor,
                  lightAmt: _finalReceiveLightAmt,
                ),

                /// Mg-Emit
                _LitImage(
                  imgSrc: AssetPaths.titleMgEmit,
                  color: emitColor,
                  lightAmt: _finalEmitLightAmt,
                ),

                /// Fg-Rocks
                Image.asset(AssetPaths.titleFgBase),

                /// Fg-Receive
                _LitImage(
                  imgSrc: AssetPaths.titleFgReceive,
                  color: orbColor,
                  lightAmt: _finalReceiveLightAmt,
                ),

                /// Fg-Emit
                _LitImage(
                  imgSrc: AssetPaths.titleFgEmit,
                  color: emitColor,
                  lightAmt: _finalEmitLightAmt,
                ),

                /// UI
                Positioned.fill(
                  child: TitleScreenUi(
                    difficulty: _difficulty,
                    onDifficultyFocused: _handleDifficultyFocused,
                    onDifficultyPressed: _handleDifficultyPressed,
                  ),
                ),
              ],
            ).animate().fadeIn(duration: 1.seconds, delay: .3.seconds);
          },
        ),                                                // to here.
      ),
    );
  }
}
Dengan pengeditan akhir ini, Anda telah menambahkan animasi ke setiap elemen di layar, dan tampilannya jauh lebih baik!
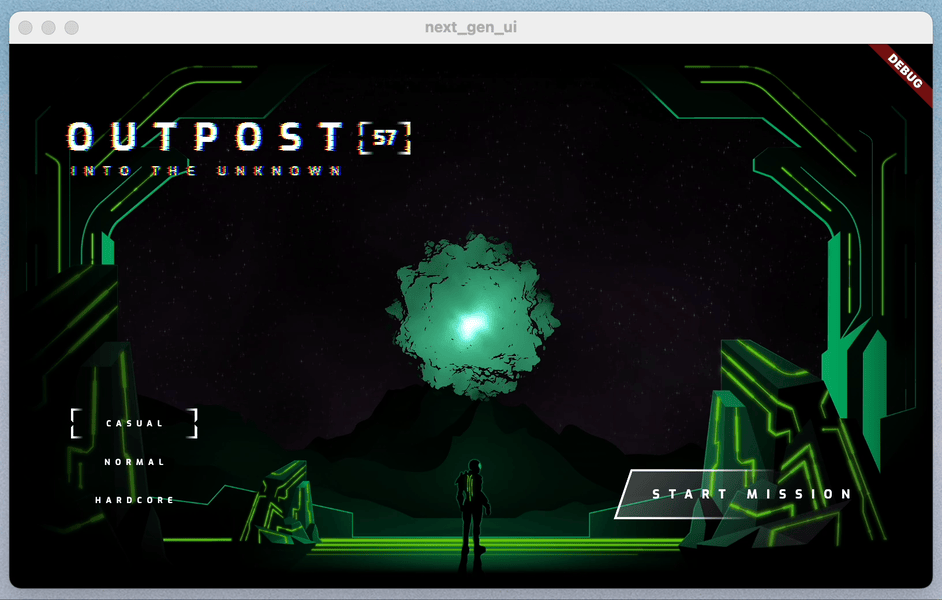
6. Menambahkan shader fragmen
Pada langkah ini, Anda menambahkan shader fragmen ke aplikasi. Pertama, Anda menggunakan shader untuk mengubah judul sehingga memberinya nuansa distopia. Kemudian, Anda menambahkan shader kedua untuk membuat bola yang berfungsi sebagai titik fokus utama halaman.
Mendistorsi judul dengan shader fragmen
Dengan perubahan ini, Anda memperkenalkan paket provider, yang memungkinkan penerusan shader yang dikompilasi ke bawah hierarki widget. Jika Anda tertarik dengan cara shader dimuat, lihat implementasinya di lib/assets.dart.
- Ubah kode di
lib/main.dart, sebagai berikut:
lib/main.dart
import 'dart:io';

import 'package:flutter/foundation.dart';
import 'package:flutter/material.dart';
import 'package:flutter_animate/flutter_animate.dart';
import 'package:provider/provider.dart';                 // Add this import
import 'package:window_size/window_size.dart';

import 'assets.dart';                                    // Add this import
import 'title_screen/title_screen.dart';

void main() {
  if (!kIsWeb && (Platform.isWindows || Platform.isLinux || Platform.isMacOS)) {
    WidgetsFlutterBinding.ensureInitialized();
    setWindowMinSize(const Size(800, 500));
  }
  Animate.restartOnHotReload = true;
  runApp(                                                // Edit from here...
    FutureProvider<Shaders?>(
      create: (context) => loadShaders(),
      initialData: null,
      child: const NextGenApp(),
    ),
  );                                                     // to here.
}

class NextGenApp extends StatelessWidget {
  const NextGenApp({super.key});

  @override
  Widget build(BuildContext context) {
    return MaterialApp(
      themeMode: ThemeMode.dark,
      darkTheme: ThemeData(brightness: Brightness.dark),
      home: const TitleScreen(),
    );
  }
}
- Untuk memanfaatkan paket
provider, dan utilitas shader yang disertakan dalamstep_01, Anda perlu mengimpornya. Tambahkan impor baru dilib/title_screen/title_screen_ui.dart, sebagai berikut:
lib/judul_layar/judul_layar_ui.dart
import 'package:extra_alignments/extra_alignments.dart';
import 'package:flutter/material.dart';
import 'package:flutter_animate/flutter_animate.dart';
import 'package:focusable_control_builder/focusable_control_builder.dart';
import 'package:gap/gap.dart';
import 'package:provider/provider.dart';                 // Add this import

import '../assets.dart';
import '../common/shader_effect.dart';                   // And this import
import '../common/ticking_builder.dart';                 // And this import
import '../common/ui_scaler.dart';
import '../styles.dart';

class TitleScreenUi extends StatelessWidget {
- Ubah judul dengan shader dengan mengedit widget
_TitleText, sebagai berikut:
lib/judul_layar/judul_layar_ui.dart
class _TitleText extends StatelessWidget {
  const _TitleText();

  @override
  Widget build(BuildContext context) {
    Widget content = Column(                             // Modify this line
      mainAxisSize: MainAxisSize.min,
      crossAxisAlignment: CrossAxisAlignment.start,
      children: [
        const Gap(20),
        Row(
          mainAxisSize: MainAxisSize.min,
          children: [
            Transform.translate(
              offset: Offset(-(TextStyles.h1.letterSpacing! * .5), 0),
              child: Text('OUTPOST', style: TextStyles.h1),
            ),
            Image.asset(AssetPaths.titleSelectedLeft, height: 65),
            Text('57', style: TextStyles.h2),
            Image.asset(AssetPaths.titleSelectedRight, height: 65),
          ],
        ).animate().fadeIn(delay: .8.seconds, duration: .7.seconds),
        Text('INTO THE UNKNOWN', style: TextStyles.h3)
            .animate()
            .fadeIn(delay: 1.seconds, duration: .7.seconds),
      ],
    );
    return Consumer<Shaders?>(                           // Add from here...
      builder: (context, shaders, _) {
        if (shaders == null) return content;
        return TickingBuilder(
          builder: (context, time) {
            return AnimatedSampler(
              (image, size, canvas) {
                const double overdrawPx = 30;
                shaders.ui
                  ..setFloat(0, size.width)
                  ..setFloat(1, size.height)
                  ..setFloat(2, time)
                  ..setImageSampler(0, image);
                Rect rect = Rect.fromLTWH(-overdrawPx, -overdrawPx,
                    size.width + overdrawPx, size.height + overdrawPx);
                canvas.drawRect(rect, Paint()..shader = shaders.ui);
              },
              child: content,
            );
          },
        );
      },
    );                                                   // to here.
  }
}
Judul akan terdistorsi—seperti yang mungkin Anda harapkan di masa depan distopia.

Tambahkan bola
Sekarang tambahkan orb di tengah jendela. Anda perlu menambahkan callback onPressed ke tombol mulai.
- Di
lib/title_screen/title_screen_ui.dart, ubahTitleScreenUisebagai berikut:
lib/judul_layar/judul_layar_ui.dart
class TitleScreenUi extends StatelessWidget {
  const TitleScreenUi({
    super.key,
    required this.difficulty,
    required this.onDifficultyPressed,
    required this.onDifficultyFocused,
    required this.onStartPressed,                         // Add this argument
  });

  final int difficulty;
  final void Function(int difficulty) onDifficultyPressed;
  final void Function(int? difficulty) onDifficultyFocused;
  final VoidCallback onStartPressed;                      // Add this attribute

  @override
  Widget build(BuildContext context) {
    return Padding(
      padding: const EdgeInsets.symmetric(vertical: 40, horizontal: 50),
      child: Stack(
        children: [
          /// Title Text
          const TopLeft(
            child: UiScaler(
              alignment: Alignment.topLeft,
              child: _TitleText(),
            ),
          ),

          /// Difficulty Btns
          BottomLeft(
            child: UiScaler(
              alignment: Alignment.bottomLeft,
              child: _DifficultyBtns(
                difficulty: difficulty,
                onDifficultyPressed: onDifficultyPressed,
                onDifficultyFocused: onDifficultyFocused,
              ),
            ),
          ),

          /// StartBtn
          BottomRight(
            child: UiScaler(
              alignment: Alignment.bottomRight,
              child: Padding(
                padding: const EdgeInsets.only(bottom: 20, right: 40),
                child: _StartBtn(onPressed: onStartPressed),  // Edit this line
              ),
            ),
          ),
        ],
      ),
    );
  }
}
Setelah memodifikasi tombol mulai dengan callback, Anda perlu membuat perubahan besar pada file lib/title_screen/title_screen.dart.
- Ubah impor, sebagai berikut:
lib/title_screen/title_screen.dart
import 'dart:math';                                       // Add this import
import 'dart:ui';                                         // And this import

import 'package:flutter/material.dart';
import 'package:flutter/services.dart';                   // Add this import
import 'package:flutter_animate/flutter_animate.dart';

import '../assets.dart';
import '../orb_shader/orb_shader_config.dart';            // And this import
import '../orb_shader/orb_shader_widget.dart';            // And this import too
import '../styles.dart';
import 'title_screen_ui.dart';

class TitleScreen extends StatefulWidget {
- Ubah
_TitleScreenStateagar sesuai dengan hal berikut. Hampir setiap bagian class dimodifikasi.
lib/title_screen/title_screen.dart
class _TitleScreenState extends State<TitleScreen>
    with SingleTickerProviderStateMixin {
  final _orbKey = GlobalKey<OrbShaderWidgetState>();

  /// Editable Settings
  /// 0-1, receive lighting strength
  final _minReceiveLightAmt = .35;
  final _maxReceiveLightAmt = .7;

  /// 0-1, emit lighting strength
  final _minEmitLightAmt = .5;
  final _maxEmitLightAmt = 1;

  /// Internal
  var _mousePos = Offset.zero;

  Color get _emitColor =>
      AppColors.emitColors[_difficultyOverride ?? _difficulty];
  Color get _orbColor =>
      AppColors.orbColors[_difficultyOverride ?? _difficulty];

  /// Currently selected difficulty
  int _difficulty = 0;

  /// Currently focused difficulty (if any)
  int? _difficultyOverride;
  double _orbEnergy = 0;
  double _minOrbEnergy = 0;

  double get _finalReceiveLightAmt {
    final light =
        lerpDouble(_minReceiveLightAmt, _maxReceiveLightAmt, _orbEnergy) ?? 0;
    return light + _pulseEffect.value * .05 * _orbEnergy;
  }

  double get _finalEmitLightAmt {
    return lerpDouble(_minEmitLightAmt, _maxEmitLightAmt, _orbEnergy) ?? 0;
  }

  late final _pulseEffect = AnimationController(
    vsync: this,
    duration: _getRndPulseDuration(),
    lowerBound: -1,
    upperBound: 1,
  );

  Duration _getRndPulseDuration() => 100.ms + 200.ms * Random().nextDouble();

  double _getMinEnergyForDifficulty(int difficulty) {
    if (difficulty == 1) {
      return .3;
    } else if (difficulty == 2) {
      return .6;
    }
    return 0;
  }

  @override
  void initState() {
    super.initState();
    _pulseEffect.forward();
    _pulseEffect.addListener(_handlePulseEffectUpdate);
  }

  void _handlePulseEffectUpdate() {
    if (_pulseEffect.status == AnimationStatus.completed) {
      _pulseEffect.reverse();
      _pulseEffect.duration = _getRndPulseDuration();
    } else if (_pulseEffect.status == AnimationStatus.dismissed) {
      _pulseEffect.duration = _getRndPulseDuration();
      _pulseEffect.forward();
    }
  }

  void _handleDifficultyPressed(int value) {
    setState(() => _difficulty = value);
    _bumpMinEnergy();
  }

  Future<void> _bumpMinEnergy([double amount = 0.1]) async {
    setState(() {
      _minOrbEnergy = _getMinEnergyForDifficulty(_difficulty) + amount;
    });
    await Future<void>.delayed(.2.seconds);
    setState(() {
      _minOrbEnergy = _getMinEnergyForDifficulty(_difficulty);
    });
  }

  void _handleStartPressed() => _bumpMinEnergy(0.3);

  void _handleDifficultyFocused(int? value) {
    setState(() {
      _difficultyOverride = value;
      if (value == null) {
        _minOrbEnergy = _getMinEnergyForDifficulty(_difficulty);
      } else {
        _minOrbEnergy = _getMinEnergyForDifficulty(value);
      }
    });
  }

  /// Update mouse position so the orbWidget can use it, doing it here prevents
  /// btns from blocking the mouse-move events in the widget itself.
  void _handleMouseMove(PointerHoverEvent e) {
    setState(() {
      _mousePos = e.localPosition;
    });
  }

  @override
  Widget build(BuildContext context) {
    return Scaffold(
      backgroundColor: Colors.black,
      body: Center(
        child: MouseRegion(
          onHover: _handleMouseMove,
          child: _AnimatedColors(
            orbColor: _orbColor,
            emitColor: _emitColor,
            builder: (_, orbColor, emitColor) {
              return Stack(
                children: [
                  /// Bg-Base
                  Image.asset(AssetPaths.titleBgBase),

                  /// Bg-Receive
                  _LitImage(
                    color: orbColor,
                    imgSrc: AssetPaths.titleBgReceive,
                    pulseEffect: _pulseEffect,
                    lightAmt: _finalReceiveLightAmt,
                  ),

                  /// Orb
                  Positioned.fill(
                    child: Stack(
                      children: [
                        // Orb
                        OrbShaderWidget(
                          key: _orbKey,
                          mousePos: _mousePos,
                          minEnergy: _minOrbEnergy,
                          config: OrbShaderConfig(
                            ambientLightColor: orbColor,
                            materialColor: orbColor,
                            lightColor: orbColor,
                          ),
                          onUpdate: (energy) => setState(() {
                            _orbEnergy = energy;
                          }),
                        ),
                      ],
                    ),
                  ),

                  /// Mg-Base
                  _LitImage(
                    imgSrc: AssetPaths.titleMgBase,
                    color: orbColor,
                    pulseEffect: _pulseEffect,
                    lightAmt: _finalReceiveLightAmt,
                  ),

                  /// Mg-Receive
                  _LitImage(
                    imgSrc: AssetPaths.titleMgReceive,
                    color: orbColor,
                    pulseEffect: _pulseEffect,
                    lightAmt: _finalReceiveLightAmt,
                  ),

                  /// Mg-Emit
                  _LitImage(
                    imgSrc: AssetPaths.titleMgEmit,
                    color: emitColor,
                    pulseEffect: _pulseEffect,
                    lightAmt: _finalEmitLightAmt,
                  ),

                  /// Fg-Rocks
                  Image.asset(AssetPaths.titleFgBase),

                  /// Fg-Receive
                  _LitImage(
                    imgSrc: AssetPaths.titleFgReceive,
                    color: orbColor,
                    pulseEffect: _pulseEffect,
                    lightAmt: _finalReceiveLightAmt,
                  ),

                  /// Fg-Emit
                  _LitImage(
                    imgSrc: AssetPaths.titleFgEmit,
                    color: emitColor,
                    pulseEffect: _pulseEffect,
                    lightAmt: _finalEmitLightAmt,
                  ),

                  /// UI
                  Positioned.fill(
                    child: TitleScreenUi(
                      difficulty: _difficulty,
                      onDifficultyFocused: _handleDifficultyFocused,
                      onDifficultyPressed: _handleDifficultyPressed,
                      onStartPressed: _handleStartPressed,
                    ),
                  ),
                ],
              ).animate().fadeIn(duration: 1.seconds, delay: .3.seconds);
            },
          ),
        ),
      ),
    );
  }
}
- Ubah
_LitImage, sebagai berikut:
lib/title_screen/title_screen.dart
class _LitImage extends StatelessWidget {
  const _LitImage({
    required this.color,
    required this.imgSrc,
    required this.pulseEffect,                            // Add this parameter
    required this.lightAmt,
  });
  final Color color;
  final String imgSrc;
  final AnimationController pulseEffect;                  // Add this attribute
  final double lightAmt;

  @override
  Widget build(BuildContext context) {
    final hsl = HSLColor.fromColor(color);
    return ListenableBuilder(                             // Edit from here...
      listenable: pulseEffect,
      child: Image.asset(imgSrc),
      builder: (context, child) {
        return ColorFiltered(
          colorFilter: ColorFilter.mode(
            hsl.withLightness(hsl.lightness * lightAmt).toColor(),
            BlendMode.modulate,
          ),
          child: child,
        );
      },
    );                                                    // to here.
  }
}
Ini adalah hasil dari penambahan ini.
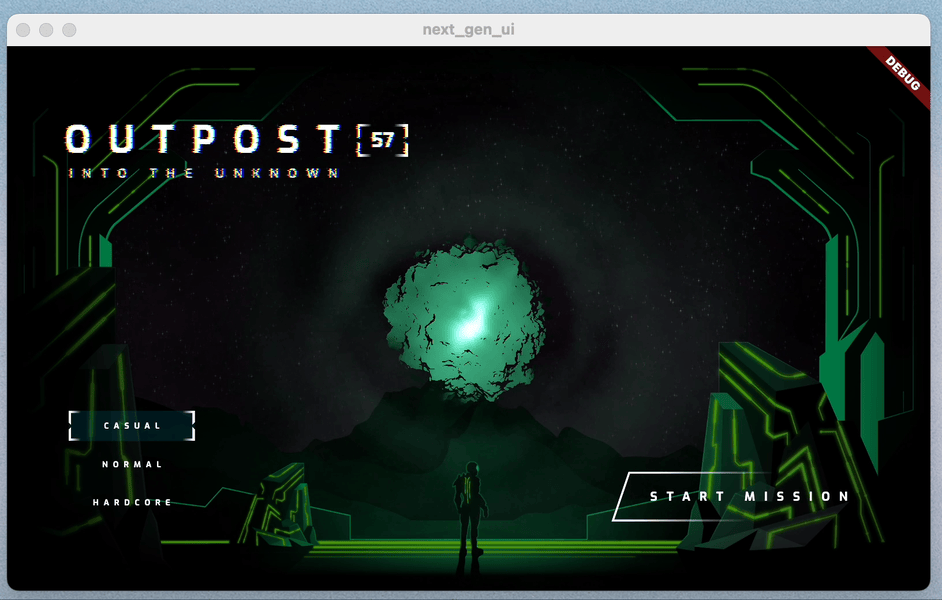
7. Menambahkan animasi partikel
Pada langkah ini, Anda menambahkan animasi partikel untuk membuat gerakan berdenyut halus ke aplikasi.
Tambahkan partikel di mana-mana
- Buat file
lib/title_screen/particle_overlay.dartbaru, lalu tambahkan kode berikut:
lib/title_screen/particle_overlay.dart
import 'dart:math';

import 'package:flutter/material.dart';
import 'package:particle_field/particle_field.dart';
import 'package:rnd/rnd.dart';

class ParticleOverlay extends StatelessWidget {
  const ParticleOverlay({super.key, required this.color, required this.energy});

  final Color color;
  final double energy;

  @override
  Widget build(BuildContext context) {
    return ParticleField(
      spriteSheet: SpriteSheet(
        image: const AssetImage('assets/images/particle-wave.png'),
      ),
      // blend the image's alpha with the specified color:
      blendMode: BlendMode.dstIn,

      // this runs every tick:
      onTick: (controller, _, size) {
        List<Particle> particles = controller.particles;

        // add a new particle with random angle, distance & velocity:
        double a = rnd(pi * 2);
        double dist = rnd(1, 4) * 35 + 150 * energy;
        double vel = rnd(1, 2) * (1 + energy * 1.8);
        particles.add(Particle(
          // how many ticks this particle will live:
          lifespan: rnd(1, 2) * 20 + energy * 15,
          // starting distance from center:
          x: cos(a) * dist,
          y: sin(a) * dist,
          // starting velocity:
          vx: cos(a) * vel,
          vy: sin(a) * vel,
          // other starting values:
          rotation: a,
          scale: rnd(1, 2) * 0.6 + energy * 0.5,
        ));

        // update all of the particles:
        for (int i = particles.length - 1; i >= 0; i--) {
          Particle p = particles[i];
          if (p.lifespan <= 0) {
            // particle is expired, remove it:
            particles.removeAt(i);
            continue;
          }
          p.update(
            scale: p.scale * 1.025,
            vx: p.vx * 1.025,
            vy: p.vy * 1.025,
            color: color.withOpacity(p.lifespan * 0.001 + 0.01),
            lifespan: p.lifespan - 1,
          );
        }
      },
    );
  }
}
- Ubah impor untuk
lib/title_screen/title_screen.dart, sebagai berikut:
lib/title_screen/title_screen.dart
import 'dart:math';
import 'dart:ui';

import 'package:flutter/material.dart';
import 'package:flutter/services.dart';
import 'package:flutter_animate/flutter_animate.dart';

import '../assets.dart';
import '../orb_shader/orb_shader_config.dart';
import '../orb_shader/orb_shader_widget.dart';
import '../styles.dart';
import 'particle_overlay.dart';                          // Add this import
import 'title_screen_ui.dart';

class TitleScreen extends StatefulWidget {
- Tambahkan
ParticleOverlayke UI dengan mengubah metodebuilddari_TitleScreenState, sebagai berikut:
lib/title_screen/title_screen.dart
@override
Widget build(BuildContext context) {
  return Scaffold(
    backgroundColor: Colors.black,
    body: Center(
      child: MouseRegion(
        onHover: _handleMouseMove,
        child: _AnimatedColors(
          orbColor: _orbColor,
          emitColor: _emitColor,
          builder: (_, orbColor, emitColor) {
            return Stack(
              children: [
                /// Bg-Base
                Image.asset(AssetPaths.titleBgBase),

                /// Bg-Receive
                _LitImage(
                  color: orbColor,
                  imgSrc: AssetPaths.titleBgReceive,
                  pulseEffect: _pulseEffect,
                  lightAmt: _finalReceiveLightAmt,
                ),

                /// Orb
                Positioned.fill(
                  child: Stack(
                    children: [
                      // Orb
                      OrbShaderWidget(
                        key: _orbKey,
                        mousePos: _mousePos,
                        minEnergy: _minOrbEnergy,
                        config: OrbShaderConfig(
                          ambientLightColor: orbColor,
                          materialColor: orbColor,
                          lightColor: orbColor,
                        ),
                        onUpdate: (energy) => setState(() {
                          _orbEnergy = energy;
                        }),
                      ),
                    ],
                  ),
                ),

                /// Mg-Base
                _LitImage(
                  imgSrc: AssetPaths.titleMgBase,
                  color: orbColor,
                  pulseEffect: _pulseEffect,
                  lightAmt: _finalReceiveLightAmt,
                ),

                /// Mg-Receive
                _LitImage(
                  imgSrc: AssetPaths.titleMgReceive,
                  color: orbColor,
                  pulseEffect: _pulseEffect,
                  lightAmt: _finalReceiveLightAmt,
                ),

                /// Mg-Emit
                _LitImage(
                  imgSrc: AssetPaths.titleMgEmit,
                  color: emitColor,
                  pulseEffect: _pulseEffect,
                  lightAmt: _finalEmitLightAmt,
                ),

                /// Particle Field
                Positioned.fill(                          // Add from here...
                  child: IgnorePointer(
                    child: ParticleOverlay(
                      color: orbColor,
                      energy: _orbEnergy,
                    ),
                  ),
                ),                                        // to here.

                /// Fg-Rocks
                Image.asset(AssetPaths.titleFgBase),

                /// Fg-Receive
                _LitImage(
                  imgSrc: AssetPaths.titleFgReceive,
                  color: orbColor,
                  pulseEffect: _pulseEffect,
                  lightAmt: _finalReceiveLightAmt,
                ),

                /// Fg-Emit
                _LitImage(
                  imgSrc: AssetPaths.titleFgEmit,
                  color: emitColor,
                  pulseEffect: _pulseEffect,
                  lightAmt: _finalEmitLightAmt,
                ),

                /// UI
                Positioned.fill(
                  child: TitleScreenUi(
                    difficulty: _difficulty,
                    onDifficultyFocused: _handleDifficultyFocused,
                    onDifficultyPressed: _handleDifficultyPressed,
                    onStartPressed: _handleStartPressed,
                  ),
                ),
              ],
            ).animate().fadeIn(duration: 1.seconds, delay: .3.seconds);
          },
        ),
      ),
    ),
  );
}
Hasil akhirnya mencakup animasi, shader fragmen, dan efek partikel—di beberapa platform.
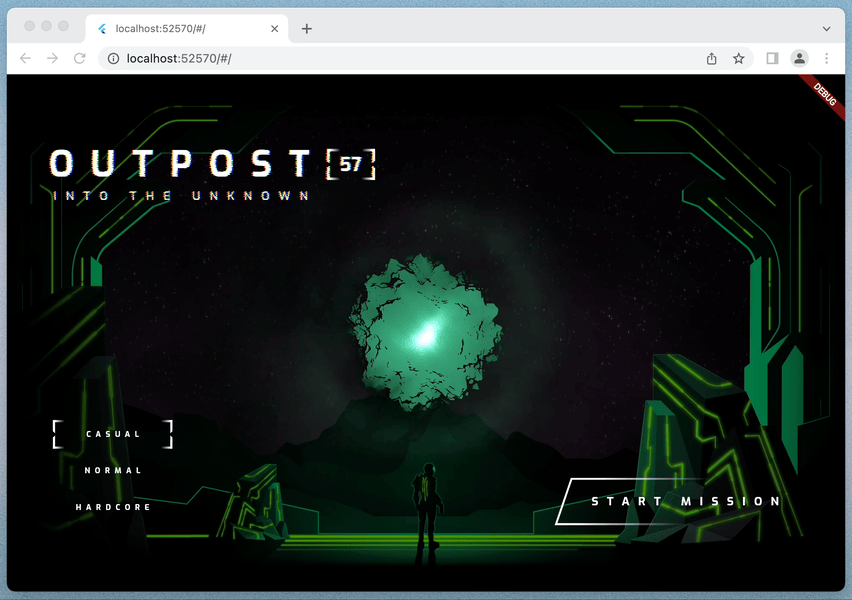
Tambahkan partikel di mana saja—bahkan web
Ada satu masalah kecil dengan kode seperti apa adanya. Saat Flutter berjalan di web, ada dua mesin rendering alternatif yang dapat digunakan: mesin CanvasKit, yang digunakan secara default di browser class desktop, dan perender DOM HTML, yang digunakan secara default untuk perangkat seluler. Masalahnya adalah perender DOM HTML tidak mendukung shader fragmen. Perbaikannya adalah mengonfigurasi pengalaman web untuk menggunakan mesin CanvasKit di mana saja.
- Ubah
web/index.html, sebagai berikut:
web/index.html
<!DOCTYPE html>
<html>
<head>
  <!--
    If you are serving your web app in a path other than the root, change the
    href value below to reflect the base path you are serving from.

    The path provided below has to start and end with a slash "/" in order for
    it to work correctly.

    For more details:
    * https://developer.mozilla.org/en-US/docs/Web/HTML/Element/base

    This is a placeholder for base href that will be replaced by the value of
    the `--base-href` argument provided to `flutter build`.
  -->
  <base href="$FLUTTER_BASE_HREF">

  <meta charset="UTF-8">
  <meta content="IE=Edge" http-equiv="X-UA-Compatible">
  <meta name="description" content="A new Flutter project.">

  <!-- iOS meta tags & icons -->
  <meta name="apple-mobile-web-app-capable" content="yes">
  <meta name="apple-mobile-web-app-status-bar-style" content="black">
  <meta name="apple-mobile-web-app-title" content="next_gen_ui">
  <link rel="apple-touch-icon" href="icons/Icon-192.png">

  <!-- Favicon -->
  <link rel="icon" type="image/png" href="favicon.png"/>

  <title>next_gen_ui</title>
  <link rel="manifest" href="manifest.json">

  <script>
    // The value below is injected by flutter build, do not touch.
    var serviceWorkerVersion = null;
  </script>
  <!-- This script adds the flutter initialization JS code -->
  <script src="flutter.js" defer></script>
</head>
<body>
  <script>
    window.addEventListener('load', function (ev) {
      // Download main.dart.js
      _flutter.loader.loadEntrypoint({
        serviceWorker: {
          serviceWorkerVersion: serviceWorkerVersion,
        },
        onEntrypointLoaded: function (engineInitializer) {  // Edit from here...
          engineInitializer.initializeEngine({
            renderer: 'canvaskit'
          }).then(function (appRunner) {                    // to here.
            appRunner.runApp();
          });
        }
      });
    });
  </script>
</body>
</html>
Berikut semua kerja keras Anda, yang ditampilkan kali ini di browser Chrome.
8. Selamat
Anda telah membuat layar pengantar game berfitur lengkap dengan animasi, shader fragmen, dan animasi partikel! Kini Anda dapat menggunakan teknik ini di semua platform yang didukung Flutter.
Mempelajari lebih lanjut
- Lihat paket
flutter_animate - Tinjau dokumentasi dukungan Flutter untuk Fragment Shader
- The Book of Shaders oleh Patricio Gonzalez Vivo dan Jen Lowe
- Shader mainan, taman bermain shader kolaboratif
- simple_shader, project contoh shader fragmen Flutter sederhana