1. はじめに
マテリアル コンポーネント(MDC)は、デベロッパーがマテリアル デザインを実装する際に役立ちます。Google のエンジニアと UX デザイナーのチームが作成した MDC には、美しく機能的な UI コンポーネントが多数含まれており、Android、iOS、ウェブ、Flutter.material.io/develop に利用可能です。 |
Codelab MDC-103 では、アプリのスタイルを設定するために、マテリアル コンポーネント(MDC)の色、エレベーション、タイポグラフィをカスタマイズしました。
マテリアル デザイン システムのコンポーネントは、事前定義されたタスクのセットを実行します。また、ボタンなど、特定の特性を持っています。ボタンは単にユーザーがアクションを実行するための手段であるだけでなく、形状、サイズ、色を備えた視覚的表現でもあり、UI が操作可能であることと、タップまたはクリックすると何かが起こることをユーザーに伝えます。
マテリアル デザイン ガイドラインは、デザイナーの観点から見たコンポーネントの記述です。複数のプラットフォームで利用できるさまざまな基本機能と、各コンポーネントを構成する微細な要素について説明しています。たとえば、背景(バックドロップ)には、バックレイヤとそのコンテンツ、フロントレイヤとそのコンテンツ、モーション ルール、表示オプションが含まれます。それぞれのコンポーネントは、アプリのニーズ、ユースケース、コンテンツに合わせてカスタマイズできます。そうしたコンポーネントの大半は、プラットフォームの SDK に含まれる従来のビュー、コントロール、関数に対応しています。
マテリアル デザイン ガイドラインには多くのコンポーネントが記載されていますが、一部のコンポーネントは再利用可能なコードでの利用に適しておらず、そのため MDC に含まれていません。従来のコードのみを使用して、そのようなエクスペリエンスを独自に作成し、アプリ用にカスタマイズしたスタイルを実現できます。
作成するアプリの概要
この Codelab では、Shrine に背景を追加します。これにより、非対称グリッドに表示される商品をカテゴリでフィルタできます。以下を使用します。
- 図形
- モーション
- 従来の Android SDK クラス
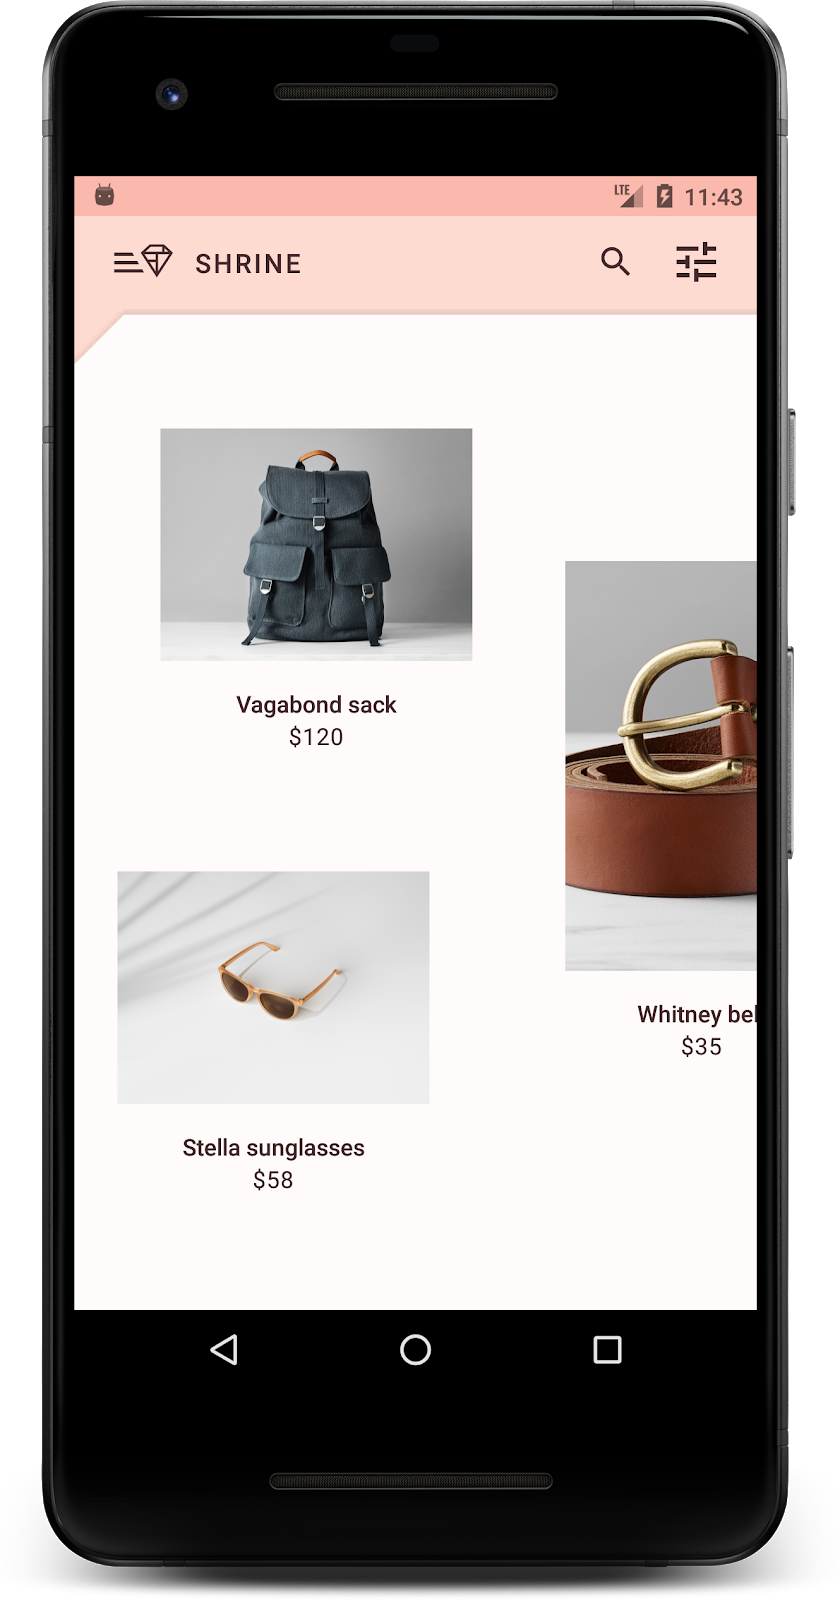
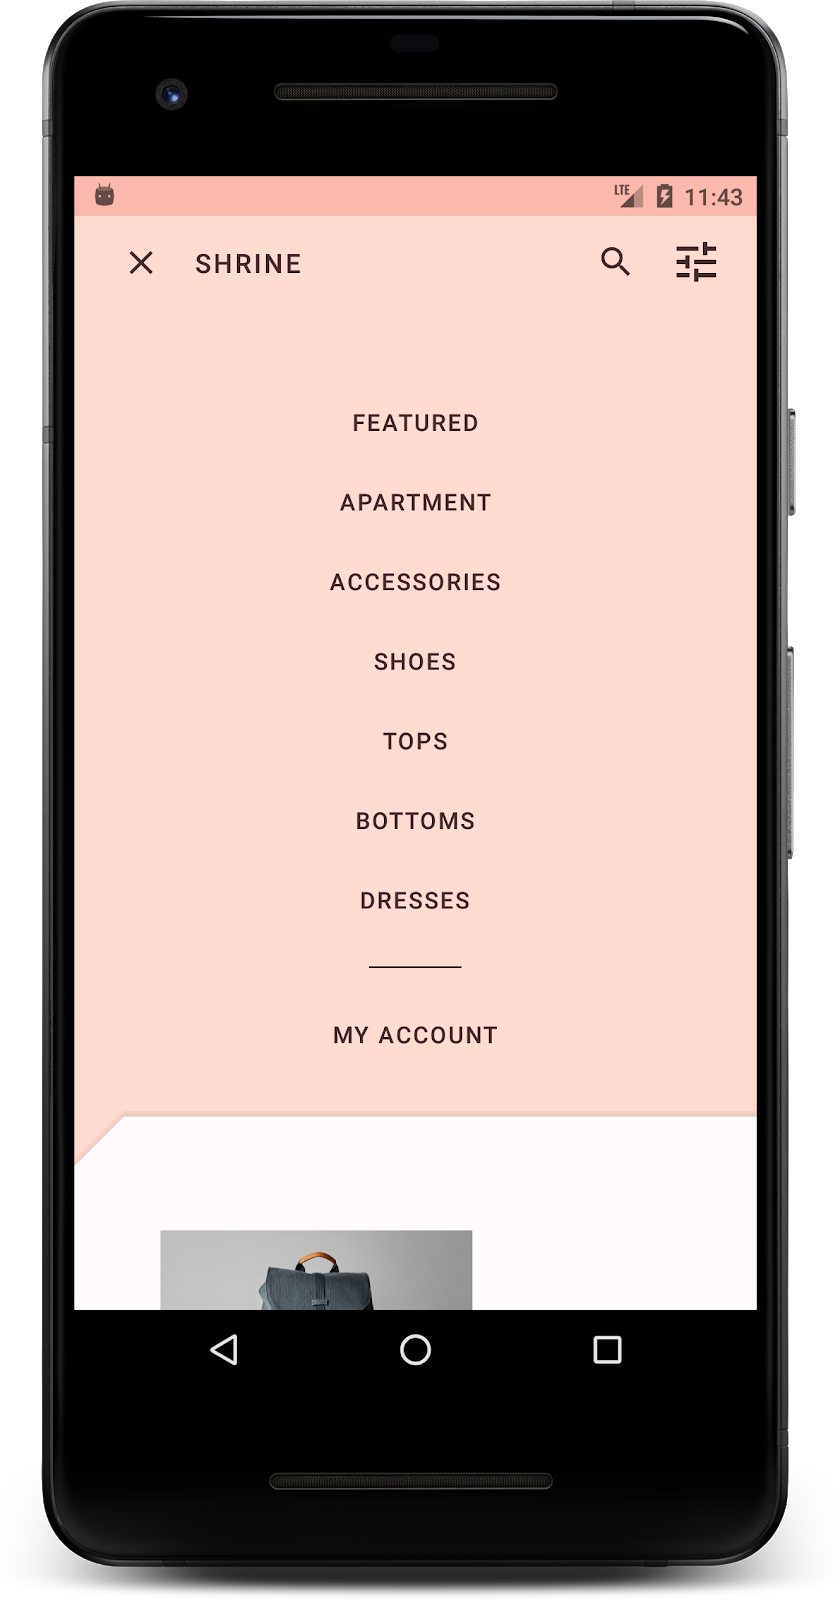
この Codelab の MDC-Android コンポーネント
- 図形
必要なもの
- Android 開発に関する基本的な知識
- Android Studio(まだお持ちでない場合はこちらからダウンロードしてください)
- Android Emulator または Android デバイス(Android Studio から入手可能)
- サンプルコード(次の手順を参照)
Android アプリの作成経験はどの程度ありますか?
<ph type="x-smartling-placeholder">2. 開発環境を設定する
MDC-103 から続行する場合
MDC-103 が完了済みであれば、コードはこの Codelab を進められる状態になっています。ステップ 3 に進みます。
ゼロから始める
Codelab のスターター アプリをダウンロードする
スターター アプリは material-components-android-codelabs-104-starter/kotlin ディレクトリにあります。開始する前に、そのディレクトリへの cd を行ってください。
GitHub からクローンを作成する
GitHub からこの Codelab のクローンを作成するには、次のコマンドを実行します。
git clone https://github.com/material-components/material-components-android-codelabs
cd material-components-android-codelabs/
git checkout 104-starter
Android Studio にスターター コードを読み込む
- 設定ウィザードが完了し、[Welcome to Android Studio] ウィンドウが表示されたら、[Open an existing Android Studio project] をクリックします。サンプルコードをインストールしたディレクトリに移動し、kotlin ->Shrine(またはパソコンで「shrine」を検索)して、Shipping プロジェクトを開きます。
- Android Studio がプロジェクトをビルドして同期するまで待ちます。進捗状況は、Android Studio ウィンドウ下部のアクティビティ インジケーターに表示されます。
- この時点では、Android SDK やビルドツール(以下に示すものなど)が不足しているため、Android Studio でビルドエラーが発生する場合があります。Android Studio の手順に沿って、これらをインストールまたは更新し、プロジェクトを同期します。
プロジェクトの依存関係を追加する
プロジェクトに MDC Android サポート ライブラリへの依存関係が必要である。ダウンロードしたサンプルコードには、この依存関係がすでにリストされているはずですが、次の手順で確認することをおすすめします。
appモジュールのbuild.gradleファイルに移動し、dependenciesブロックに MDC Android への依存関係が含まれていることを確認します。
api 'com.google.android.material:material:1.1.0-alpha06'
- (省略可)必要に応じて
build.gradleファイルを編集して次の依存関係を追加し、プロジェクトを同期します。
dependencies {
    api 'com.google.android.material:material:1.1.0-alpha06'
    implementation 'androidx.legacy:legacy-support-v4:1.0.0'
    implementation 'com.android.volley:volley:1.1.1'
    implementation 'com.google.code.gson:gson:2.8.5'
    implementation "org.jetbrains.kotlin:kotlin-stdlib-jdk7:1.3.21"
    testImplementation 'junit:junit:4.12'
    androidTestImplementation 'androidx.test:core:1.1.0'
    androidTestImplementation 'androidx.test.ext:junit:1.1.0'
    androidTestImplementation 'androidx.test:runner:1.2.0-alpha05'
    androidTestImplementation 'androidx.test.espresso:espresso-core:3.2.0-alpha05'
}
スターター アプリを実行する
|
完了しました。デバイスで Shrine アプリが動作しているはずです。
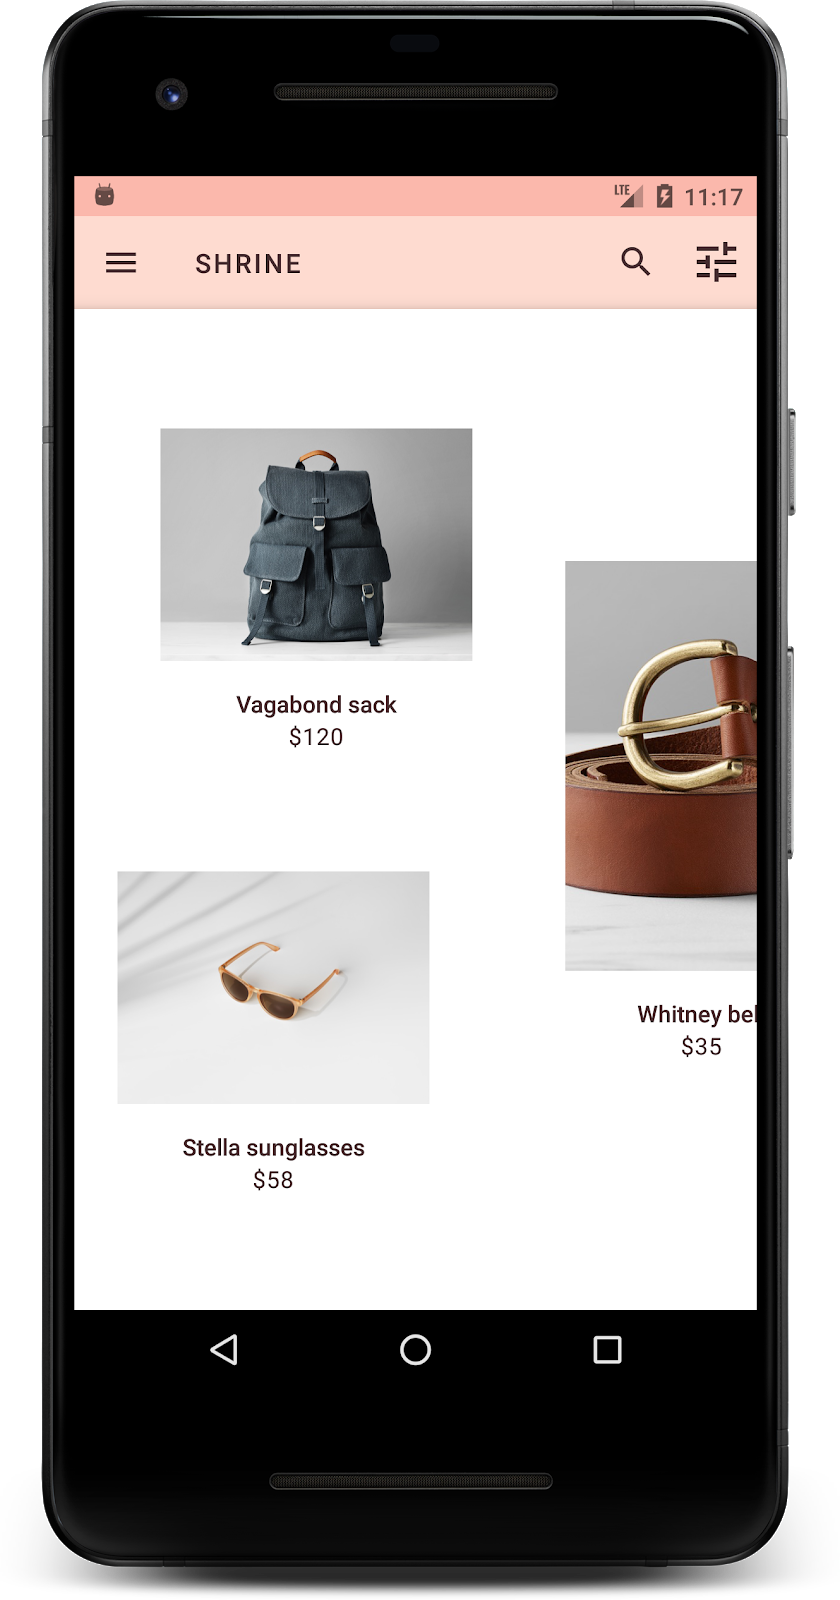
3. 背景メニューを追加する
背景は、アプリの最も遠い背面で、他のすべてのコンテンツやコンポーネントの背後に表示されます。バックレイヤ(アクションとフィルタを表示する)とフロントレイヤ(コンテンツを表示する)の 2 つのサーフェスで構成されます。背景を使用して、ナビゲーションやコンテンツ フィルタなどのインタラクティブな情報とアクションを表示できます。
グリッド コンテンツを隠す
shr_product_grid_fragment.xml で、NestedScrollView に android:visibility="gone" 属性を追加して、商品コンテンツを一時的に削除します。
shr_product_grid_fragment.xml
<androidx.core.widget.NestedScrollView
   android:layout_width="match_parent"
   android:layout_height="match_parent"
   android:layout_marginTop="56dp"
   android:background="@color/productGridBackgroundColor"
   android:elevation="8dp"
   android:visibility="gone"
   app:layout_behavior="@string/appbar_scrolling_view_behavior">
このリージョンに背景をインストールします。トップ アプリバーと、背景に表示されるメニュー コンテンツが区別されないようにするため、背景をトップ アプリバーと同じ色にします。
shr_product_grid_fragment.xml で、ルート FrameLayout の AppBarLayout の前に最初の要素として以下を追加します。
shr_product_grid_fragment.xml
<LinearLayout
   style="@style/Widget.Shrine.Backdrop"
   android:layout_width="match_parent"
   android:layout_height="match_parent"
   android:gravity="center_horizontal"
   android:orientation="vertical"
   android:paddingTop="100dp"
   android:paddingBottom="100dp">

</LinearLayout>
styles.xml に以下を追加します。
styles.xml
<style name="Widget.Shrine.Backdrop" parent="">
   <item name="android:background">?attr/colorAccent</item>
</style>
頑張りましたね。これで、Shrine の UI に美しい背景が追加されました。次に、メニューを追加します。
メニューを追加する
メニューは基本的にテキストボタンのリストです。ここに 1 つ追加します。
res -> layout ディレクトリに shr_backdrop.xml という新しいレイアウト ファイルを作成し、以下を追加します。
shr_backdrop.xml
<?xml version="1.0" encoding="utf-8"?>
<merge xmlns:android="http://schemas.android.com/apk/res/android">

   <com.google.android.material.button.MaterialButton
       style="@style/Widget.Shrine.Button.TextButton"
       android:layout_width="wrap_content"
       android:layout_height="wrap_content"
       android:text="@string/shr_featured_label" />

   <com.google.android.material.button.MaterialButton
       style="@style/Widget.Shrine.Button.TextButton"
       android:layout_width="wrap_content"
       android:layout_height="wrap_content"
       android:text="@string/shr_apartment_label" />

   <com.google.android.material.button.MaterialButton
       style="@style/Widget.Shrine.Button.TextButton"
       android:layout_width="wrap_content"
       android:layout_height="wrap_content"
       android:text="@string/shr_accessories_label" />

   <com.google.android.material.button.MaterialButton
       style="@style/Widget.Shrine.Button.TextButton"
       android:layout_width="wrap_content"
       android:layout_height="wrap_content"
       android:text="@string/shr_shoes_label" />

   <com.google.android.material.button.MaterialButton
       style="@style/Widget.Shrine.Button.TextButton"
       android:layout_width="wrap_content"
       android:layout_height="wrap_content"
       android:text="@string/shr_tops_label" />

   <com.google.android.material.button.MaterialButton
       style="@style/Widget.Shrine.Button.TextButton"
       android:layout_width="wrap_content"
       android:layout_height="wrap_content"
       android:text="@string/shr_bottoms_label" />

   <com.google.android.material.button.MaterialButton
       style="@style/Widget.Shrine.Button.TextButton"
       android:layout_width="wrap_content"
       android:layout_height="wrap_content"
       android:text="@string/shr_dresses_label" />

   <View
       android:layout_width="56dp"
       android:layout_height="1dp"
       android:layout_margin="16dp"
       android:background="?android:attr/textColorPrimary" />

   <com.google.android.material.button.MaterialButton
       style="@style/Widget.Shrine.Button.TextButton"
       android:layout_width="wrap_content"
       android:layout_height="wrap_content"
       android:text="@string/shr_account_label" />

</merge>
さらに、<include> タグを使用して、先ほど shr_product_grid_fragment.xml に追加した LinearLayout にこのリストを追加します。
shr_product_grid_fragment.xml
<LinearLayout
   style="@style/Widget.Shrine.Backdrop"
   android:layout_width="match_parent"
   android:layout_height="match_parent"
   android:gravity="center_horizontal"
   android:orientation="vertical"
   android:paddingTop="88dp">

   <include layout="@layout/shr_backdrop" />
</LinearLayout>
ビルドして実行します。ホーム画面は次のようになります。
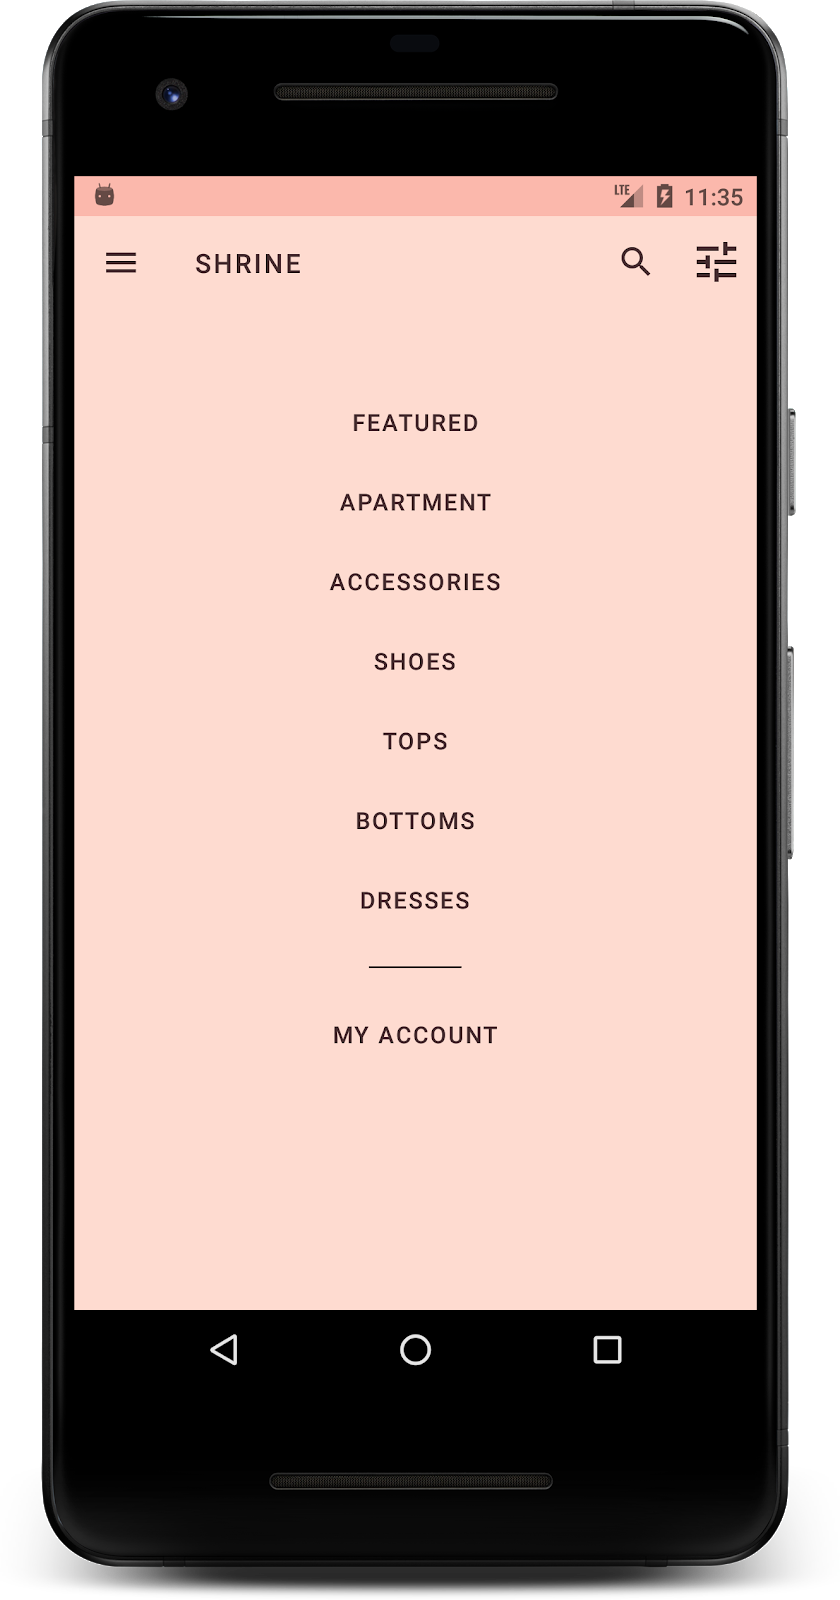
これで、背景を設定できました。隠したコンテンツに戻りましょう。
4. シェイプを追加する
この Codelab で Shrine に変更を加える前は、主要な商品コンテンツは最も遠い背面に配置されていました。背景を追加すると、コンテンツがその背景の前に表示されるため、より強調されます。
新しいレイヤを追加する
商品グリッドレイヤが再び表示されます。NestedScrollView から android:visibility="gone" 属性を削除します。
shr_product_grid_fragment.xml
<androidx.core.widget.NestedScrollView
   android:layout_width="match_parent"
   android:layout_height="match_parent"
   android:layout_marginTop="56dp"
   android:background="@color/productGridBackgroundColor"
   android:elevation="8dp"
   app:layout_behavior="@string/appbar_scrolling_view_behavior">
左上隅にノッチを配置したフロントレイヤのスタイルを設定しましょう。マテリアル デザインでは、このようなカスタマイズが可能なコンポーネントをシェイプと呼びます。マテリアル サーフェスはさまざまな形状で表示できます。シェイプによってサーフェスに強調とスタイルを加え、ブランドを表現できます。マテリアル シェイプには、曲線または傾斜のある角とエッジ、任意の数の辺を設定できます。また、対称または非対称にできます。
シェイプを追加する
グリッドの形状を変更します。カスタム シェイプの背景が用意されていますが、シェイプは Android Marshmallow 以降でのみ正しく表示されます。NestedScrollView に shr_product_grid_background_shape 背景を設定できるのは、Android Marshmallow 以降のみです。まず、次のように id を NestedScrollView に追加して、コード内で参照できるようにします。
shr_product_grid_fragment.xml
<androidx.core.widget.NestedScrollView
   android:id="@+id/product_grid"
   android:layout_width="match_parent"
   android:layout_height="match_parent"
   android:layout_marginTop="56dp"
   android:background="@color/productGridBackgroundColor"
   android:elevation="8dp"
   app:layout_behavior="@string/appbar_scrolling_view_behavior">
次に、ProductGridFragment.kt でプログラムによって背景を設定します。次のロジックを追加して、背景を onCreateView() の return 文の直前に設定します。
ProductGridFragment.kt
// Set cut corner background for API 23+
if (Build.VERSION.SDK_INT >= Build.VERSION_CODES.M) {
       view.product_grid.background = context?.getDrawable(R.drawable.shr_product_grid_background_shape)
}
最後に、(カスタムのシェイプの背景でも使用されている)productGridBackgroundColor カラーリソースを次のように更新します。
colors.xml
<color name="productGridBackgroundColor">#FFFBFA</color>
ビルドして実行します。
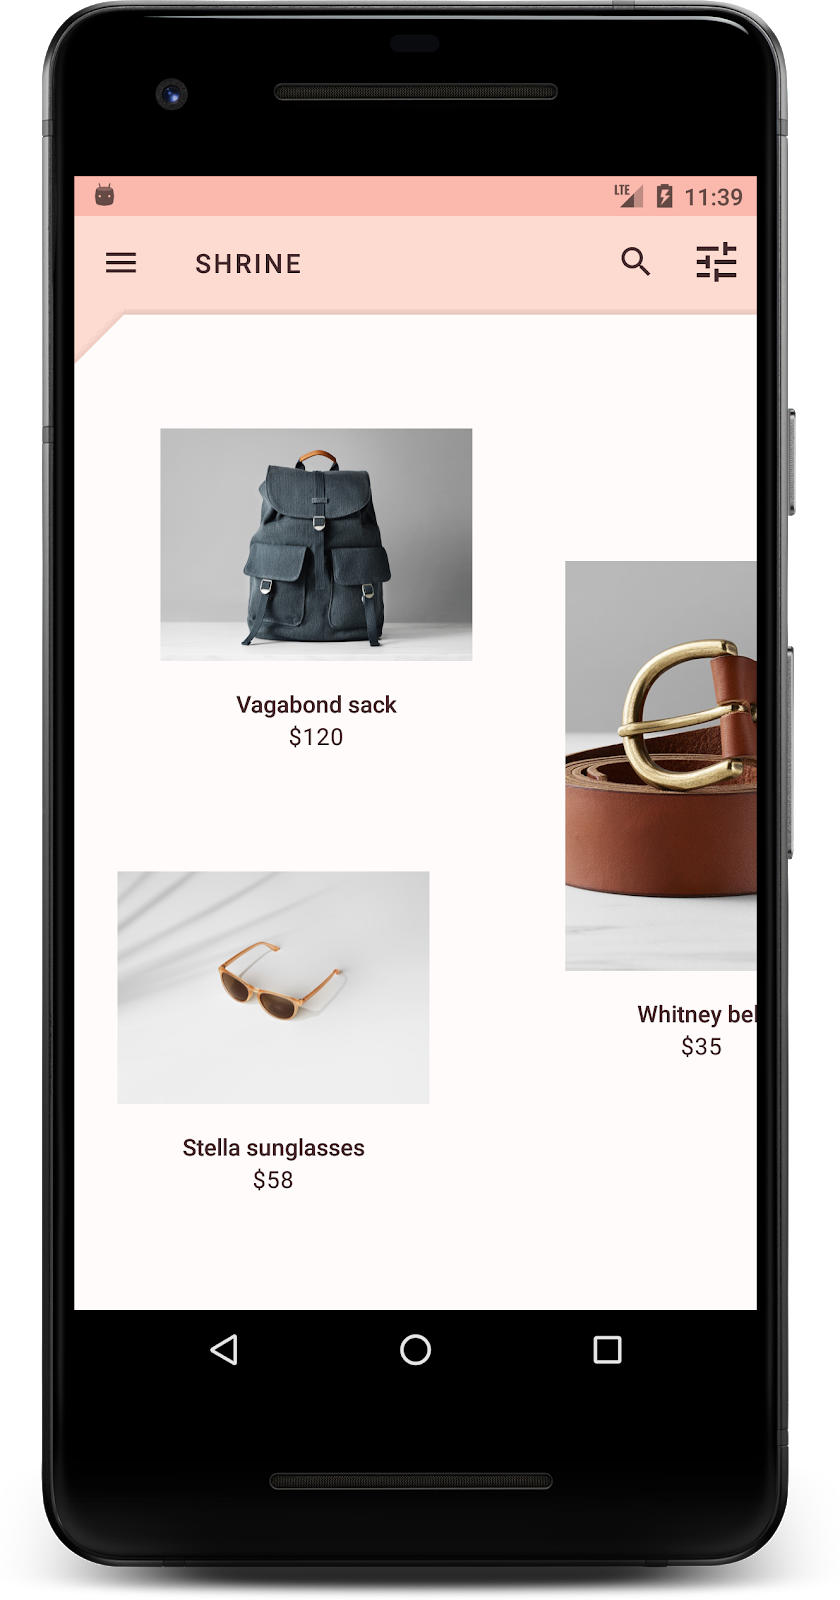
これで、Shrine のプライマリ サーフェスにカスタム スタイル付きのシェイプが設定されました。サーフェスの高度により、白いフロントレイヤのすぐ後ろに何かがあることがユーザーにわかります。それでは、ユーザーがそこにあるメニュー、つまりメニューを確認できるように、モーションを追加しましょう。
5. モーションを追加する
モーションは、アプリに命を吹き込む手段です。動きは、大きくてドラマチックにしたり、微妙でミニマルにしたり、その中間にもできます。使用する動きの種類は、状況に適している必要があります。定期的に繰り返すアクションに適用される動きは、定期的にあまり時間をかけないように、小さく微妙なものにする必要があります。その他の状況(ユーザーがアプリを初めて開くときなど)では、人目を引くことができ、アプリの使い方をユーザーに周知できます。
メニューボタンに開示モーションを追加する
動きとは、前の図形が真下に動くことを指します。NavigationIconClickListener.kt には、シートの翻訳アニメーションを作成するクリック リスナーがすでに用意されています。このクリック リスナーは、ツールバーを設定するセクションにある ProductGridFragement の onCreateView() で設定できます。以下の行を追加して、ツールバーのメニュー アイコンにクリック リスナーを設定します。
ProductGridFragment.kt
view.app_bar.setNavigationOnClickListener(NavigationIconClickListener(activity!!, view.product_grid))
セクションは次のようになります。
ProductGridFragment.kt
// Set up the toolbar.
(activity as AppCompatActivity).setSupportActionBar(view.app_bar)
view.app_bar.setNavigationOnClickListener(NavigationIconClickListener(activity!!, view.product_grid))
ビルドして実行します。メニューボタンを押します。

ナビゲーション メニュー アイコンをもう一度押すと、非表示になります。
フロントレイヤのモーションを微調整
モーションはブランドを表現するのに効果的な方法です。異なるタイミング カーブを使用して、出現アニメーションがどのように表示されるか見てみましょう。
以下のように、ProductGridFragment.kt のクリック リスナーを更新して、ナビゲーション アイコンのクリック リスナーに Interpolator を渡すようにします。
ProductGridFragment.kt
view.app_bar.setNavigationOnClickListener(NavigationIconClickListener(activity!!, view.product_grid, AccelerateDecelerateInterpolator()))
それによって効果が変わりますよね?
6. ブランド アイコン
ブランドの図像も親しみやすいアイコンに拡張されています。開示アイコンをカスタマイズしてタイトルと結合し、ユニークなブランドをデザインしましょう。
メニューボタンのアイコンを変更する
メニューボタンを変更して、ダイヤモンドのデザインのアイコンを表示する。shr_product_grid_fragment.xml のツールバーを更新して、新しく用意されたブランド アイコン(shr_branded_menu)を使用するようにします。また、app:contentInsetStart 属性と android:padding 属性を設定して、ツールバーをデザイナーの仕様に合わせます。
shr_product_grid_fragment.xml
<androidx.appcompat.widget.Toolbar
   android:id="@+id/app_bar"
   style="@style/Widget.Shrine.Toolbar"
   android:layout_width="match_parent"
   android:layout_height="?attr/actionBarSize"
   android:paddingStart="12dp"
   android:paddingLeft="12dp"
   android:paddingEnd="12dp"
   android:paddingRight="12dp"
   app:contentInsetStart="0dp"
   app:navigationIcon="@drawable/shr_branded_menu"
   app:title="@string/shr_app_name" />
ProductGridFragment.kt の onCreateView() のクリック リスナーを再度更新し、次のようにメニューが開いているときと閉じたときにツールバーのドローアブルを取り込むようにします。
ProductGridFragment .kt
// Set up the toolbar.
(activity as AppCompatActivity).setSupportActionBar(view.app_bar)
view.app_bar.setNavigationOnClickListener(NavigationIconClickListener(
       activity!!,
       view.product_grid,
       AccelerateDecelerateInterpolator(),
       ContextCompat.getDrawable(context!!, R.drawable.shr_branded_menu), // Menu open icon
       ContextCompat.getDrawable(context!!, R.drawable.shr_close_menu))) // Menu close icon
ビルドして実行します。


良い傾向です。背景を表示できる場合は、ダイヤモンドのメニュー アイコンが表示されます。メニューを非表示にできる場合は、代わりに閉じるアイコンが表示されます。
7. まとめ
これら 4 つの Codelab では、マテリアル コンポーネントを使用して、ブランドの個性とスタイルを表現するユニークでエレガントなユーザー エクスペリエンスを構築する方法を見てきました。
次のステップ
この Codelab MDC-104 で一連の Codelab は完了です。MDC-Android のその他のコンポーネントについては、MDC-Android コンポーネント カタログをご覧ください。
この Codelab のさらなる課題として、背景メニューからカテゴリを選択したときに表示される商品画像を変更するように Shrine アプリケーションを変更します。
このアプリを Firebase に接続してバックエンドを機能させる方法については、Firebase Android Codelab をご覧ください。
