
1. Introduction


Note: This codelab requires a physical device to test
TensorFlow is a multipurpose machine learning framework. TensorFlow can be used anywhere from training huge models across clusters in the cloud, to running models locally on an embedded system like your phone.
This codelab uses TensorFlow Lite to run an image recognition model on an Android device.
Install Android Studio 4.1 or above
If you don't have it installed already, go download and install AndroidStudio 4.1 or above while you are training your TensorFlow Lite model.
What you'll learn
- How to train your own custom image classifier using TensorFlow Lite Model Maker.
- How to use Android Studio to import the TensorFlow Lite model to integrate the custom model in an Android app using CameraX.
- How to use GPU on your phone to accelerate your model.
What you will build
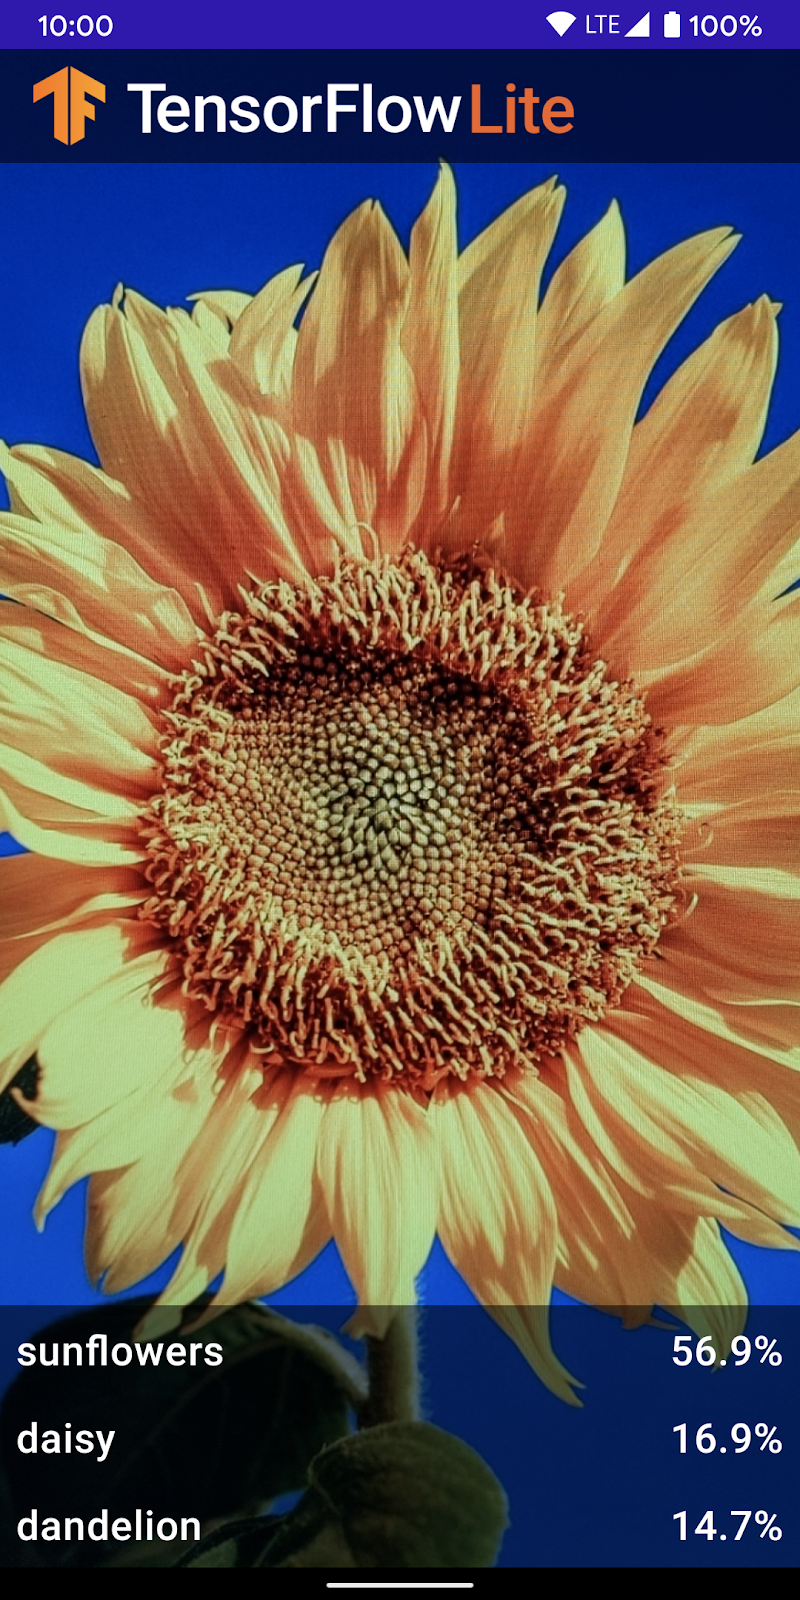
A simple camera app that runs a TensorFlow image recognition program to identify flowers.
License: Free to use
2. Train a flower recognizer using Colab
Before kicking off the model training, start downloading and installing Android Studio 4.1 or above.
Open the Colab which shows how to train a classifier with Keras to recognize flowers using TensorFlow Lite transfer learning.
3. Set up the working directory
Clone the Git repository
The following command will clone the Git repository containing the files required for this codelab:
git clone https://github.com/hoitab/TFLClassify.git
Next, go to the directory you just cloned the repository. This is where you will be working on for the rest of this codelab:
cd TFLClassify
4. Set up the Android skeleton app
Install Android Studio 4.1 or above
If you don't have it installed already, go install AndroidStudio 4.1 or above.
Open the project with Android Studio
Open a project with Android Studio by taking the following steps:
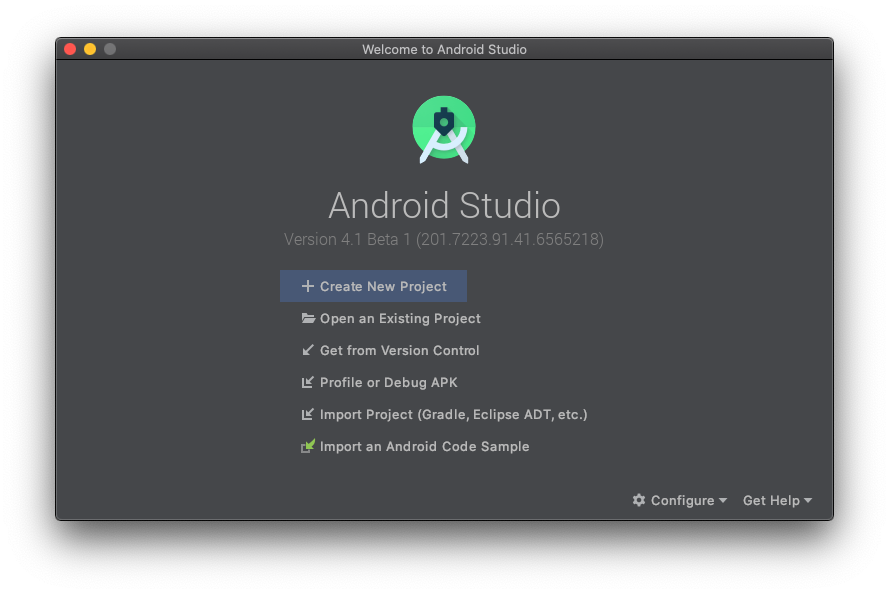
- Open Android Studio
 . After it loads select "Open an Existing project" from this popup:
- In the file selector, choose
TFLClassify/build.gradlefrom your working directory.
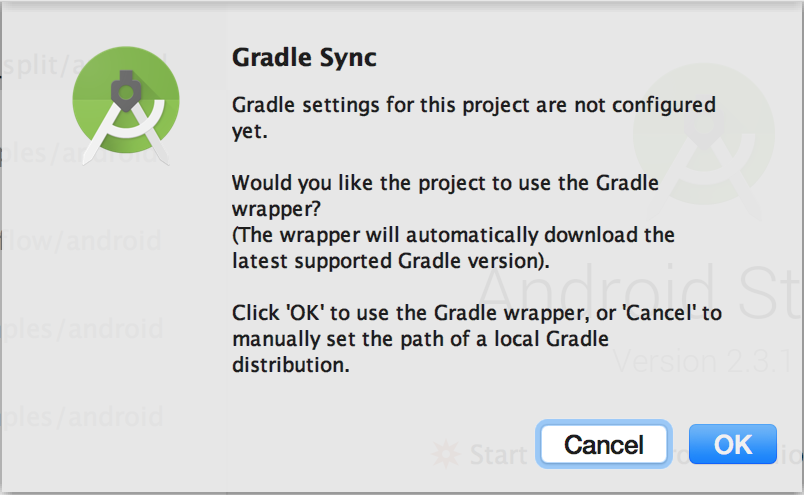
- You will get a "Gradle Sync" popup, the first time you open the project, asking about using gradle wrapper. Click "OK".
- Enable developer model and USB Debugging on your phone if you have not already. This is a one-time set up. Follow these instructions.
- Once both your project and your phone is ready, you can run it on a real device by selecting
TFL_Classify.startand press the run button on the toolbar:

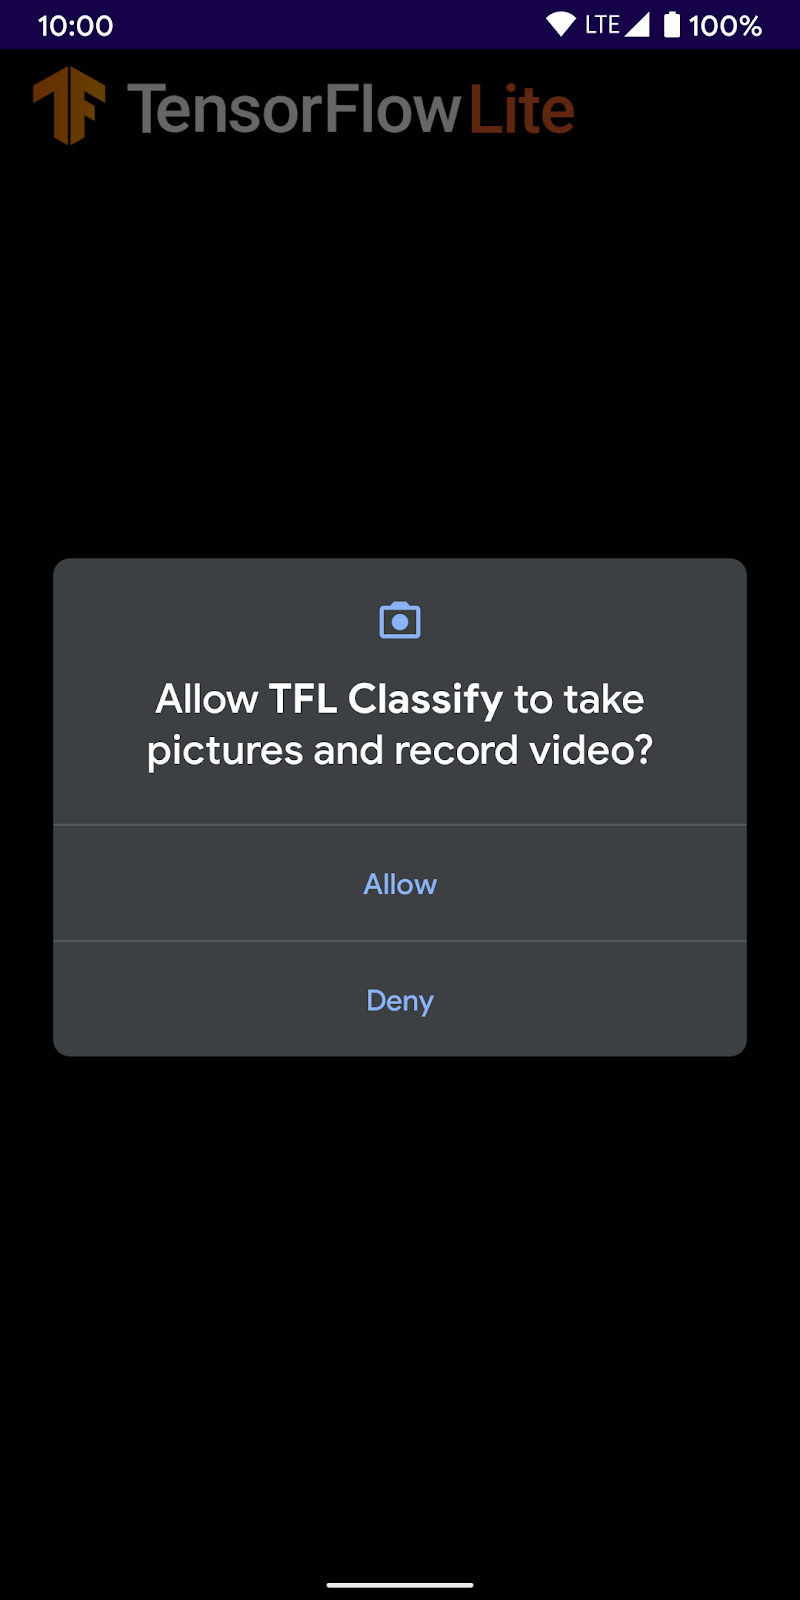
- Now allow the Tensorflow Demo to access your camera:
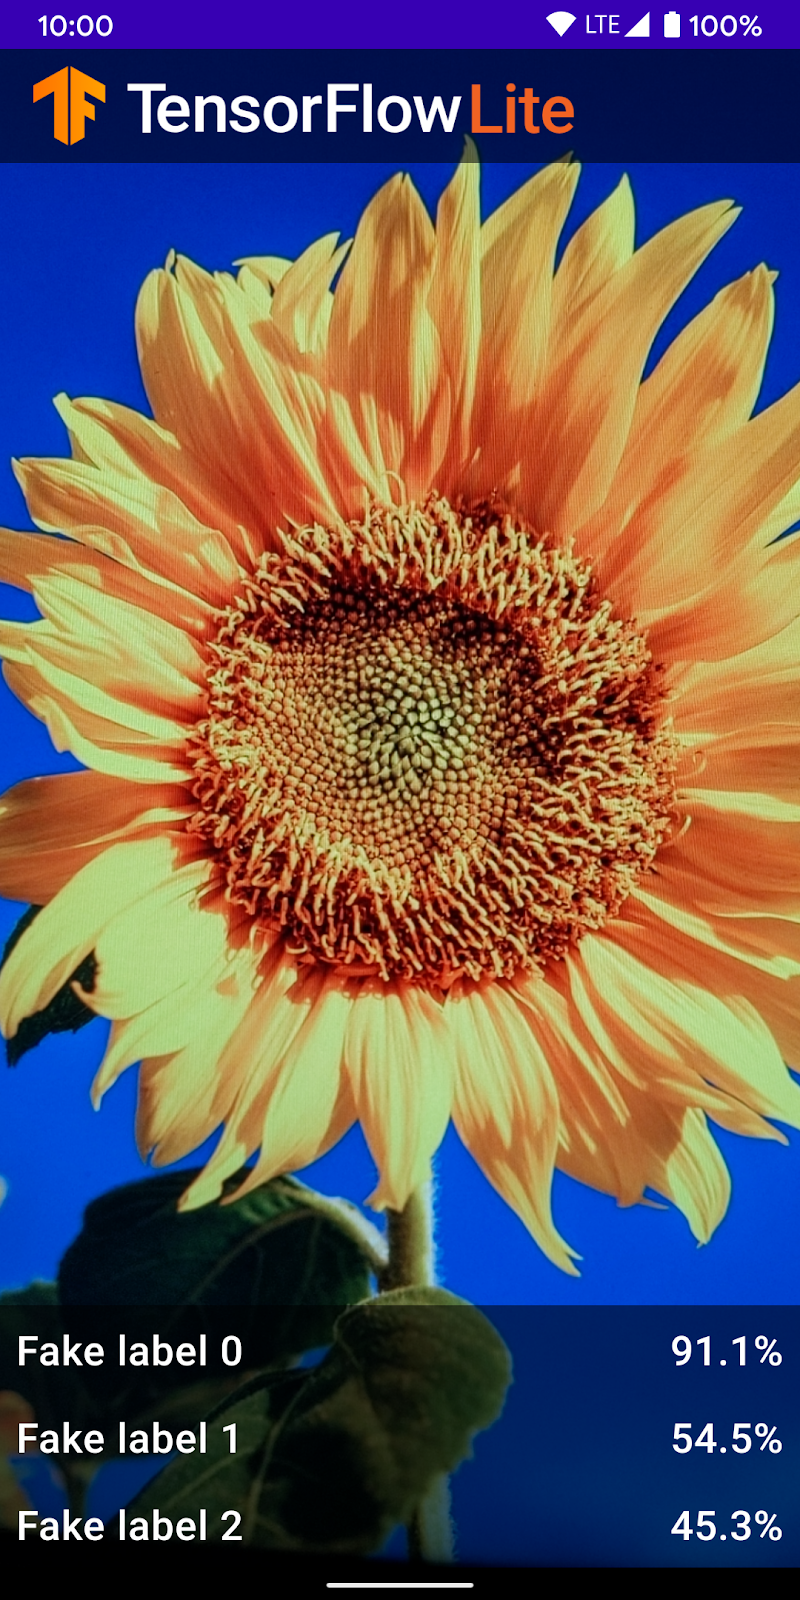
- You will see the following screen on your phone with random numbers taking the place of where real results will be displayed.
5. Add TensorFlow Lite to the Android app
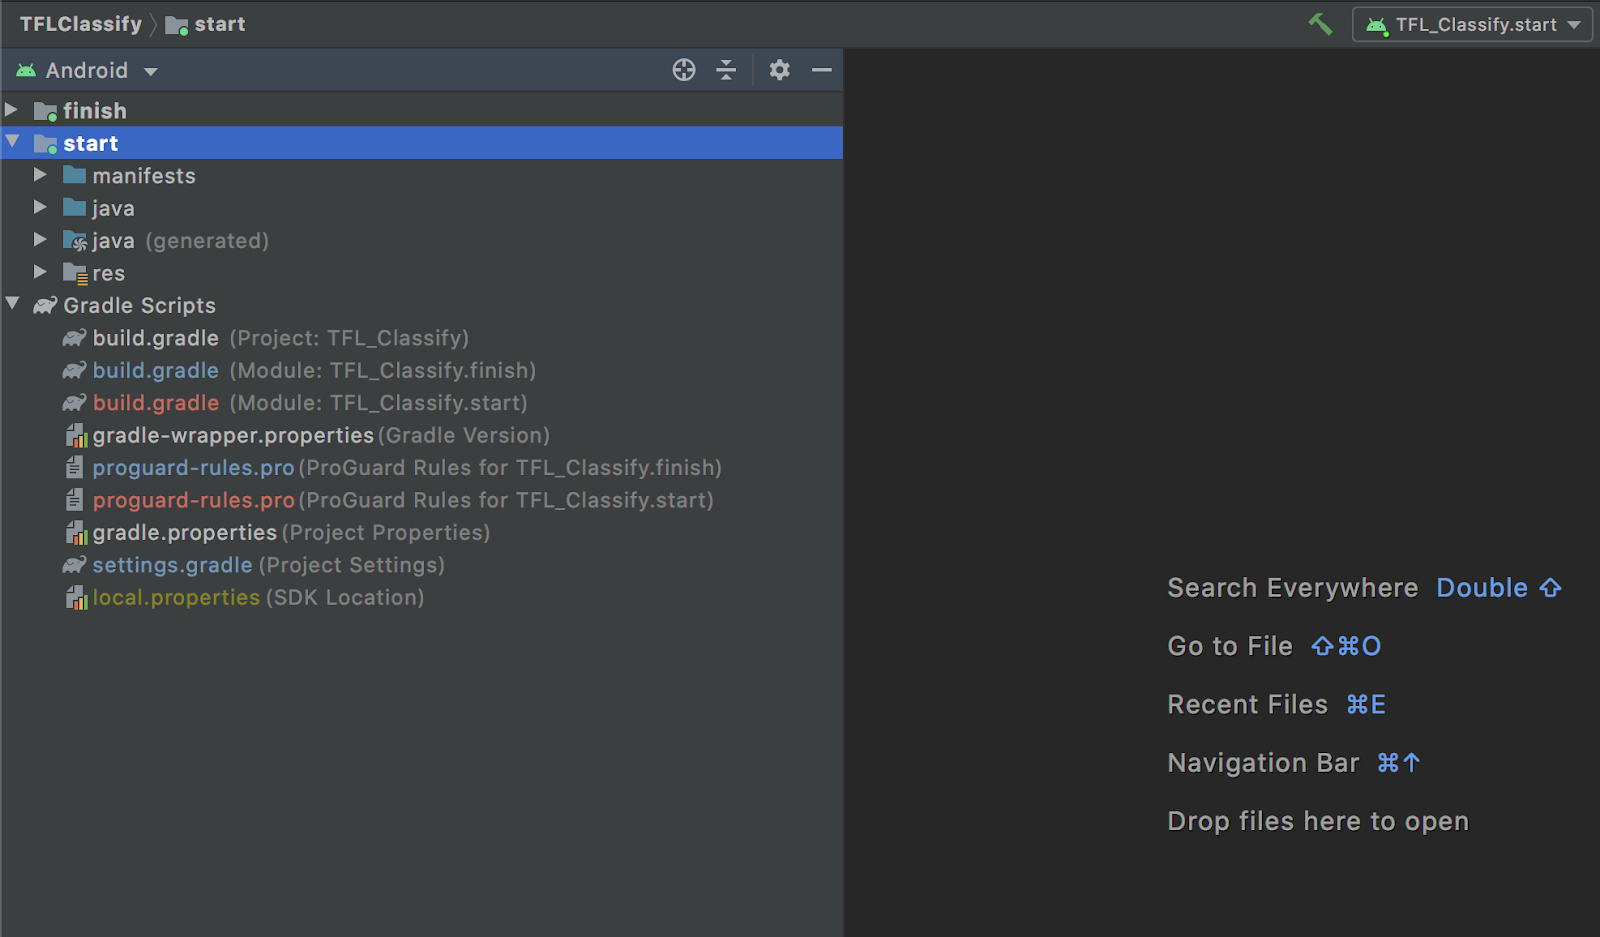
- Select the
startmodule in the project explorer on the left hand side:
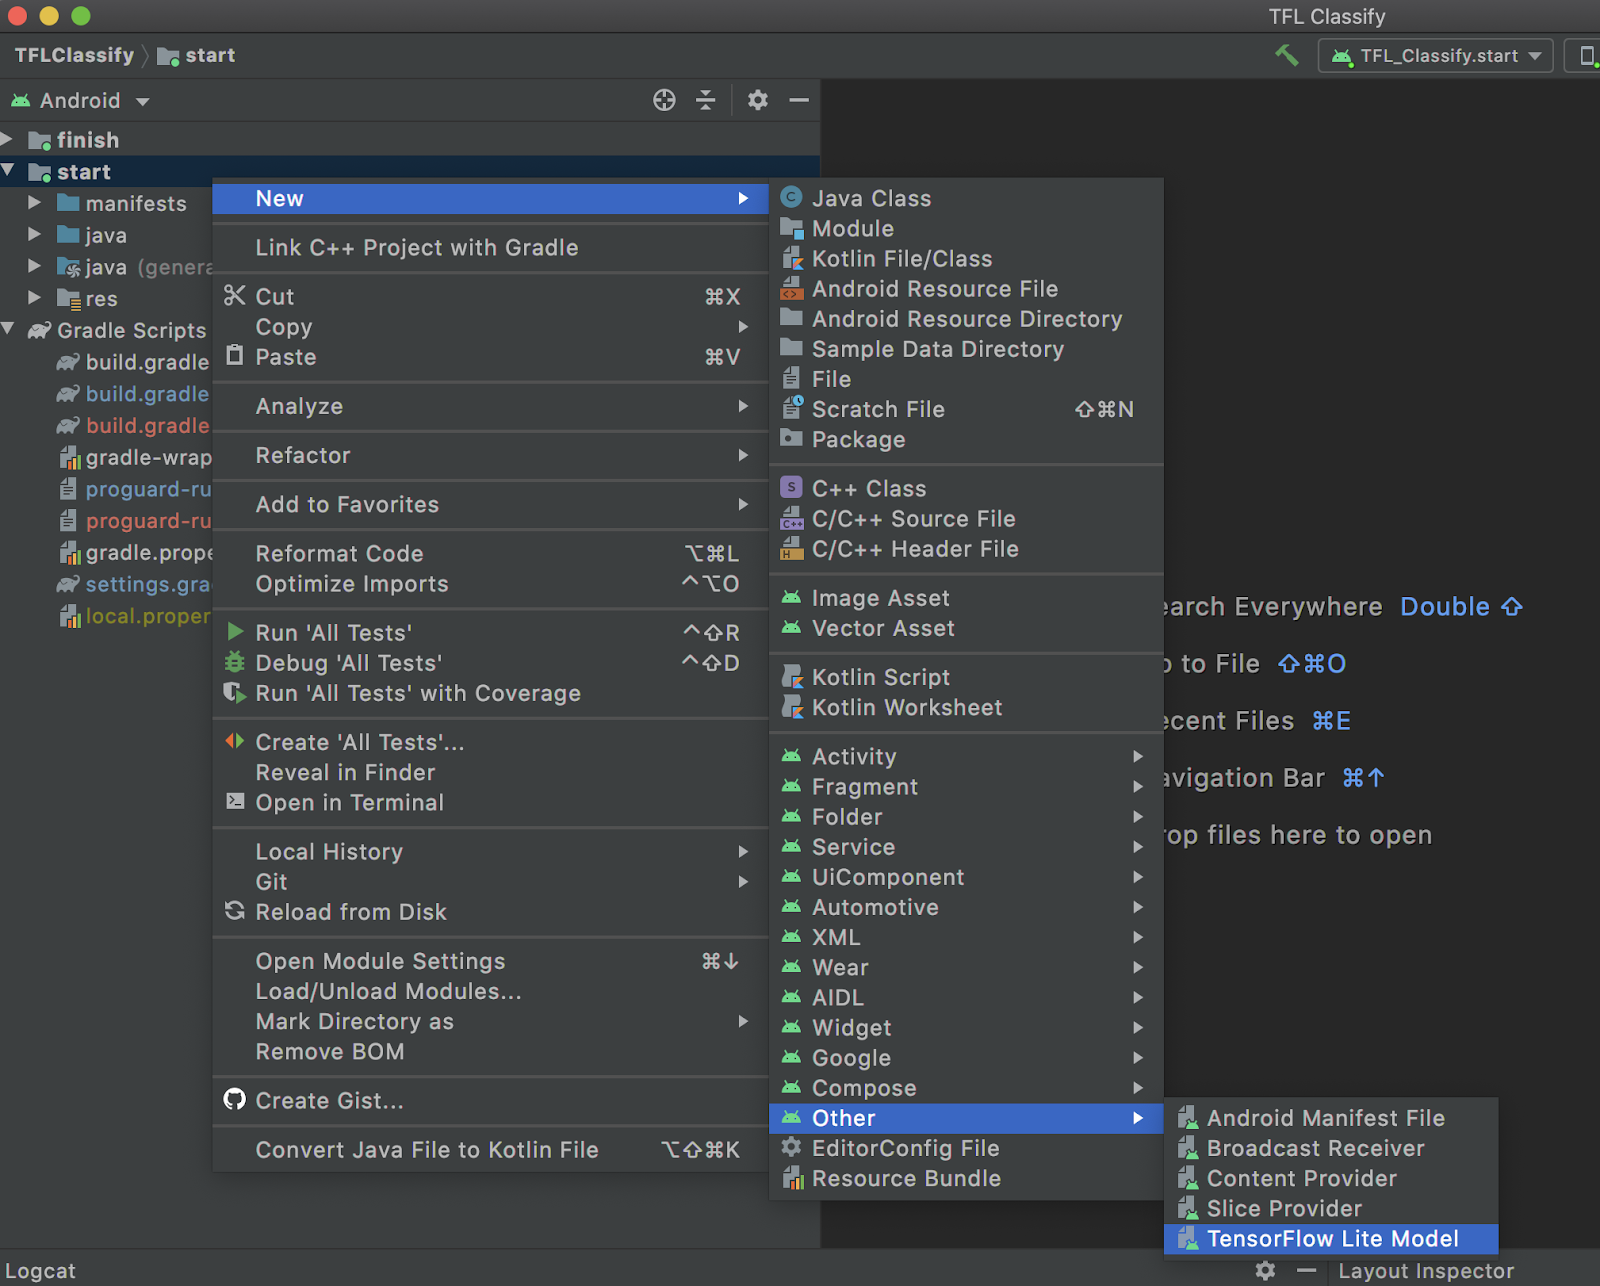
- Right-click on the
startmodule or click onFile, thenNew>Other>TensorFlow Lite Model
- Select the model location where you have downloaded the custom trained
FlowerModel.tfliteearlier.
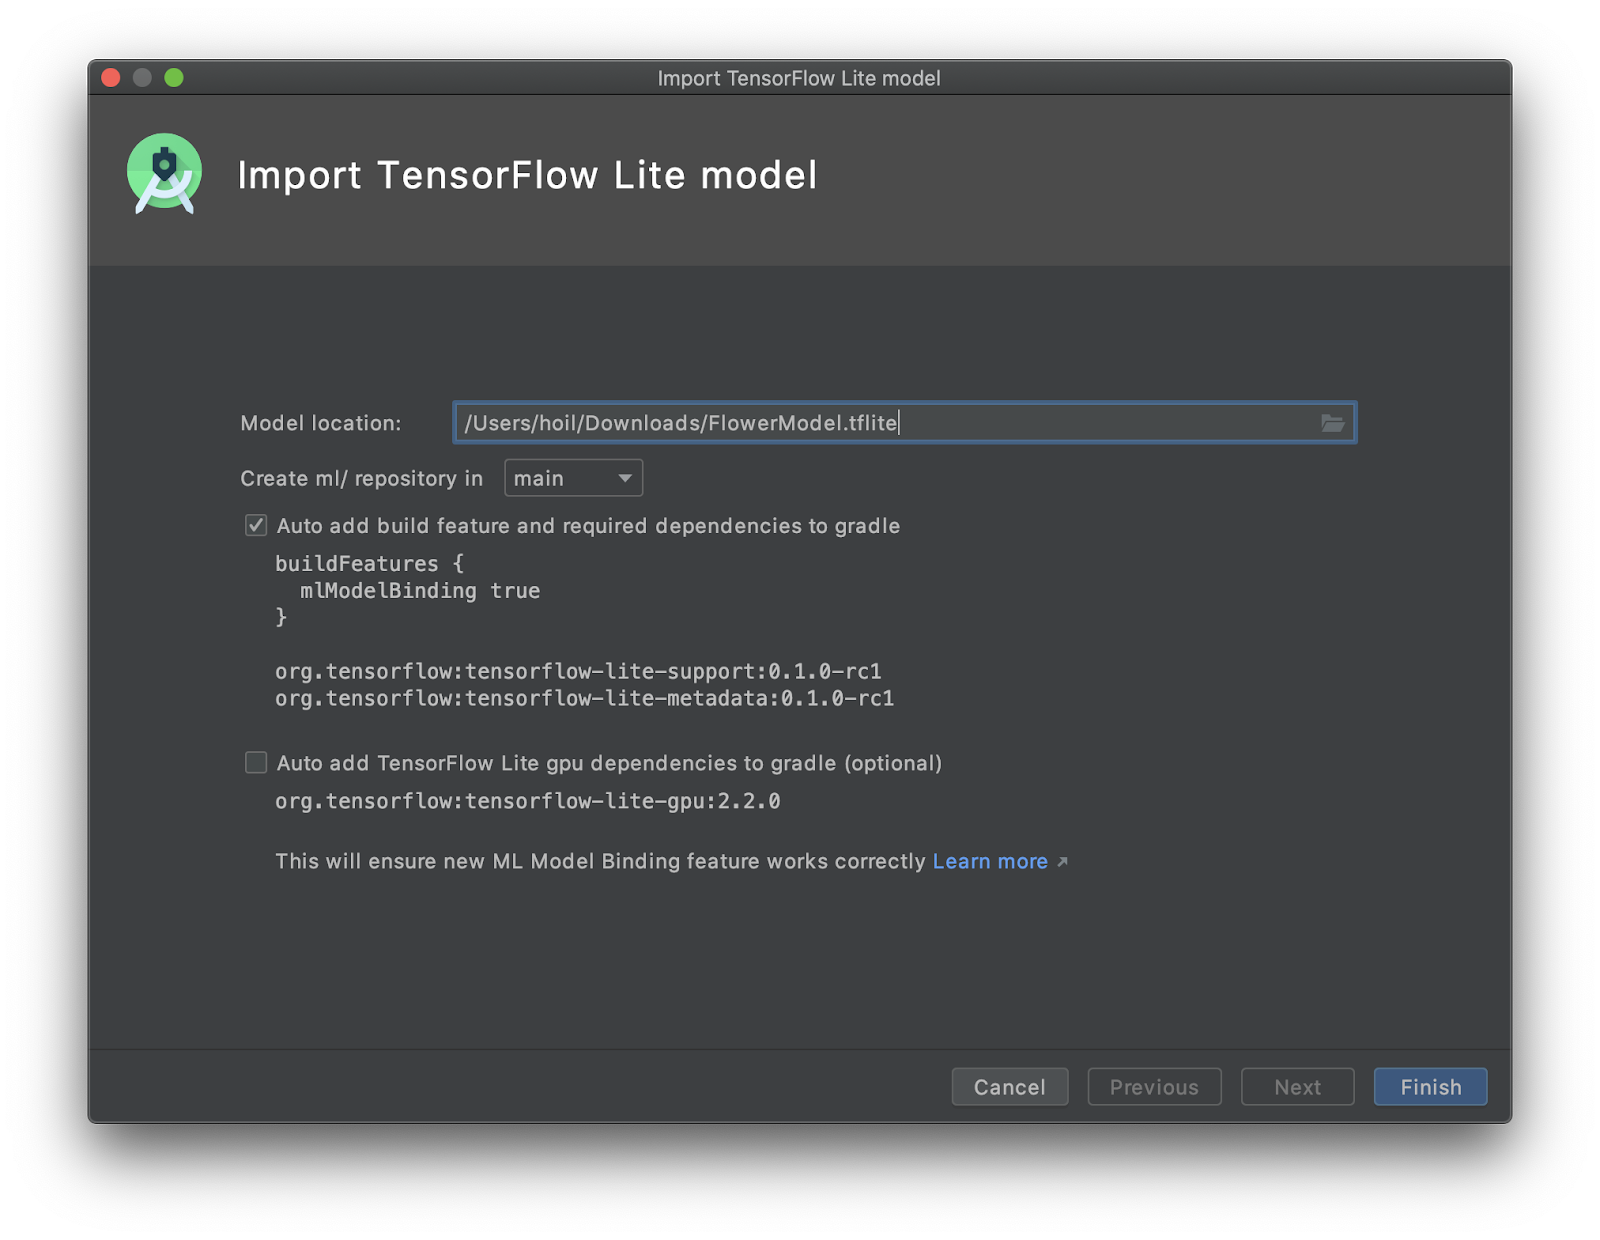
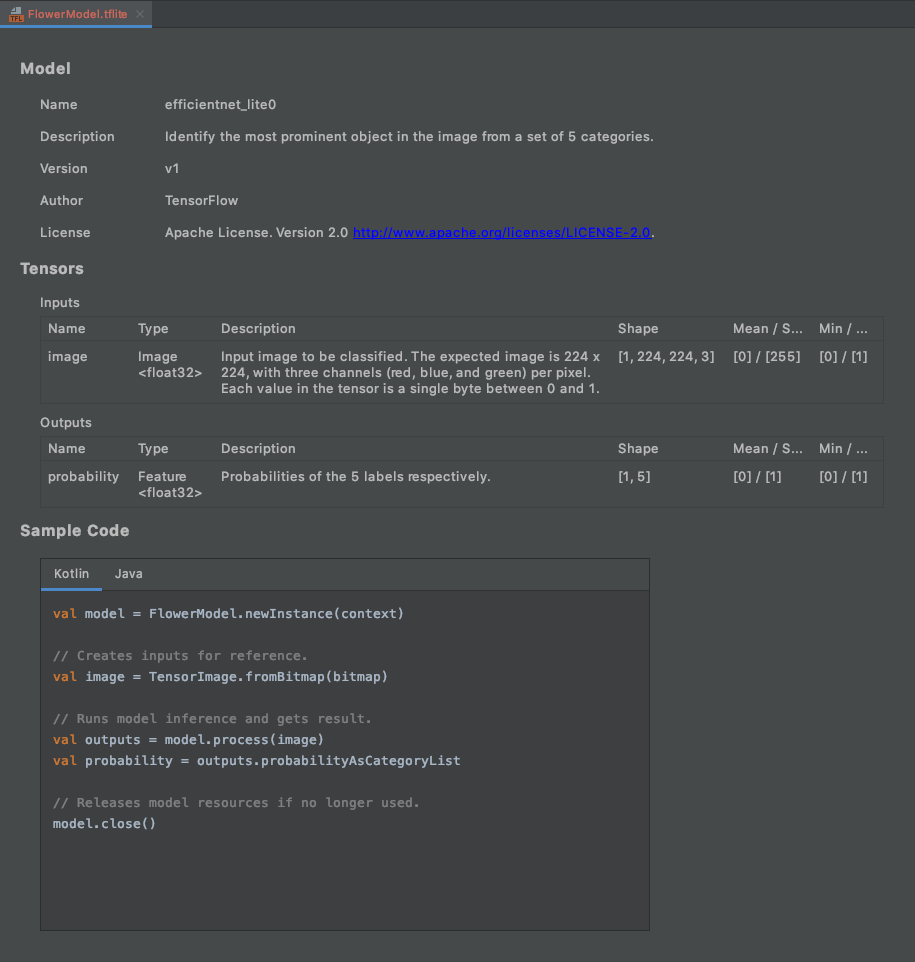
- Click
Finish. - You will see the following at the end. The FlowerModel.tflite is successfully imported and it shows the high level information regarding the model including the input / output as well as some sample code to get you started.
6. Optional: Checking out all todo list
TODO list makes it easy to navigate to the exact location where you need to update the codelab. You can also use it in your Android project to remind yourself of future work. You can add todo items using code comments and type the keyword TODO. To access the list of TODOs, you can:
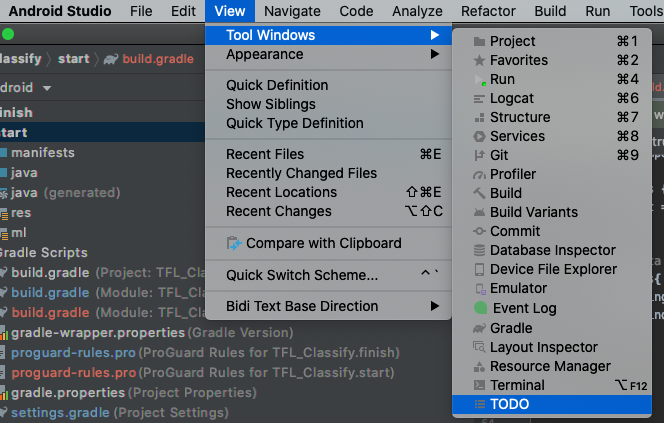
- A great way to see what we are going to do is to check out the TODO list. To do that, select from the top menu bar
View>Tool Windows>TODO
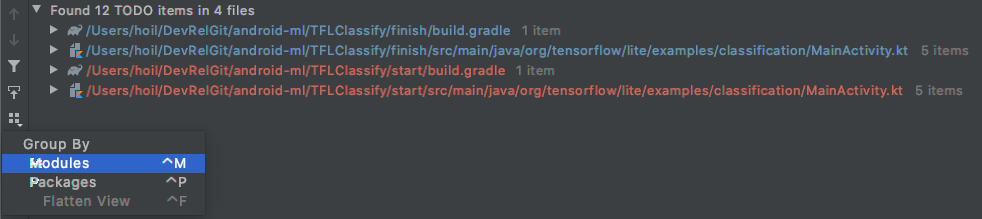
- By default, it lists all TODOs in all modules which makes it a little confusing. We can sort out only the start TODOs by clicking on the group by button on the side of the TODO panel and choose
Modules
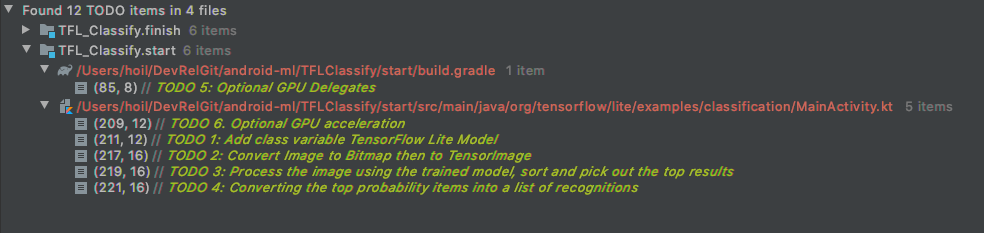
- Expand all the items under the start modules:
7. Run the custom model with TensorFlow Lite
- Click on TODO 1 in the TODO list or open the MainActivity.kt file and locate TODO 1, initialize the model by adding this line:
private class ImageAnalyzer(ctx: Context, private val listener: RecognitionListener) :
        ImageAnalysis.Analyzer {

  ...
  // TODO 1: Add class variable TensorFlow Lite Model
  private val flowerModel = FlowerModel.newInstance(ctx)

  ...
}
- Inside the analyze method for the CameraX Analyzer, we need to convert the camera input
ImageProxyinto aBitmapand create aTensorImageobject for the inference process.
override fun analyze(imageProxy: ImageProxy) {
  ...
  // TODO 2: Convert Image to Bitmap then to TensorImage
  val tfImage = TensorImage.fromBitmap(toBitmap(imageProxy))
  ...
}
- Process the image and perform the following operations on the result:
- Descendingly sort the results by probability under the attribute
scorewith the highest probability first. - Take the top k results as defined by the constant
MAX_RESULT_DISPLAY. You can optionally vary the value of this variable to get more or less results.
override fun analyze(imageProxy: ImageProxy) {
  ...
  // TODO 3: Process the image using the trained model, sort and pick out the top results
  val outputs = flowerModel.process(tfImage)
      .probabilityAsCategoryList.apply {
          sortByDescending { it.score } // Sort with highest confidence first
      }.take(MAX_RESULT_DISPLAY) // take the top results

  ...
}
- Convert the sorted and filtered results into data objects
Recognitionready to be consumed byRecyclerViewvia Data Binding:
override fun analyze(imageProxy: ImageProxy) {
  ...
  // TODO 4: Converting the top probability items into a list of recognitions
  for (output in outputs) {
      items.add(Recognition(output.label, output.score))
  }
  ...
}
- Comment out or delete the following lines which help generate the fake results we see before:
// START - Placeholder code at the start of the codelab. Comment this block of code out.
for (i in 0..MAX_RESULT_DISPLAY-1){
    items.add(Recognition("Fake label $i", Random.nextFloat()))
}
// END - Placeholder code at the start of the codelab. Comment this block of code out.
- Run the app on a real device by selecting
TFL_Classify.startand press the run button on the toolbar:
- You will see the following screen on your phone with random numbers taking the place of where real results will be displayed:
8. Optional: Accelerate inference with GPU delegate
TensorFlow Lite supports several hardware accelerators to speed up inference on your mobile device. GPU is one of the accelerators that TensorFlow Lite can leverage through a delegate mechanism and it is fairly easy to use.
- Open build.gradle under the
startmodule or you can click on TODO 5 under the TODO list and add the following dependency:
// TODO 5: Optional GPU Delegates
implementation 'org.tensorflow:tensorflow-lite-gpu:2.3.0'
- Go back to the MainActivity.kt file or click on TODO 6 in the TODO list. Replace the simple initiation of the flowerModel with the following: Get an instance of the GPU compatibility list and initialize the GPU depending on if it is one of the listed compatible GPUs. Otherwise, initiate 4 CPU threads to run the model instead:
private class ImageAnalyzer(ctx: Context, private val listener: RecognitionListener) :
        ImageAnalysis.Analyzer {
  ...

  // TODO 1: Add class variable TensorFlow Lite Model
  // Initializing the flowerModel by lazy so that it runs in the same thread when the process
  // method is called.
  private val flowerModel: FlowerModel by lazy{

    // TODO 6. Optional GPU acceleration
    val compatList = CompatibilityList()

    val options = if(compatList.isDelegateSupportedOnThisDevice){
        Log.d(TAG, "This device is GPU Compatible ")
        Model.Options.Builder().setDevice(Model.Device.GPU).build()
    } else {
        Log.d(TAG, "This device is GPU Incompatible ")
        Model.Options.Builder().setNumThreads(4).build()
    }

  ...
}
- Change the model initializer to use this by adding
optionsto the method input:
private class ImageAnalyzer(ctx: Context, private val listener: RecognitionListener) :
        ImageAnalysis.Analyzer {

  private val flowerModel: FlowerModel by lazy{

    ...

    // Initialize the Flower Model
    FlowerModel.newInstance(ctx, options)
  }
}
- Run the app on a real device by selecting
TFL_Classify.startand press the run button on the toolbar:
9. What Next?
Here are some links for more information:
- Try out other TFLite models compatible with ML Model binding from tfhub.dev.
- Learn more about TFLite from the docs on tensorflow.org and the code repo.
- Try some other TFLite pretrained models including a speech hotword detector and an on-device version of smart-reply.
- Learn more about TensorFlow in general with our getting started docs.