1. Before you begin
In the previous codelab you created an app for Android and iOS that used a basic image labelling model that recognizes several hundred classes of image. It recognized a picture of a flower very generically – seeing petals, flower, plant, and sky.
To update the app to recognize specific flowers, daisies or roses for example, you'll need a custom model that's trained on lots of examples of each of the type of flower you want to recognize.
Prerequisites
- The previous Codelab in this learning path.
What you'll build and learn
- How to train an Image Classifier custom model using TensorFlow Lite Model Maker.
What you'll need
- No particular hardware is needed – everything can be completed using Google Colab in the browser.
2. Get Started
All of the code to follow along has been prepared for you and is available to execute using Google Colab here. If you don't have access to Google Colab, you can clone the repo and use the notebook called CustomImageClassifierModel.ipynb which can be found in the ImageClassificationMobile->colab directory.
If you have lots of examples of particular flowers, it is relatively easy for you to train a model with TensorFlow Lite Model maker to recognize them.
The easiest way to do this is to create a .zip or .tgz file containing the images, sorted into directories. For example, if you use images of daisies, dandelions, roses, sunflower and tulips, you can organize them into directories like this:
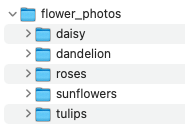
Zip that up and host it on a server, and you'll be able to train models with it. You'll use one that has been prepared for you in the rest of this lab.
This lab will assume you are using Google Colab to train the model. You can find colab at colab.research.google.com. If you're using another environment you may have to install a lot of dependencies, not least TensorFlow.
3. Install and import dependencies
- Install TensorFlow Lite Model Maker. You can do this with a pip install. The &> /dev/null at the end just suppresses the output. Model Maker outputs a lot of stuff that isn't immediately relevant. It's been suppressed so you can focus on the task at hand.
# Install Model maker
!pip install -q tflite-model-maker &> /dev/null
- Next you'll need to import the libraries that you need to use and ensure that you are using TensorFlow 2.x:
# Imports and check that we are using TF2.x
import numpy as np
import os

from tflite_model_maker import configs
from tflite_model_maker import ExportFormat
from tflite_model_maker import model_spec
from tflite_model_maker import image_classifier
from tflite_model_maker.image_classifier import DataLoader

import tensorflow as tf
assert tf.__version__.startswith('2')
tf.get_logger().setLevel('ERROR')
Now that the environment is ready, it's time to start creating your model!
4. Download and Prepare your Data
If your images are organized into folders, and those folders are zipped up, then if you download the zip and decompress it, you'll automatically get your images labelled based on the folder they're in. This directory will be referenced as data_path.
data_path = tf.keras.utils.get_file(
      'flower_photos',
      'https://storage.googleapis.com/download.tensorflow.org/example_images/flower_photos.tgz',
      untar=True)
This data path can then be loaded into a neural network model for training with TensorFlow Lite Model Maker's ImageClassifierDataLoader class. Just point it at the folder and you're good to go.
One important element in training models with machine learning is to not use all of your data for training. Hold back a little to test the model with data it hasn't previously seen. This is easy to do with the split method of the dataset that comes back from ImageClassifierDataLoader. By passing a 0.9 into it, you'll get 90% of it as your training data, and 10% as your test data:
data = DataLoader.from_folder(data_path)
train_data, test_data = data.split(0.9)
Now that your data is prepared, you can create a model using it.
5. Create the Image Classifier Model
Model Maker abstracts a lot of the specifics of designing the neural network so you don't have to deal with network design, and things like convolutions, dense, relu, flatten, loss functions and optimizers. For a default model, you can simply use a single line of code to create a model by training a neural network with the provided data:
model = image_classifier.create(train_data)
When you run this, you'll see output that looks a bit like the following:
Model: "sequential_2"
_________________________________________________________________
Layer (type)                 Output Shape              Param #
=================================================================
hub_keras_layer_v1v2_2 (HubK (None, 1280)              3413024
_________________________________________________________________
dropout_2 (Dropout)          (None, 1280)              0
_________________________________________________________________
dense_2 (Dense)              (None, 5)                 6405
=================================================================
Total params: 3,419,429
Trainable params: 6,405
Non-trainable params: 3,413,024
_________________________________________________________________
None
Epoch 1/5
103/103 [===] - 15s 129ms/step - loss: 1.1169 - accuracy: 0.6181

Epoch 2/5
103/103 [===] - 13s 126ms/step - loss: 0.6595 - accuracy: 0.8911

Epoch 3/5
103/103 [===] - 13s 127ms/step - loss: 0.6239 - accuracy: 0.9133

Epoch 4/5
103/103 [===] - 13s 128ms/step - loss: 0.5994 - accuracy: 0.9287

Epoch 5/5
103/103 [===] - 13s 126ms/step - loss: 0.5836 - accuracy: 0.9385
The first part is showing your model architecture. What Model Maker is doing behind the scenes is called Transfer Learning, which uses an existing pre-trained model as a starting point, and just taking the things that that model learned about how images are constructed and applying them to understanding these 5 flowers. You can see this in the first line that reads:
hub_keras_layer_v1v2_2 (HubK (None, 1280) 3413024
The key is the word ‘Hub', telling us that this model came from TensorFlow Hub. By default, TensorFlow Lite Model Maker uses a model called ‘MobileNet' which is designed to recognize 1000 types of image. The logic here is that the methodology that it uses, by learning ‘features' to distinguish between 1000 classes, can be reused. The same ‘features' can be mapped to our 5 classes of flowers, so they don't have to be learned from scratch.
The model went through 5 epochs – where an epoch is a full cycle of training where the neural network tries to match the images to their labels. By the time it went through 5 epochs, in around 1 minute, it was 93.85% accurate on the training data. Given that there's 5 classes, a random guess would be 20% accurate, so that's progress! (It also reports a ‘loss' number, but you safely ignore that for now.)
Earlier you split the data into training and test data, so you can get a gauge for how the network performs on data it hasn't previously seen – a better indicator of how it might perform in the real world by using model.evaluate on the test data:
loss, accuracy = model.evaluate(test_data)
This will output something like this:
12/12 [===] - 5s 115ms/step - loss: 0.6622 - accuracy: 0.8801
Note the accuracy here. It's 88.01%, so using the default model in the real world should expect that level of accuracy. That's not bad for the default model that you trained in about a minute. Of course you could probably do a lot of tweaking to improve the model, and that's a science unto itself!
6. Export the Model
Now that the model is trained, the next step is to export it in the .tflite format that a mobile application can use. Model maker provides an easy export method that you can use — simply specify the directory to output to.
Here's the code:
model.export(export_dir='/mm_flowers')
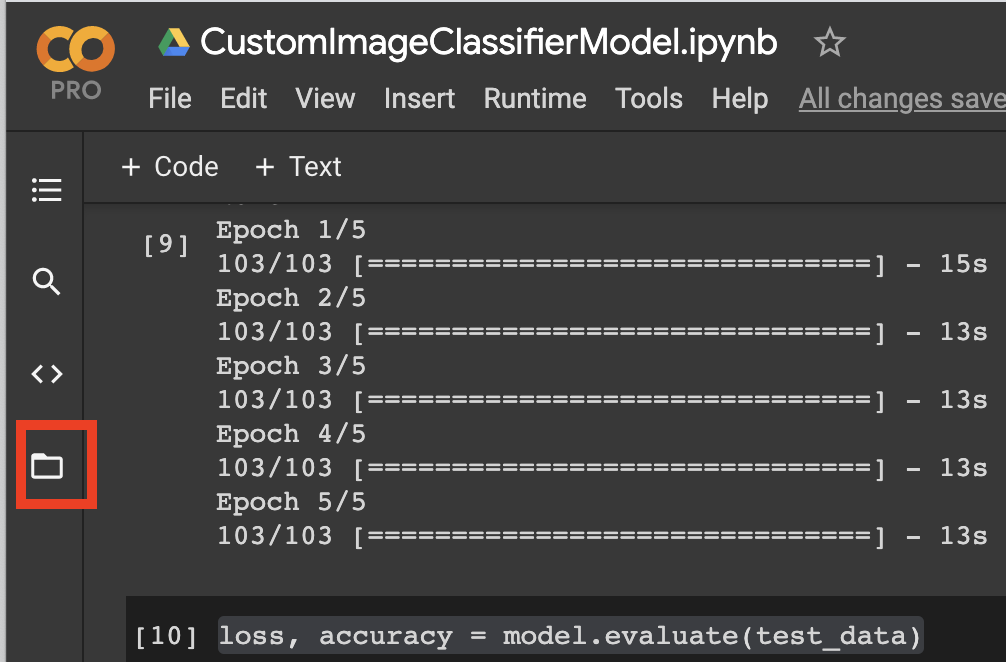
If you are running this in Google Colab, you can then see the model by clicking the folder icon on the left of the screen:
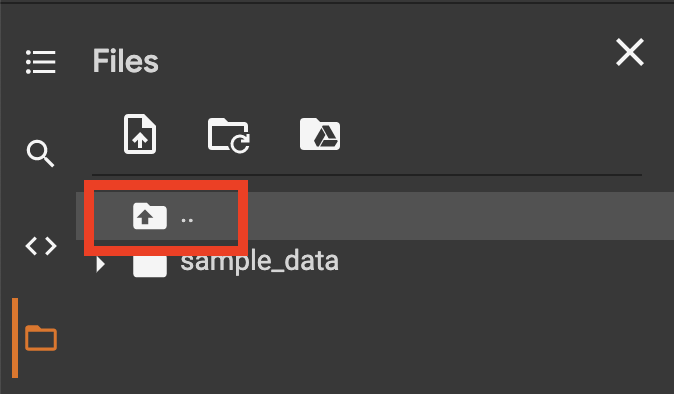
From here, you'll get a listing of the current directory. Use the indicated button to move "up" a directory:
In your code you specified to export to mm_flowers directory. Open that, and you'll see a file called ‘model.tflite'. This is your trained model.
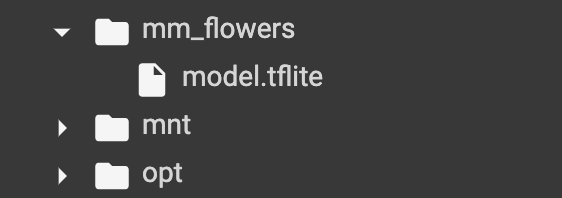
Select the file and you'll see 3 dots pop up on the right. Click these to get a context menu, and you can download the model from there.
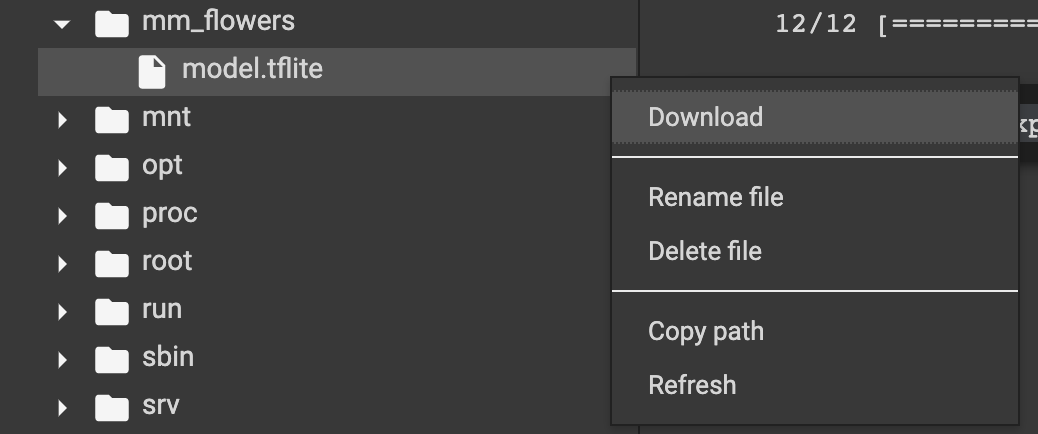
After a few moments your model will be downloaded to your downloads folder.
7. Congratulations
You're now ready to integrate it into your mobile app! You'll do that in the next lab.
