
1. Getting Started
Introduction to Projects in Google Cloud
Google Cloud projects form the basis for creating, enabling, and using all Google Cloud services including managing APIs, enabling billing, adding and removing collaborators, and managing permissions for Google Cloud resources.
A project provides a way to:
- Organize your cloud resources: It lets you keep related resources together, making them easier to manage, monitor, and understand.
- Isolate your environments: You can use separate projects to isolate different environments like development, testing, and production, ensuring that resources in one environment don't inadvertently affect others.
- Control access and permissions: Projects act as a security boundary. You can define Identity and Access Management (IAM) policies at the project level to control who has access to which resources and what actions they can perform within that project.
- Track usage and billing: All the resources within a project are associated with a single billing account, making it convenient to track the cost incurred by that specific set of resources.
- Manage quotas and limits: Many Google Cloud quotas and limits are applied at the project level.
The Importance of a Billing Account
A billing account in Google Cloud is linked to one or more projects and is used to pay for the resources consumed by those projects. It contains your payment information and allows Google Cloud to charge you for the services you use.
Here's why a billing account is crucial:
- Enables Resource Creation and Usage: You cannot create most billable resources in Google Cloud without a valid billing account linked to your project. Google Cloud needs a way to charge you for the services you consume. Without a billing account, the platform won't allow you to provision resources that incur costs.
- Cost Management and Tracking: The billing account provides a centralized view of all the costs incurred by the projects linked to it. You can monitor your spending, set budgets, and analyze cost trends across your projects.
- Payment and Invoicing: The billing account manages your payment methods and provides you with invoices for your Google Cloud usage.
- Service Enablement: Some services or features in Google Cloud might require a linked billing account to be enabled.
2. Redeem Credits
Now that you understand why a billing account is needed, we'd like you to get started setting up one and creating a Google Cloud project, without the need to provide your payment information.
Sign in and access your credits
- You should have received a link for credits. Navigate to the provided URL to claim the credits.
- If you are not already signed in to your Gmail account, click Sign in with Google and log in with the desired Gmail account.
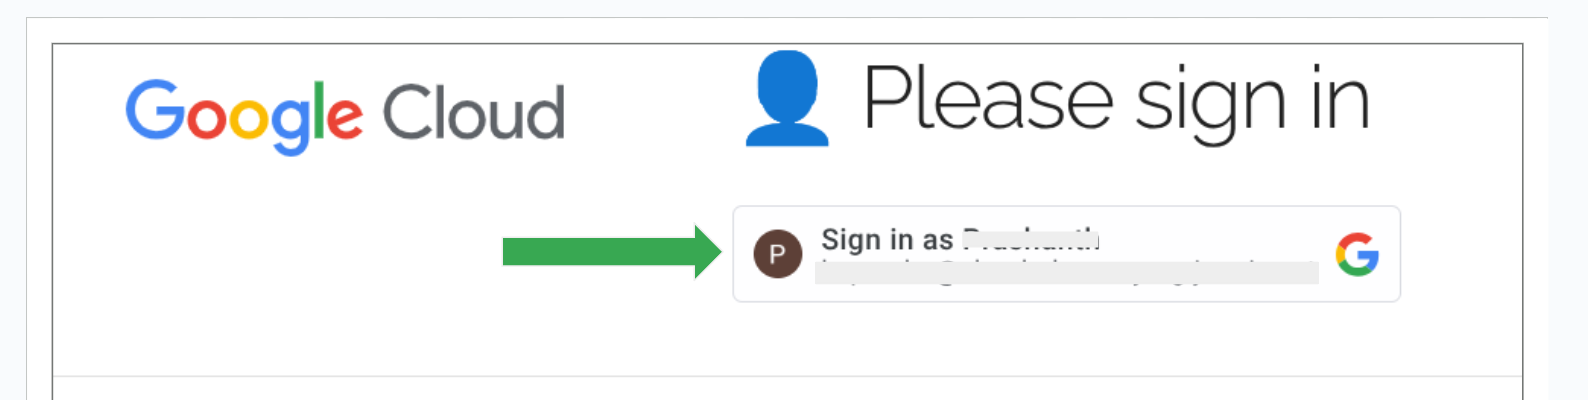
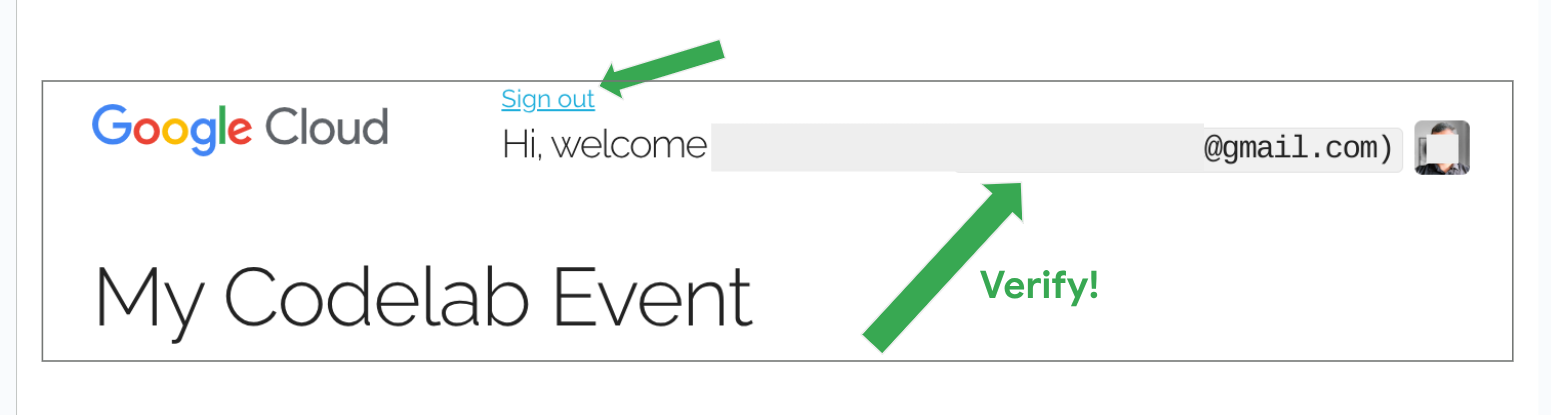
- Once signed in, please verify that you have signed in with the right account. This should be the same as the Google Cloud account that you will be using. You can sign out if needed, and sign back in with the right account.
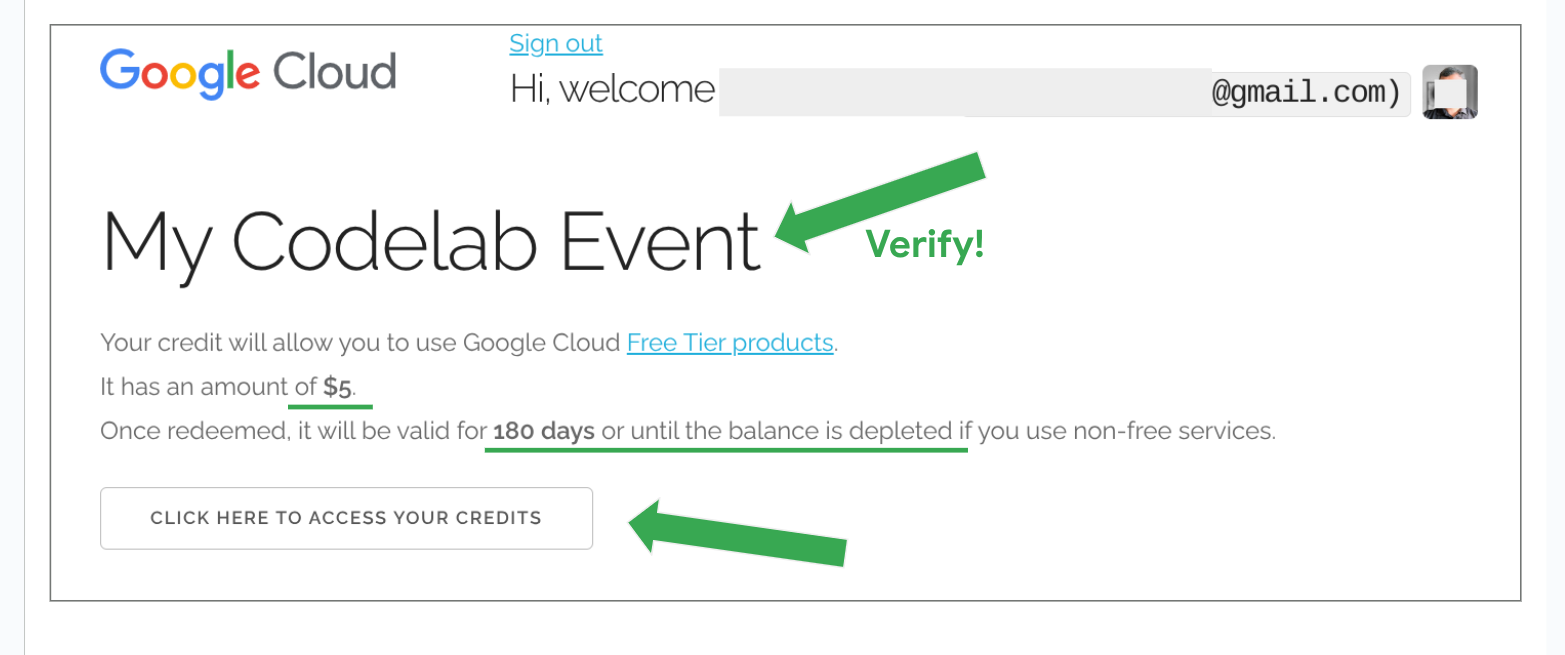
- Once signed in, you should see a page detailing the credit offer (e.g., amount, validity). Double check that you are seeing the name of the event / codelab in order to confirm that you are on the right URL. Click the button to access or redeem your credits (e.g., CLICK HERE TO ACCESS YOUR CREDITS).
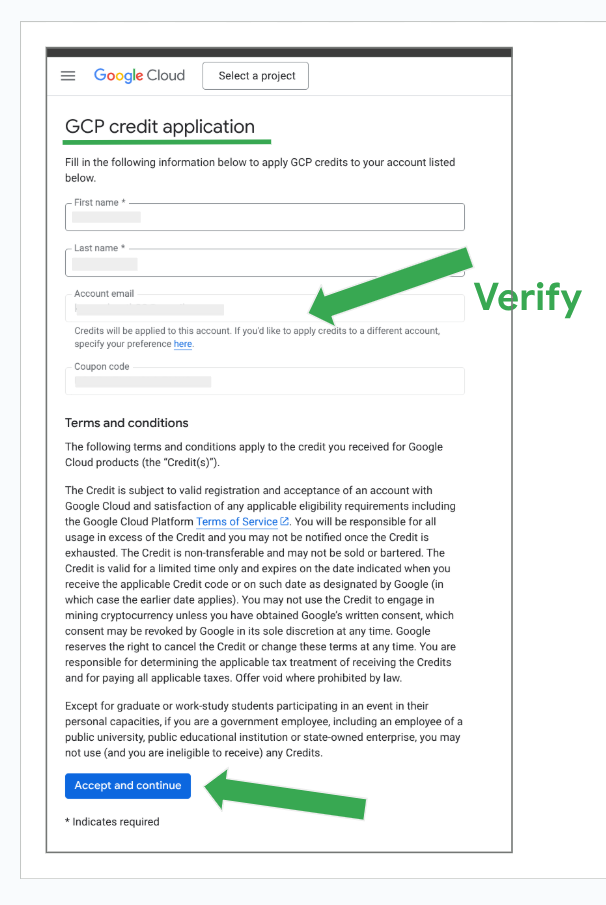
- On the GCP credit application form:
- Your First name and Last name would be pre-populated, but please verify it is correct.
- Verify that the Account email listed is the correct Gmail account you want the credits applied to.
- The Coupon code would be pre-populated and will be uneditable.
- Read the Terms and conditions.
- Click ACCEPT AND CONTINUE.
- Once this is done, you will be taken to the Google Cloud Billing Overview page. This is a confirmation that the credit has been successfully applied.
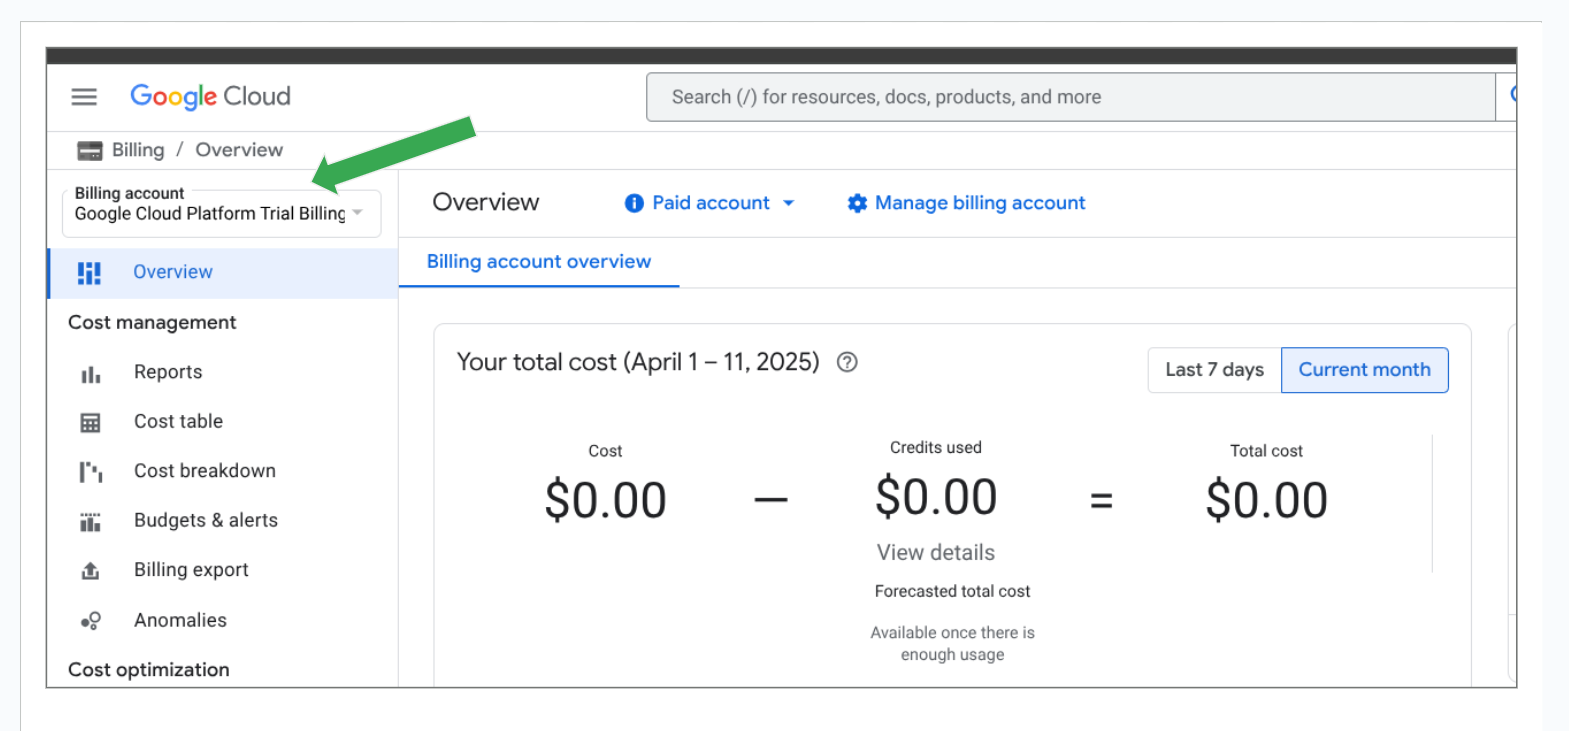
- If you'd like to verify that the provided amount is credited, then you can click on the
creditsnavigation link on the left and view the original credit provided and the remaining credit at any point of time during your use of Google Cloud.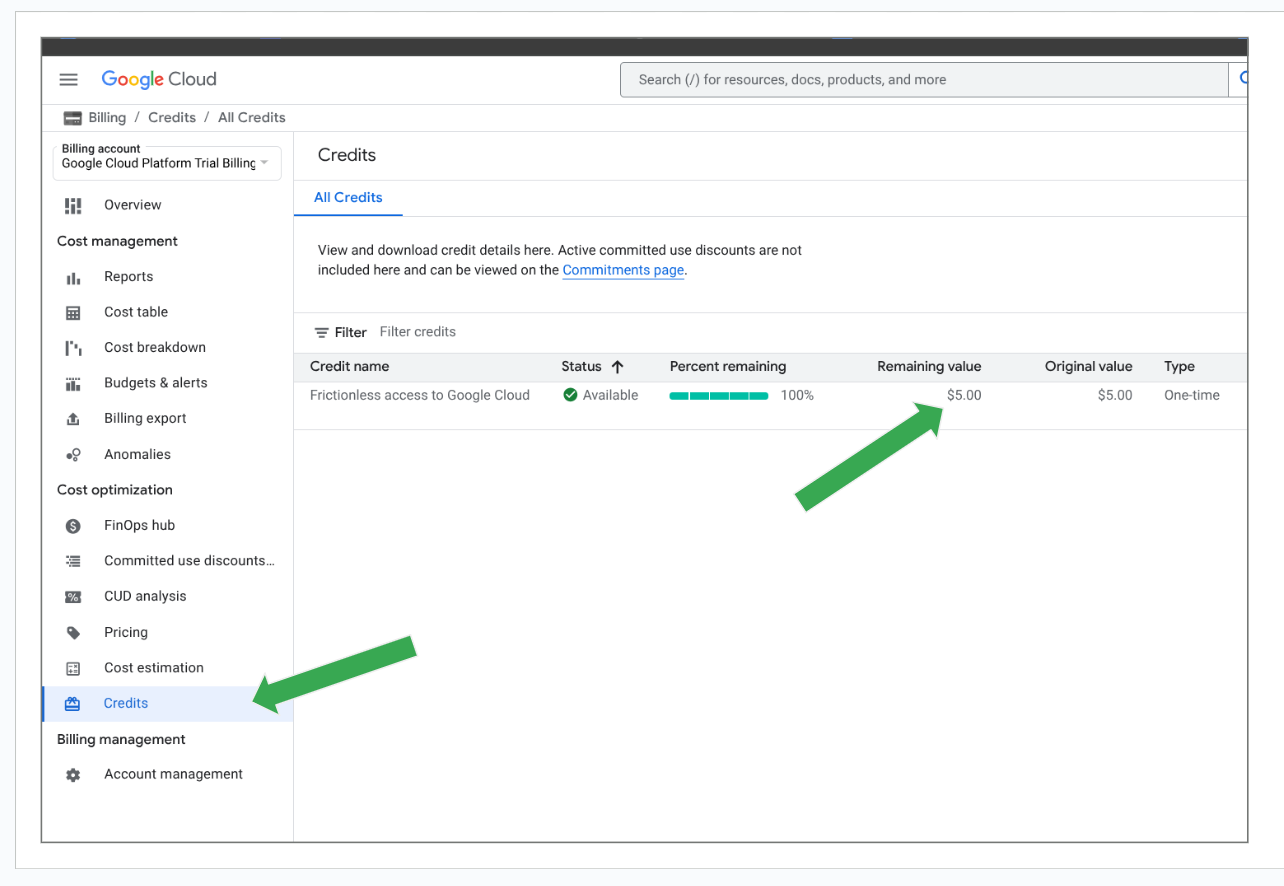
You have now claimed the provided credits. Next, create a project.`
3. Create a Project
Create a Google Cloud Project and associate a Billing Account
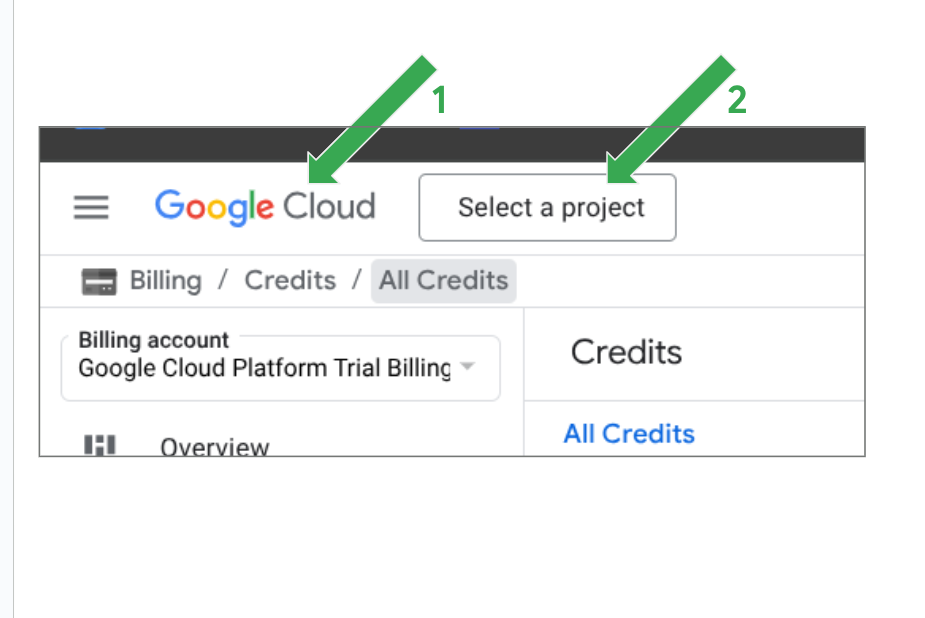
- Navigate to the Google Cloud Console: console.cloud.google.com or click on the Google Cloud text at the top of the page.
- In the top navigation bar, click the project selector dropdown (it might say "Select a project" or show an existing project name).
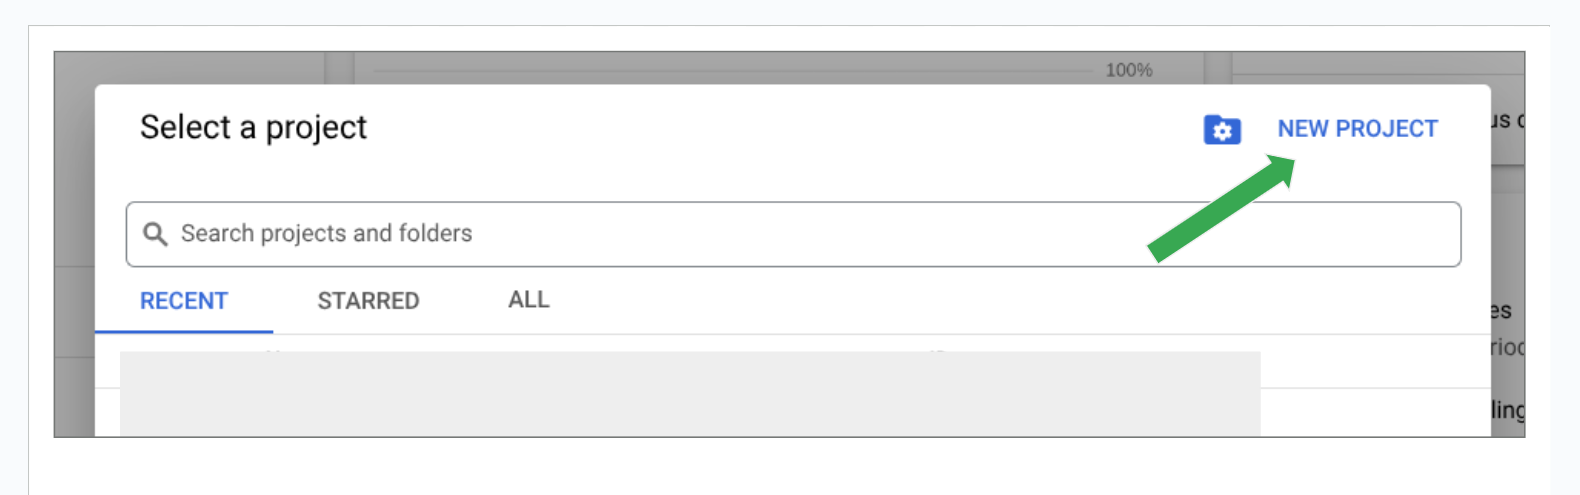
- In the "Select a project" dialog that appears, click NEW PROJECT.
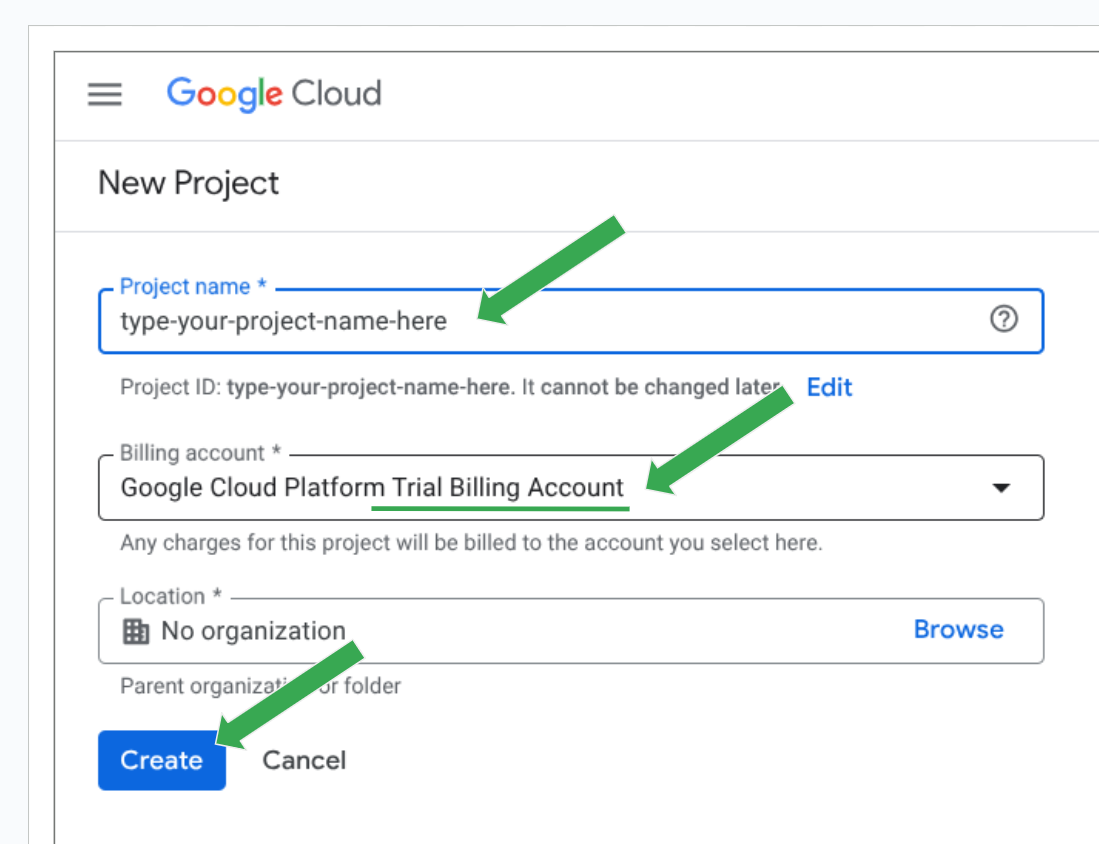
- In the "New Project" form:
- Enter a unique Project name (e.g.,
my-first-project). - For Billing account, select the appropriate account. If you just redeemed credits, you might see a "Trial Billing Account" or similar – select that one. If you have an existing billing account, select it. If you have just one billing account, it defaults to that and hence you may not see any field to select the billing account. This is ok, and you may proceed.
- Select No organization for Location unless you are specifically instructed otherwise.
- Click CREATE.
- Enter a unique Project name (e.g.,
- When the project is successfully created, you will be dropped into the dashboard page, and you will see the project that you just created in the project selector. You will also see the
project name, andproject idin the dashboard in theProject Infotile. Thisproject idis important, keep a note of it, or where to find it when needed.
- (Conditional) Link Billing Account: If you couldn't select a billing account during project creation, or you'd like to verify if the billing account was linked - a. Wait for the project creation to complete. b. Navigate to Billing using the left-hand navigation menu in the Google Cloud Console. You may also type in the word "billing" in the search bar at the top and navigate to the
Billing Accountssection. c. If you see a display that says
 This project has no billing account, then you should now link your billing account. Click onLink a billing accountlink.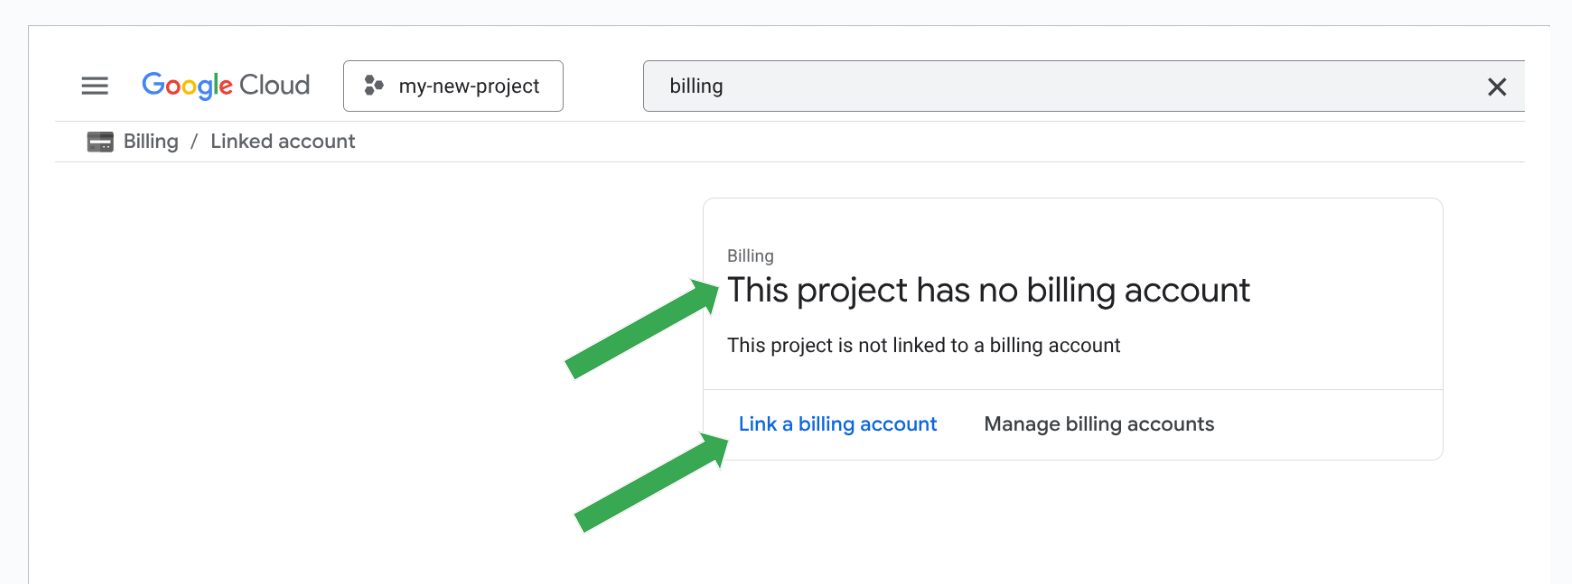 d. Select the correct billing account (e.g., "Google Cloud Platform Trial Billing Account") and confirm by clicking on
 Set account.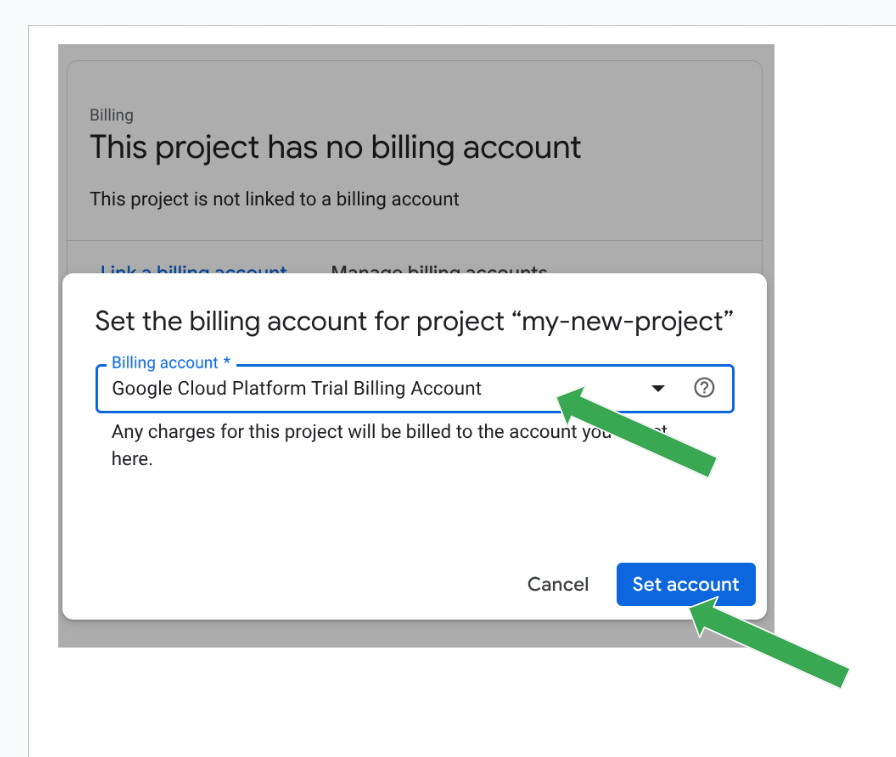 e. You may be taken back to the billing overview screen once the credit is linked.
You have now successfully claimed your credits and created a new Google Cloud project. You may now proceed with the lab.
4. Conclusion
These are learning credits that you can use to run and execute the provided codelab. You are not required to provide your credit card or other payment details in order to redeem these credits.
These credits last for 6 months, or until the credited amount is fully consumed. You may use these credit to attempt other codelabs, or even build out your own ideas and prototypes on Google Cloud, as long as you don't consume all the credits.
If this is your first time on Google Cloud, you might also be eligible to claim the 90-day, $300 Free Trial offer