
1. Introduction
In this lab, you'll use Gemini Code Assist, an AI-powered collaborator in Google Cloud. You'll get familiar with how you can use Gemini Chat and inline code assistance to generate code, understand code and other AI assisted coding tasks.
What you'll do...
- You'll use Cloud Shell IDE to download an existing code template for a Web application.
- You'll use Gemini Chat in Cloud Shell IDE to ask general questions about Google Cloud.
- You'll use Gemini Code Assist Inline code assistance in Cloud Shell IDE to generate, summarize and complete code.
What you'll learn...
- How to use Gemini Code Assist for several developer tasks like code generation, code completion and code summarization.
- How to use Cloud Assist to learn about Google Cloud.
What you'll need...
- Chrome web browser
- A Gmail account
- A Cloud Project with billing enabled
- Gemini Code Assist enabled for your Cloud Project
This lab is targeted to developers of all levels, including beginners. Although the sample application is in Python language, you don't need to be familiar with Python programming in order to understand what's going on. Our focus will be on getting familiar with the capabilities of Gemini Code Assist for developers.
2. Setup
This section covers everything you need to do to get started with this lab.
Enable Cloud Assist in the Google Cloud Project
We will now enable Cloud Assist in our Google Cloud Project. Follow the steps given below:
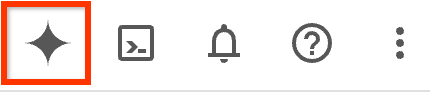
- Visit https://console.cloud.google.com and ensure that you have selected the Google Cloud Project that you plan to work with for this lab. Click on the Open Gemini icon that you see in the top right.
- Cloud Assist chat window will open up on the right side of the console. Click on the button as shown below. It will show another screen, where it will highlight the APIs that it is enabling, etc. Go with the default and click on the Enable button.
If you do not see the Enable button and instead see a Chat interface, it is likely that you have already enabled Cloud Assist for the project and you can directly go to the next step.

- Once it is enabled, you can test out Cloud Assist by asking for a prompt or two. A few sample queries are shown but you can try something like
What is Cloud Run?
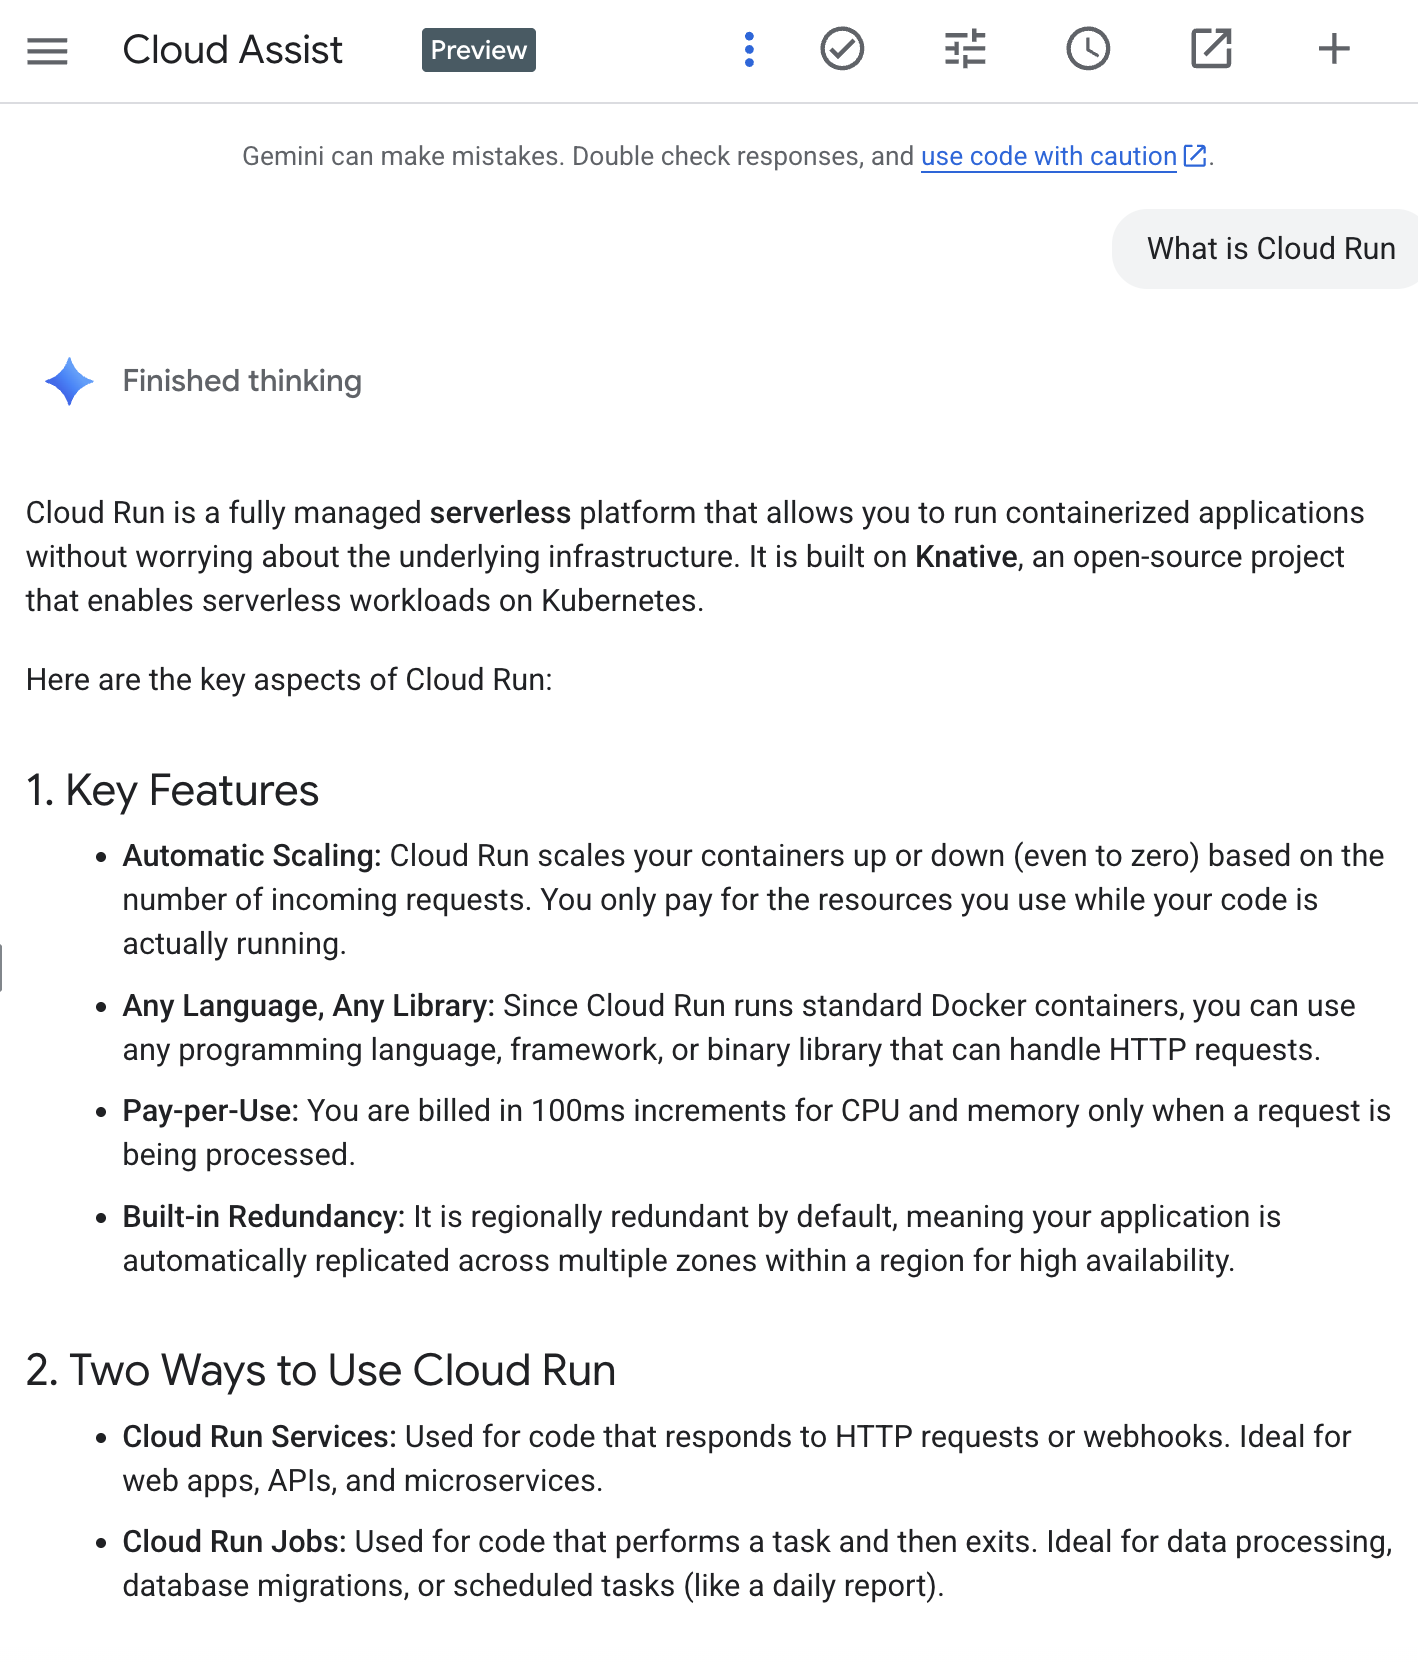
Cloud Assist will respond with the answer to your question. You can click on the X icon on the top right corner to close the Cloud Assist chat window.
Enable Gemini Code Assist in Cloud Shell IDE
We will be using Cloud Shell IDE, a fully-managed Code OSS-based development environment, for the rest of the codelab. We need to enable and configure Code Assist in the Cloud Shell IDE and the steps are given below:
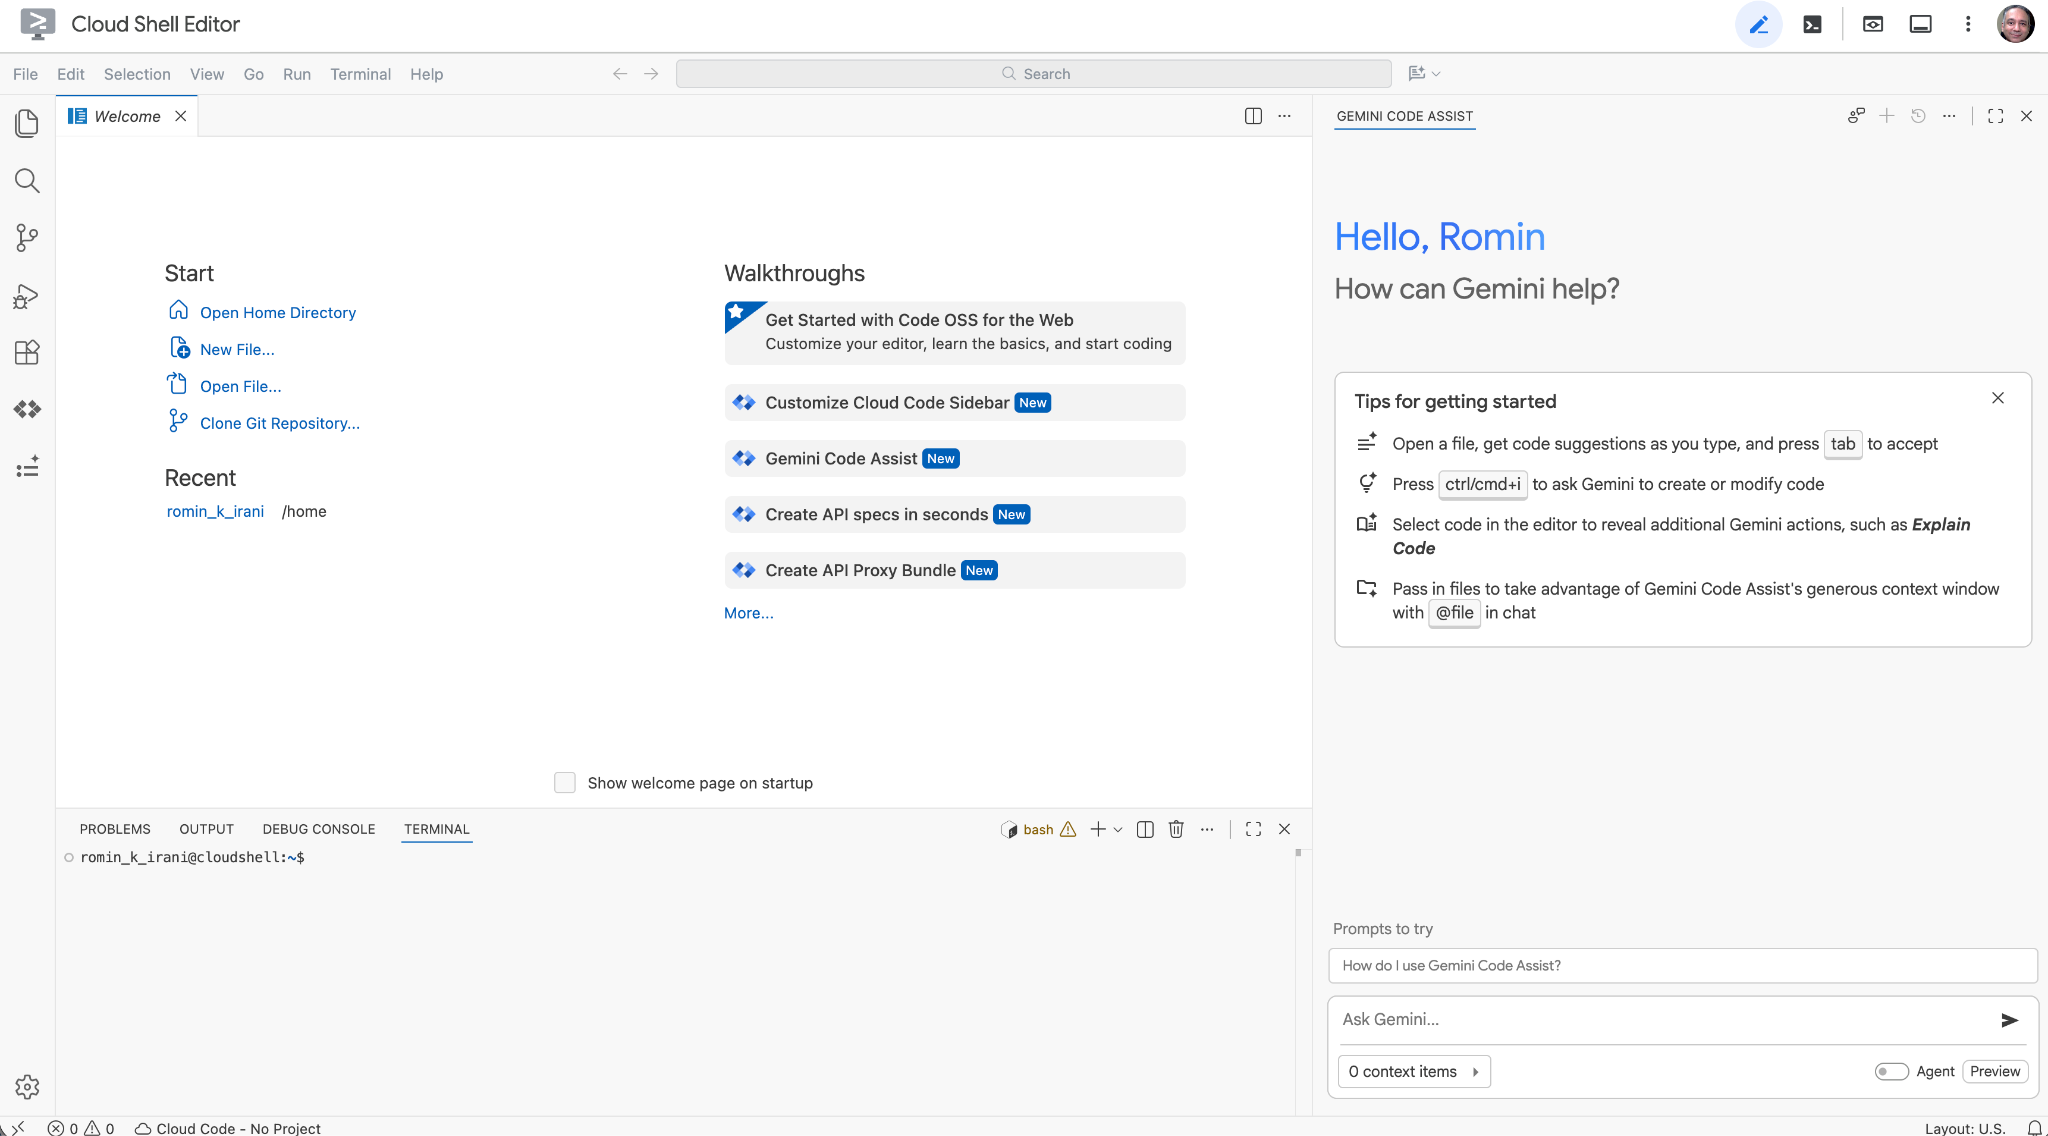
- Visit ide.cloud.google.com. It may take a while for the IDE to appear, so please be patient. You will see a screen similar to the one shown below. Gemini Code Assist window would have opened up in the rightmost pane.
- If you see Cloud Code - Sign in button in the bottom status bar, then click and authorize the plugin as instructed. If you see "Cloud Code - no project" in the status bar, select that and then select the specific Google Cloud Project from the list of projects that you plan to work with.
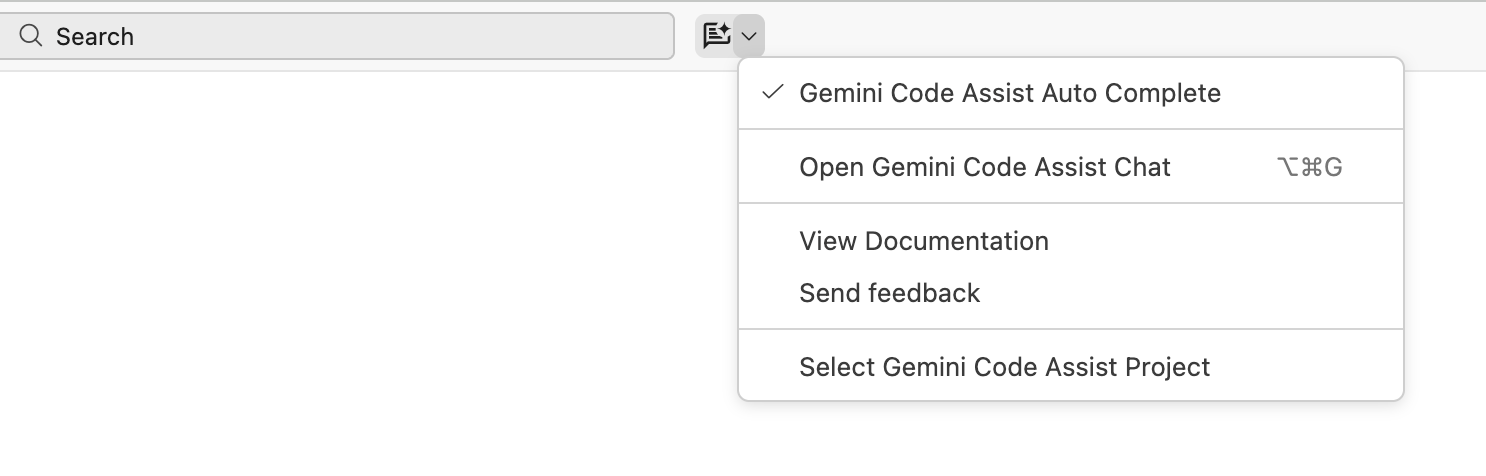
- You can toggle the Gemini Code Assist at any time via the Gemini Chat drop down that is to the right of the Search bar as shown below. Click on the Open Gemini Code Assist Chat option to make the Gemini Code Assist Chat appear in the right pane.
Gemini Code Assist is ready to use!
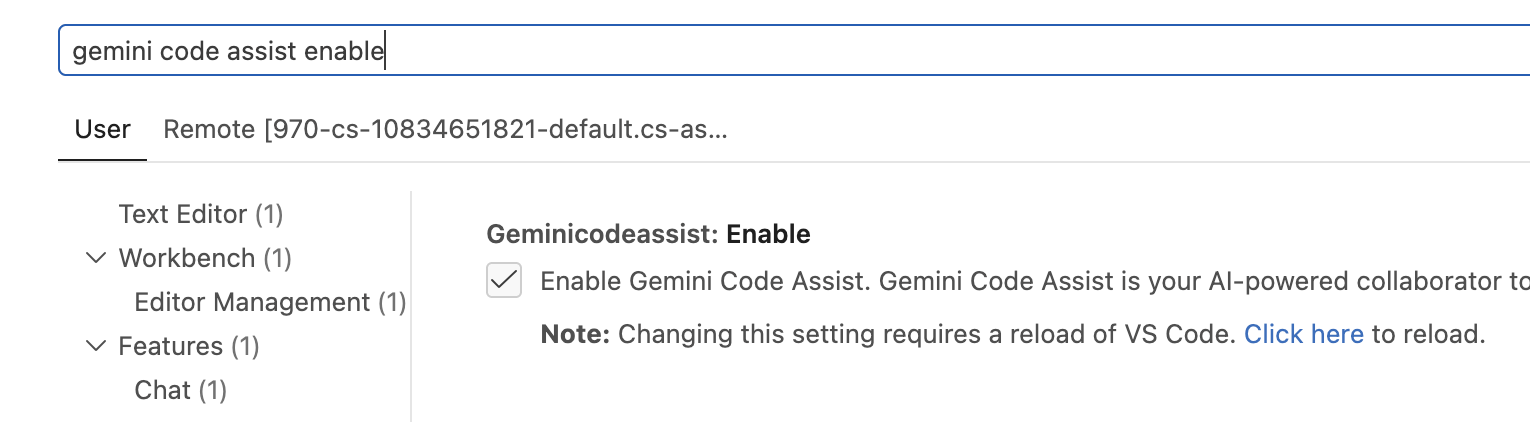
Optional: If you are not able to see the Gemini Code Assist pane in the IDE, check if Gemini Code Assist has been enabled. To do that, go into the Settings and then search for Gemini Code Assist Enable as shown below. The setting should be selected.
3. Create the Sample application
We will create a sample application (a Python Flask application) that we will use to explore Gemini Code Assist's features.
Follow these steps:
- Click on the Google Cloud project name in the status bar below.

- A list of options will appear. Click on New Application from the list below.
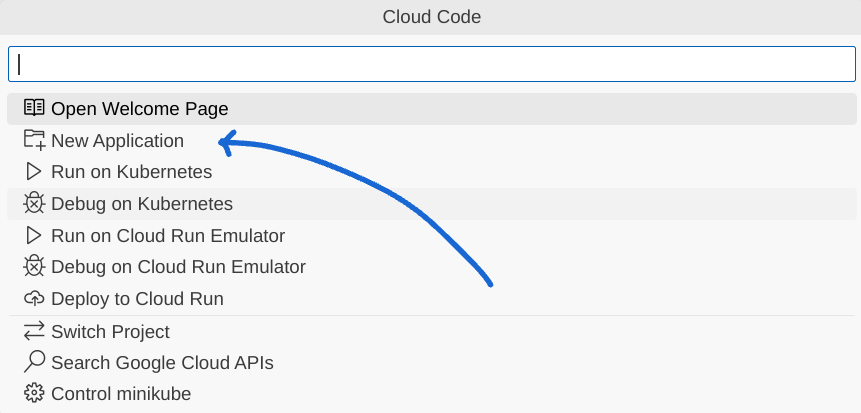
- Select Cloud Run application.
- Select the Python (Flask): Cloud Run application template.
- Save the new application in your preferred location.
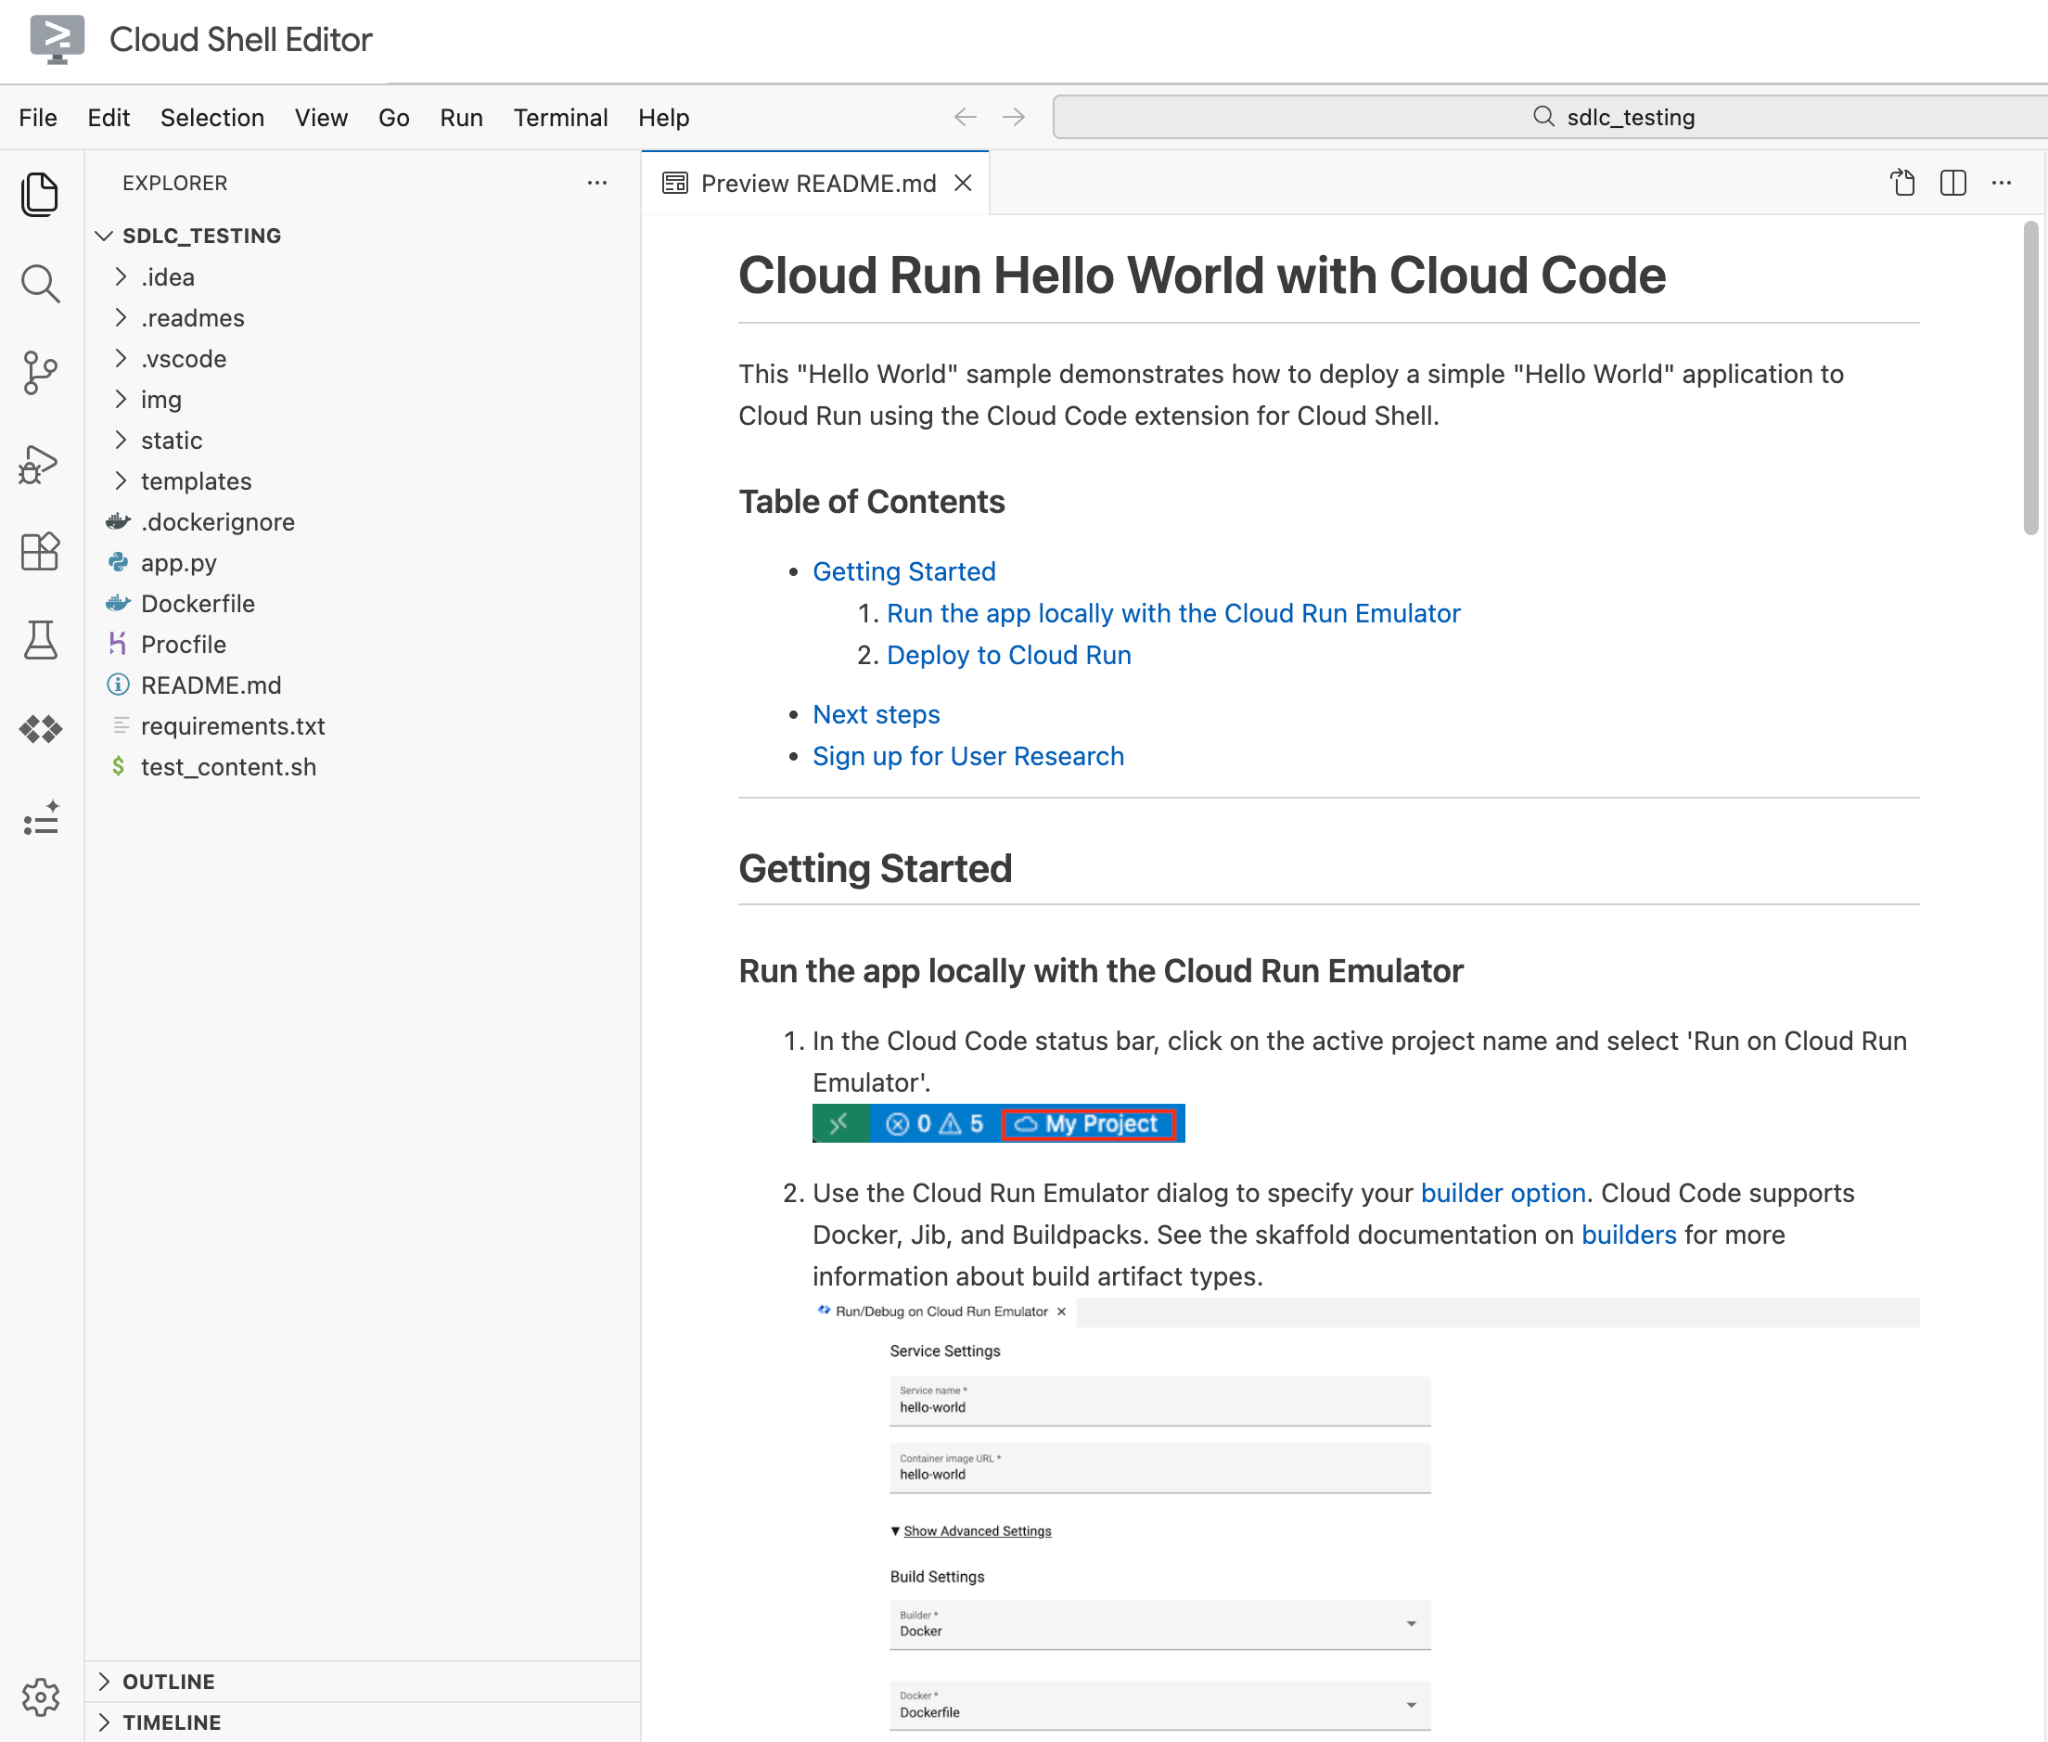
- A notification confirms that your application was created, and a new window opens with your application loaded as shown below. A
README.mdfile is opened. You can close that view for now.
4. Chat with Gemini
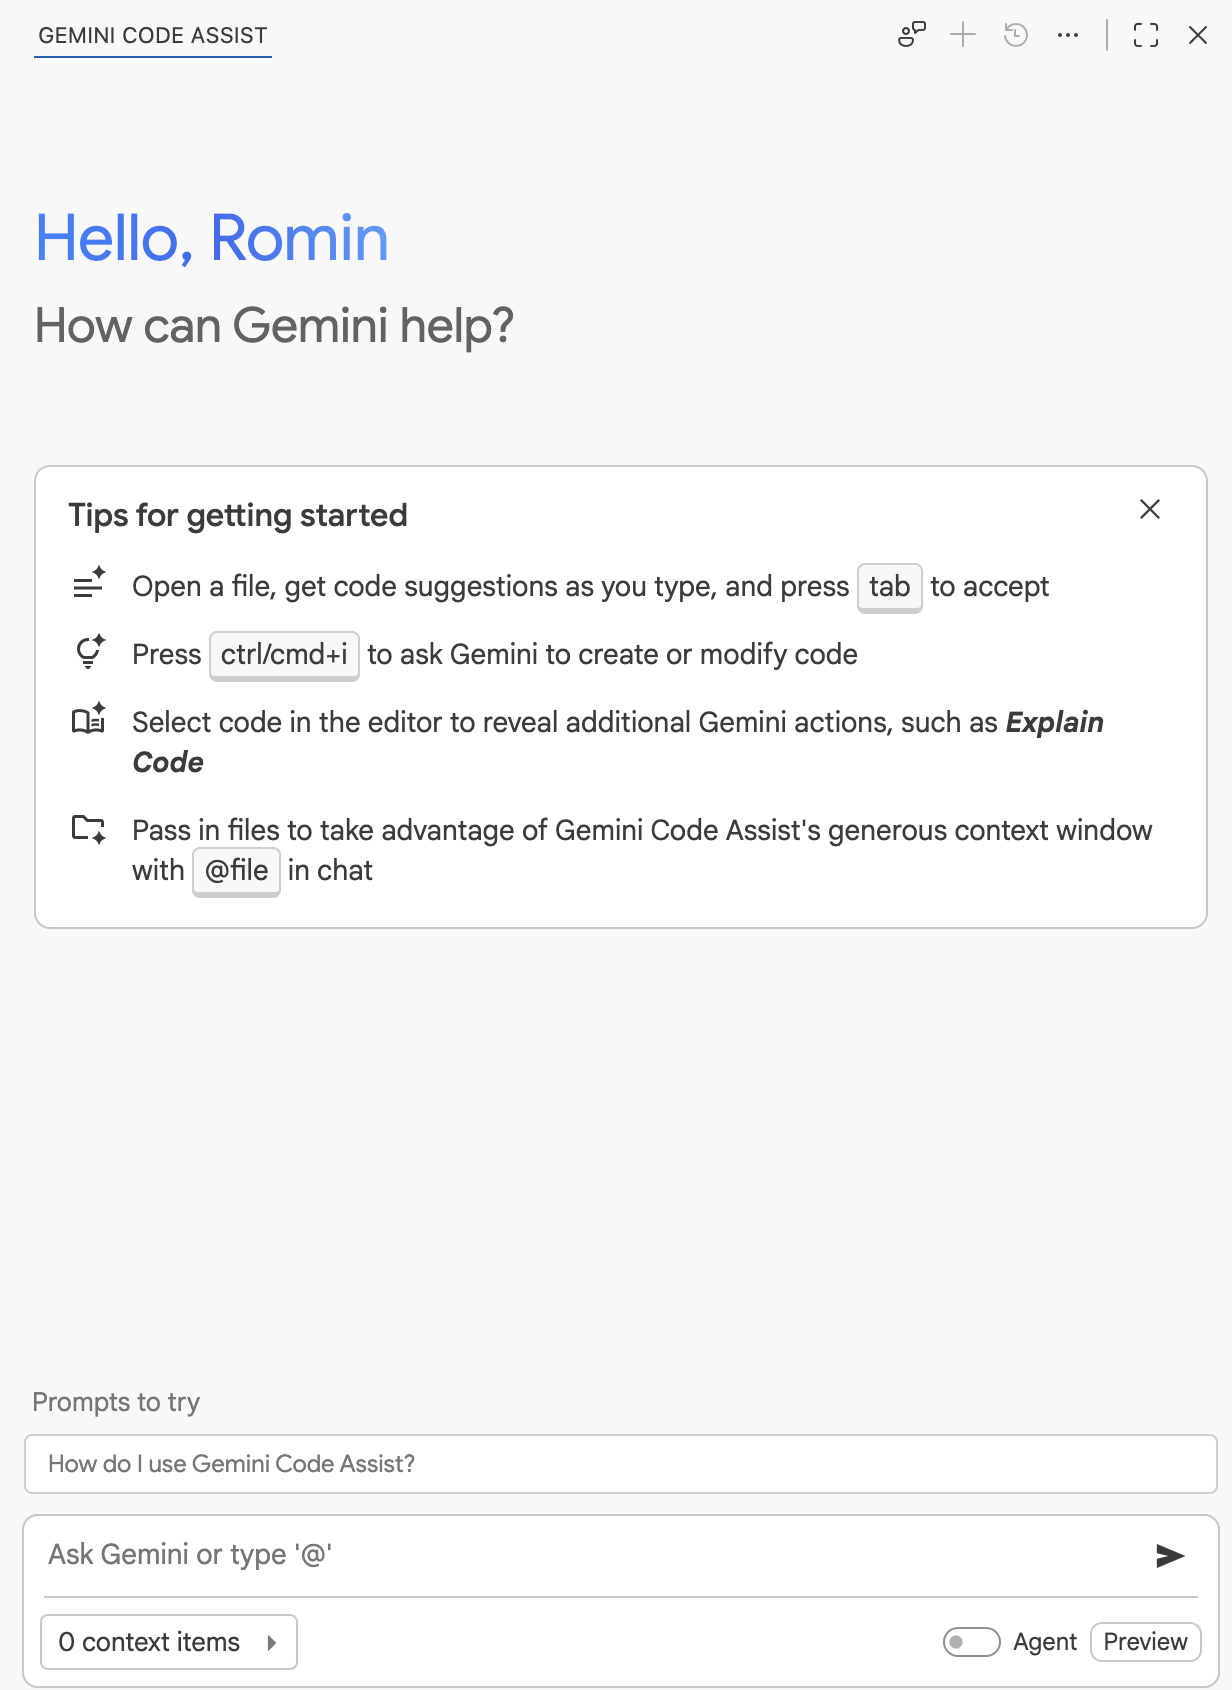
We're going to start by learning how to chat with Gemini. Bring up the Gemini Code Assist Chat in the right panel as explained earlier.
Once you do that, you can chat with Gemini to get help on Google Cloud.
Let us use the Gemini chat pane to enter a prompt and view the response from Gemini. Enter the following prompt:
What is Cloud Run?
Gemini should respond with the details about Cloud Run. Prompts are questions or statements that describe the help that you need. Prompts can include context from existing code that Google Cloud analyzes to provide more useful or complete responses. For more information on writing prompts to generate good responses, see Write better prompts for Gemini in Google Cloud.
Try out the following sample prompts or any of your own to ask questions about Google Cloud:
What is the difference between Cloud Run and Cloud Functions?What services are available on Google Cloud to run containerized workloads?What are the best practices to optimize costs while working with Google Cloud Storage?
5. Code Explanation
To help you be more productive while minimizing context switching, Gemini Code Assist provides AI-powered smart actions directly in your code editor. When you select your code in your code editor, you can view and select from a list of actions relevant to your context.
You can use Gemini Code Assist to help you understand parts of the application code. Return to the application that we had created in a previous step and you can use Gemini Code Assist to explain the files and code that are available in your IDE.
- If the files are not visible, in the IDE activity bar, click Explorer (
 ).
). - In the Explorer pane, select Dockerfile.
- You can select any portion of the file contents, click the bulb (
 ), and then click Gemini: Explain this. For example, select the line that begins with ENTRYPOINT, click the bulb ( ), and then click Gemini: Explain this. Gemini generates a natural-language explanation about the specific section of the Dockerfile that you need more information on. Gemini responds with details about the ENTRYPOINT instruction. You learn that, with this instruction, Docker will run the
 app.pyfile when the container launches. - To view the contents of the
app.pyfile, in the activity bar, click Explorer (), and then select app.py. - In the hello() function definition, feel free to select the lines that you would like to get more information on. Then click the bulb ( ), then click Gemini : Explain this. In our example, we selected the following two lines of code and then triggered the Gemini: Explain this action.

- Gemini responds with a detailed explanation of these two Cloud Run environment variables (
K_SERVICE, K_REVISION) and how they are used in the application code. Do note that Gemini with its knowledge of Google Cloud and services like Cloud Run has not only explained the Python code but also given the context of what those variables mean within Cloud Run.
Try out the following additional ways to get a code explanation:
- Keep app.py as the currently opened file in the IDE. Go to the Gemini chat pane in the left navigation bar in VS Code and enter the prompt Explain this file. This will consider the whole file and explain it to you.
- You can also select any part of the file and then use the Gemini chat pane on the left, enter the prompt Explain this. This will explain only the selected part of the file. This is similar to you clicking the bulb( ) and then clicking Gemini: Explain this.
6. Generate code with prompts
This section shows you how to use Gemini Code Assist to generate code from comments.
Let's try out these features. Follow the steps given below:
- Create a new file named
utils.py. - In your new code file, on a new line, enter
# Function to print a list of blobs in a Google Cloud Storage bucket, and then pressEnter(for Windows and Linux) orReturn(for MacOS). Gemini may try to generate code as you type but don't accept it. We will specifically trigger the code generation in the next step. - To trigger code generation, press
Control+Enter(for Windows and Linux) orControl+Return(for MacOS). Next to your prompt text in the Python file, Gemini Code Assist generates the code in the form of ghost text. It will provide you one or more suggestions for code with a toolbar, through which you can navigate from one code suggestion to another (in case there are multiple suggestions). You can even accept any of the code suggestions via the toolbar. In case you cannot see the toolbar or it disappears, hover over the generated code for it to appear again. - Optional: To accept the generated code, press
Tab. In case there are multiple suggestions, you can pressTabmultiple times to navigate from one suggested code snippet to the next.
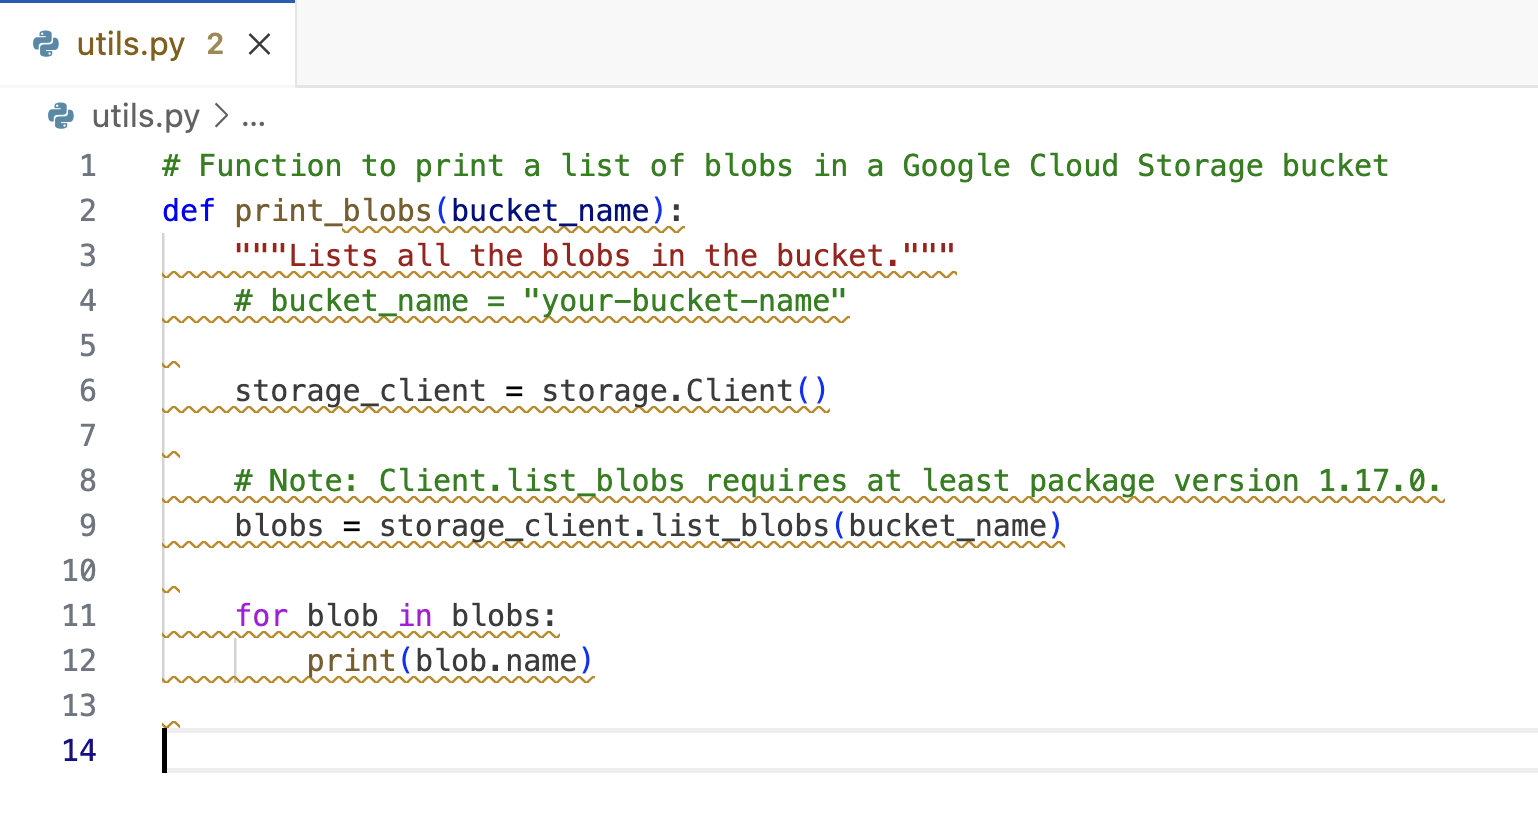
This will insert the code that you accepted in the utils.py file. A sample screenshot is shown below. The code that is provided to you might differ from the one shown below. If additional methods are generated, you can delete those methods after accepting the code.
(Optional) Here are a few other suggestions to try out for code generation:
- You can also use the Gemini chat feature to ask the same prompt and get the response in the chat window. The Chat interface then displays options to copy the code or insert into the current file.
- Try out your own prompts for sample code that you would like. A few suggestions are given below (assuming that you are in one of the python files): or choose from some of the prompts given below:
- Write Python code to publish a message to Google Cloud Pub/Sub
- Write Python code to initialize a BigQuery client
- Write Python code to connect my application to Cloud SQL
7. Get inline code suggestions while you code
While you write code, Gemini Code Assist makes inline code suggestions that you can either accept or ignore. To try this feature, we will modify the utils.py file that we created in the previous section :
- Open the
utils.pyfile as the current file in the Cloud Shell IDE. - One of the things that we can do is to provide the correct
importstatements, if they are not there in the generated code. - Start typing the word
importand you should see Gemini Code Assist suggesting code in the form of ghost text. To accept the code suggestion from Gemini Code Assist, pressTab. Otherwise, to ignore the suggestion, pressEscor continue writing your code. In the sample screen below, it suggests importing thestorageclass since it is being used in the code. PressTabto accept the code suggestion. It is also suggestedimport osstatement, but since it is not needed, we can remove it.

- Go to the end of the
utils.pyfile and add the line to invoke the function, if it is not provided. In the case here, it is theprint_blobsfunction or it could be a different function in your case. You can just start typing the function name and code complete will help you finish the statement. - You will need to provide the bucket_name and you can use the following public bucket name :
gemini-codeassist-bucket.The sample invocation for the function is shown below. Please note that you might see minor differences in terms of function names, etc.
print_blobs(bucket_name="gemini-codeassist-bucket")
(Optional) Run the sample code
Since we wrote code to list down the blobs in a Google Cloud Storage bucket, we will need to install the google-cloud-storage Python library.
Go to the requirements.txt file and add a new line with google-cloud-storage dependency as shown below. A sample requirements.txt file is shown below.
Flask==2.3.3
requests==2.31.0
debugpy # Required for debugging.
google-cloud-storage
Save the requirements.txt file.
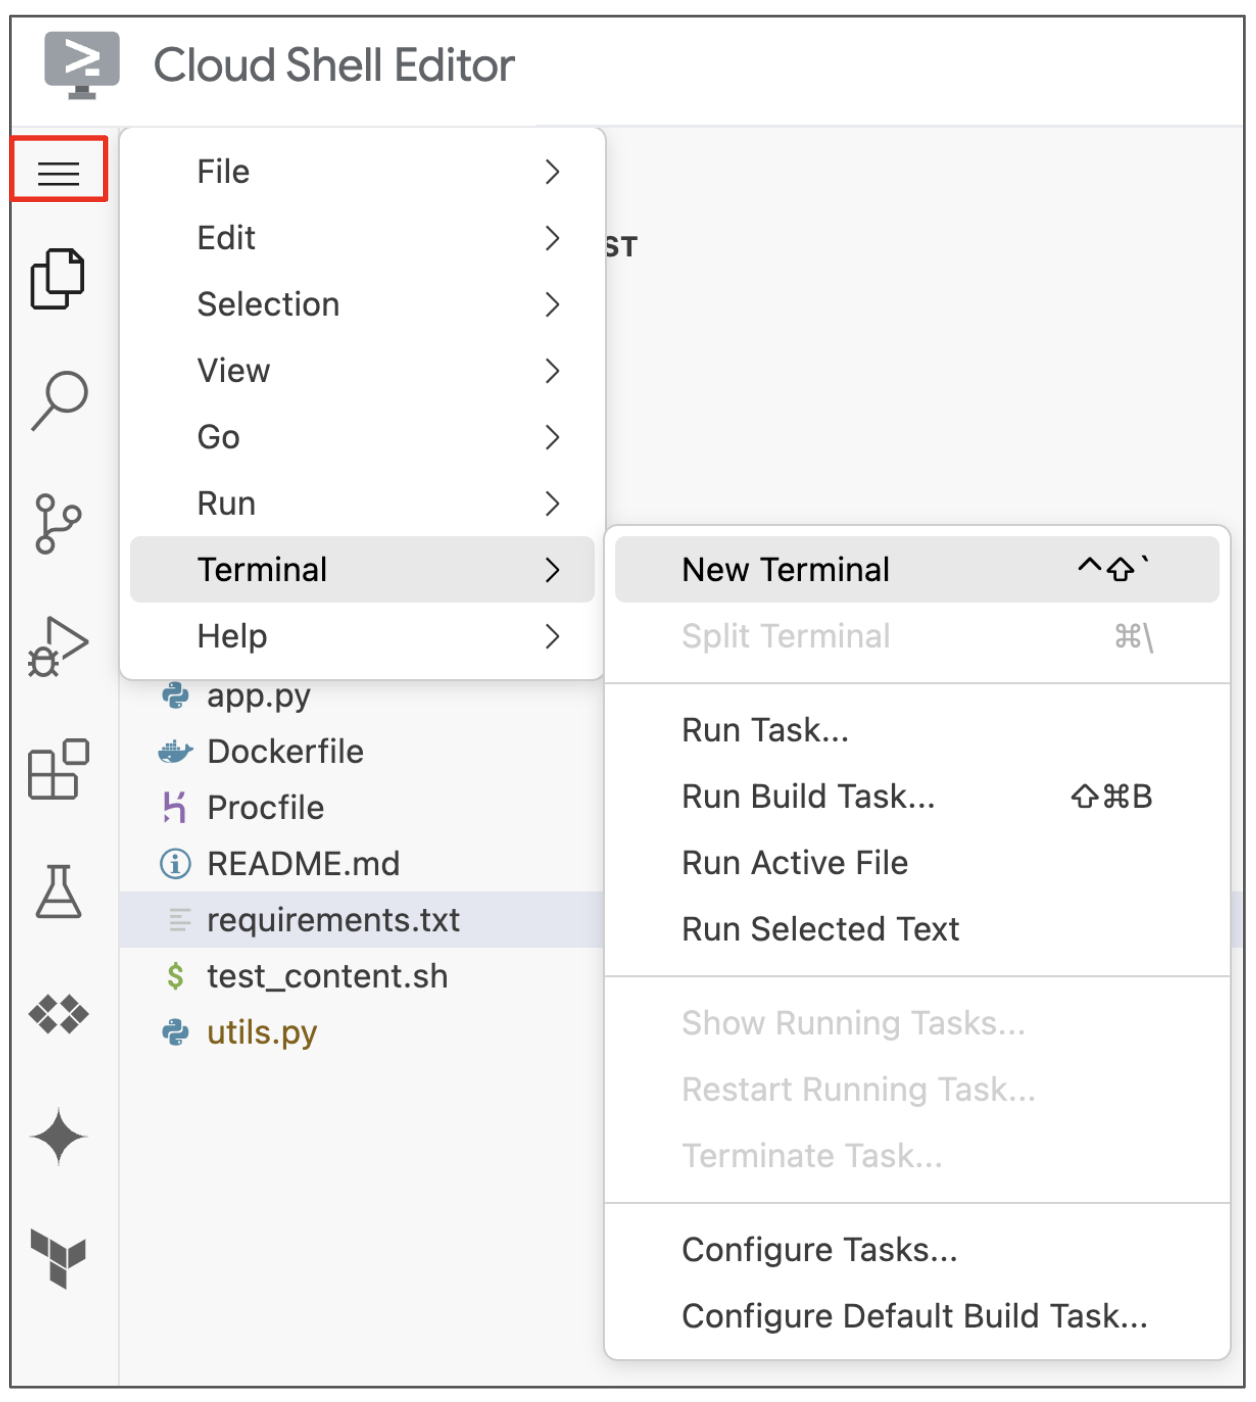
To see the code in action, we will need to launch a new Terminal session from Cloud Shell IDE via the menu icon in the top left. Click on the menu icon and then Terminal → New Terminal as shown below:
In the Terminal session, install the Python dependencies via the following command:
pip3 install -r requirements.txt
Finally, you can run the utils.py file via the following command:
python utils.py
This should display the blobs that are present in the public Google Cloud Storage bucket. You should ideally see 2 blobs listed in the output (file1.txt and file2.txt).
Troubleshooting
In case you receive an "access" error while displaying the objects in the above public bucket, you can opt to create your own Google Cloud Storage bucket and use that instead of gemini-codeassist-bucket. The next section shows you how to do that.
(Optional) Create your own Cloud Storage bucket
Let us take the help of Gemini to provide us commands to create a bucket, make it publicly accessible and upload sample objects into the bucket.
Start with the following prompt: "What is the gcloud command to create a public bucket in Google Cloud Storage?"
This should provide you with a gcloud command to create a bucket. The exact command is shown below:
gcloud storage buckets create gs://<BUCKET_NAME>
Select a unique name for the <BUCKET_NAME> and execute the command in the terminal.
Now that we have created a bucket, we would like the bucket to be publicly accessible. Let's ask Gemini for the command to do that using the following prompt: "How do I make a google cloud storage bucket publicly accessible?"
This should provide you with a gcloud command to make it publicly accessible. The response should be something like this:
gcloud storage buckets add-iam-policy-binding gs://<BUCKET_NAME> --member=allUsers --role=roles/storage.objectViewer
Replace the <BUCKET_NAME> with the bucket name that you used earlier and execute the command.
Finally, we would like to upload a few sample files to the bucket. Execute the following commands in the terminal (Remember to substitute the <BUCKET_NAME> variable with your bucket name.
touch f1.txt
touch f2.txt

gcloud storage cp f1.txt gs://<BUCKET_NAME>
gcloud storage cp f2.txt gs://<BUCKET_NAME>
You can now execute the utils.py file by using your <BUCKET_NAME> instead of the gemini-codeassist-bucket.
Cleanup
If you have created your own Google Cloud Storage bucket, we strongly recommend deleting the bucket to avoid any charges and potential security risks.
You can delete the bucket with the command given below:
gcloud storage buckets delete gs://<BUCKET_NAME>
8. Congratulations!
Congratulations - you've successfully worked with Gemini Code Assist on a sample project to understand how it can assist with Code Generation, Code Completion, Code Summarization and help you with getting answers to questions about Google Cloud.