
1. Overview
Google Cloud Text-to-Speech API allows developers to include natural-sounding, synthetic human speech as playable audio in their applications. The Text-to-Speech API converts text or Speech Synthesis Markup Language (SSML) input into audio data like MP3 or LINEAR16 (the encoding used in WAV files).
In this codelab, you will focus on using the Text-to-Speech API with Node.js. You will learn how to list available voices and also synthesize audio from text.
What you'll learn
- How to use the Cloud Shell
- How to enable the Text-to-Speech API
- How to Authenticate API requests
- How to install the Google Cloud client library for Node.js
- How to list available voices
- How to synthesize audio from text
What you'll need
Survey
How will you use this tutorial?
How would you rate your experience with Node.js?
How would you rate your experience with using Google Cloud Platform services?
2. Setup and Requirements
Self-paced environment setup
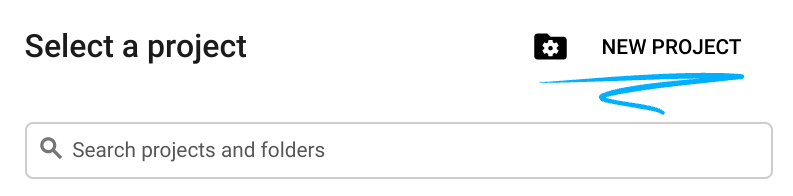
- Sign in to Cloud Console and create a new project or reuse an existing one. (If you don't already have a Gmail or G Suite account, you must create one.)

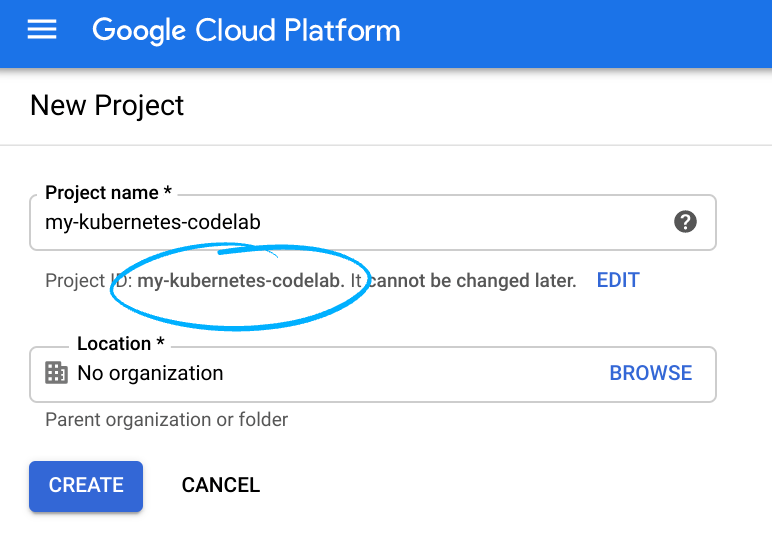
Remember the project ID, a unique name across all Google Cloud projects (the name above has already been taken and will not work for you, sorry!). It will be referred to later in this codelab as PROJECT_ID.
- Next, you'll need to enable billing in Cloud Console in order to use Google Cloud resources.
Running through this codelab shouldn't cost much, if anything at all. Be sure to to follow any instructions in the "Cleaning up" section which advises you how to shut down resources so you don't incur billing beyond this tutorial. New users of Google Cloud are eligible for the $300USD Free Trial program.
Start Cloud Shell
While Google Cloud can be operated remotely from your laptop, in this codelab you will be using Google Cloud Shell, a command line environment running in the Cloud.
Activate Cloud Shell
- From the Cloud Console, click Activate Cloud Shell
.

If you've never started Cloud Shell before, you'll be presented with an intermediate screen (below the fold) describing what it is. If that's the case, click Continue (and you won't ever see it again). Here's what that one-time screen looks like:

It should only take a few moments to provision and connect to Cloud Shell.

This virtual machine is loaded with all the development tools you'll need. It offers a persistent 5GB home directory and runs in Google Cloud, greatly enhancing network performance and authentication. Much, if not all, of your work in this codelab can be done with simply a browser or your Chromebook.
Once connected to Cloud Shell, you should see that you are already authenticated and that the project is already set to your project ID.
- Run the following command in Cloud Shell to confirm that you are authenticated:
gcloud auth list
Command output
 Credentialed Accounts
ACTIVE  ACCOUNT
*       <my_account>@<my_domain.com>

To set the active account, run:
    $ gcloud config set account `ACCOUNT`
gcloud config list project
Command output
[core]
project = <PROJECT_ID>
If it is not, you can set it with this command:
gcloud config set project <PROJECT_ID>
Command output
Updated property [core/project].
3. Enable the Text-to-Speech API
Before you can begin using the Text-to-Speech API, you must enable the API. You can enable the API by using the following command in the Cloud Shell:
gcloud services enable texttospeech.googleapis.com
4. Authenticate API requests
In order to make requests to the Text-to-Speech API, you need to use a Service Account. A Service Account belongs to your project and it is used by the Google Client Node.js library to make Text-to-Speech API requests. Like any other user account, a service account is represented by an email address. In this section, you will use the Cloud SDK to create a service account and then create credentials you will need to authenticate as the service account.
First, set an environment variable with your GOOGLE_CLOUD_PROJECT which you will use throughout this codelab:
export GOOGLE_CLOUD_PROJECT=$(gcloud config get-value core/project)
Next, create a new service account to access the Text-to-Speech API by using:
gcloud iam service-accounts create my-text-to-speech-sa \
  --display-name "my text-to-speech codelab service account"
Next, create credentials that your Node.js code will use to login as your new service account. Create these credentials and save it as a JSON file "~/key.json" by using the following command:
gcloud iam service-accounts keys create ~/key.json \
  --iam-account  my-text-to-speech-sa@${GOOGLE_CLOUD_PROJECT}.iam.gserviceaccount.com
Finally, set the GOOGLE_APPLICATION_CREDENTIALS environment variable, which is used by the Text-to-Speech API Node.js library, covered in the next step, to find your credentials. The environment variable should be set to the full path of the credentials JSON file you created, by using:
export GOOGLE_APPLICATION_CREDENTIALS="/home/${USER}/key.json"
5. Install the Google Cloud Text-to-Speech API client library for Node.js
First, create a project that you will use to run this Text-to-Speech API lab, initialize a new Node.js package in a folder of your choice:
npm init
NPM asks several questions about the project configuration, such as name and version. For each question, press ENTER to accept the default values. The default entry point is a file named index.js.
Next, install the Google Cloud Speech library to the project:
npm install --save @google-cloud/text-to-speech
For more instructions on how to set up a Node.js development for Google Cloud please see the Setup Guide.
Now, you're ready to use Text-to-Speech API!
6. List Available Voices
In this section, you will first list all available voices in English for audio synthesis.
Navigate to the index.js file inside the and replace the code with the following:
'use strict';

/**
 * Lists available voices for the specified language.
 *
 * @param {string} languageCode - The language code.
 */
async function listVoices(languageCode) {
  const textToSpeech = require('@google-cloud/text-to-speech');

  const client = new textToSpeech.TextToSpeechClient();

  const [result] = await client.listVoices({languageCode});
  const voices = result.voices;

  voices.forEach((voice) => {
    console.log(`${voice.name} (${voice.ssmlGender}): ${voice.languageCodes}`);
  });
}

listVoices('en');
Take a minute or two to study the code. Run the app:
node .
You should see the following output:
en-US-Standard-A (MALE): en-US
en-US-Standard-B (MALE): en-US
en-US-Standard-C (FEMALE): en-US
en-US-Standard-D (MALE): en-US
en-US-Standard-E (FEMALE): en-US
en-US-Standard-F (FEMALE): en-US
...
7. Synthesize audio from text
You can use Text-to-Speech API to convert a string into audio data. You can configure the output of speech synthesis in a variety of ways, including selecting a unique voice or modulating the output in pitch, volumn, speaking rate, and sample rate.
Navigate to the index.js file inside the and append the following code:
/**
 * Sythesizes sample text into an .mp3 file.
 */
async function synthesize() {
  const textToSpeech = require('@google-cloud/text-to-speech');
  const fs = require('fs');
  const util = require('util');

  const client = new textToSpeech.TextToSpeechClient();

  const text = 'This is a demonstration of the Google Cloud Text-to-Speech API';

  const request = {
    input: {text: text},
    voice: {languageCode: 'en-US', ssmlGender: 'NEUTRAL'},
    audioConfig: {audioEncoding: 'MP3'},
  };

  const [response] = await client.synthesizeSpeech(request);
  // Write the binary audio content to a local file
  const writeFile = util.promisify(fs.writeFile);
  await writeFile('output.mp3', response.audioContent, 'binary');
  console.log('Audio content written to file: output.mp3');
}

synthesize();
Take a minute or two to study the code and see how it is used to create an audio file from text.
node .
You should see the following output:
Audio content written to file "output.mp3"
8. Congratulations!
You learned how to use the Text-to-Speech API using Node.js to perform different kinds of transcription on audio files!
Clean up
To avoid incurring charges to your Google Cloud Platform account for the resources used in this quickstart:
- Go to the Cloud Platform Console.
- Select the project you want to shut down, then click ‘Delete' at the top: this schedules the project for deletion.
Learn More
- Google Cloud Text-to-Speech API: https://cloud.google.com/text-to-speech/docs
- Node.js on Google Cloud Platform: https://cloud.google.com/nodejs/
- Google Cloud Node.js client: https://googlecloudplatform.github.io/google-cloud-node/
License
This work is licensed under a Creative Commons Attribution 2.0 Generic License.