1. Introduction
Let's assume that you need to adjust the values of some parameters in your app after you publish your app on the Play store. Typically, you should republish a new version of your app, and the users should update the app on their phone as well.
In general, the app update will work if you want to commit a long-lasting change to your app. However, what if you're going to adjust the value of some parameters in your app frequently? Or, what if you want to run some experiments to find the optimal app configuration?
In these cases, app updates would not work well. Because it requires some time until the update is entirely propagated to the users. Also, it's quite challenging to run the experiments across several app versions.
Also, how can you determine whether the user journey of the app is working as intended? You may rely on user comments on the Play console. However, it might not be precise enough to make a clear decision.
If you run into any issues (code bugs, grammatical errors, unclear wording, etc.) as you work through this codelab, please report the issue via the Report a mistake link in the lower left corner of the codelab.
What you'll learn
- How to create a funnel in the Google Analytics for Firebase
- How to use the Firebase Remote Config
- How to run the Firebase A/B testing
What you'll need
- Android Studio version 4.1+
- A Google account
- A test device with Android 5.0+ with a USB cable to connect your device, or an Android Emulator running AVD(Android Virtual Device) with a system image that supports Play Store/Google APIs
How would you rate your level of experience with AdMob?
How would you rate your level of experience with Firebase?
2. Setup development environment
Download the code
Click the following button to download all the code for this codelab:
Unpack the downloaded zip file. This will unpack a root folder named admob-firebase-codelabs-android-master.
...or clone the GitHub repository from the command line.
$ git clone https://github.com/googlecodelabs/admob-firebase-codelabs-android
The repository contains four folders as follows:
 101-base — Starting code that you will build in this codelab.
 101-complete_and_102-base — Completed code for this codelab & starter for the 102 codelab.
 102-complete — Completed code for the 102 codelab.
Import the starter app
Launch Android Studio, choose "Import project" in the welcome screen. Then select the 101-complete_and_102-base directory from the code you have downloaded.
You should now have the project open in Android Studio.
Add Firebase config file to the Android project
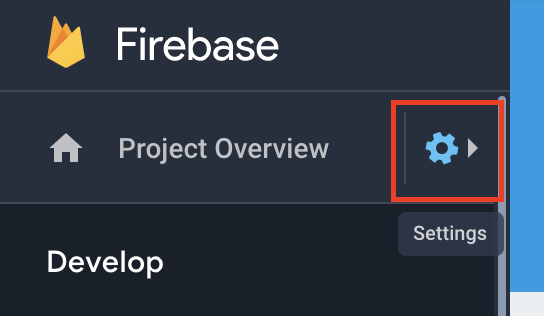
- From the overview screen of the Awesome Drawing Quiz project, click the Settings icon.
- Under the General tab, select the Android app to download the google-service.json file.
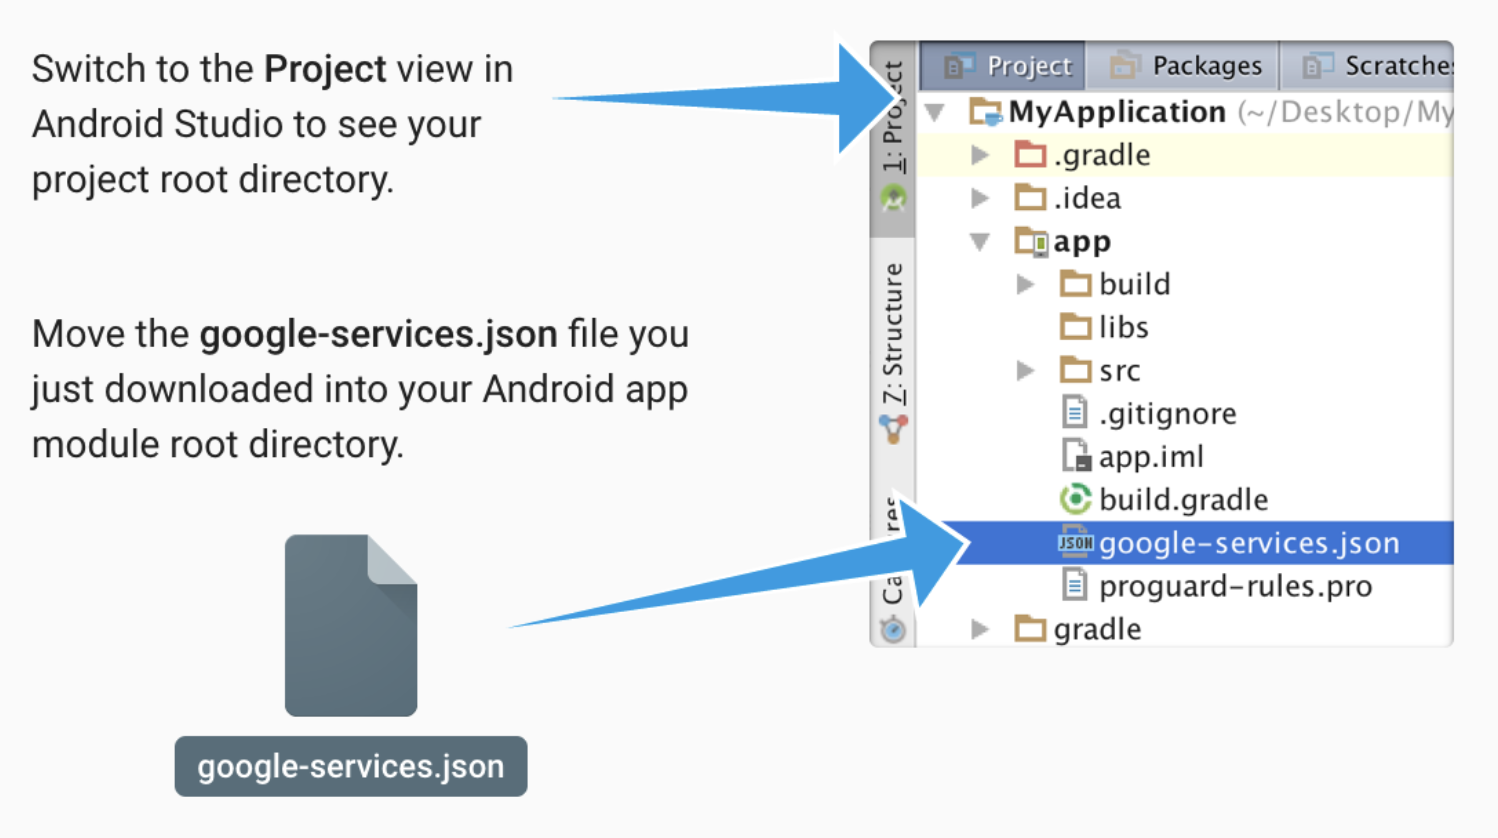
- Move the configuration file into the
 app directory in your project.
3. Open the Firebase project from the console
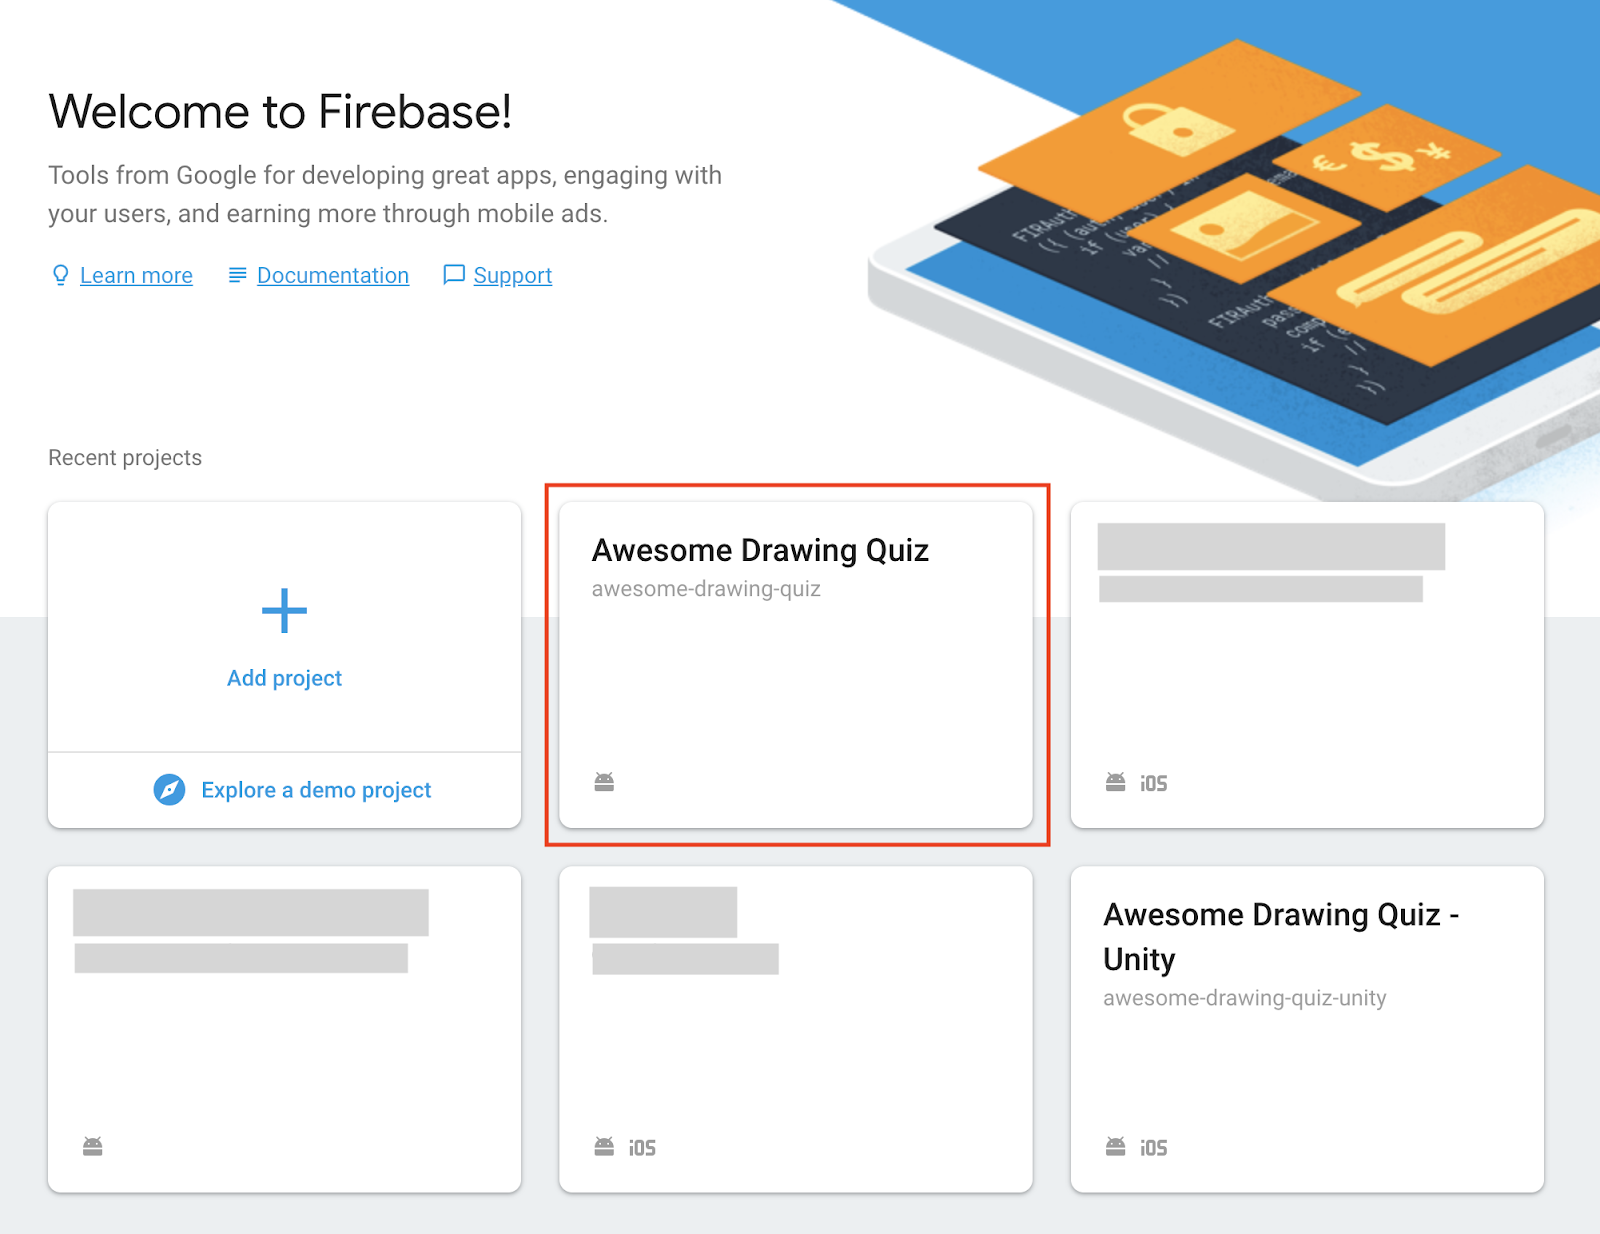
Before moving on to the next step, open the project from the Firebase console that you have created in the ‘Setup Firebase Project' step of the AdMob+Firebase 101 Codelab.
4. Create a funnel of app events
There might be a few app events that you've added to track the user activity inside of the app. By reading the report of each app event, you can get the details associated with the event like total counts, average counts per user, demographics, etc..
However, what if you want to see the completion rate of a series of events, instead of focusing on a specific event? In Google Analytics for Firebase, you can use the Funnel to visualize and optimize the completion rate of a series of app events.
Create a funnel
To create a funnel:
- Go to the Firebase console and select the Awesome Drawing Quiz project you created earlier.
- Click the Funnels.
- Click NEW FUNNEL.
- Enter a name and description for the funnel.
- Select the first two events you want to use as steps in the funnel.
- Click ADD ANOTHER EVENT for each additional step, and select an event.
- Click CREATE.
By following the above steps, create the following funnels:
#1 Funnel name: Level success rate Events: level_start, level_success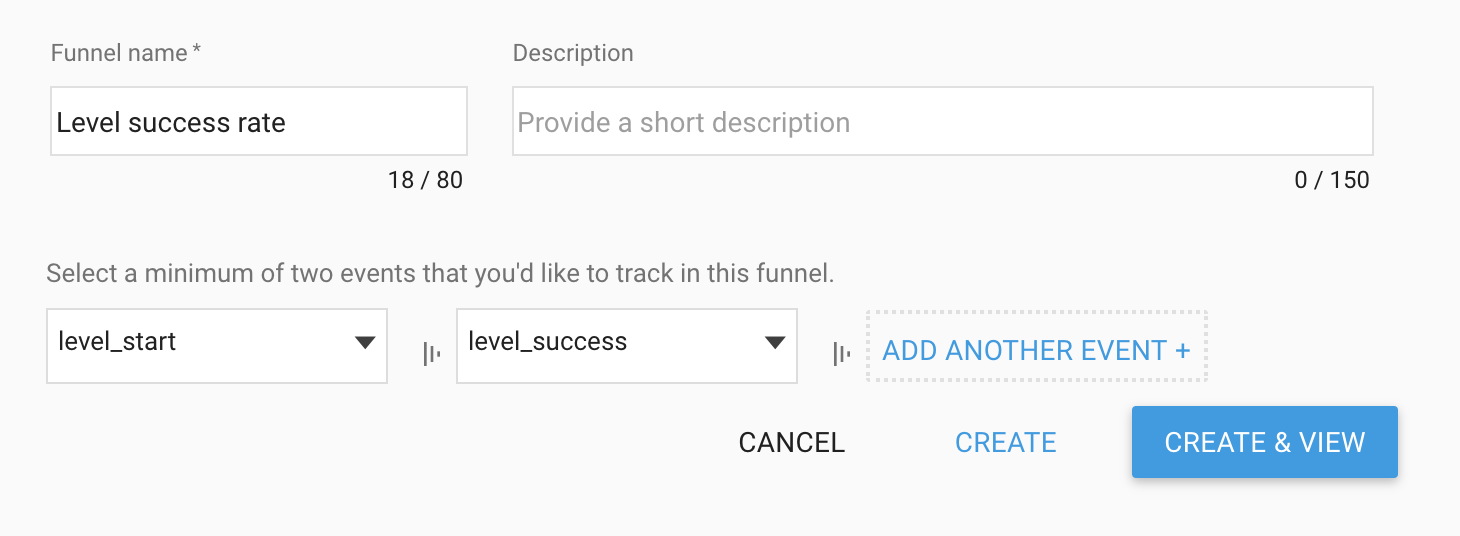
#2 Funnel name: Rewarded Ad completion rate Events: ad_reward_prompt, ad_reward_impression, ad_reward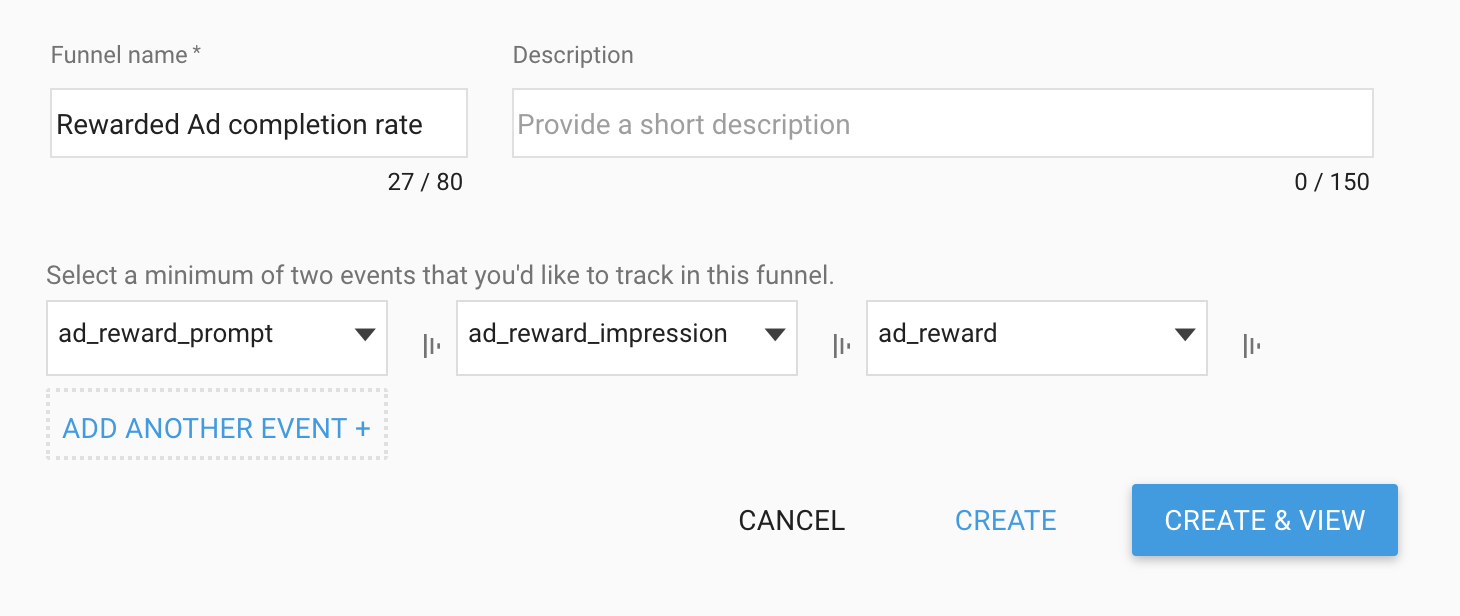
#3 Funnel name: Game completion rate Events: game_start, game_complete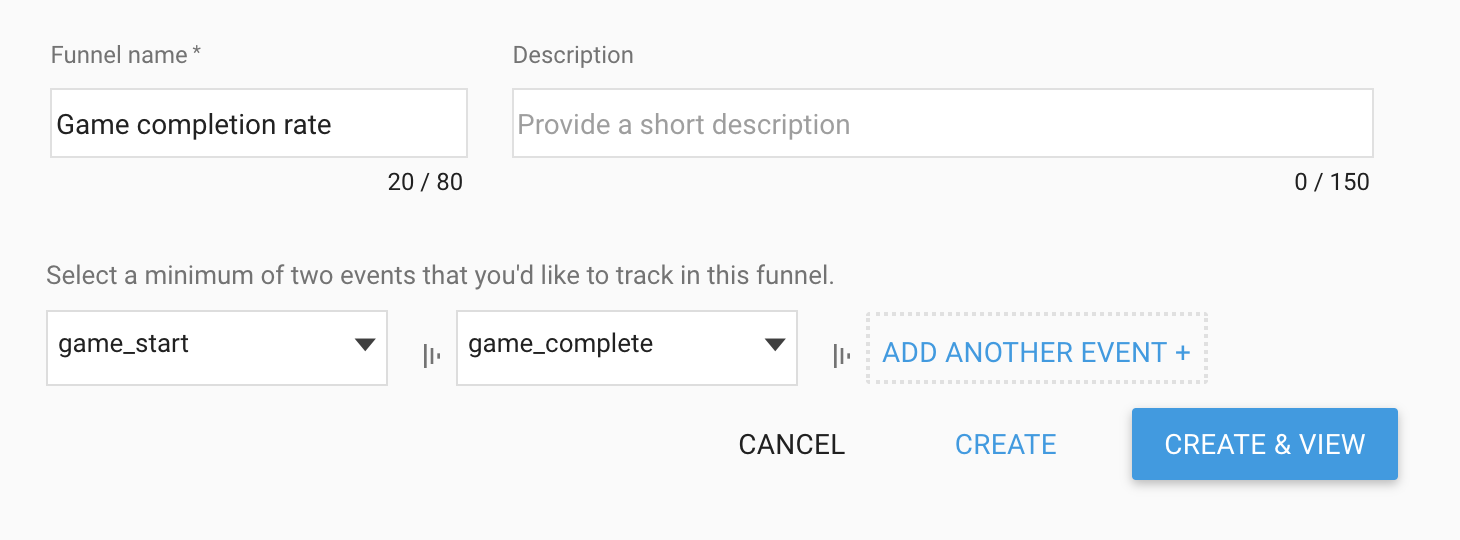
View funnel analysis
Once you have created some funnels, you can access it in the Funnels menu in the Firebase console. By clicking the funnel name in the list, you can see the detailed analysis of each funnel.
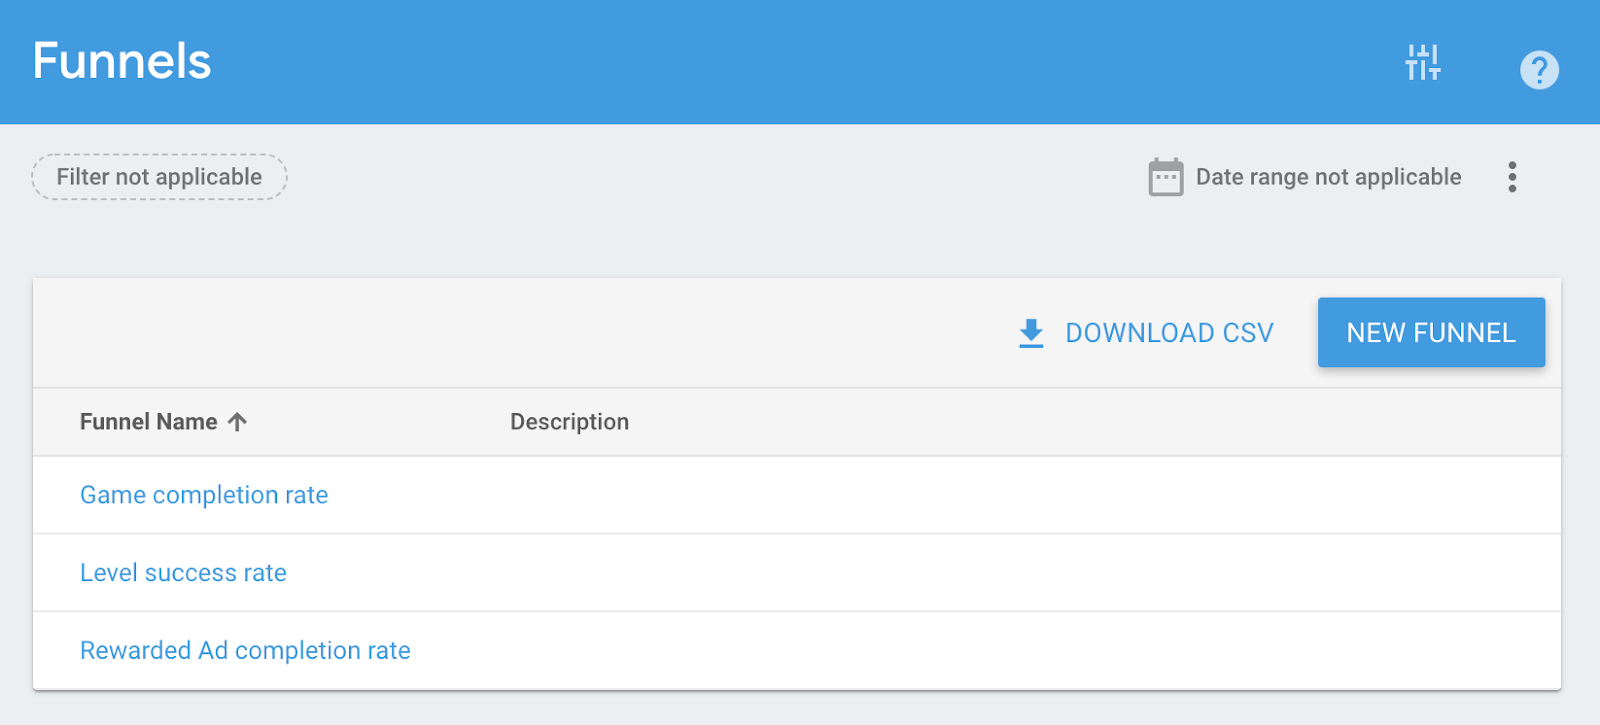
As an example, click the Level success rate. It will show the funnel details as follows:
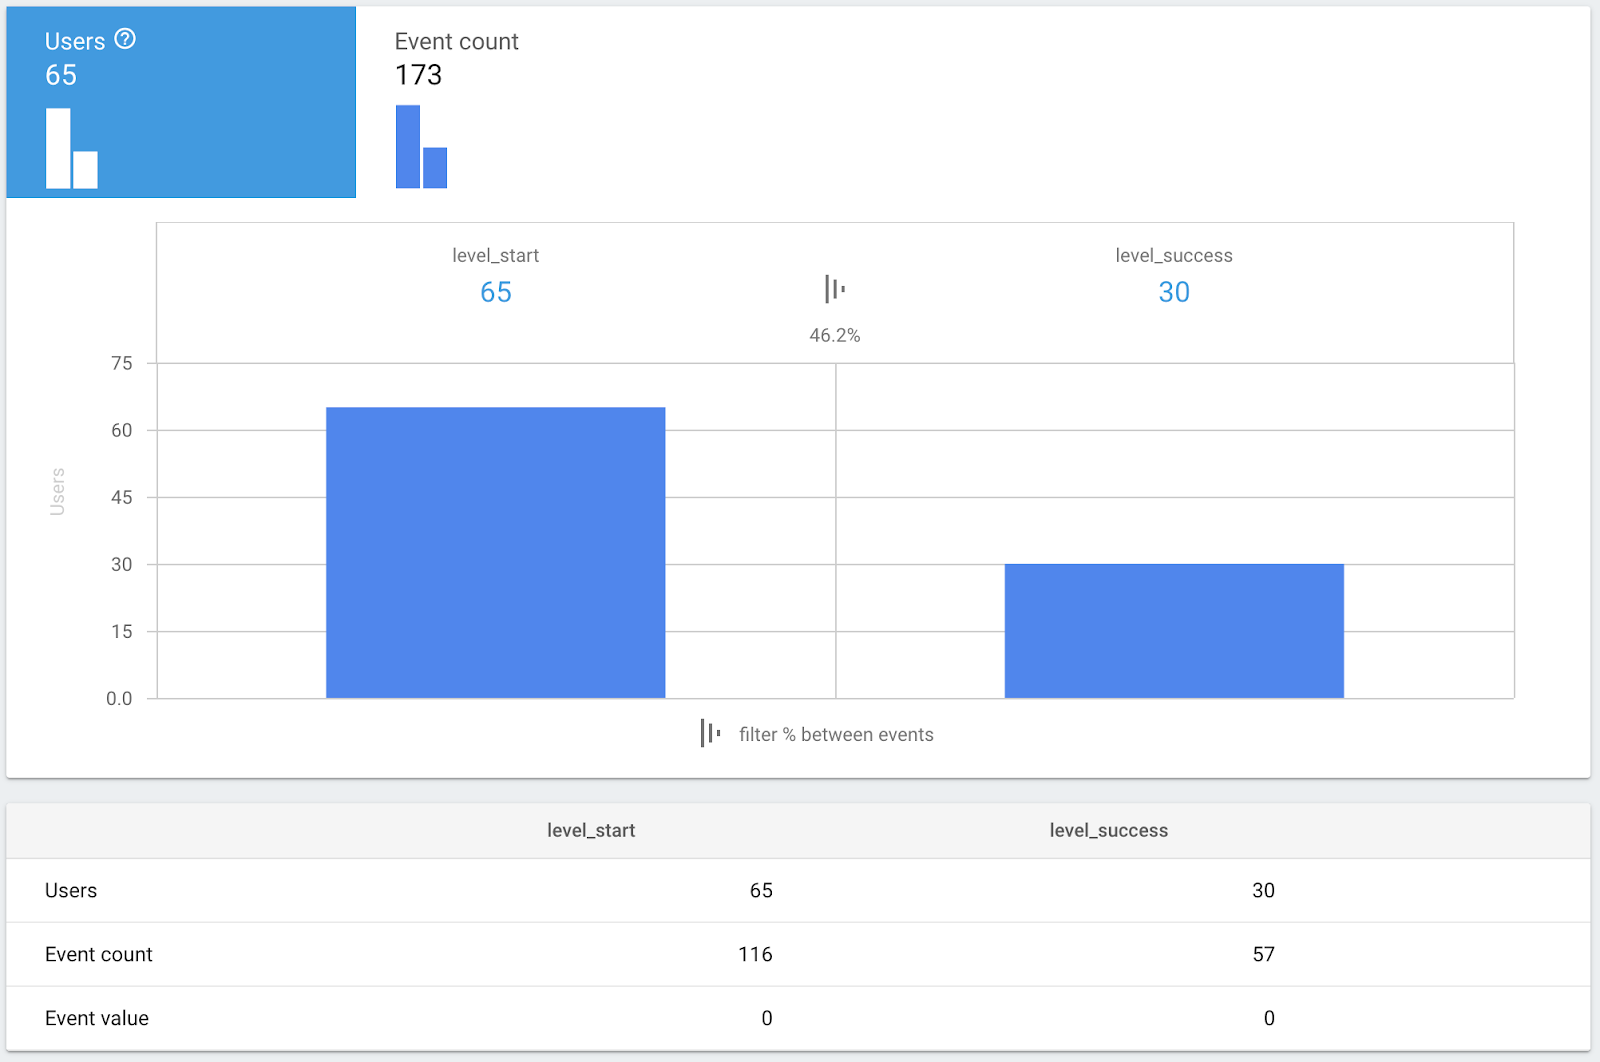
From the above screenshot, you can see the % of users who have cleared a level (triggered the level_success event) after starting a level (triggered the level_start event). In here, you can see that 46.2% of the users have cleared the level.
Once you click Event count, it will show the metrics based on number of events as follows:
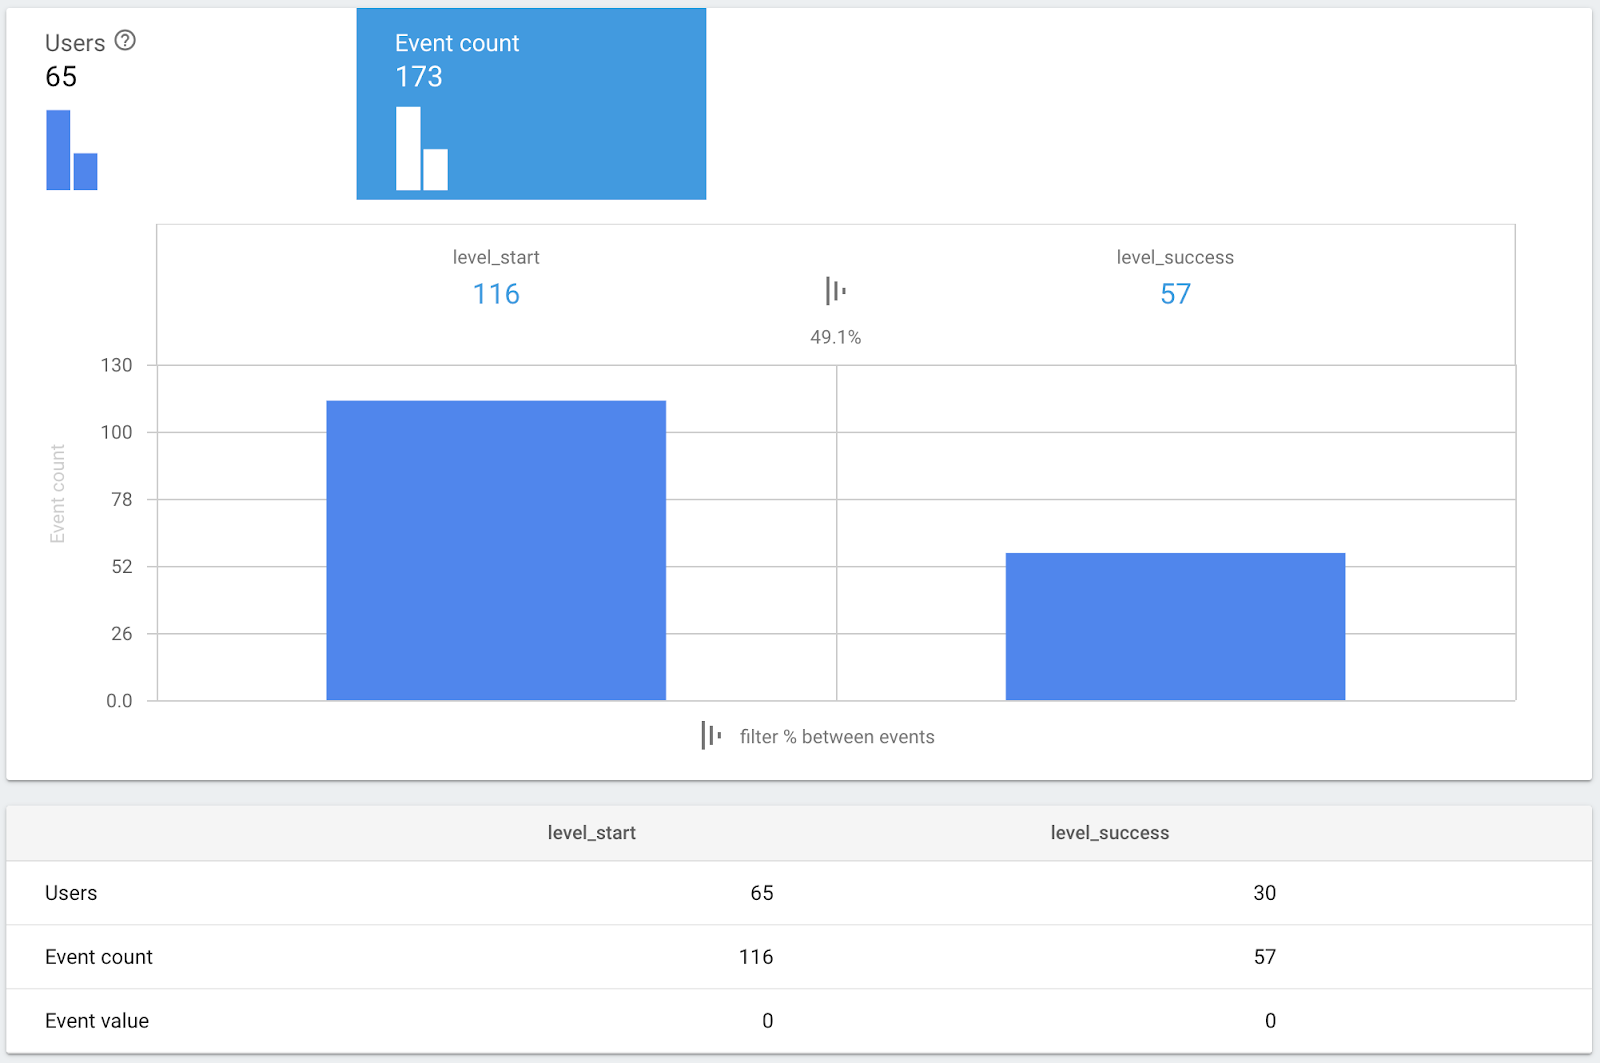
Based on the metrics on the above screenshot, there were 116 attempts (triggered the level_start event) and 57 clears (triggered the level_success event) during the period.
Since the completion rate based on the events(49.1%) is slightly higher than the rate based on the user(46.2%), you can say that there are a few people who perform better than the others.
5. Integrate the Remote Config into the app
Since you can get some insights on your app based on the app events and the funnel, you may want to optimize your app. It usually includes a fine-tuning of the parameter value in the app. To modify the value of those parameters, you'll need to update the app so the changes can be applied to the users.
By using the Remote Config in Firebase, you can adjust those values without an app update, which means you can change the app behavior without having to disturb your users by forcing them to download the update.
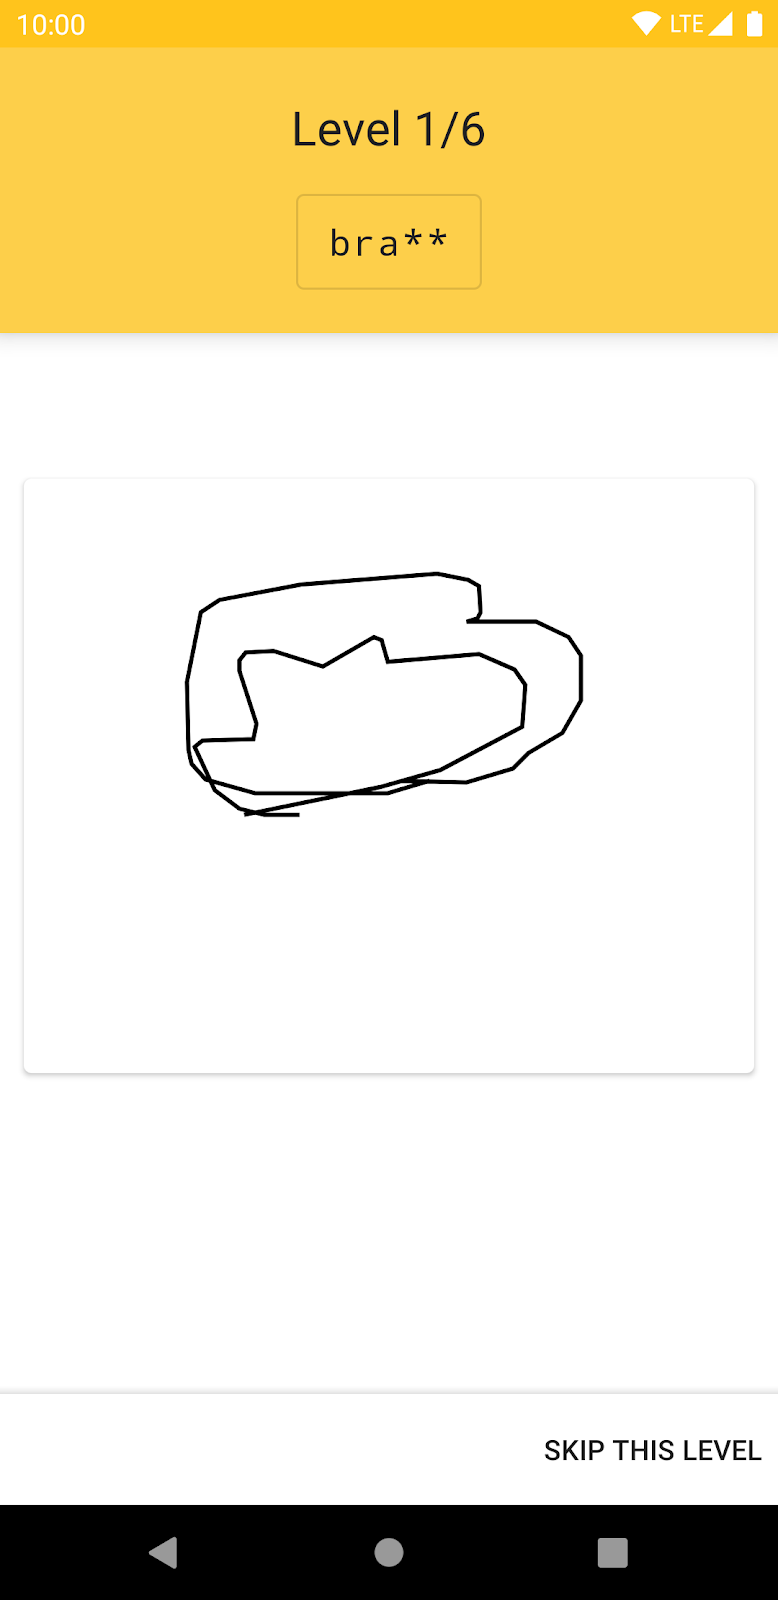
In this Codelab, you'll learn how to make the reward amount (number of letters to be disclosed after watching a Rewarded Video Ad) adjustable without an app update by using the Remote Config.
Add the Remote Config to the app dependency
Let's start by adding Firebase Remote Config to the app dependency.
app/build.gradle
apply plugin: 'com.android.application'

android {
    ...
}

dependencies {
    ...

    // TODO: Add Firebase Remote Config dependency (102)
    implementation 'com.google.firebase:firebase-config-ktx'

    ...
}

...
Sync your project with gradle files
To make sure that all dependencies are available to your app, sync your project with gradle files. Select File > Sync Project with Gradle Files menu to sync your project with gradle files.
Set a default value of the Remote Config parameter
Fetching the values from the Remote Config requires a network connection. For the case when the network is not available, you should define a default value for each Remote Config parameter.
Create the remote_config_defaults.xml file under res/xml folder. Then, set a default value of the reward amount (reward_amount)as follows.
res/xml/remote_config_defaults.xml
<?xml version="1.0" encoding="utf-8"?>
<defaultsMap>
    <entry>
        <key>reward_amount</key>
        <value>1</value>
    </entry>
</defaultsMap>
Note that reward_amount is the name of the parameter in the Remote Config.
Fetch the reward amount from the Remote Config
Modify the AwesomeDrawingQuiz.kt to make the GameSettings class to hold a reference to the RemoteConfig instance.
Note that the RemoteConfig instance is configured to fetch the latest values from the server in debug mode to help the development process. (Set minimum fetch interval to zero seconds by calling fetch(0L))
AwesomeDrawingQuiz.kt
class AwesomeDrawingQuiz : Application() {

    ...

    // COMPLETE: Provide FirebaseRemoteConfig instance (102)
    private fun provideGameSettings() = GameSettings(provideRemoteConfig())

    // COMPLETE: Add a function that provides a FirebaseRemoteConfig instance (102)
    private fun provideRemoteConfig(): FirebaseRemoteConfig {
        val rc = Firebase.remoteConfig.apply {
            setDefaultsAsync(R.xml.remote_config_defaults)
        }
        val fetchTask = if (BuildConfig.DEBUG) rc.fetch(0L) else rc.fetch()
        fetchTask.addOnCompleteListener {
            if (it.isSuccessful) {
                Log.d("AwesomeDrawingQuiz", "Remote config value fetched")
                rc.activate()
            }
        }
        return rc
    }
}
Then, change the GameSettings class to fetch the reward amount from the Remote Config.
GameSettings.kt
// TODO: Add FirebaseRemoteConfig as a class member
class GameSettings(private val rc: FirebaseRemoteConfig) {

  ...

  // TODO: Apply reward amount from the Remote Config (102)
  val rewardAmount: Int
    get() = rc.getLong(KEY_REWARD_AMOUNT).toInt()

  companion object {
    ...

    // TODO: Add a key for 'reward_amount' Remote Config parameter (102)
    private const val KEY_REWARD_AMOUNT = "reward_amount"
  }
}
Create a Remote Config parameter from the console
Next, you'll create a new Remote Config parameter for the reward amount so you can adjust its value on the fly.
To create a new parameter, go to the Firebase console, then select the Awesome Drawing Quiz project that you have created earlier. Click Remote Config -> ADD YOUR FIRST PARAMETER button.
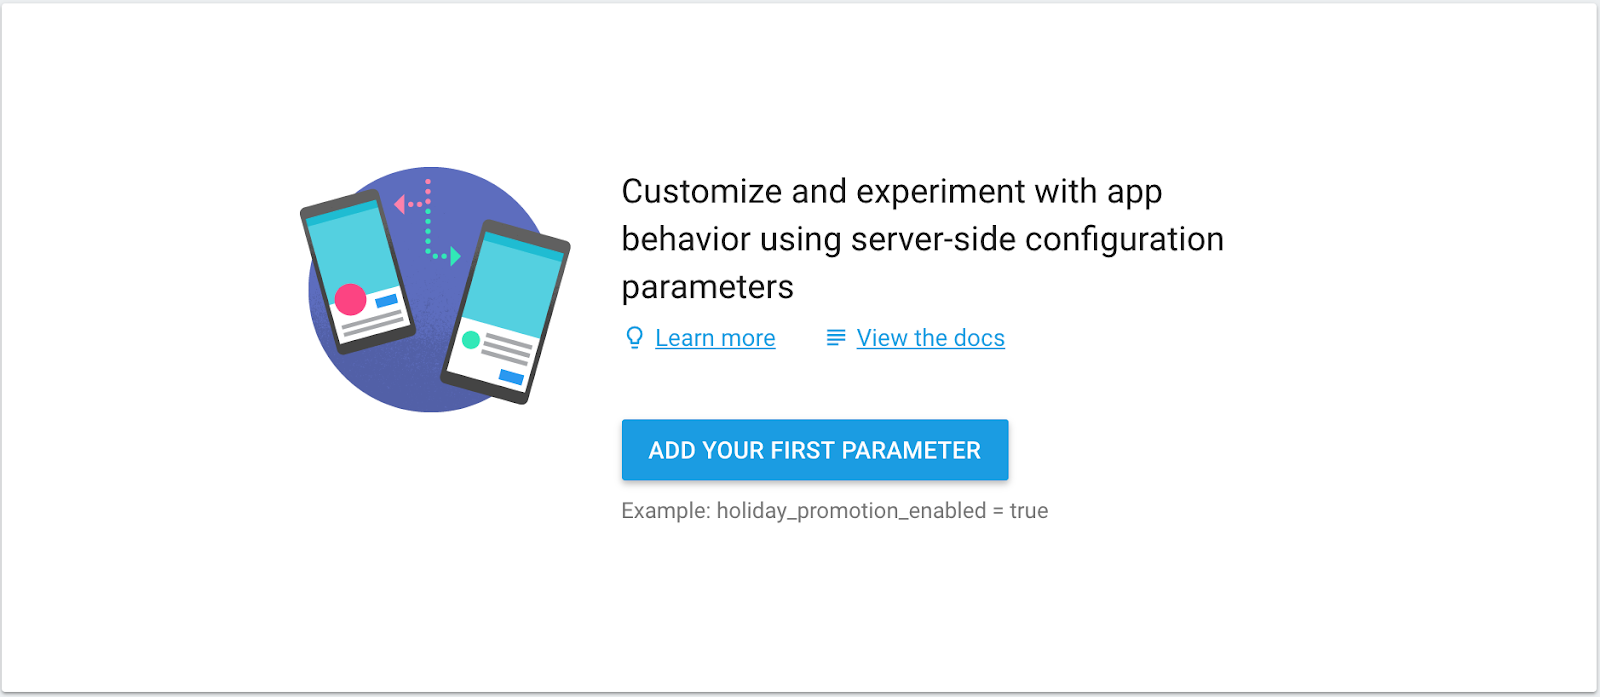
Name the parameter as reward_amount and set its default value to 1. Then click the Add Parameter button.

Click the Publish Changes button to make the change live to the users.

6. Change the app behavior with the Remote Config
The amount of the reward in the Awesome Drawing Quiz can now be configured on the Firebase console without having to update the app code.
In this section, you're going to change the reward amount from 1 to 2 to make the app reveal two more characters as a hint after watching a Rewarded Ad.
Update the default value of the reward_amount parameter
Go to the Firebase console, then select the Awesome Drawing Quiz project you created earlier. Click Remote Config, and click reward_amount from the list. Next, change the default value to 2 then click the Update button.
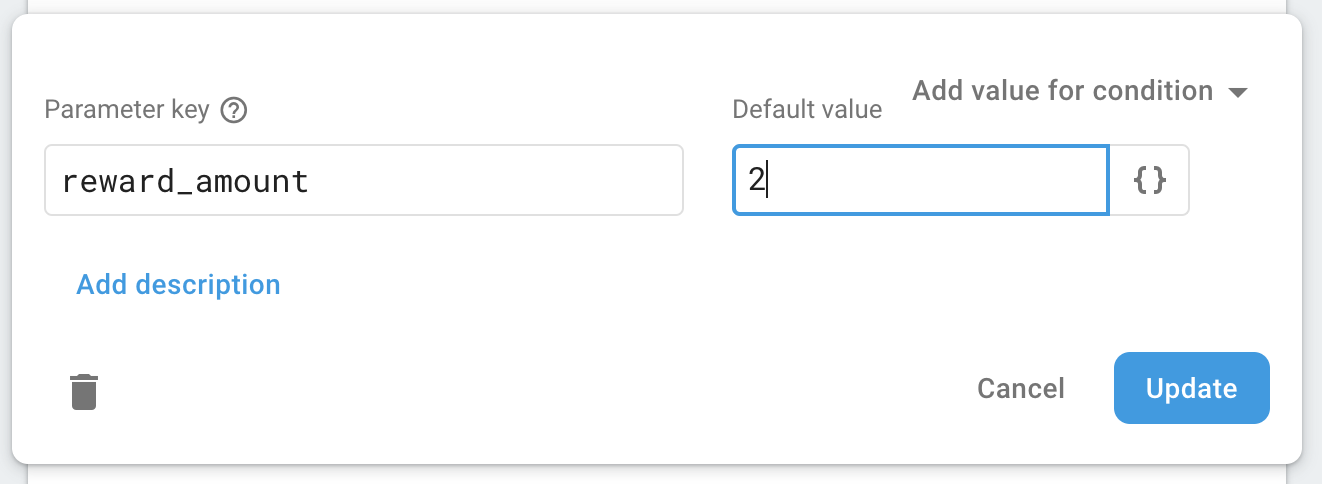
Click the Publish changes button to make the change live to the users.

Verify the app behavior change
To confirm the app behavior change, run the project again. Once you finish watching a Rewarded Ad, you'll notice that the app now reveals two letters as a reward, as we configured in the Remote Config console.
Before watching a Rewarded Ad | Revealed two extra letters as a reward |
7. Create the experiment to optimize the reward amount
Now you can change the amount of the reward without having to publish an app update. However, how you can determine the amount that you've changed is good for the app?
With the Firebase A/B Testing, you can run the experiments to optimize the overall user experience of the app without needing to update an app or building a separate tool to run and track the performance of each experiment.
Design the experiment
Before creating a new experiment, you should set a clear objective or goal of the experiment. Make sure to go through the following checklist before you create a new experiment.
- What: What do you want to optimize? (e.g., game difficulty, Ad timing/visibility, etc.)
- Why: What's your business goal for running the experiment? (e.g., to maximize the Ad revenue, to increase the retention, etc.)
- Who: Who is subject to be in the experiment? (e.g., All users, Specific user audience, etc.)
In this Codelab, you're going to create an experiment to optimize the reward amount value to maximize the daily user engagement of the Awesome Drawing Quiz.
Create the experiment
Open the Awesome Drawing Quiz project from the Firebase console. Select A/B Testing menu, then click the Create experiment button.
Select the Remote Config to create a Remote Config experiment.
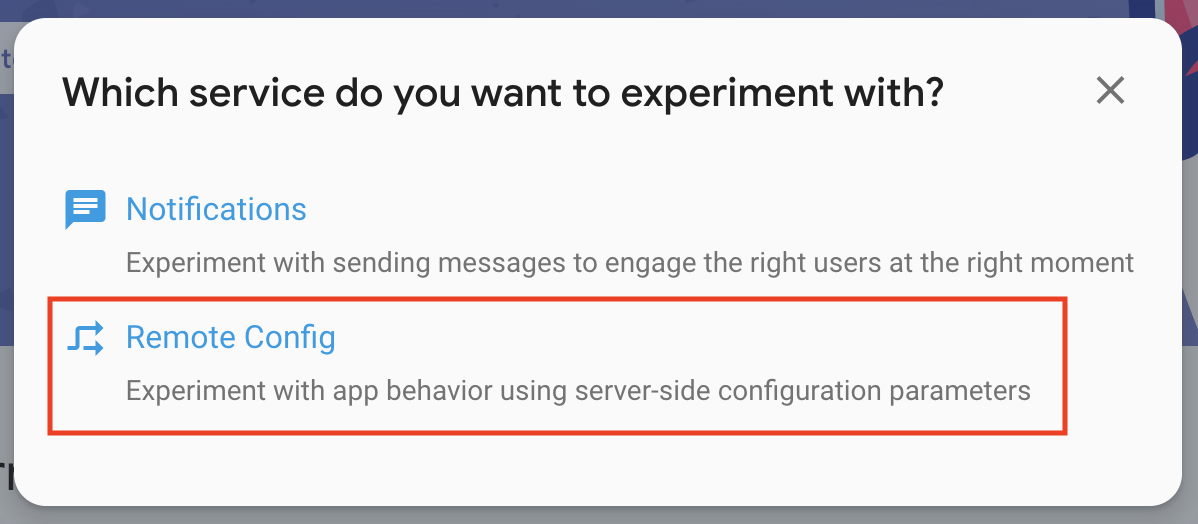
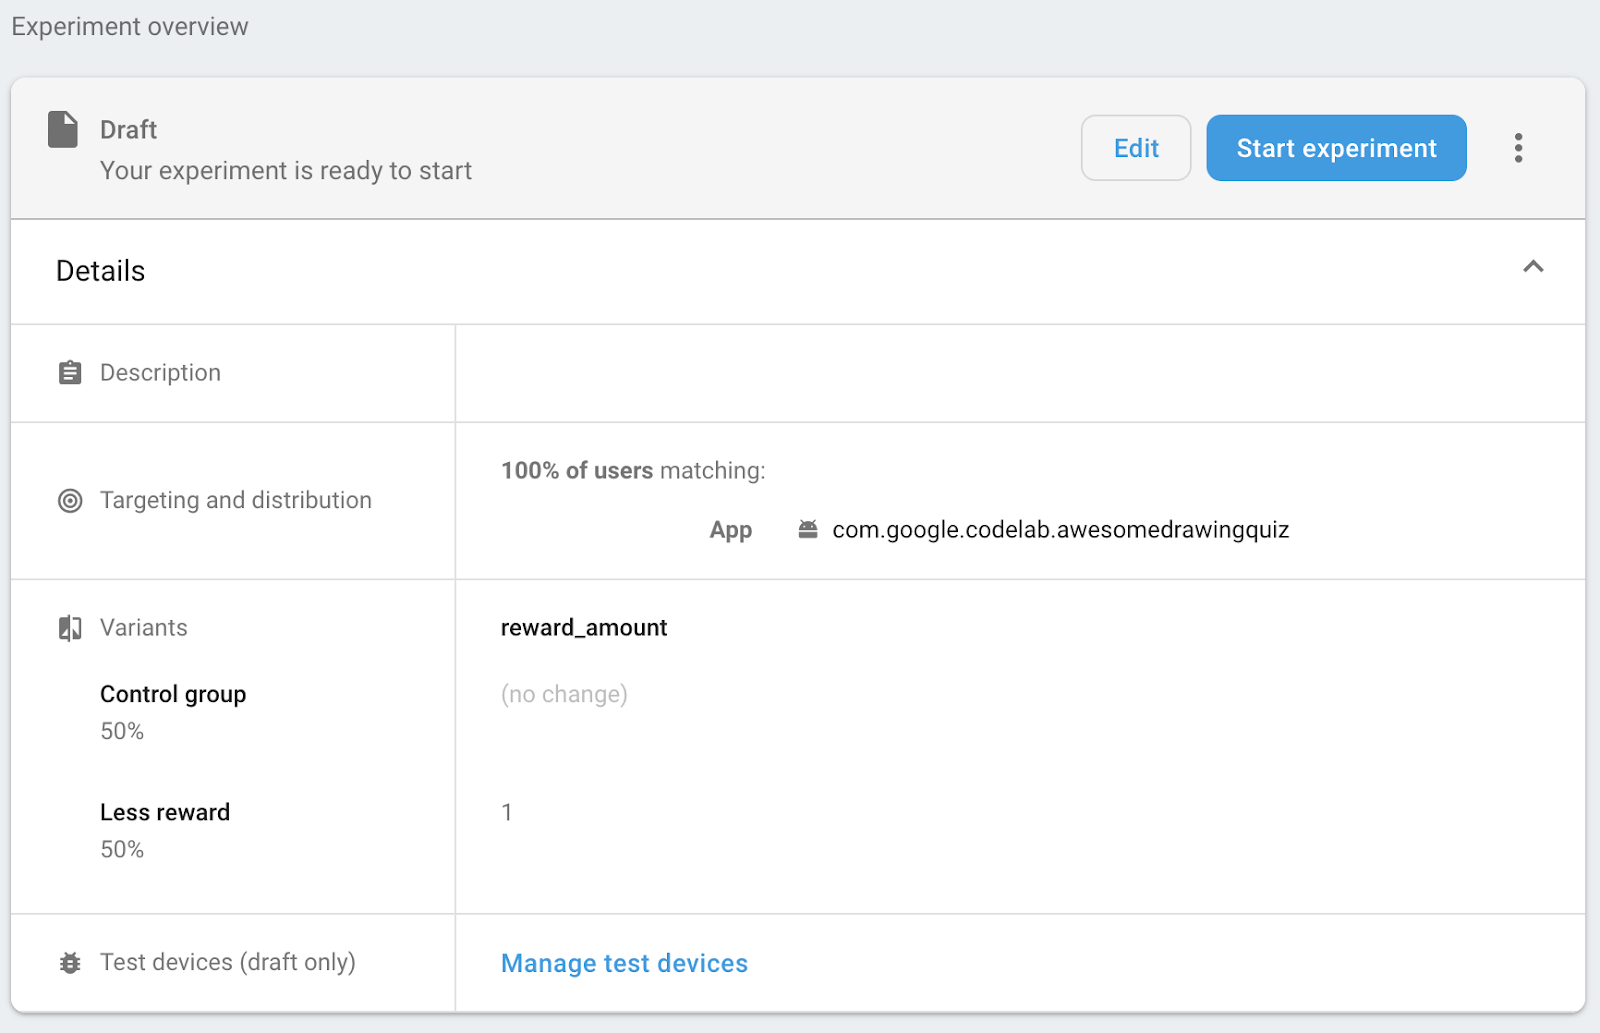
Name the experiment as ‘Amount of the Reward' as shown in the following screenshot.

Configure the targeting options. In this Codelab, you're going to target 100% of the users of the Awesome Drawing Quiz.
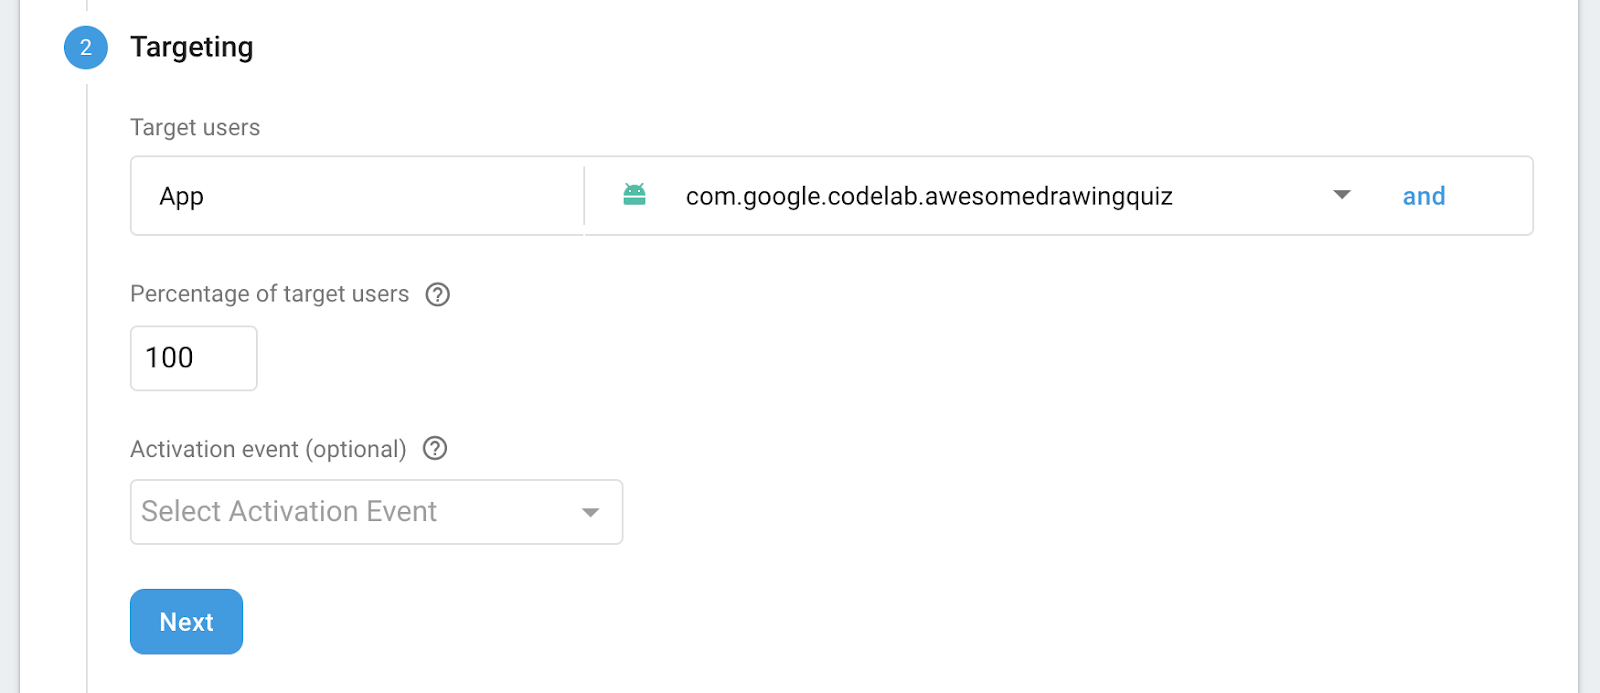
Since the main objective of the experiment is to find an optimal value that maximizes the daily user engagement, select the Daily user engagement as a primary metric to track.

Lastly, setup control and variant group so you can figure out which group performs better. Select reward_amount from the control group, and leave its value unchanged. For the variant group, name it as ‘Less reward,' then change the value of the reward_amount to 1.
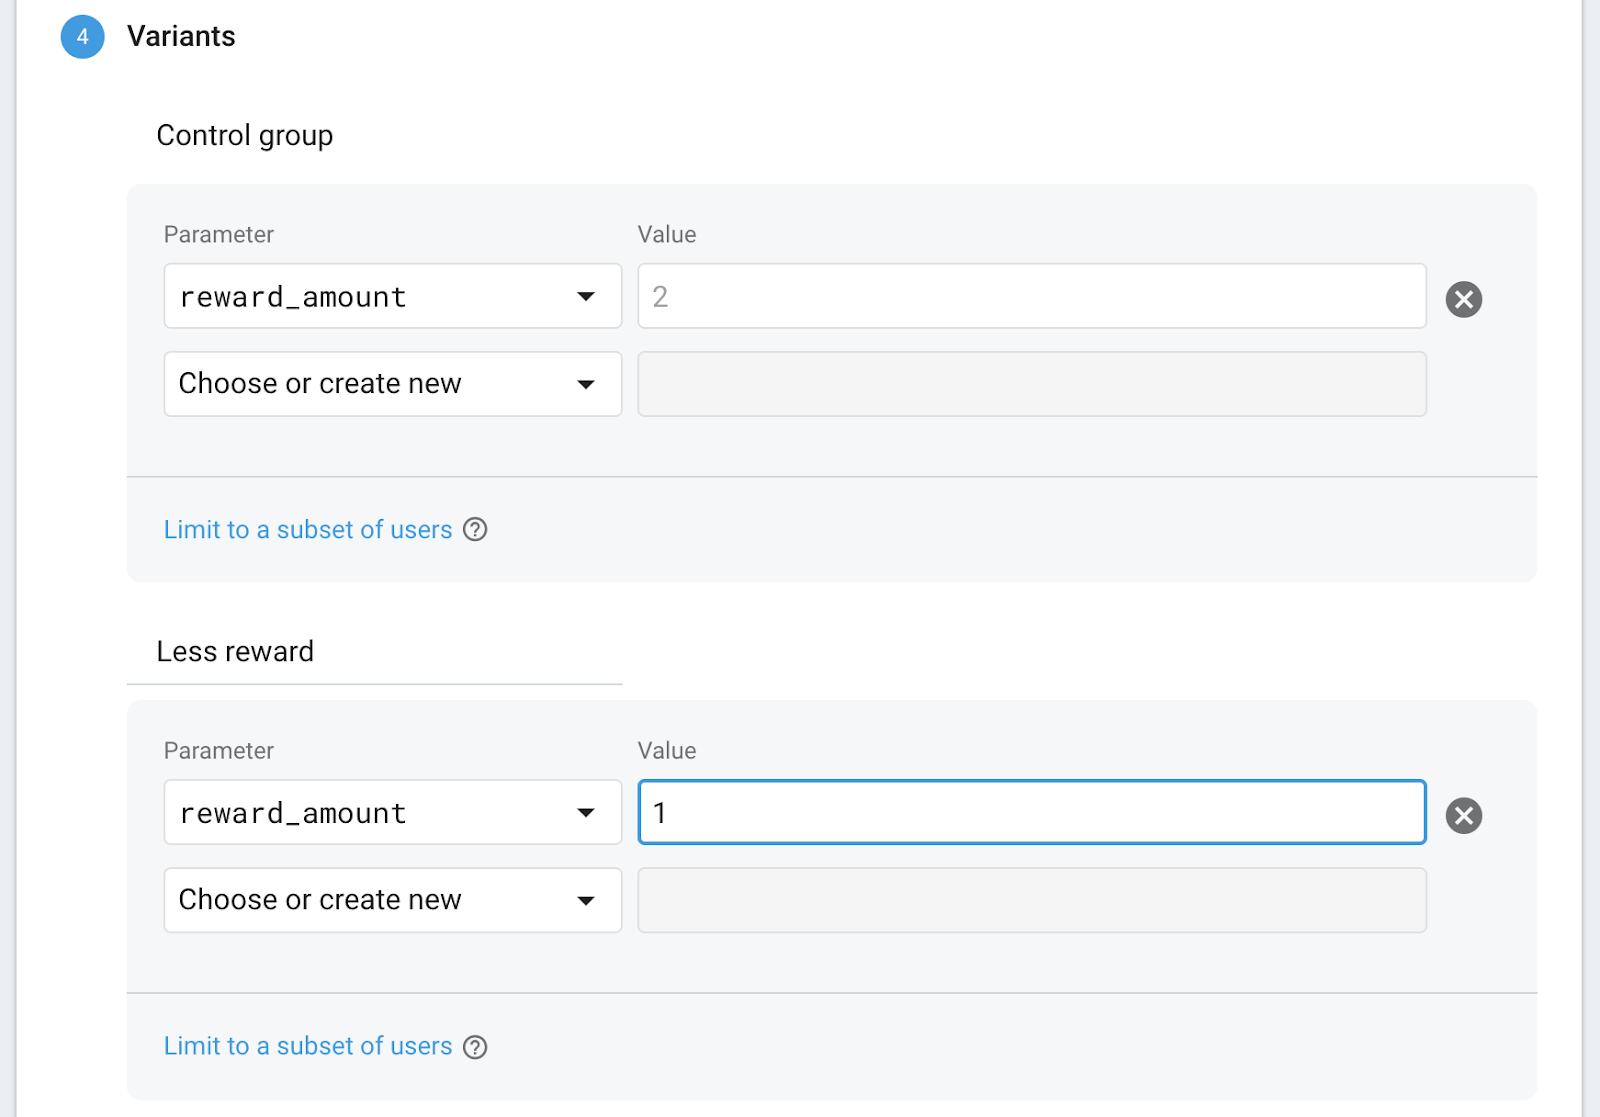
With this configuration, people in the ‘Less reward' group will receive one letter as a reward, while the people in the Control group will receive two letters as a reward. As a result, you're going to see how the amount of reward impacts the users.
Once you click the Review button, you'll see an overview of the experiment as follows.
Run the experiment
Click the Start experiment button to run the experiment. Note that you can't change the experiment configuration once it starts.

8. Manage the experiment
View the experiment progress
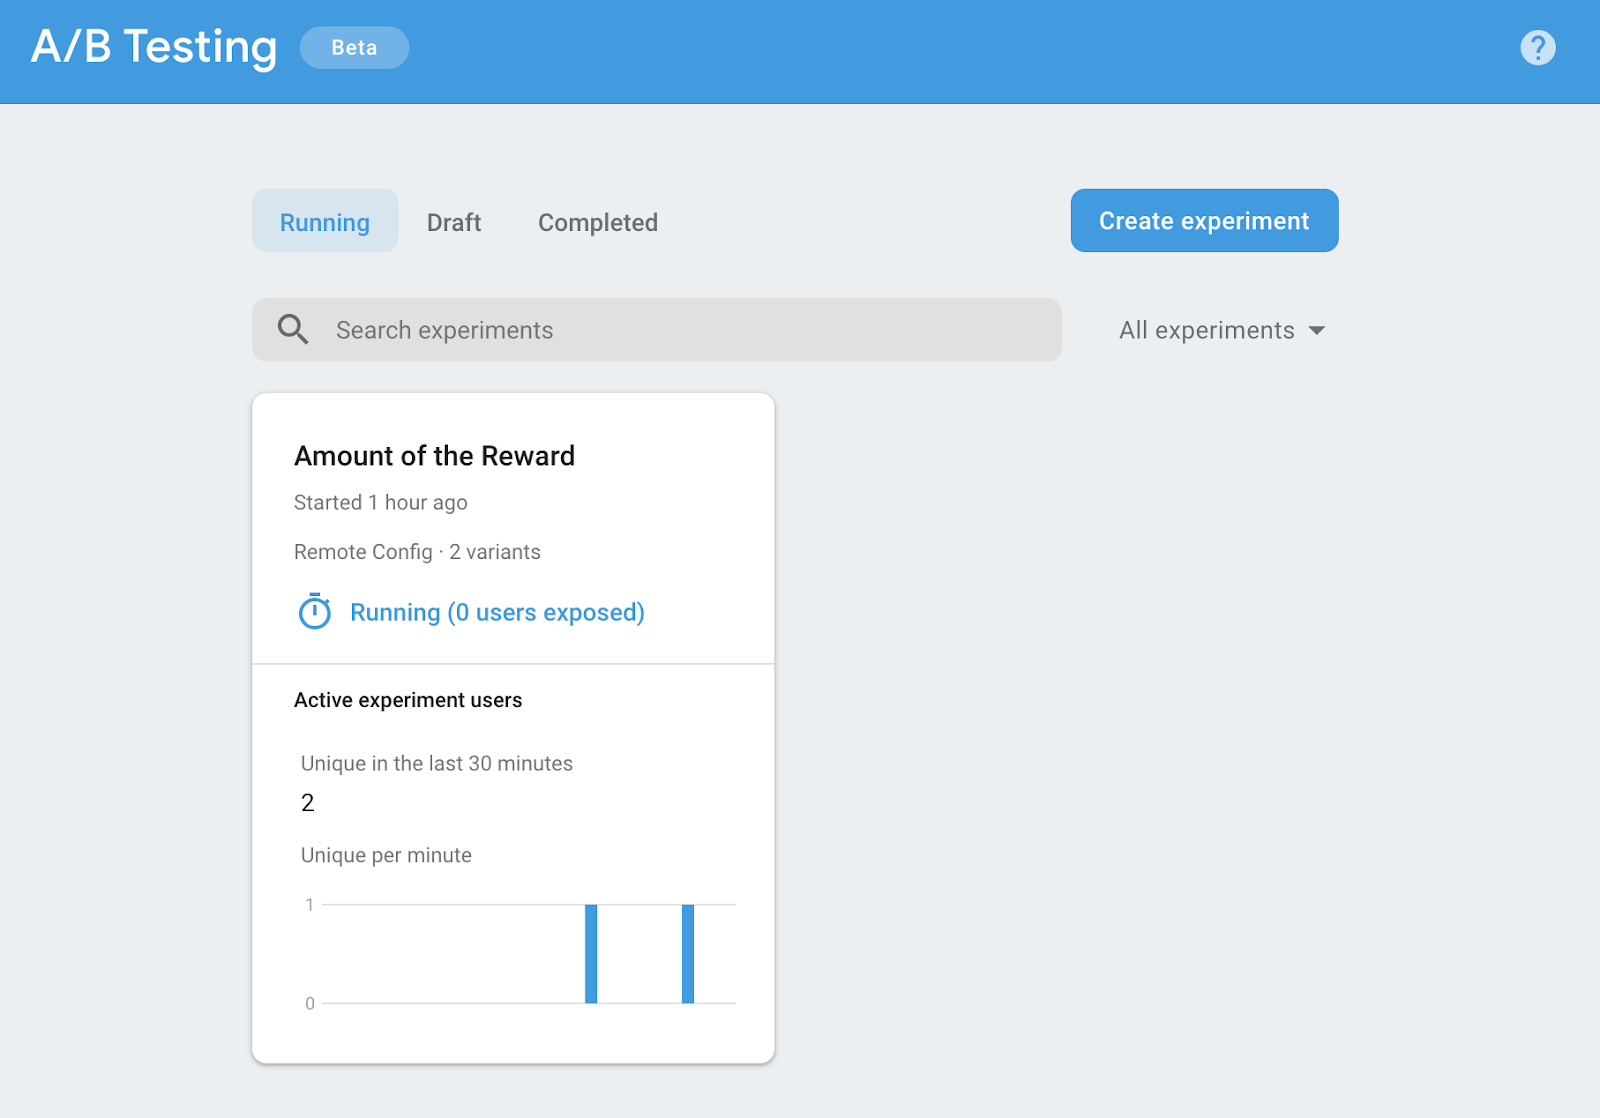
You can check the experiment progress from the A/B Testing menu in the Firebase console, which will look like the following screenshot. Note that you can also see the number of users who participate in the experiment in the last 30 minutes in the card.
Once you click the experiment from the list, you can see the experiment details. Until the experiment can declare a leader (i.e., the best performing variant), you'll see ‘It's too early to declare a leader' message.
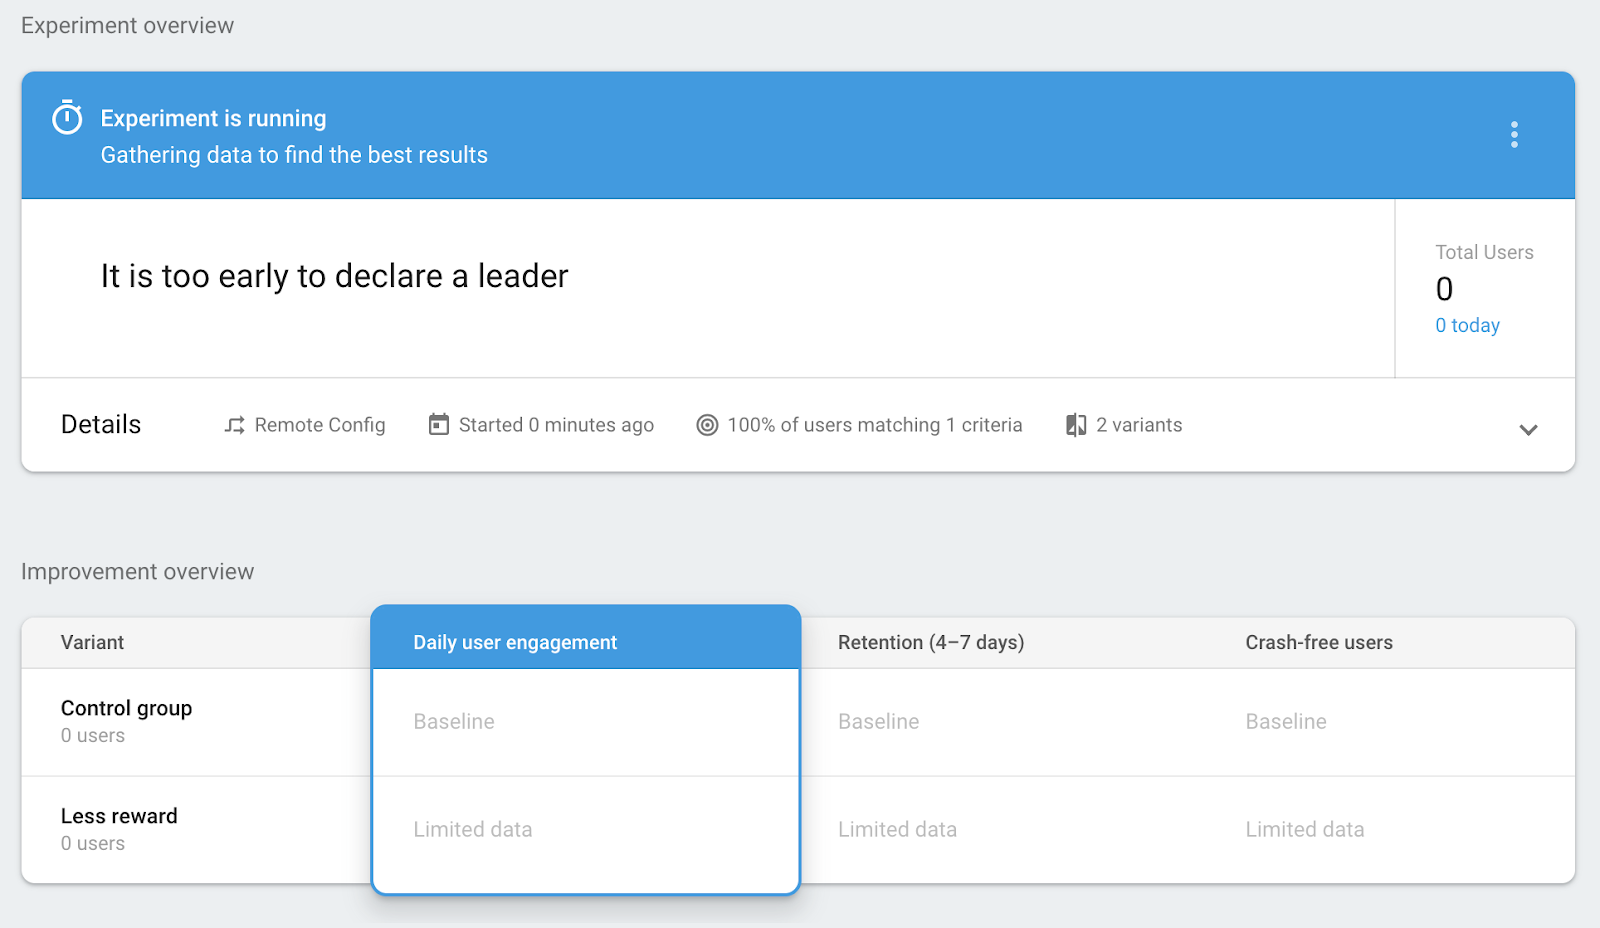
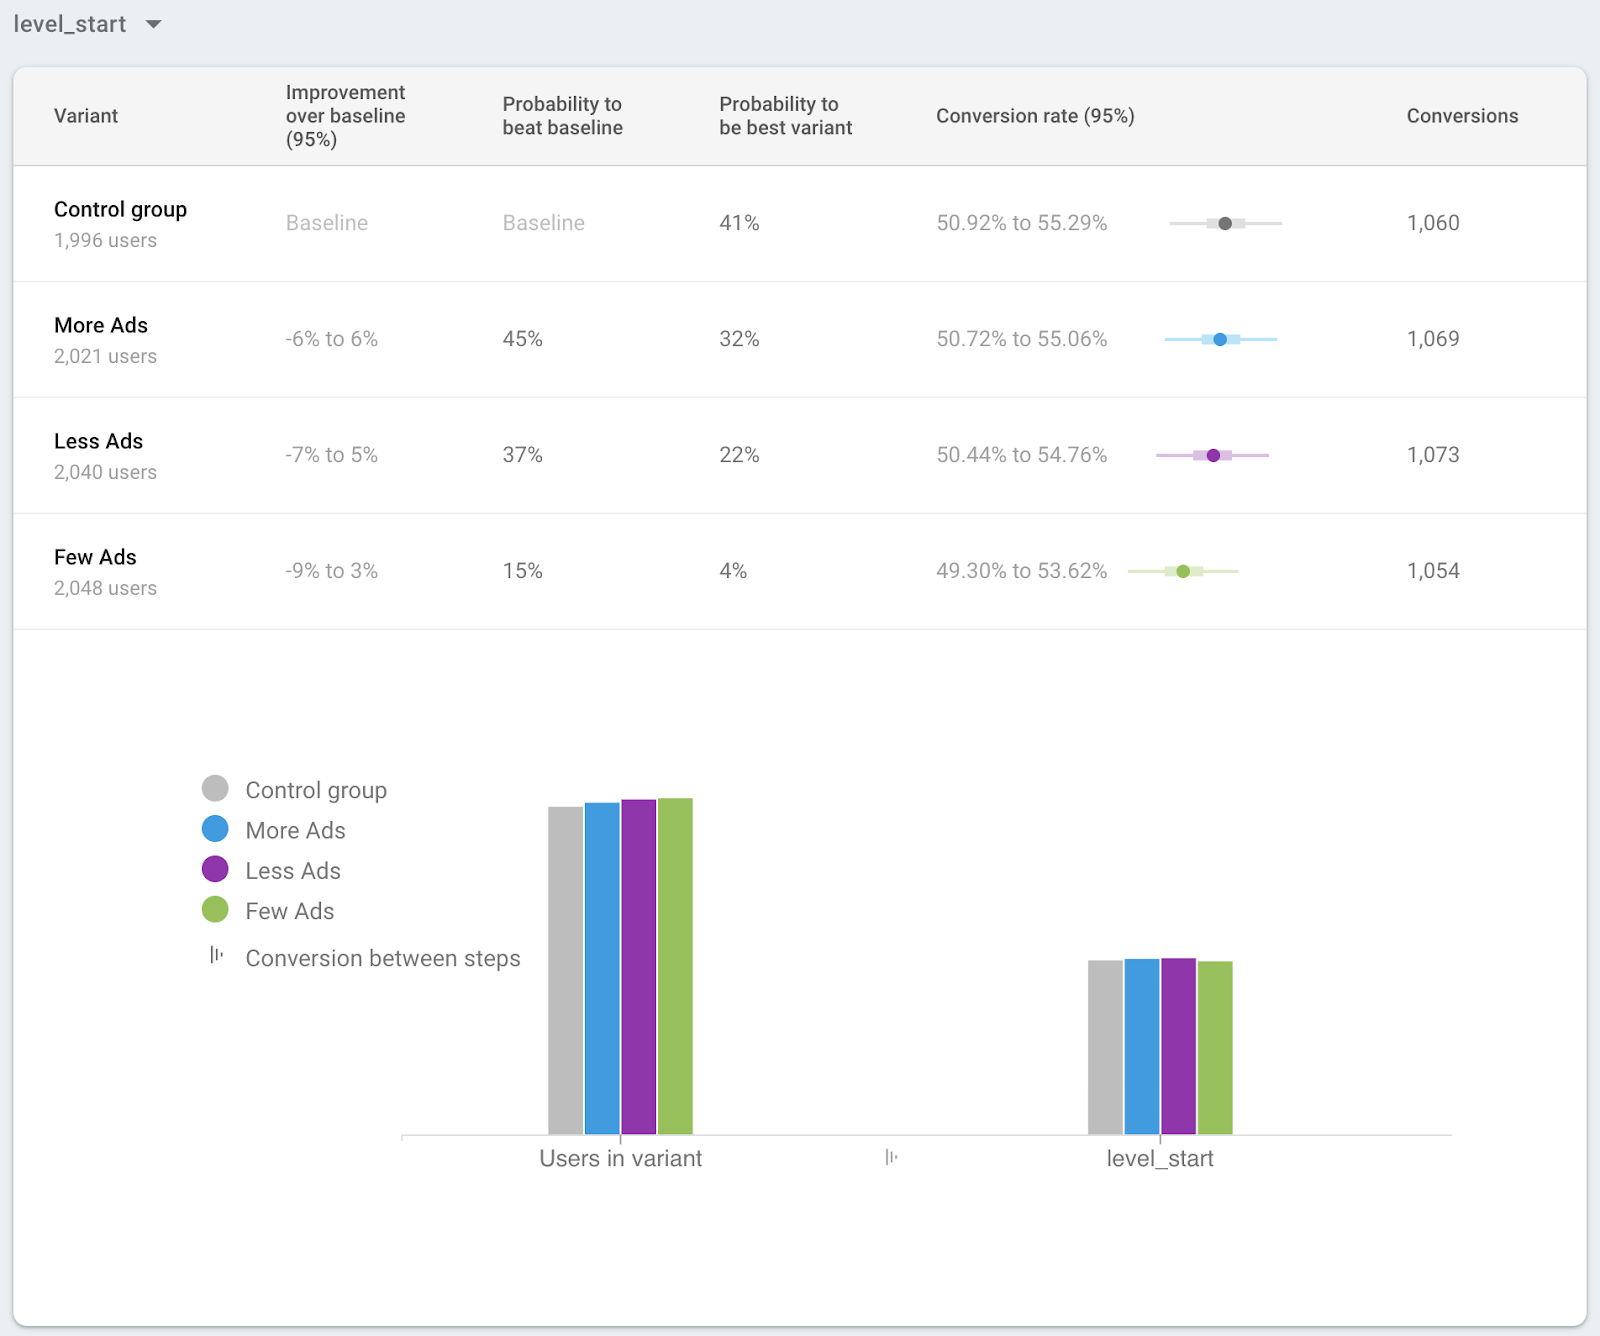
Once the experiment has been running for a while, it will start to display the data collected during the experiment so far under the Improvement overview section. You can compare the performance of each variant to see which one performs better. The following screenshot shows an example of the Improvement overview section.
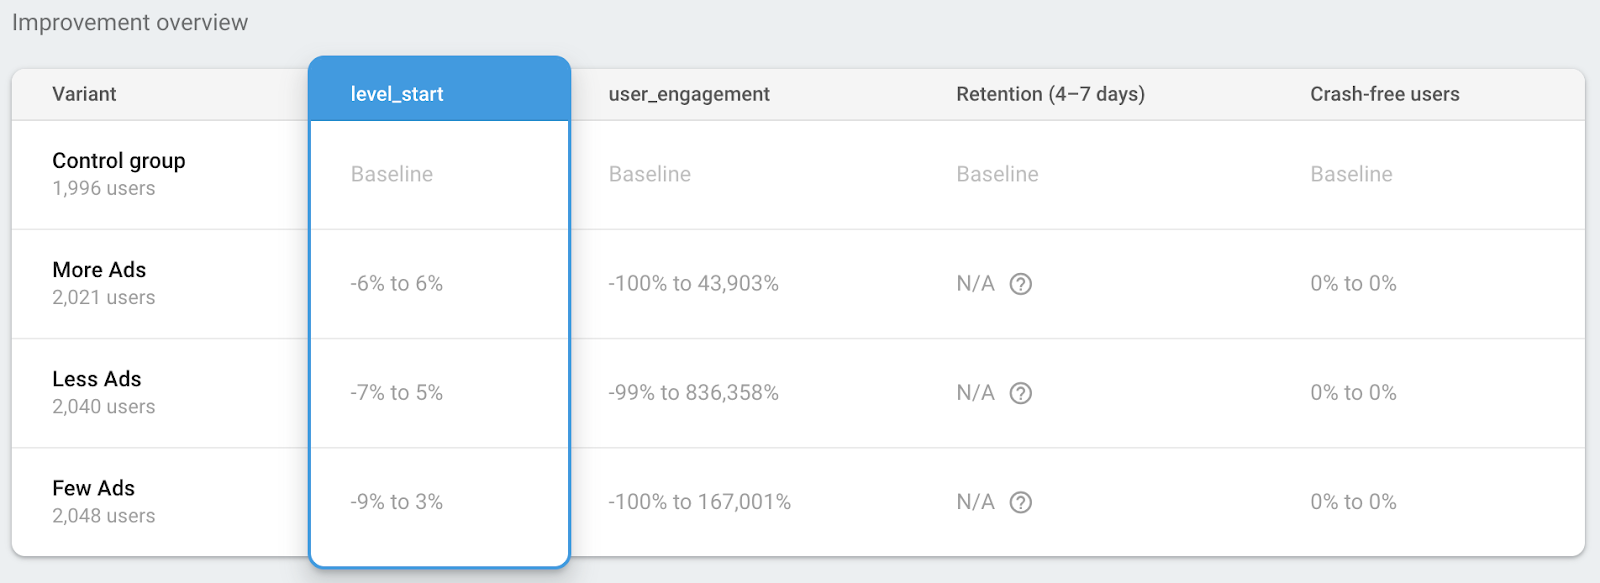
From the table below the Improvement overview section, you can check the details of the goal metrics of the experiment as well as additional metrics being tracked in the experiment. The following screenshot shows an example of the metrics details section.
Roll out the leader to all users
After the experiment has run long that you have a leader, or winning variant, you can roll out the experiment to 100% of the users. Once the A/B Testing has found a clear leader, it will encourage you to roll out the leading variant to all users.

However, even if the experiment has not declared a clear leader, you can still choose to roll out a variant to all of the users.
On the experiment details screen, click the context menu (  ), and then click Roll out variant.

Choose a variant to roll out to all users, then click the Review in Remote Config button to review the changes before you make a change in the Remote Config.
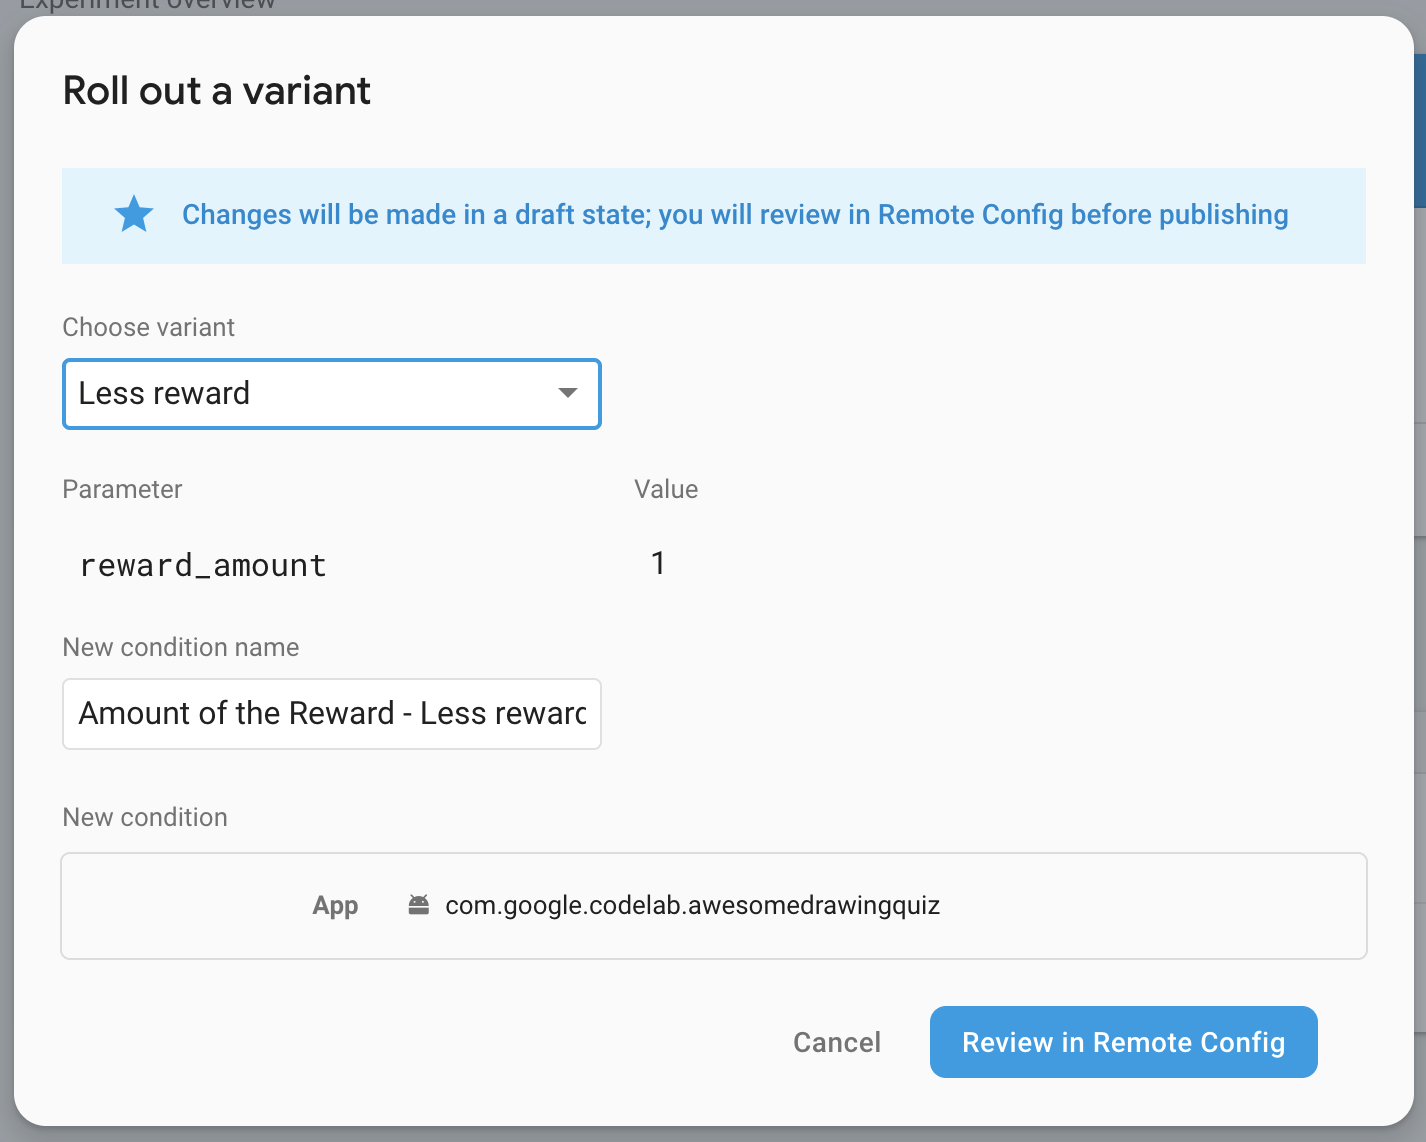
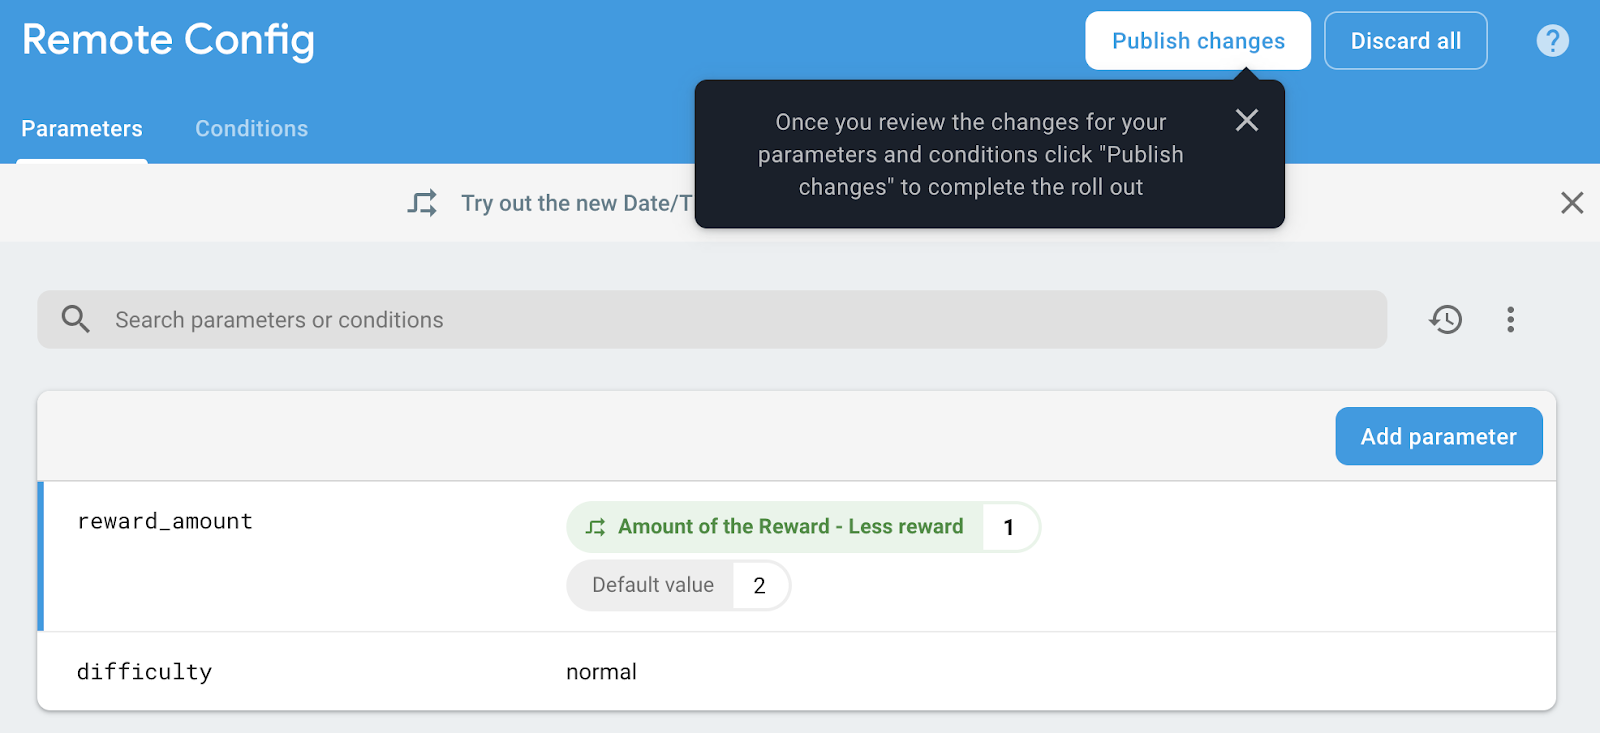
After you confirm that the draft does not have any issue, click the Publish changes button to make the change live to all users.
9. All done!
You have completed AdMob+Firebase 102 Android Codelab. You can find the completed code for this Codelab on  102-complete folder.

