
1. 簡介
Android 10 以上版本支援手勢操作,可做為新的操作模式。這樣一來,應用程式就能使用整個螢幕,提供更身歷其境的顯示體驗。使用者從螢幕底端向上滑動時,系統會將他們帶往 Android 主畫面。如果使用者從左側或右側邊緣向內滑動,系統會將他們帶往上一個畫面。
應用程式可透過這兩項手勢,充分利用螢幕底部的空間。不過,如果應用程式使用手勢,或在系統手勢區域中設有控制項,可能會與全系統手勢發生衝突。
本程式碼研究室旨在教導您如何使用插邊,避免手勢衝突。此外,本程式碼研究室也旨在教導您如何使用手勢排除 API,為需要位於手勢區域的控制項 (例如拖曳控點) 排除手勢。
課程內容
- 如何在檢視區塊上使用插邊監聽器
- 如何使用手勢排除 API
- 手勢啟用時沉浸模式的運作方式
本程式碼研究室旨在協助您讓應用程式與系統手勢相容。我們不會對與主題無關的概念和程式碼多做介紹,但會事先準備好這些程式碼區塊,屆時您只要複製及貼上即可。
建構項目
Android 通用音樂播放器 (UAMP) 是以 Kotlin 編寫的 Android 音樂播放器範例應用程式。您將為手勢操作設定 UAMP。
- 使用插邊將控制項移離手勢區域
- 使用手勢排除 API,針對衝突的控制項選擇不使用返回手勢
- 使用建構版本,透過手勢操作模式探索沉浸模式行為變化
軟硬體需求
- 搭載 Android 10 以上版本的裝置或模擬器
- Android Studio
2. 應用程式總覽
Android 通用音樂播放器 (UAMP) 是以 Kotlin 編寫的 Android 範例音樂播放器應用程式。支援背景播放、音訊焦點處理、Google 助理整合,以及 Wear、TV 和 Auto 等多個平台。
|
|
|


圖 1:UAMP 中的流程
UAMP 會從遠端伺服器載入音樂目錄,讓使用者瀏覽專輯和歌曲。使用者輕觸歌曲,歌曲就會透過連線的音箱或耳機播放。這個應用程式不支援系統手勢。因此,在搭載 Android 10 以上版本的裝置上執行 UAMP 時,一開始會遇到一些問題。
3. 做好準備
如要取得範例應用程式,請從 GitHub 複製存放區,然後切換至 starter 分支:
$ git clone https://github.com/googlecodelabs/android-gestural-navigation/
另外,您也可以下載存放區為 ZIP 檔案,然後解壓縮並在 Android Studio 中開啟。
操作步驟如下:
- 在 Android Studio 中開啟並建構應用程式。
- 建立新的虛擬裝置,然後選取 API 級別 29。或者,您也可以連線至搭載 API 級別 29 以上版本的實體裝置。
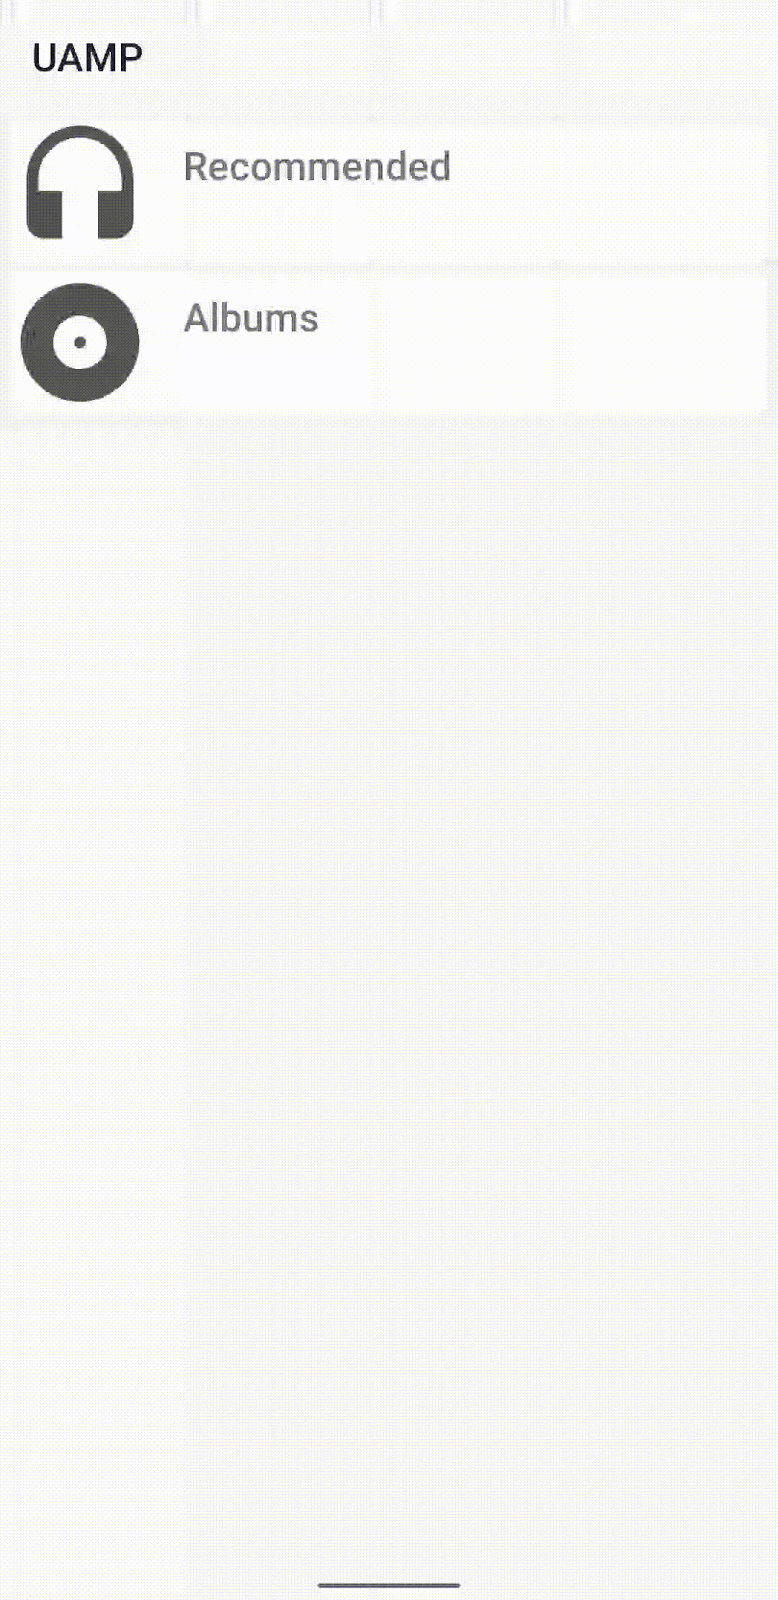
- 執行應用程式。清單會將歌曲歸類在「推薦」和「專輯」選項下方。
- 按一下「建議」,然後從歌曲清單中選取歌曲。
- 應用程式會開始播放歌曲。
啟用手勢操作
如果您使用 API 級別 29 執行新的模擬器執行個體,系統可能不會預設開啟手勢操作模式。如要啟用手勢操作模式,請依序選取「系統設定」>「系統」>「系統操作模式」>「手勢操作模式」。
以手勢操作模式執行應用程式
如果啟用手勢操作模式並開始播放歌曲,你可能會發現播放器控制項非常靠近首頁和返回手勢區域。
4. 無邊框顯示
什麼是無邊框設計?
無論是啟用手勢或按鈕進行導覽,在 Android 10 以上版本執行的應用程式都能提供全螢幕體驗。如要提供無邊框體驗,你的應用程式必須在透明導覽列和狀態列後方繪製。
在導覽列後方繪製
如要讓應用程式在導覽列下方算繪內容,請先將導覽列背景設為透明。然後將狀態列設為透明。這樣一來,應用程式就能在整個螢幕高度顯示。
如要變更導覽列和狀態列顏色,請按照下列步驟操作:
- 導覽列:開啟
res/values-29/styles.xml,並將navigationBarColor設為color/transparent。 - 狀態列:同樣將
statusBarColor設為color/transparent。
請參閱下列 res/values-29/styles.xml 程式碼範例:
<!-- change navigation bar color -->
<item name="android:navigationBarColor">
    @android:color/transparent
</item>

<!-- change status bar color -->
<item name="android:statusBarColor">
    @android:color/transparent
</item>
系統 UI 可見性旗標
您也必須設定系統 UI 可見性標記,告知系統在系統資訊列下方配置應用程式。View 類別的 systemUiVisibility API 可設定多種旗標。請執行下列步驟:
- 開啟
MainActivity.kt類別,然後找出onCreate()方法。取得fragmentContainer的例項。 - 將下列項目設為
content.systemUiVisibility:
View.SYSTEM_UI_FLAG_LAYOUT_STABLEView.SYSTEM_UI_FLAG_LAYOUT_FULLSCREENView.SYSTEM_UI_FLAG_LAYOUT_HIDE_NAVIGATION
請參閱下列 MainActivity.kt 程式碼範例:
  val content: FrameLayout = findViewById(R.id.fragmentContainer)
  content.systemUiVisibility = View.SYSTEM_UI_FLAG_LAYOUT_STABLE or
            View.SYSTEM_UI_FLAG_LAYOUT_FULLSCREEN or
            View.SYSTEM_UI_FLAG_LAYOUT_HIDE_NAVIGATION
同時設定這些旗標時,您會告知系統要以全螢幕顯示應用程式,就像沒有導覽列和狀態列一樣。請執行下列步驟:
- 執行應用程式,然後選取要播放的歌曲,前往播放器畫面。
- 確認播放器控制項是否繪製在導覽列下方,導致難以存取:
|
|


- 前往系統設定,切換回三按鈕操作模式,然後返回應用程式。
- 確認使用三按鈕導覽列時,控制項更難以使用:請注意,
SeekBar隱藏在導覽列後方,而「播放/暫停」則大部分被導覽列遮住。 - 請稍微探索及實驗一下。完成後,請前往「系統設定」,然後切換回「手勢操作」:
應用程式現在會繪製無邊框畫面,但有可用性問題、應用程式控制項衝突和重疊,這些問題必須解決。
5. 插邊
WindowInsets 會告知應用程式系統 UI 出現在內容上方的位置,以及系統手勢優先於應用程式內手勢的畫面區域。插邊是由 Jetpack 中的 WindowInsets 類別和 WindowInsetsCompat 類別表示。強烈建議您使用 WindowInsetsCompat,確保所有 API 層級的行為一致。
系統插邊和必要系統插邊
以下是常用的插邊 API 類型:
- 系統視窗插邊:可顯示系統 UI 在應用程式上的顯示位置。我們會說明如何使用系統插邊,將控制項移開系統資訊列。
- 系統手勢插邊:傳回所有手勢區域。在這些地區,應用程式內的任何滑動控制項都可能意外觸發系統手勢。
- 必要手勢插邊:這是系統手勢插邊的子集,無法覆寫。這些區域會顯示系統手勢的行為一律優先於應用程式內手勢。
使用插邊移動應用程式控制項
現在您已進一步瞭解插邊 API,可以按照下列步驟修正應用程式控制項:
- 從
view物件例項取得playerLayout的例項。 - 在
playerView中新增OnApplyWindowInsetsListener。 - 將檢視區塊移離手勢區域:找出底部的系統插邊值,並將檢視區塊的邊框間距增加該值。如要相應更新檢視區塊的邊框間距,請將 [與應用程式底部邊框間距相關聯的值] 加上 [與系統插邊底部值相關聯的值]。
請參閱下列 NowPlayingFragment.kt 程式碼範例:
playerView = view.findViewById(R.id.playerLayout)
playerView.setOnApplyWindowInsetsListener { view, insets ->
   view.updatePadding(
      bottom = insets.systemWindowInsetBottom + view.paddingBottom
   )
   insets
}
- 執行應用程式並選取歌曲。請注意,播放器控制項似乎沒有任何變化。如果您新增中斷點並在偵錯模式下執行應用程式,會發現系統未呼叫監聽器。
- 如要修正這個問題,請切換至
FragmentContainerView,這個版本會自動處理這個問題。開啟activity_main.xml,並將FrameLayout變更為FragmentContainerView。
請參閱下列 activity_main.xml 程式碼範例:
<androidx.fragment.app.FragmentContainerView xmlns:android="http://schemas.android.com/apk/res/android"
    xmlns:tools="http://schemas.android.com/tools"
    android:id="@+id/fragmentContainer"
    tools:context="com.example.android.uamp.MainActivity"
    android:layout_width="match_parent"
    android:layout_height="match_parent"/>
- 再次執行應用程式,然後前往播放器畫面。底部的播放器控制項會避開底部手勢操作區域。
應用程式控制項現在可搭配手勢操作,但控制項移動的幅度超出預期。請務必解決這個問題。
保留目前的邊框間距和邊界
如果切換至其他應用程式或前往主畫面,然後返回應用程式,但未關閉應用程式,你會發現播放器控制項每次都會向上移動。
這是因為應用程式會在每次活動開始時觸發 requestApplyInsets()。即使沒有這個呼叫,WindowInsets 仍可在檢視區塊生命週期的任何時間點多次分派。
您首次將插邊底部值金額新增至 activity_main.xml 中宣告的應用程式底部邊框間距值時,目前的 InsetListener 會在 playerView 上完美運作。不過,後續的呼叫會繼續將插邊底部值新增至已更新檢視區塊的底部邊框間距。
如要解決這個問題,請按照下列步驟操作:
- 記錄初始檢視區塊邊框間距值。在接聽程式碼之前,建立新的 val 並儲存
playerView的初始檢視區塊邊框間距值。
請參閱下列 NowPlayingFragment.kt 程式碼範例:
val initialPadding = playerView.paddingBottom
- 使用這個初始值更新檢視區塊的底部邊框間距,避免使用應用程式目前的底部邊框間距值。
請參閱下列 NowPlayingFragment.kt 程式碼範例:
   playerView.setOnApplyWindowInsetsListener { view, insets ->
            view.updatePadding(bottom = insets.systemWindowInsetBottom + initialPadding)
            insets
        }
- 再次執行應用程式。在應用程式之間切換,以及返回主畫面。返回應用程式時,播放器控制項會顯示在手勢區域上方。
重新設計應用程式控制項
播放器的搜尋列太靠近底部手勢區域,因此使用者完成水平滑動時,可能會誤觸主畫面手勢。如果進一步增加邊框間距,或許可以解決問題,但播放器可能會移到高於所需的位置。
使用插邊可修正手勢衝突,但有時只要稍微變更設計,就能完全避免手勢衝突。如要重新設計播放器控制項,避免手勢衝突,請按照下列步驟操作:
- 開啟
fragment_nowplaying.xml。切換至「設計」檢視畫面,然後選取最底部的SeekBar:

- 切換至程式碼檢視模式。
- 如要將
SeekBar移至playerLayout頂端,請將 SeekBar 的layout_constraintTop_toBottomOf變更為parent。 - 如要將
playerView中的其他項目限制為SeekBar的底部,請在media_button、title和position上將layout_constraintTop_toTopOf從父項變更為@+id/seekBar。
請參閱下列 fragment_nowplaying.xml 程式碼範例:
<androidx.constraintlayout.widget.ConstraintLayout
   android:layout_width="match_parent"
   android:layout_height="wrap_content"
   android:padding="8dp"
   android:layout_gravity="bottom"
   android:background="@drawable/media_overlay_background"
   android:id="@+id/playerLayout">

   <ImageButton
       android:id="@+id/media_button"
       android:layout_width="@dimen/exo_media_button_width"
       android:layout_height="@dimen/exo_media_button_height"
       android:background="?attr/selectableItemBackground"
       android:scaleType="centerInside"
       app:layout_constraintLeft_toLeftOf="parent"
       app:layout_constraintTop_toTopOf="@+id/seekBar"
       app:srcCompat="@drawable/ic_play_arrow_black_24dp"
       tools:ignore="ContentDescription" />

   <TextView
       android:id="@+id/title"
       android:layout_width="0dp"
       android:layout_height="wrap_content"
       android:layout_marginTop="8dp"
       android:layout_marginStart="@dimen/text_margin"
       android:layout_marginEnd="@dimen/text_margin"
       android:ellipsize="end"
       android:maxLines="1"
       android:textAppearance="@style/TextAppearance.Uamp.Title"
       app:layout_constraintTop_toTopOf="@+id/seekBar"
       app:layout_constraintLeft_toRightOf="@id/media_button"
       app:layout_constraintRight_toLeftOf="@id/position"
       tools:text="Song Title" />

   <TextView
       android:id="@+id/subtitle"
       android:layout_width="0dp"
       android:layout_height="wrap_content"
       android:layout_marginStart="@dimen/text_margin"
       android:layout_marginEnd="@dimen/text_margin"
       android:ellipsize="end"
       android:maxLines="1"
       android:textAppearance="@style/TextAppearance.Uamp.Subtitle"
       app:layout_constraintTop_toBottomOf="@+id/title"
       app:layout_constraintLeft_toRightOf="@id/media_button"
       app:layout_constraintRight_toLeftOf="@id/position"
       tools:text="Artist" />

   <TextView
       android:id="@+id/position"
       android:layout_width="0dp"
       android:layout_height="wrap_content"
       android:layout_marginTop="8dp"
       android:layout_marginStart="@dimen/text_margin"
       android:layout_marginEnd="@dimen/text_margin"
       android:ellipsize="end"
       android:maxLines="1"
       android:textAppearance="@style/TextAppearance.Uamp.Title"
       app:layout_constraintTop_toTopOf="@+id/seekBar"
       app:layout_constraintRight_toRightOf="parent"
       tools:text="0:00" />

   <TextView
       android:id="@+id/duration"
       android:layout_width="0dp"
       android:layout_height="wrap_content"
       android:layout_marginStart="@dimen/text_margin"
       android:layout_marginEnd="@dimen/text_margin"
       android:ellipsize="end"
       android:maxLines="1"
       android:textAppearance="@style/TextAppearance.Uamp.Subtitle"
       app:layout_constraintTop_toBottomOf="@id/position"
       app:layout_constraintRight_toRightOf="parent"
       tools:text="0:00" />

   <SeekBar
       android:id="@+id/seekBar"
       android:layout_width="match_parent"
       android:layout_height="wrap_content"
       app:layout_constraintBottom_toBottomOf="parent"
       app:layout_constraintEnd_toEndOf="parent"
       app:layout_constraintStart_toStartOf="parent"
       app:layout_constraintTop_toBottomOf="parent" />

</androidx.constraintlayout.widget.ConstraintLayout>
- 執行應用程式,並與播放器和搜尋列互動。
這些微小的設計變更可大幅提升應用程式品質。
6. 手勢排除 API
修正住家手勢區域中,手勢衝突的播放器控制項。返回手勢區域也可能與應用程式控制項發生衝突。以下螢幕截圖顯示,播放器搜尋列目前位於左右兩側的返回手勢區域:

SeekBar 會自動處理手勢衝突。但您可能需要使用會觸發手勢衝突的其他 UI 元件。在這種情況下,您可以使用 Gesture Exclusion API 部分停用返回手勢。
使用手勢排除 API
如要建立手勢排除區域,請在檢視區塊上呼叫 setSystemGestureExclusionRects(),並提供 rect 物件清單。這些 rect 物件會對應至排除矩形區域的座標。這項呼叫必須在檢視區塊的 onLayout() 或 onDraw() 方法中完成。如要這麼做,請按照下列步驟操作:
- 建立名為
view的新套件。 - 如要呼叫這個 API,請建立名為
MySeekBar的新類別,並擴充AppCompatSeekBar。
請參閱下列 MySeekBar.kt 程式碼範例:
class MySeekBar @JvmOverloads constructor(
    context: Context,
    attrs: AttributeSet? = null,
    defStyle: Int = android.R.attr.seekBarStyle
) : androidx.appcompat.widget.AppCompatSeekBar(context, attrs, defStyle) {

}
- 建立名為
updateGestureExclusion()的新方法。
請參閱下列 MySeekBar.kt 程式碼範例:
private fun updateGestureExclusion() {

}
- 新增檢查,在 API 級別 28 以下時略過這項呼叫。
請參閱下列 MySeekBar.kt 程式碼範例:
private fun updateGestureExclusion() {
        // Skip this call if we're not running on Android 10+
        if (Build.VERSION.SDK_INT < 29) return
}
- 由於手勢排除 API 的限制為 200 dp,因此請只排除搜尋列的拇指。取得 SeekBar 邊界的副本,並將每個物件新增至可變動的清單。
請參閱下列 MySeekBar.kt 程式碼範例:
private val gestureExclusionRects = mutableListOf<Rect>()

private fun updateGestureExclusion() {
    // Skip this call if we're not running on Android 10+
    if (Build.VERSION.SDK_INT < 29) return

    thumb?.also { t ->
        gestureExclusionRects += t.copyBounds()
    }
}
- 使用您建立的
gestureExclusionRects清單呼叫systemGestureExclusionRects()。
請參閱下列 MySeekBar.kt 程式碼範例:
private val gestureExclusionRects = mutableListOf<Rect>()

private fun updateGestureExclusion() {
    // Skip this call if we're not running on Android 10+
    if (Build.VERSION.SDK_INT < 29) return

    thumb?.also { t ->
        gestureExclusionRects += t.copyBounds()
    }
    // Finally pass our updated list of rectangles to the system
    systemGestureExclusionRects = gestureExclusionRects
}
- 從
onDraw()或onLayout()呼叫updateGestureExclusion()方法。覆寫onDraw()並呼叫updateGestureExclusion。
請參閱下列 MySeekBar.kt 程式碼範例:
override fun onDraw(canvas: Canvas) {
    super.onDraw(canvas)
    updateGestureExclusion()
}
- 您必須更新
SeekBar參照。首先,請開啟fragment_nowplaying.xml。 - 將
SeekBar變更為com.example.android.uamp.view.MySeekBar。
請參閱下列 fragment_nowplaying.xml 程式碼範例:
<com.example.android.uamp.view.MySeekBar
    android:id="@+id/seekBar"
    android:layout_width="match_parent"
    android:layout_height="wrap_content"
    app:layout_constraintBottom_toBottomOf="parent"
    app:layout_constraintEnd_toEndOf="parent"
    app:layout_constraintStart_toStartOf="parent"
    app:layout_constraintTop_toBottomOf="parent" />
- 如要更新
NowPlayingFragment.kt中的SeekBar參照,請開啟NowPlayingFragment.kt,並將positionSeekBar的型別變更為MySeekBar。如要比對變數類型,請將findViewById呼叫的SeekBar泛型變更為MySeekBar。
請參閱下列 NowPlayingFragment.kt 程式碼範例:
val positionSeekBar: MySeekBar = view.findViewById<MySeekBar>(
     R.id.seekBar
).apply { progress = 0 }
- 執行應用程式並與
SeekBar互動。如果手勢仍有衝突,您可以在MySeekBar中實驗及修改拇指邊界。請注意,手勢排除區域不宜過大,否則會限制其他潛在的手勢排除呼叫,並造成使用者行為不一致。
7. 恭喜
恭喜!您已瞭解如何避免及解決系統手勢衝突!
您擴展了無邊框設計,並使用插邊將應用程式控制項移出手勢區域,讓應用程式使用全螢幕。您也瞭解如何在應用程式控制項中停用系統返回手勢。
您現在已瞭解讓應用程式支援系統手勢的重要步驟!