
1. Introduction
Last Updated: 2020-1-6
Firebase Cloud Messaging (FCM) is a cross-platform messaging solution that lets you reliably send messages at no cost.
Using FCM, you can notify a client app that new email or other data is available to sync. You can send notification messages to drive user re-engagement and retention. For use cases such as instant messaging, a message can transfer a payload of up to 4KB to a client app.
How does it work?
A FCM implementation includes two main components for sending and receiving:
- A trusted environment such as Cloud Functions for Firebase or an app server on which to build, target, and send messages.
- An iOS, Android, or web (JavaScript) client app that receives messages via the corresponding platform-specific transport service.
FCM Architectural Overview

FCM relies on the following set of components that build, transport, and receive messages:
- Tooling to compose or build message requests. The Notifications composer provides a GUI-based option for creating notification requests. For full automation and support for all message types, you must build message requests in a trusted server environment that supports the Firebase Admin SDK or the FCM server protocols. This environment could be Cloud Functions for Firebase, Google App Engine, or your own app server.
- The FCM backend, which (among other functions) accepts message requests, performs fanout of messages via topics, and generates message metadata such as the message ID.
- A platform-level transport layer, which routes the message to the targeted device, handles message delivery, and applies platform-specific configuration where appropriate. This transport layer includes:
- Android transport layer (ATL) for Android devices with Google Play services
- Apple Push Notification service (APNs) for iOS devices
- Web push protocol for web apps
- The FCM SDK on the user's device, where the notification is displayed or the message is handled according to the app's foreground/background state and any relevant application logic.
What you'll build
In this codelab, you're going to add push notification to a sample iOS app with FCM.
What you'll learn
- How to subscribe and unsubscribe a user for push messaging
- How to handle incoming push messages
- How to display a notification
- How to respond to notification clicks
What you'll need
- Xcode 11.0 or later
- CocoaPods 1.9.0 or later
- Apple Developer Account
- A physical iOS device to run your app
- Basic knowledge of Swift
2. Getting set up
Download the sample code
In this codelab, you will build your own test app, but if you want to see and run the existing sample app, you can download the quickstart sample code.
There are two ways to get the sample:
- Clone the Git repository:
$ git clone https://github.com/firebase/quickstart-ios.git
- Download the ZIP file:
If you download the source as a ZIP file, unpacking it gives you a root folder quickstart-ios.
Create a new app
Create your own test app by the following steps (the steps below are in XCode 12.3):
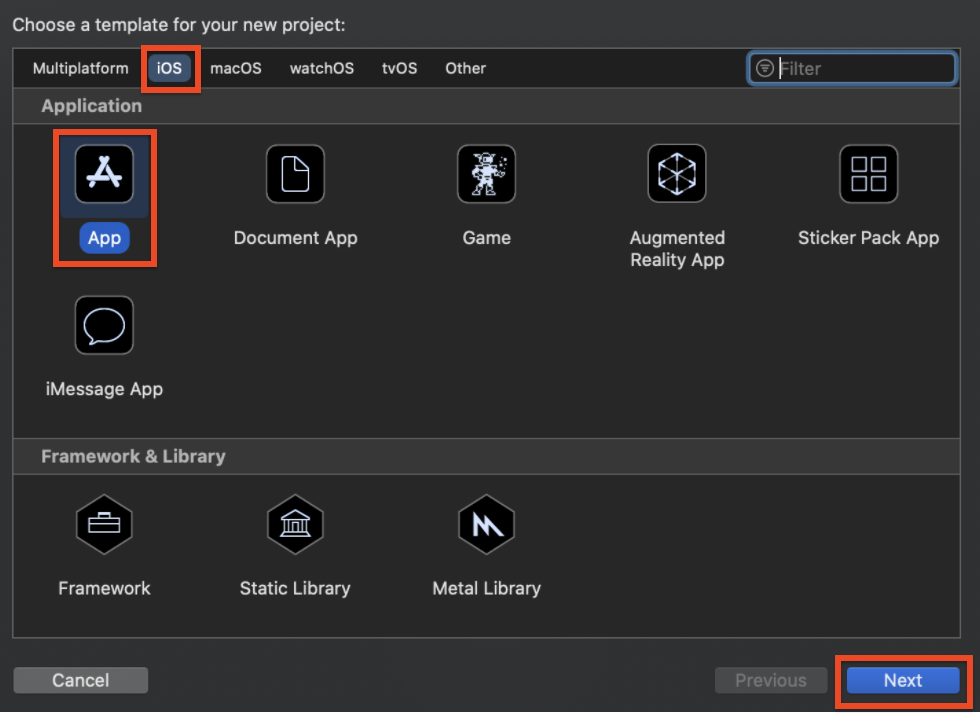
- Open XCode and select Create a new Xcode project.
- Select App and click Next.
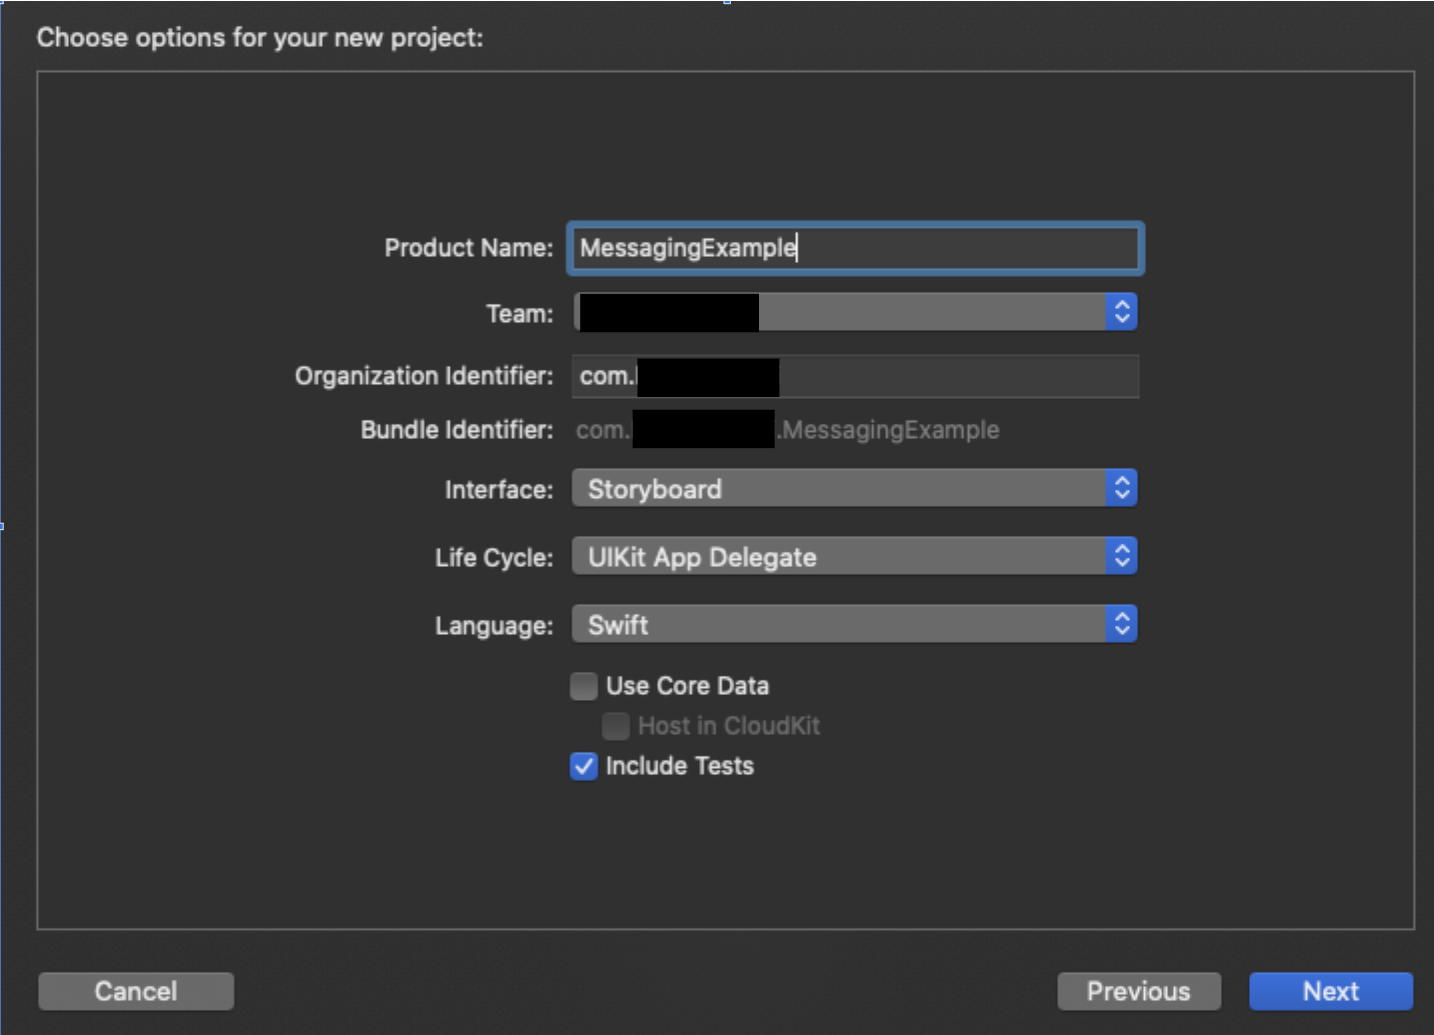
- Input Product Name (eg. MessagingExample)
- Select Team (If you have not created Team, configure it in Apple Developer Account).
- Input Organization Identifier (eg.
com.your-name) - Input Bundle Identifier (eg.
com.your-name.MessagingExample, it should be unique among all iOS apps). - Select Storyboard in the Interface pulldown.
- Select UIKit App Delegate in the Life Cycle pulldown.
- Select Swift in the Language.
- Click Next.
You will need the Bundle Identifier when you create an APN key and register your app to your Firebase project.
3. Configuring APNs
Create the authentication key
This section describes how to generate an authentication key for an App ID enabled for Push Notifications. If you have an existing key, you can use that key instead of generating a new one.
To create an authentication key:
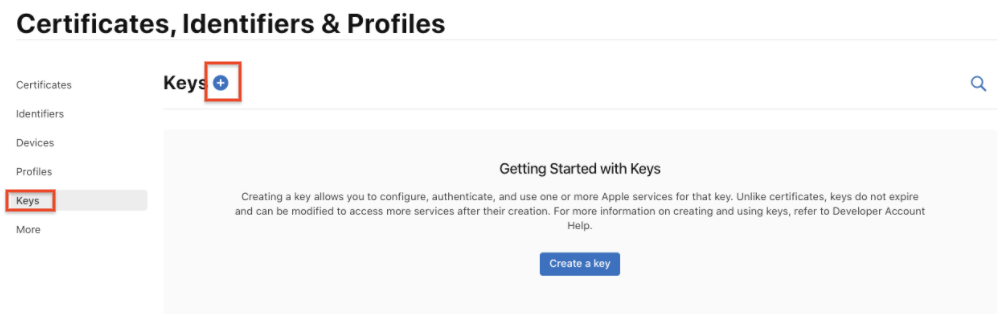
- In your developer account, go to Certificates, Identifiers & Profiles, and navigate to Keys.

- Click the Add button (+) in the upper-right corner.
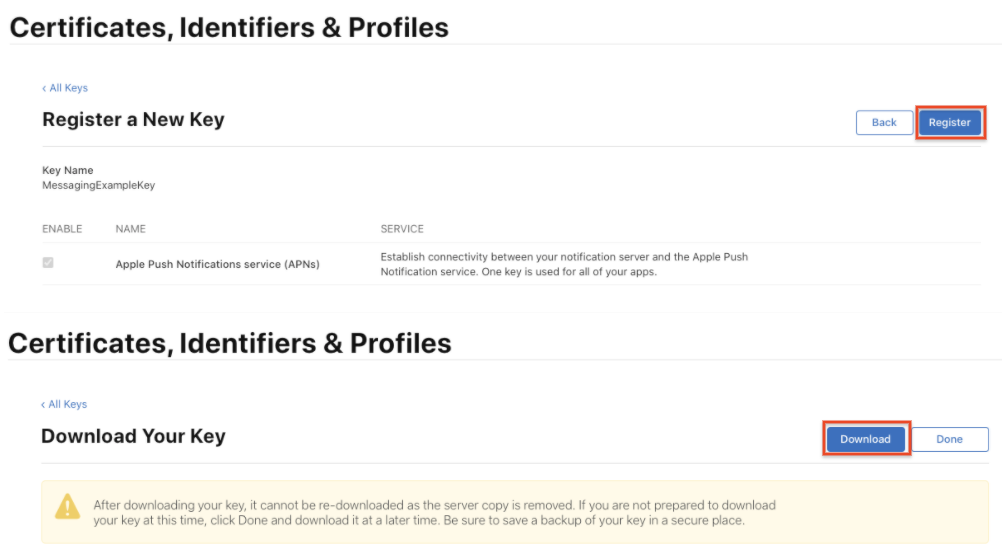
- Enter a description for the APNs Auth Key
- Under Key Services, select the APNs checkbox, and click Continue.
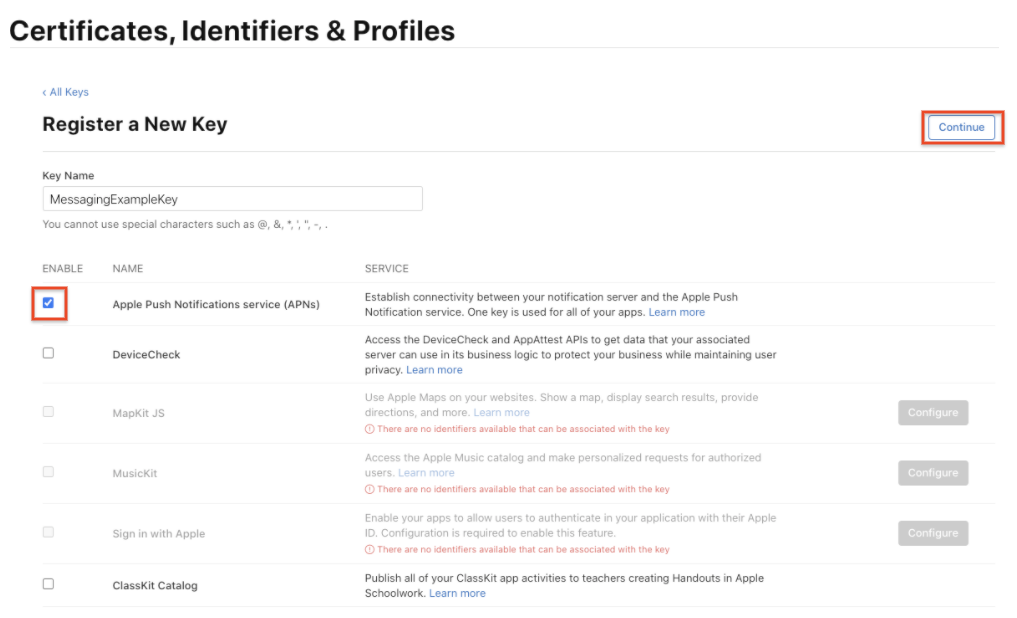
- Click Register and then Download. Save your key in a secure place. This is a one-time download, and the key cannot be retrieved later.
Create an App ID
An App ID is an identifier that uniquely identifies an app. As a convention it is represented by a reversed domain.
- Navigate to the Apple Developer Member Center and sign in.
- Navigate to Certificates, Identifiers and Profiles.
- Navigate to Identifiers.
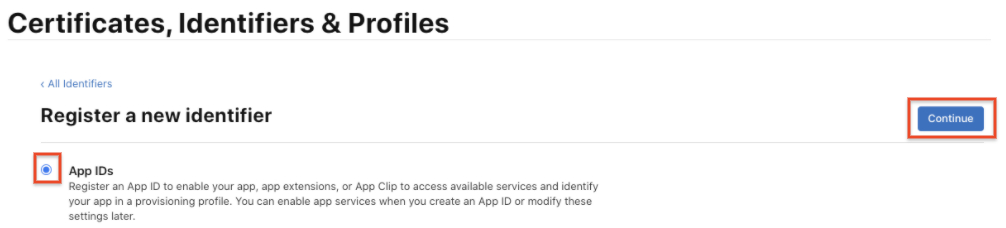
- Click the + button to create a new App ID.

- Select the App IDs radio button, and click Continue.
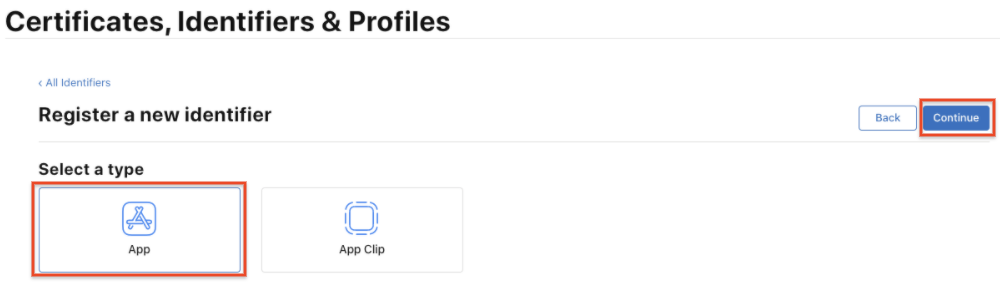
- Select App, and click Continue.
- To create the new App ID:
- Input a Name for your App ID.
- Input a Team ID. This value must match the Team ID in the Membership tab.
- In the App ID Suffix section, select Explicit App ID, then input your Bundle ID.

- In the App Services section, make sure that Push Notifications is checked.

- Click Continue and check that your input is correct:
- The value of Identifier should match the concatenation of the values of the Team ID and of the Bundle ID
- Push Notifications should be Configurable
- Click Register to create the App ID.
Create the Profile
To test your app while under development, you need a Profile for development to authorize your devices to run an app that is not yet published on the App Store.
- Navigate to the Apple Developer Member Center and sign in.
- Navigate to Certificates, Identifiers and Profiles.
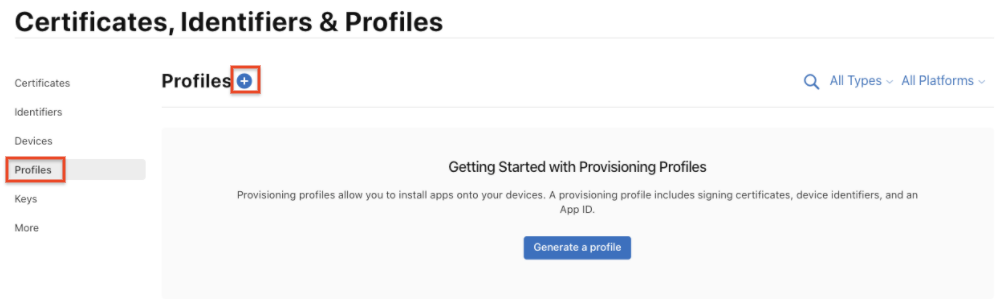
- In the drop down menu on the top left corner, select iOS, tvOS, watchOS if it's not already selected, then navigate to Profiles.
- Click the + button to create a new Profile.
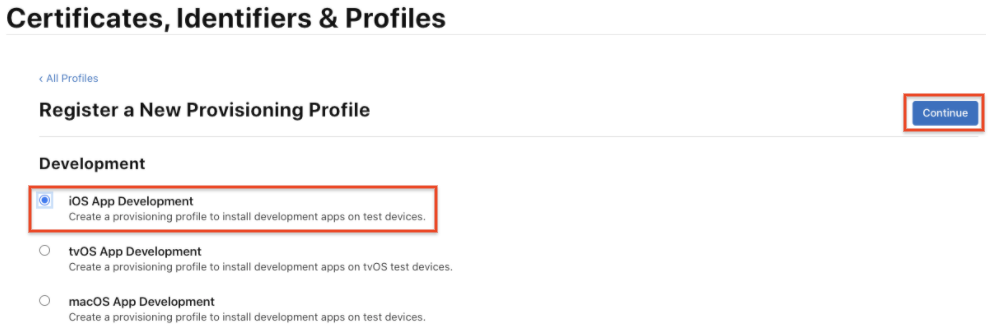
- Select iOS App Development as provisioning profile type, then click Continue.
- In the drop down menu, select the App ID you want to use, then click Continue.
- Select the iOS Development certificate of the App ID you have chosen in the previous step, then click Continue.
- Select the iOS devices that you want to include in the Provisioning Profile, then click Continue. Make sure to select all the devices you want to use for your testing.
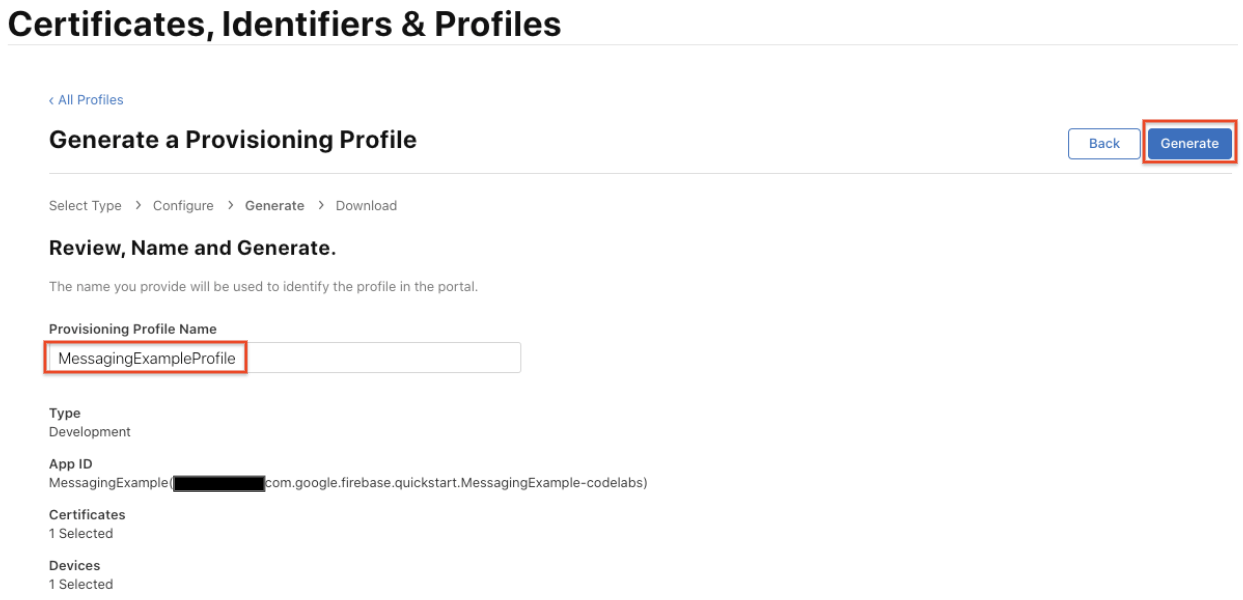
- Input a name for this provisioning profile (e.g. MessagingExampleProfile), then click Generate.
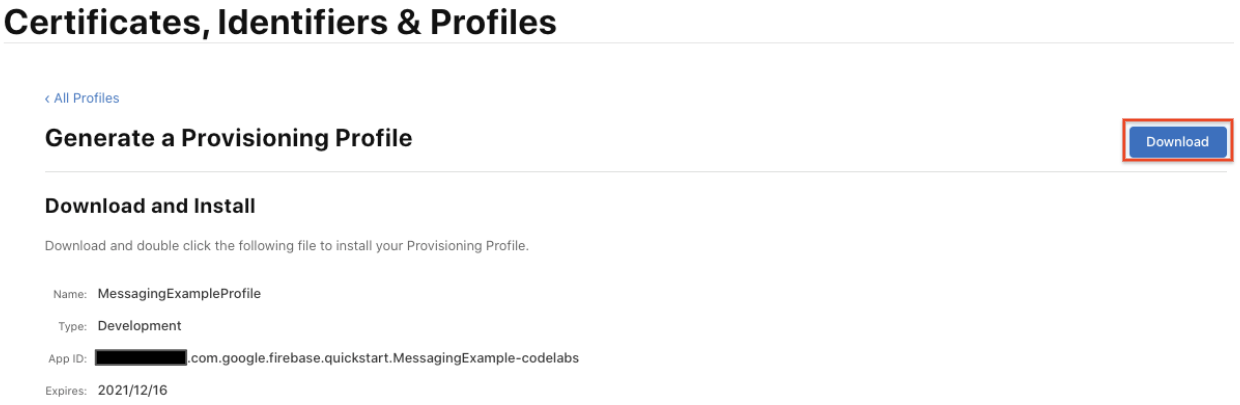
- Click Download to save the Provisioning Profile to your Mac.
- Double-click the Provisioning Profile file to install it.
4. Adding Firebase to your iOS project
Create a Firebase project
Before you can add Firebase to your iOS app, you need to create a Firebase project to connect to your iOS app. Visit Understand Firebase Projects to learn more about Firebase projects.
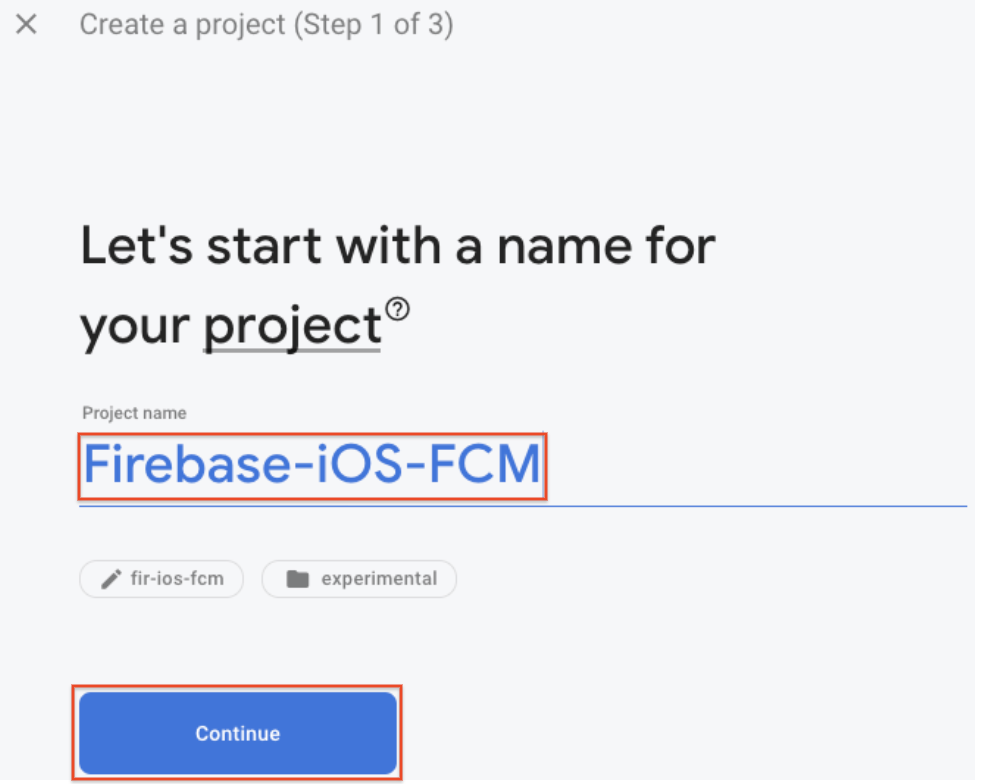
- In the Firebase console, click Add project, then select or enter a Project name.
If you have an existing Google Cloud Platform (GCP) project, you can select the project from the dropdown menu to add Firebase resources to that project.
- (Optional) If you are creating a new project, you can edit the Project ID.
Firebase automatically assigns a unique ID to your Firebase project. Visit Understand Firebase Projects to learn about how Firebase uses the project ID.
- Click Continue.
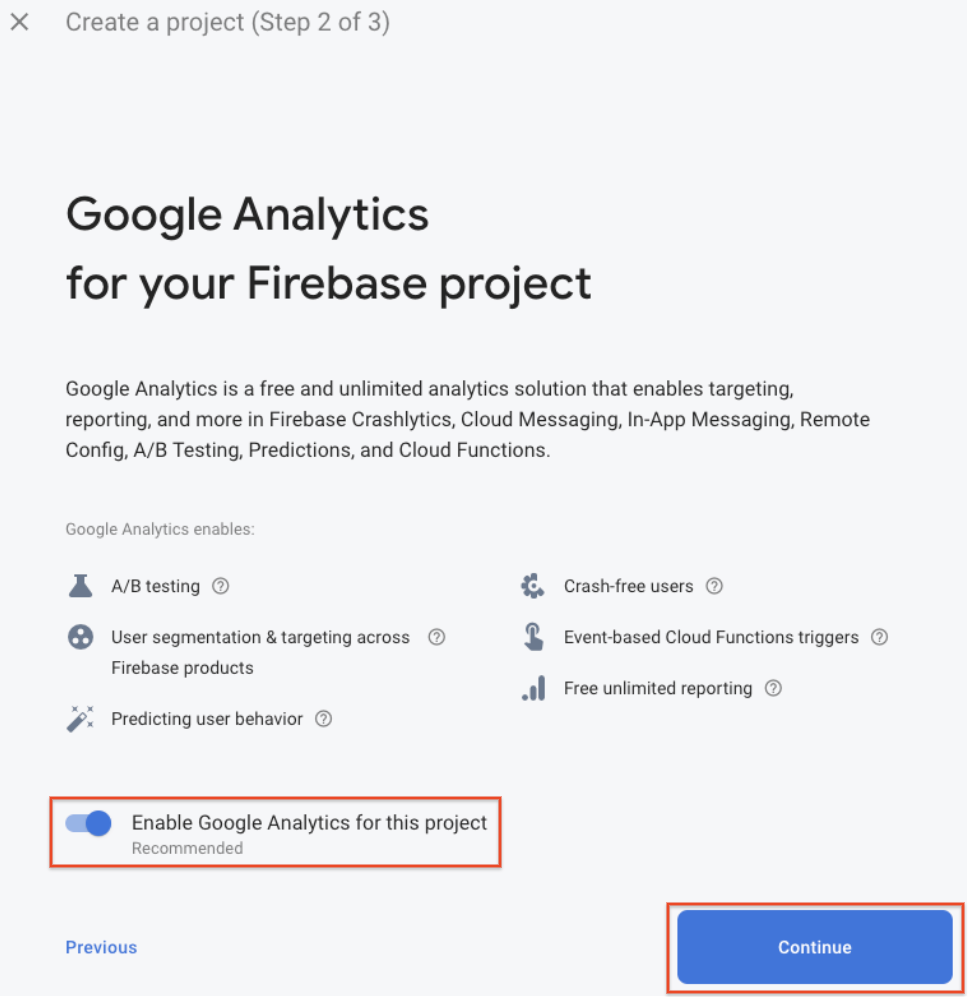
- Set up Google Analytics for your project, which enables you to have an optimal experience using any of the following Firebase products:
- Firebase Crashlytics
- Firebase Predictions
- Firebase Cloud Messaging
- Firebase In-App Messaging
- Firebase Remote Config
- Firebase A/B Testing
When prompted, select to use an existing Google Analytics account or to create a new account. If you choose to create a new account, select your Analytics reporting location, then accept the data sharing settings and Google Analytics terms for your project.
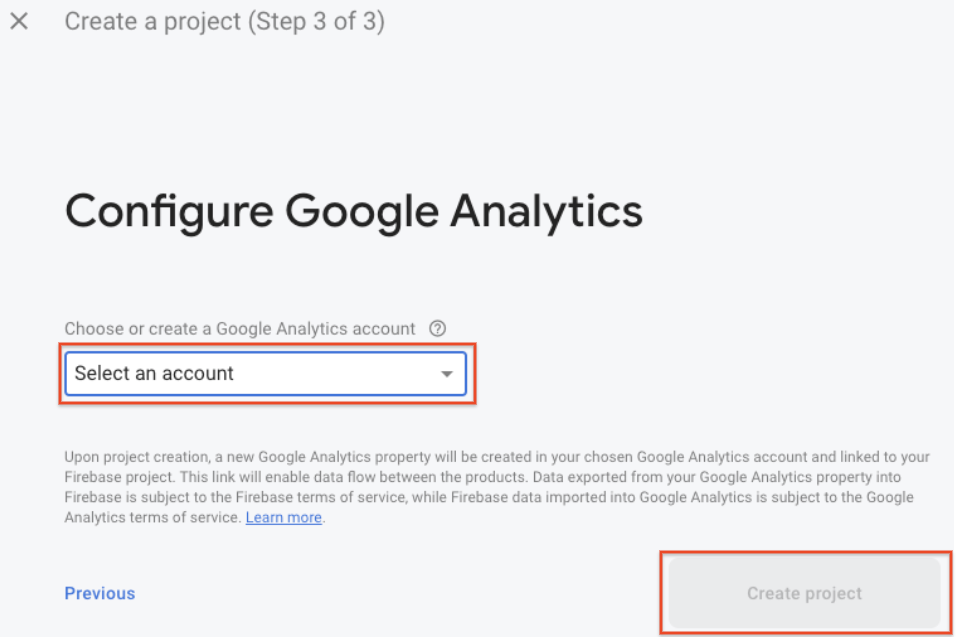
- Click Create project (or Add Firebase, if you're using an existing GCP project).
Firebase automatically provisions resources for your Firebase project. When the process completes, you'll be taken to the overview page for your Firebase project in the Firebase console.
Register your app with Firebase
After you have a Firebase project, you can add your iOS app to it.
Visit Understand Firebase Projects to learn more about best practices and considerations for adding apps to a Firebase project, including how to handle multiple build variants.
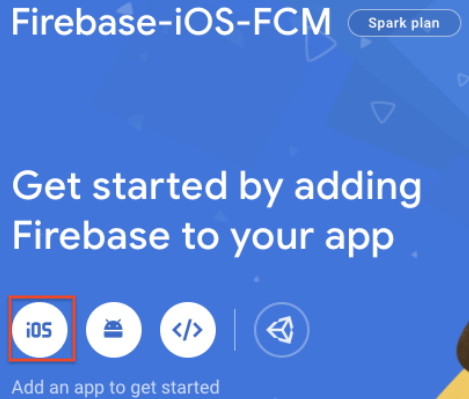
- Go to the Firebase console.
- In the center of the project overview page, click the iOS icon to launch the setup workflow.
If you've already added an app to your Firebase project, click Add app to display the platform options.
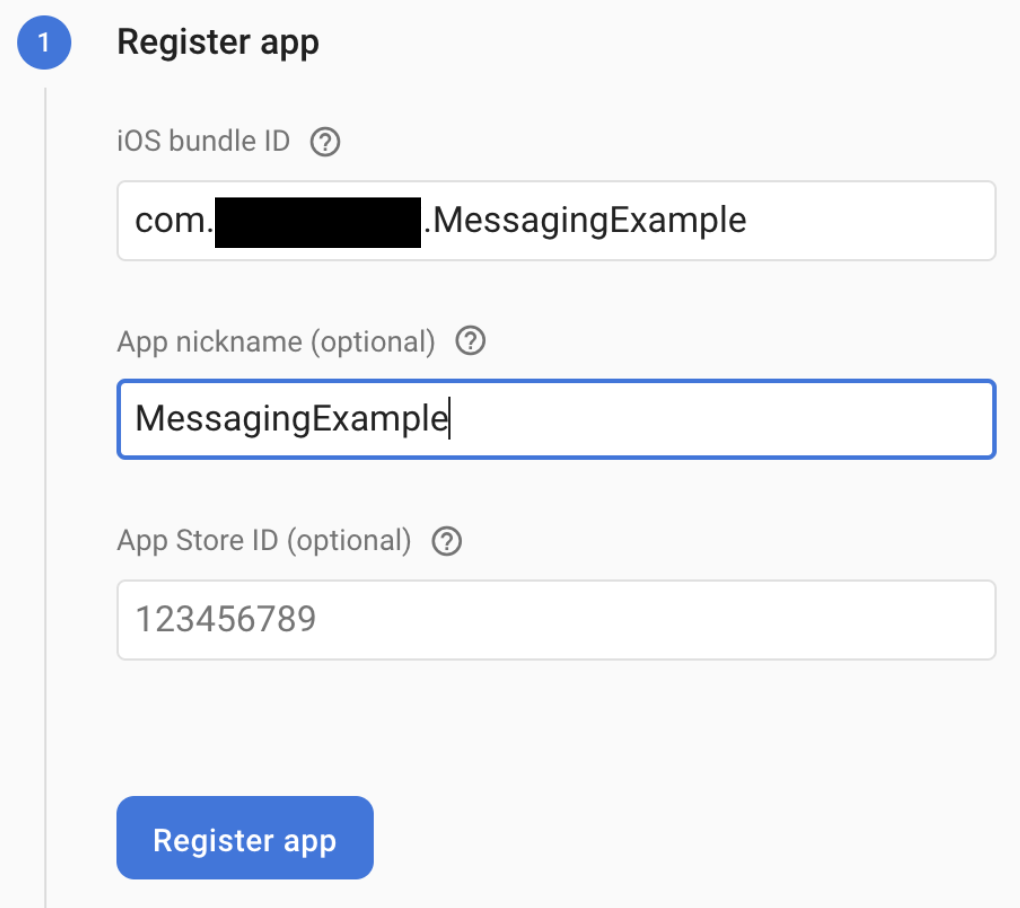
- Enter your app's bundle ID in the iOS bundle ID field.
- (Optional) Enter other app information: App nickname and App Store ID.
- Click Register app.
Add a Firebase configuration file
- Click Download GoogleService-Info.plist to obtain your Firebase iOS config file (
GoogleService-Info.plist).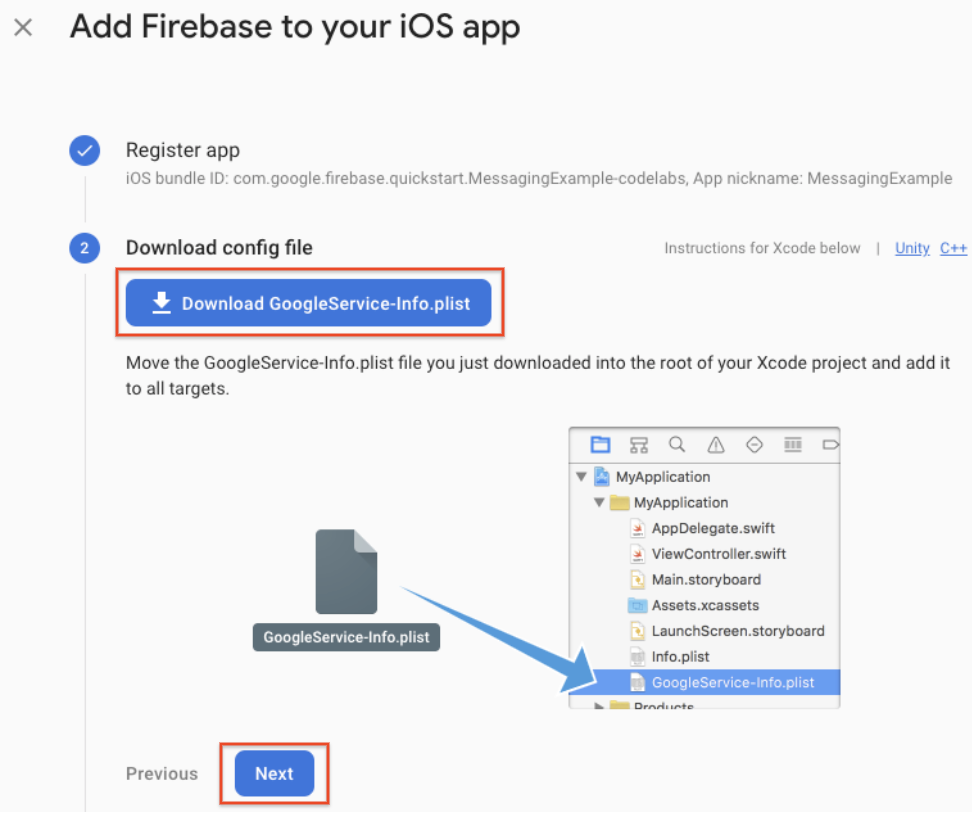
- Move your config file into the root of your Xcode project. If prompted, select to add the config file to all targets.
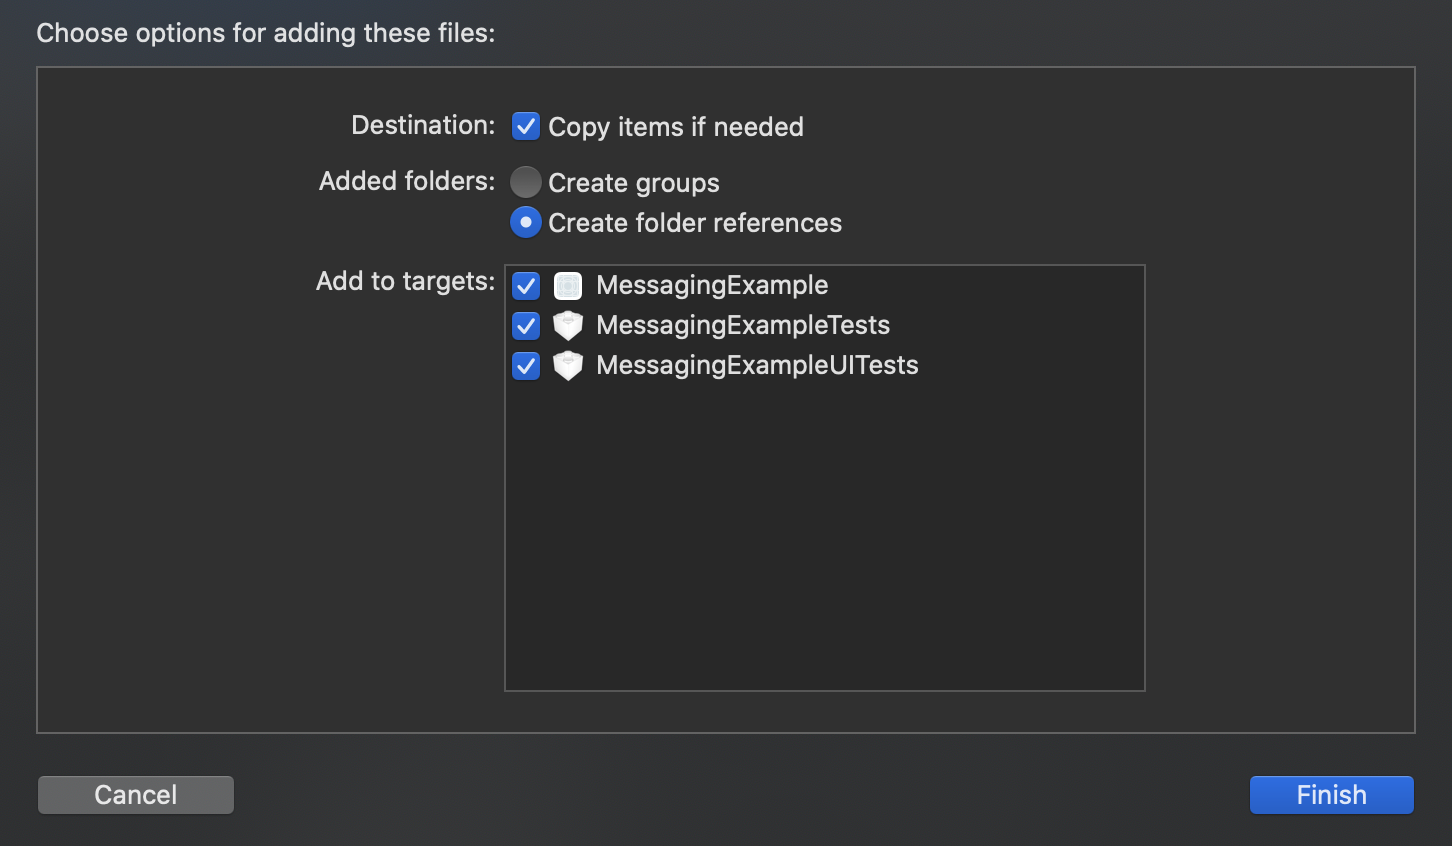
If you have multiple bundle IDs in your project, you must associate each bundle ID with a registered app in the Firebase console so that each app can have its own GoogleService-Info.plist file.
Close XCode.
Add Firebase SDKs to your app
We recommend using CocoaPods to install the Firebase libraries. However, if you'd rather not use CocoaPods, you can integrate the SDK frameworks directly or use the Swift Package Manager beta.
- Create a Podfile if you don't already have one. If you are using the quickstart sample, the Xcode project and Podfile (with pods) are already present.
$ cd MessagingExample
$ pod init
- To your Podfile, add the Firebase pods that you want to use in your app.
You can add any of the supported Firebase products to your iOS app.
In the quickstart sample, Google Analytics and Firebase Cloud Messaging SDKs have been added.
# Add the Firebase pod for Google Analytics
pod 'Firebase/Analytics'

# Add the pod for Firebase Cloud Messaging
pod 'Firebase/Messaging'
- Install the pods, then open your
.xcworkspacefile to see the project in Xcode:
$ pod install
- Open
MessagingExample.xcworkspace, and click Next in the Firebase console.
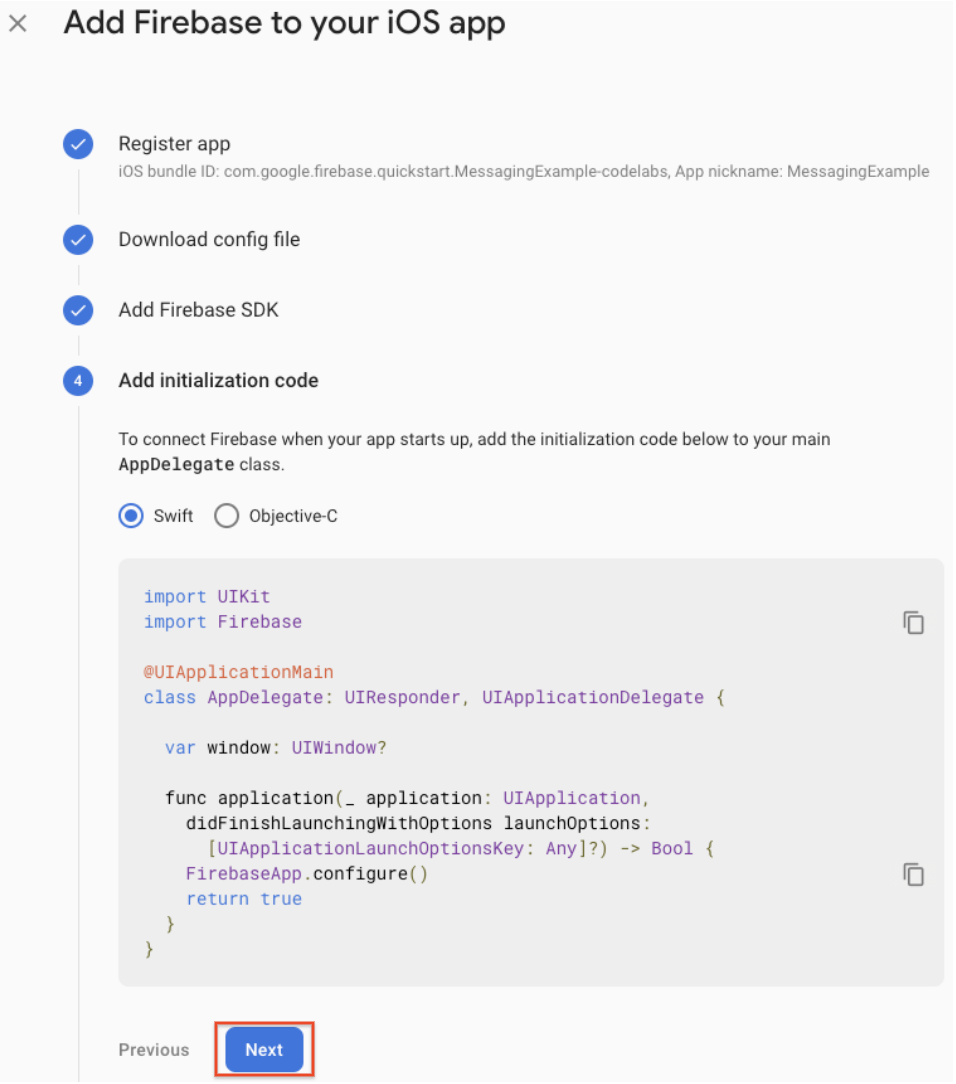
Initialize Firebase in your app
You'll need to add Firebase initialization code to your application.
Import the Firebase module and configure a shared instance (In the quickstart sample, Firebase module is already imported).
- Import the Firebase module in your
UIApplicationDelegate:
AppDelegate.swift
import UIKit
import Firebase // Add this line
- Configure a FirebaseApp shared instance, typically in your app's
application:didFinishLaunchingWithOptions:method:
AppDelegate.swift
func application(_ application: UIApplication, didFinishLaunchingWithOptions launchOptions: [UIApplication.LaunchOptionsKey: Any]?) -> Bool {
  FirebaseApp.configure() // Add this line
  return true
}
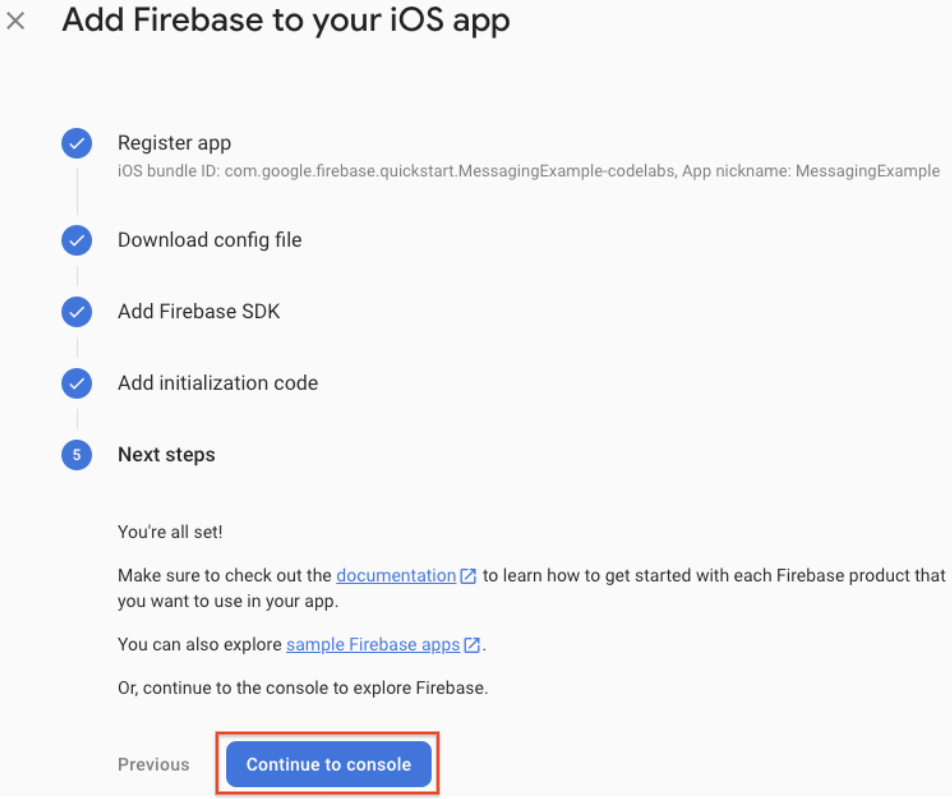
- Click Next in the Firebase console.
- Firebase SDKs are added to your app. Click Continue to console.
5. Configuring FCM client
Upload your APNs authentication key
Upload your APNs authentication key to Firebase.
- Inside your project in the Firebase console, select the gear icon, select Project Settings, and then select the Cloud Messaging tab.

- In APNs authentication key under Apple app configuration, click the Upload button to upload your development authentication key, or production authentication key, or both. At least one is required.

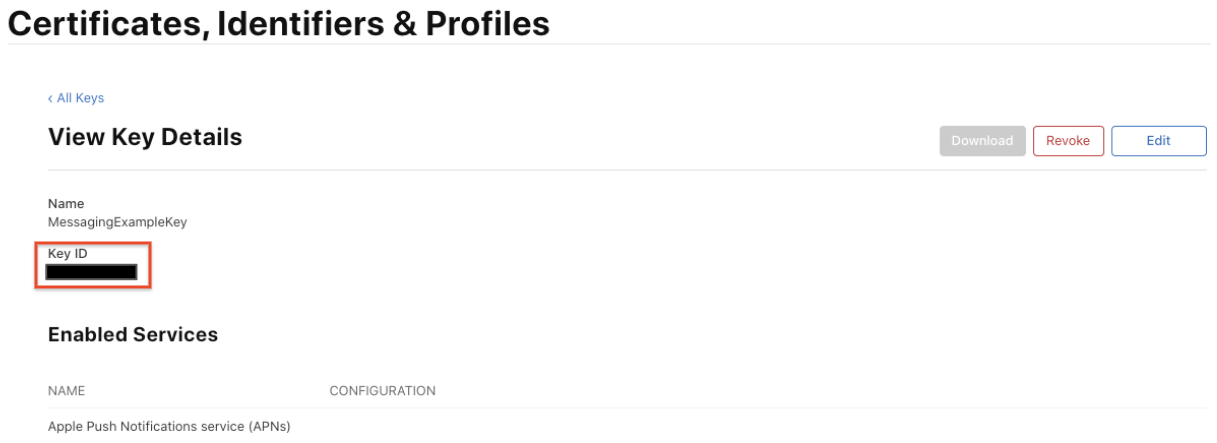
- Browse to the location where you saved your key, select it, and click Open. Add the key ID for the key (available in Certificates, Identifiers & Profiles in the Apple Developer Member Center) and click Upload.
Register for remote notifications
Either at startup, or at the desired point in your application flow, register your app for remote notifications.
In the quickstart sample, registerForRemoteNotifications is already added.
AppDelegate.swift
func application(_ application: UIApplication, didFinishLaunchingWithOptions launchOptions: [UIApplication.LaunchOptionsKey: Any]?) -> Bool {
  FirebaseApp.configure()
  // [START register for remote notifications]
  if #available(iOS 10.0, *) {
    // For iOS 10 display notification (sent via APNS)
    UNUserNotificationCenter.current().delegate = self

    let authOptions: UNAuthorizationOptions = [.alert, .badge, .sound]
    UNUserNotificationCenter.current().requestAuthorization(options: authOptions, completionHandler: {_, _ in })
  } else {
    let settings: UIUserNotificationSettings = UIUserNotificationSettings(types: [.alert, .badge, .sound], categories: nil)
    application.registerUserNotificationSettings(settings)
  }

  application.registerForRemoteNotifications()
  // [END register for remote notifications]
  return true
}
Assign UNUserNotificationCenter's delegate property by adding these lines at the end of AppDelegate.swift.
AppDelegate.swift
@available(iOS 10, *)
extension AppDelegate : UNUserNotificationCenterDelegate {

  // Receive displayed notifications for iOS 10 devices.
  func userNotificationCenter(_ center: UNUserNotificationCenter,
                              willPresent notification: UNNotification,
    withCompletionHandler completionHandler: @escaping (UNNotificationPresentationOptions) -> Void) {
    let userInfo = notification.request.content.userInfo

    // Print full message.
    print(userInfo)

    // Change this to your preferred presentation option
    completionHandler([[.alert, .sound]])
  }

  func userNotificationCenter(_ center: UNUserNotificationCenter,
                              didReceive response: UNNotificationResponse,
                              withCompletionHandler completionHandler: @escaping () -> Void) {
    let userInfo = response.notification.request.content.userInfo

    // Print full message.
    print(userInfo)

    completionHandler()
  }
}
Set the messaging delegate
To receive registration tokens, implement the messaging delegate protocol and set FIRMessaging's delegate property after calling [FIRApp configure]. For example, if your application delegate conforms to the messaging delegate protocol, you can set the delegate on application:didFinishLaunchingWithOptions: to itself (In the quickstart sample, it's already set).
AppDelegate.swift
func application(_ application: UIApplication, didFinishLaunchingWithOptions launchOptions: [UIApplication.LaunchOptionsKey: Any]?) -> Bool {
  FirebaseApp.configure()
  Messaging.messaging().delegate = self // Add this line
  // [START register for remote notifications]
  if #available(iOS 10.0, *) {
    // For iOS 10 display notification (sent via APNS)
    UNUserNotificationCenter.current().delegate = self

    let authOptions: UNAuthorizationOptions = [.alert, .badge, .sound]
    UNUserNotificationCenter.current().requestAuthorization(options: authOptions, completionHandler: {_, _ in })
  } else {
    let settings: UIUserNotificationSettings = UIUserNotificationSettings(types: [.alert, .badge, .sound], categories: nil)
    application.registerUserNotificationSettings(settings)
  }

  application.registerForRemoteNotifications()
  // [END register for remote notifications]
  return true
}
Assign FIRMessaging's delegate property by adding these lines at the end of AppDelegate.swift.
AppDelegate.swift
extension AppDelegate : MessagingDelegate {
  func messaging(_ messaging: Messaging, didReceiveRegistrationToken fcmToken: String?) {
    print("Firebase registration token: \(String(describing: fcmToken))")

    let dataDict:[String: String] = ["token": fcmToken ?? ""]
    NotificationCenter.default.post(name: Notification.Name("FCMToken"), object: nil, userInfo: dataDict)
  }
}
Add Capabilities
You added the Push Notifications capability in the Create an App ID section, but you have to also add this capability on XCode by the following steps (the steps below are in XCode 12.3):
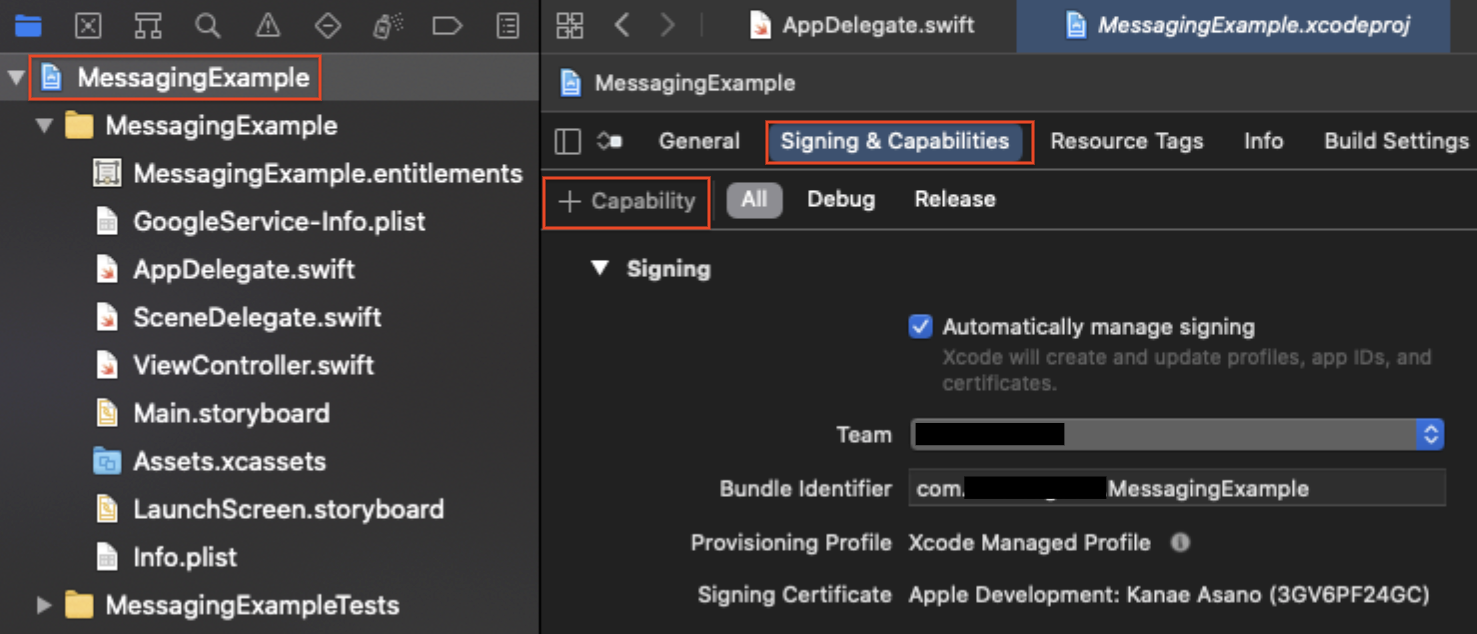
- Click the project name in the Navigator Area.
- Click Signing & Capabilities.
- Click + Capability.
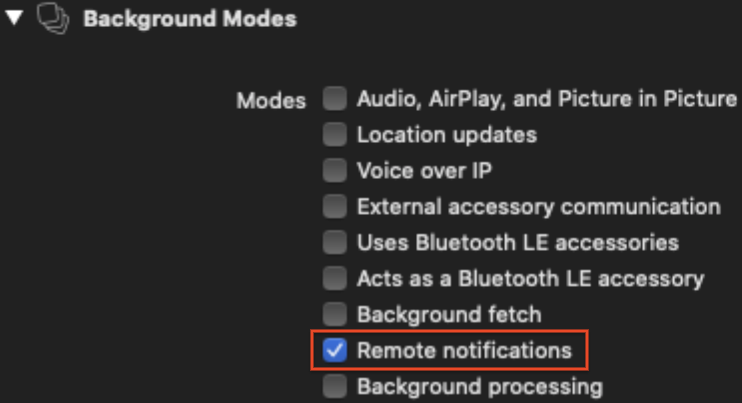
- Double-click Background Modes.
- Click + Capability again.
- Double-click Push Notifications.
- Check Remote notifications in the Background Modes sections.
6. Send a notification message
You can send a test message by the following steps:
- Install and run the app on the target device. You'll need to accept the request for permission to receive remote notifications.
- Obtain the registration token in the XCode log.

- Make sure the app is in the background on the device.
- Open the Notifications composer and select New notification.
- Enter the message text.
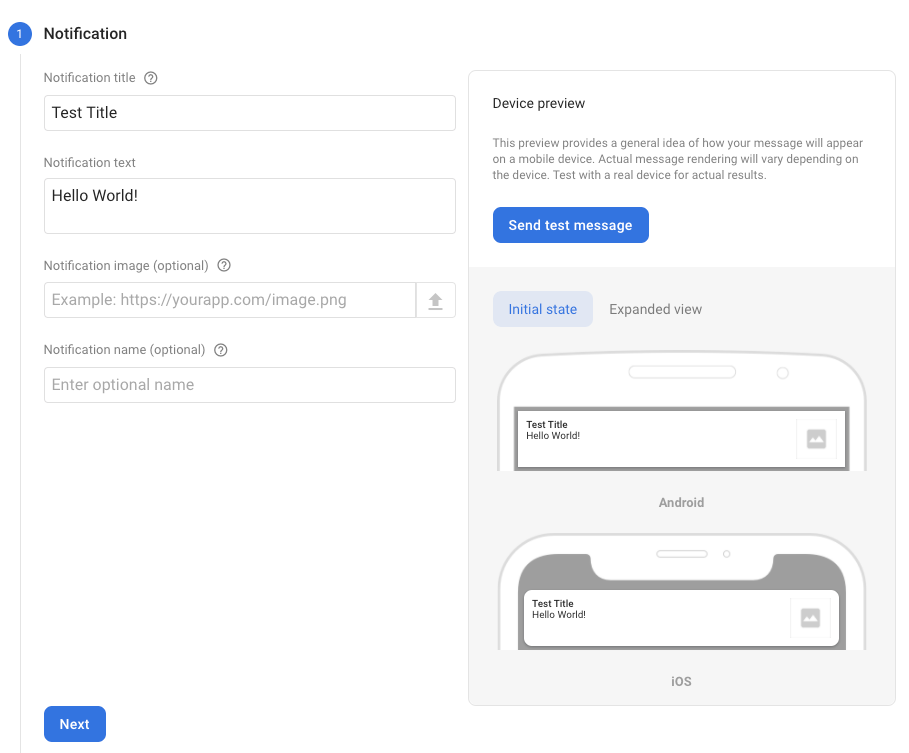
- Select Send test message.
- In the field labeled Add an FCM registration token, enter the registration token that you obtained in step 2.
- Click Test.
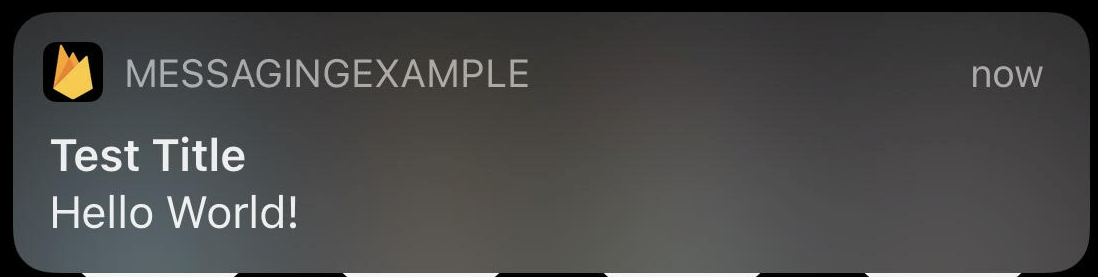
After you click Test, the targeted client device (with the app in the background) should receive the notification in the notification center.
For insight into message delivery to your app, see the FCM reporting dashboard, which records the number of messages sent and opened on iOS and Android devices.
7. Congratulations
Congratulations, you've successfully sent a test message!
There are many more functions and configurations in FCM such as topic subscription.
Check out the official developer document if you're interested in them.
What's next?
Check out some of these codelabs.