1. Before you begin
This codelab shows you how to set up an OAuth client and how to use the Google Cloud Console to grant Identity and Access Management (IAM) roles to principals for your project.
Prerequisites
- Ability to navigate the Cloud Console.
What you'll learn
- How to set up your app as an OAuth client.
- How to restrict access to your app with Identity and Access Management (IAM).
What you'll need
- A modern web browser, such as Google Chrome.
- A Google Account, such as a Gmail account or a Google Workspace account.
- Access to a Cloud BIlling account or a credit card to use to sign up for a free trial.
2. Create a Google Cloud project and set up a billing account
- Sign in to the Cloud Console.
- Go to the project- selector page.
- Click Create project.
- Name your project and then make a note of the generated project ID.
- Edit the other fields as needed.
- Click Create.
- If you haven't already, enable billing in the Cloud Console to use Google Cloud resources.
Although this codelab shouldn't cost much, if anything, follow the instructions in the Clean up section to shut down resources and avoid costs beyond this codelab. Note that new users of Google Cloud are eligible for the US$300 free trial.
3. Grant access with IAM
IAM lets you grant role-based access to users for your project and resources. In this section, you use IAM to grant a user access to a couple of roles for your project.
Enable the IAM and Resource Manager APIs
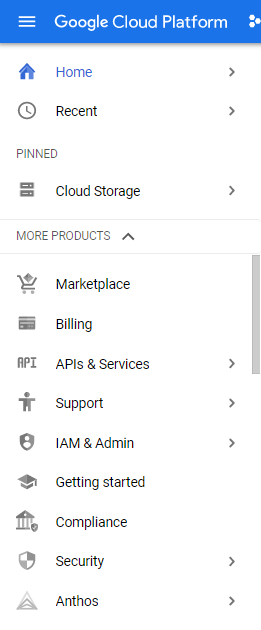
- In the navigation menu in the Cloud Console, click APIs & Services.

- Select ENABLE APIS AND SERVICES.

- Search for the IAM API and then enable it.
- Search for
Resource Manager APIand then enable it.
Grant a role with IAM
- Go to the IAM page.
The name of your project appears in the project selector. The project selector tells you what project you're in.

If you don't see the name of your project, use the project selector to select it.
- Click Add.
- Enter the email address of a principal.
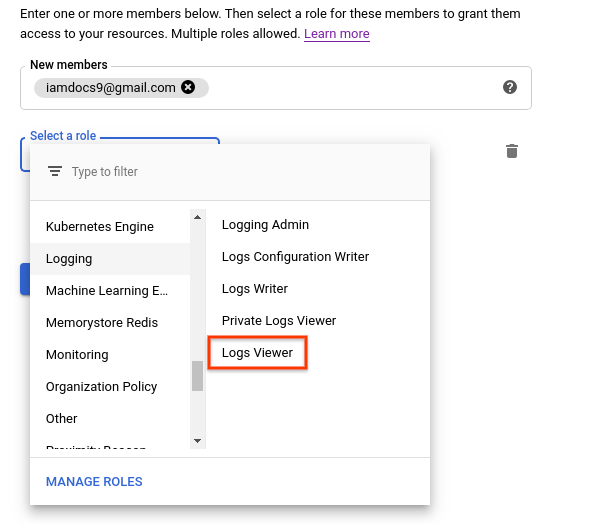
- From the Select a role drop-down menu, select Logging > Logs Viewer > Save.

- Verify that the principal and the role are listed on the IAM page.
That's it—you granted an identity and access management role to a principal!
Observe the effects of identity and access management roles
In this section, you verify that the principal to whom you granted a role can access the expected Cloud Console pages:
- Send this URL to the principal to whom you granted the role:
https://console.cloud.google.com/logs?project=PROJECT_ID
- Verify that the principal can access and view the URL.
The principal can't access a Cloud Console page for which they haven't been granted the appropriate role. Instead, they see an error message like this example:
You don't have permissions to view logs.
Grant other roles to the same principal
- In the Cloud Console, go to the IAM page.
- Locate the principal to whom you want to grant another role and then click Edit
 .
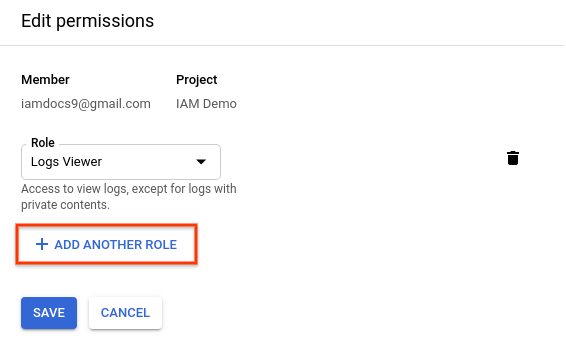
. - In the Edit permissions pane, click Add another role.

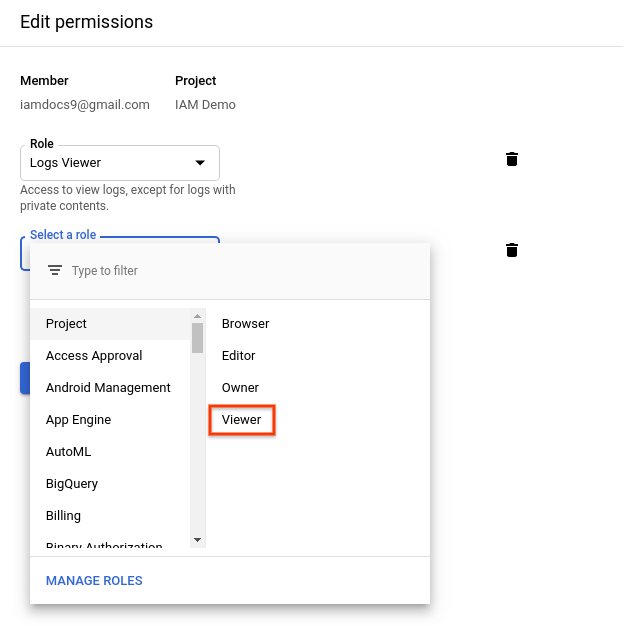
- In the Select a role drop-down menu, click Project > Viewer > Save.

The principal now has a second identity and access management role.
Revoke the roles granted to the principal
- Locate the principal whose role you want to revoke and then click
 Edit .
 - In the Edit permissions pane, click
 next to both roles that you previously granted to the principal.
 - Click Save.
You removed the principal from both of the roles. If this person tries to view any of the pages that they could previously access, they see an error message.
4. Clean up
To avoid charges to your Google Cloud account for the resources used in this codelab:
- In the Cloud Console, go to the Manage resources page.
- In the project list, select the project that you want to delete and then click Delete.
- In the dialog, type the project ID and then click Shut down to delete the project.
5. Congratulations
Congratulations! You learned how to set up an OAuth client and use the Cloud Console to grant identity and access management roles to principals for your project.
