
1. Introduction
This codelab builds on the Sign in with Google button for Web codelab, so be sure to complete it first.
In this codelab, you'll use the Google Identity Services JavaScript library and One Tap prompts to add user sign-in to static and dynamic web pages using HTML and JavaScript APIs.
We'll also setup a server-side login endpoint to verify JWT ID tokens.
What you'll learn
- How to setup a server-side login endpoint to verify ID tokens
- How to add a Google One Tap prompt to a web page
- as a static HTML element, and
- dynamically using JavaScript.
- How the One Tap prompt behaves
What you'll need
- Basic knowledge of HTML, CSS, JavaScript and Chrome DevTools (or equivalent).
- A place to edit and host HTML and JavaScript files.
- The Client ID obtained in the previous codelab.
- An environment capable of running a basic Python app.
Lets go!
2. Setup a login endpoint
First, we'll create a Python script that acts as a basic web server and setup the Python environment necessary to run it.
Running locally, the script serves the landing page and static HTML and dynamic One Tap pages to the browser. It accepts POST requests, decodes the JWT contained in the credential parameter, and validates that it was issued by Google Identity's OAuth platform.
After decoding and verifying a JWT the script redirects to the index.html landing page to display the results.
Copy this into a file named simple-server.py:
"""Very basic web server to handle GET and POST requests."""
from http.server import SimpleHTTPRequestHandler
import json
import socketserver
from typing import Dict, Optional, Tuple
import urllib.parse
from urllib.parse import parse_qs

from google.auth.transport import requests as google_auth_requests
from google.oauth2 import id_token


""" NOTE: You'll need to change this """
CLIENT_ID = (
    "PUT_YOUR_WEB_CLIENT_ID_HERE"
)

""" these may change for a Cloud IDE, but good as-is for local termainals """
SERVER_ADDRESS = "0.0.0.0"
PORT = 3000
TARGET_HTML_PAGE_URL = f"http://localhost:{PORT}/"
""" and this is the end of constants you might need to change """

HTTP_STATUS_OK = 200
HTTP_STATUS_BAD_REQUEST = 400
HTTP_STATUS_UNAUTHORIZED = 401
HTTP_STATUS_INTERNAL_SERVER_ERROR = 500
HTTP_STATUS_FOUND = 303  # For redirection after decode and verify
OIDC_SERVER = "accounts.google.com"


class OIDCJWTReceiver(SimpleHTTPRequestHandler):
  """Request handler to securely process a Google ID token response."""

  def _validate_csrf(self, request_parameters: Dict) -> Tuple[bool, str]:
    """Validates the g_csrf_token to protect against CSRF attacks."""
    csrf_token_body = request_parameters.get("g_csrf_token")
    if not csrf_token_body:
      return False, "g_csrf_token not found in POST body."

    csrf_token_cookie = None
    cookie_header = self.headers.get("Cookie")
    if cookie_header:
      cookie_pairs = (c.split("=", 1) for c in cookie_header.split(";"))
      cookies = {k.strip(): v.strip() for k, v in cookie_pairs}
      csrf_token_cookie = cookies.get("g_csrf_token")
    if not csrf_token_cookie:
      return False, "g_csrf_token not found in cookie."

    if csrf_token_body != csrf_token_cookie:
      return False, "CSRF token mismatch."

    return True, "CSRF token validated successfully."

  def _parse_and_validate_credential(
      self, request_parameters: Dict
  ) -> Optional[Tuple[Optional[Dict], str]]:
    """Parse POST data, extract, decode and validate user credential."""
    credential = request_parameters.get("credential")
    if not credential:
      return None, "Credential not provided"

    try:
      id_info = id_token.verify_oauth2_token(
          credential, google_auth_requests.Request(), CLIENT_ID
      )
      return id_info, ""
    except ValueError as e:
      return None, f"Error during JWT decode: {e}"
    except Exception as e:
      return None, f"Unexpected error during credential validation: {e}"

  def _redirect_to_html(self, response_data: Dict) -> None:
    """Redirect to the target HTML page with data in the URL fragment."""
    try:
      json_data = json.dumps(response_data)
      encoded_data = urllib.parse.quote(json_data)
      redirect_url = f"http://localhost:{PORT}/#data={encoded_data}"
      self.send_response(HTTP_STATUS_FOUND)
      self.send_header("Location", redirect_url)
      self.send_header("Connection", "close")
      self.end_headers()
    except Exception as e:
      print(f"An error occurred during redirection: {e}")
      self.send_response(HTTP_STATUS_INTERNAL_SERVER_ERROR)
      self.send_header("Content-type", "text/plain")
      self.send_header("Connection", "close")
      self.end_headers()
      self.wfile.write(f"A redirect error occurred: {e}".encode("utf-8"))

  def _send_bad_request(self, message: str) -> None:
    """Sends a 400 Bad Request response."""
    self.send_response(HTTP_STATUS_BAD_REQUEST)
    self.send_header("Content-type", "text/plain")
    self.send_header("Connection", "close")
    self.end_headers()
    self.wfile.write(message.encode("utf-8"))

  def do_POST(self):
    """Handle POST requests for the /user-login path."""
    if self.path != "/user-login":
      self.send_error(404, "File not found")
      return

    try:
      content_length = int(self.headers.get("Content-Length", 0))
      post_data_bytes = self.rfile.read(content_length)
      post_data_str = post_data_bytes.decode("utf-8")
      request_parameters = {
          key: val[0]
          for key, val in parse_qs(post_data_str).items()
          if len(val) == 1
      }

      csrf_valid, csrf_message = self._validate_csrf(request_parameters)
      if not csrf_valid:
        print(f"CSRF verify failure: {csrf_message}")
        self._send_bad_request(f"CSRF verify failure: {csrf_message}")
        return

      decoded_id_token, error_message = self._parse_and_validate_credential(
          request_parameters
      )

      response_data = {}
      if decoded_id_token:
        response_data["status"] = "success"
        response_data["message"] = decoded_id_token
      elif error_message:
        response_data["status"] = "error"
        response_data["message"] = error_message
      else:
        response_data["status"] = "error"
        response_data["message"] = "Unknown error during JWT validation"

      self._redirect_to_html(response_data)

    except Exception as e:
      self._redirect_to_html(
          {"status": "error", "error_message": f"Internal server error: {e}"}
      )


with socketserver.TCPServer(("", PORT), OIDCJWTReceiver) as httpd:
  print(
      f"Serving HTTP on {SERVER_ADDRESS} port"
      f" {PORT} (http://{SERVER_ADDRESS}:{PORT}/)"
  )
  httpd.serve_forever()
Since we're going to verify the JWT was issued to your client using the audience (aud) field of the ID token, your Python app needs to know which Client ID is being used. To do this, replace PUT_YOUR_WEB_CLIENT_ID_HERE with the Client ID you used in the previous Sign In With Google button codelab.
Python environment
Lets setup the environment to run the web server script.
You'll need Python 3.8 or later along with a few packages to help with JWT verification and decode.
$ python3 --version
If your version of python3 is less than 3.8 you may need to change your shell PATH so the expected version is found or install a newer version of Python on your system.
Next, make a file named requirements.txt that lists the packages we need for JWT decode and verification:
google-auth
Run these commands in the same directory as simple-server.py and requirements.txt to create a virtual environment and install packages only for this app:
$ python3 -m venv env
$ source env/bin/activate
(env) $ pip install -r requirements.txt
Now start the server and if everything is working properly you'll see this:
(env) $ python3 ./simple-server.py
Serving HTTP on 0.0.0.0 port 3000 (http://0.0.0.0:3000/) ...
Cloud based IDEs
This codelab was designed to run on in a local terminal and localhost, but with some changes it may be used on platforms like Replit or Glitch. Each platform has its own setup requirements and Python environment defaults so you'll likely need to change a few things like TARGET_HTML_PAGE_URL and the Python setup.
For example, on Glitch you'd still add a requirements.txt but also create a file named start.sh to automatically start the Python server:
python3 ./simple-server.py
The URLs used by the Python script and HTML files also needs to be updated to the external URL of your Cloud IDE. So we'd have something like this: TARGET_HTML_PAGE_URL = f"https://your-project-name.glitch.me/" and since the HTML files throughout this codelab also default to use localhost you'll need to update them with the external Cloud IDE URL: data-login_uri="https://your-project-name.glitch.me/user-login".
3. Create a landing page
Next, we'll create a landing page that displays the results of signing in with One Tap. The page displays the decoded JWT ID token or an error. A form on the page can also be used to send a JWT to the login endpoint on our Python HTTP server where it's decoded and verified. It uses a CSRF double-submit cookie and POST Request Parameter so that it can reuse the same user-login server endpoint as the gsi/client HTML and JavaScript API examples in the codelab.
In your terminal, save this in a file named index.html:
<!doctype html>
<html lang="en">
  <head>
    <meta charset="UTF-8" />
    <meta name="viewport" content="width=device-width, initial-scale=1.0" />
    <title>JWT Verification</title>
    <style>
      body { font-family: sans-serif; margin: 0; }
      .top-nav {
        text-align: center; padding: 15px 0; background-color: #f8f9fa;
        border-bottom: 1px solid #dee2e6; width: 100%;
      }
      .top-nav a {
        margin: 0 15px; text-decoration: none; font-weight: bold;
        color: #007bff; font-size: 1.1em;
      }
      .top-nav a:hover { text-decoration: underline; }
      .page-container { padding: 20px; }
      pre {
        background-color: #f9f9f9; padding: 10px; overflow-x: auto;
        white-space: pre-wrap; word-break: break-all;
      }
      .error { color: red; }
      .success { color: green; }
      #jwt-form { margin-bottom: 20px; flex: 1; }
      fieldset {
        border: 1px solid #ddd; padding: 10px; margin: 0;
        min-width: 0; flex: 1; }
      legend { font-weight: bold; margin-bottom: 5px; }
      textarea { width: 100%; box-sizing: border-box; vertical-align: top; }
      button[type="submit"] { padding: 8px 15px; margin-top: 10px; }
      @media (min-width: 1024px) {
        .main-content { display: flex; gap: 20px; }
        .main-content > #jwt-form,
        .main-content > .result-container {
          flex-basis: 50%; /* Each item takes up 50% of the width */
          margin-bottom: 0; /* Remove bottom margin when side-by-side */
          display: flex; /* Make the result container a flex container */
          flex-direction: column; /* Stack children vertically */
          flex: 1; /* Allows the result container to grow and shrink */
        }
      }
    </style>
  </head>
  <body>
    <nav class="top-nav">
      <a href="static-page.html">One Tap Static Page</a>
      <a href="dynamic-page.html">One Tap Dynamic Page</a>
      <a href="prompt-outcomes.html">Prompt behaviors</a>
    </nav>
    <div class="page-container">
      <h1>JWT Verification</h1>

      <div class="main-content">
        <form id="jwt-form" action="/user-login" method="post">
          <fieldset>
            <legend>Encoded JWT ID Token</legend>
            <textarea id="credential" name="credential" rows="5"
                      cols="50"></textarea>
            <button type="submit">Verify JWT</button>
          </fieldset>
        </form>

        <section class="result-container">
          <fieldset>
            <legend>Decode and verify result</legend>
            <p id="status"></p>
            <pre id="result"></pre>
          </fieldset>
        </section>
      </div>
    </div>
    <script>
      const statusElement = document.getElementById("status");
      const resultElement = document.getElementById("result");

      const handleResponse = (responseData) => {
        const { status, message } = responseData;
        const result = message
          ? status === "success"
            ? JSON.stringify(message, null, 2)
            : message
          : "";

        statusElement.textContent = status;
        resultElement.textContent = result;
        statusElement.className = "";
        if (status === "success") {
          statusElement.classList.add("success");
        } else if (status === "error") {
          statusElement.classList.add("error");
        }
      };

      const getEncodedDataFromHash = (hash) => {
        const urlParams = new URLSearchParams(hash.substring(1));
        return urlParams.get("data");
      };

      const processHashData = (hash) => {
        const encodedData = getEncodedDataFromHash(hash);
        if (encodedData) {
          try {
            const jsonData = JSON.parse(decodeURIComponent(encodedData));
            handleResponse(jsonData);
            history.pushState(
              "",
              document.title,
              window.location.pathname + window.location.search,
            );
          } catch (error) {
            handleResponse({
              status: "error",
              message: "Error parsing data from URL: " + error,
            });
          }
        }
      };

      window.addEventListener("load",
                              () => processHashData(window.location.hash));
      window.addEventListener("hashchange",
                              () => processHashData(window.location.hash));
    </script>

    <script>
      document.addEventListener("DOMContentLoaded", () => {

        const generateRandomString = (length) => {
        const chars = "ABCDEFGHIJKLMNOPQRSTUVWXYZ" +
                      "abcdefghijklmnopqrstuvwxyz" +
                      "0123456789";
          let result = "";
          for (let i = 0; i < length; i++) {
            result += chars.charAt(Math.floor(Math.random() * chars.length));
          }
          return result;
        };

        const csrfToken = generateRandomString(12);
        document.cookie = `g_csrf_token=${csrfToken};path=/;SameSite=Lax`;
        const form = document.getElementById("jwt-form");
        const hiddenInput = document.createElement("input");
        hiddenInput.setAttribute("type", "hidden");
        hiddenInput.setAttribute("name", "g_csrf_token");
        hiddenInput.setAttribute("value", csrfToken);
        form.appendChild(hiddenInput);
      });
    </script>
  </body>
</html>
Test the web server and JWT decoding
Before we try and work with One Tap we'll make sure the server endpoint environment is setup and working.
Browse to the landing page, http://localhost:3000/ and press the Verify JWT button.
You should see this
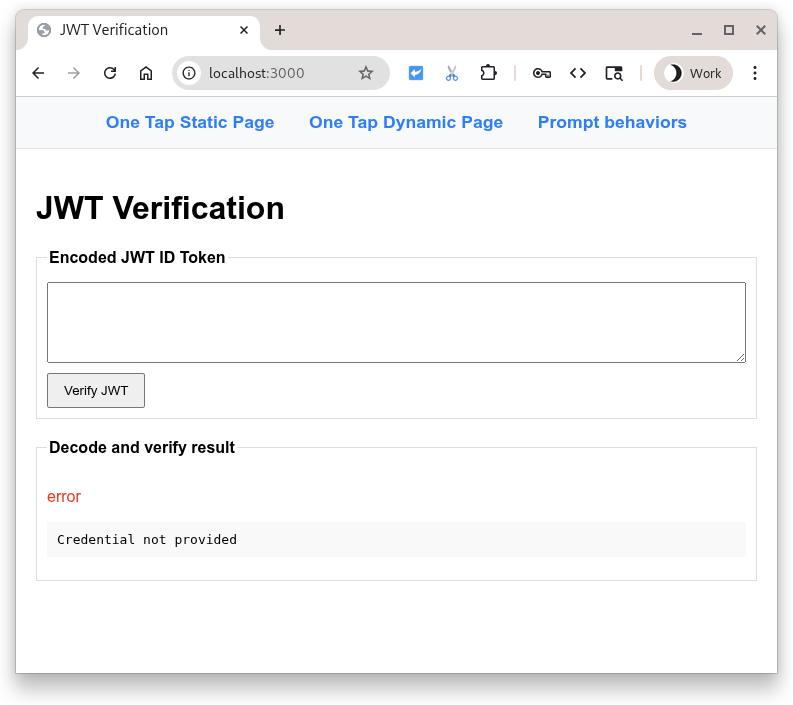
Pressing the button sends a POST with the contents of the entryfield to the Python script. The script is expecting an encoded JWT to be present in the entryfield, so it attempts to decode and verify the payload. Afterwards it redirects back to the landing page to display the results.
But wait, there wasn't a JWT... didn't this fail? Yes, but gracefully!
Since the field was empty an error is displayed. Now try entering some text (any text you'd like) in the entryfield and pressing the button again. It fails with a different decode error.
You can paste an encoded Google issued JWT ID token in the entryfield and have the Python script decode, verify and display it for you... or you could use https://jwt.io to inspect any encoded JWT.
4. Static HTML page
OK, now we'll set up One Tap to work on HTML pages without using any JavaScript. This can be useful for static sites or for caching systems and CDNs.
Start by adding this code sample into a file named static-page.html:
<!DOCTYPE html>
<html lang="en">
  <head>
    <script src="https://accounts.google.com/gsi/client" async></script>
    <link rel="icon" href="data:," />
  </head>
  <body>
    <h1>Google One Tap static HTML page</h1>
    <div
      id="g_id_onload"
      data-client_id="PUT_YOUR_WEB_CLIENT_ID_HERE"
      data-ux_mode="redirect"
      data-login_uri="http://localhost:3000/user-login"
    ></div>
  </body>
</html>
Next, open static-page.html and replace PUT_YOUR_WEB_CLIENT_ID_HERE with the Client ID you used in the previous Sign In With Google button codelab.
So what does this do?
Any HTML element with an id of g_id_onload and it's data attributes are used to configure the Google Identity Services library (gsi/client). It also displays the One Tap prompt when the document is loaded in the browser.
The data-login_uri attribute is the URI that will receive a POST request from the browser after the user signs in. This request contains the encoded JWT issued by Google.
Check out the HTML code generator and the HTML API reference for a complete list of One Tap options.
Sign-in
Click http://localhost:3000/static-page.html.
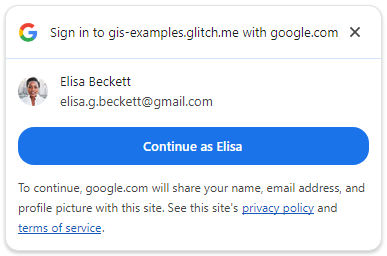
You should see the One Tap prompt displayed in your browser.
Press Continue as to sign-in.
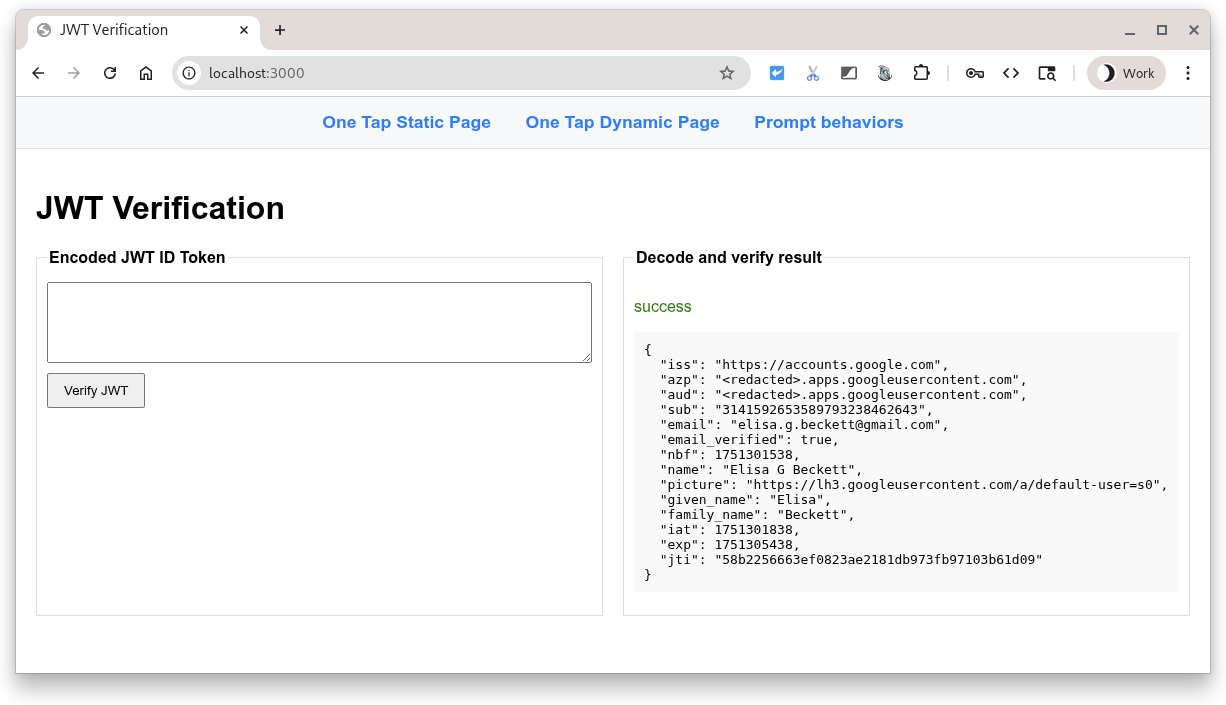
After sign in, Google sends a POST request to your Python server's login endpoint. The request contains an encoded JWT that is signed by Google.
From there, the server uses one of Google's public signing keys to verify that Google created and signed the JWT. It then decodes and verifies the audience matches your Client ID. Next, a CSRF check is done to make sure the Cookie value and the request parameter value in the POST body are equal. If they're not, it's a sure sign of trouble.
Finally, the landing page displays the successfully verified JWT as a JSON formatted ID token user credential.
Common errors
There are several ways for the sign-in flow to fail. Some of the most common reasons are:
data-client_idis missing or incorrect, In this case you'll see an error in DevTools console and the One Tap prompt won't work.data-login_uriisn't available because an incorrect URI was entered, the web server wasn't started, or is listening on the wrong port. If this happens the One Tap prompt appears to work but an error will be visible in the DevTools network tab when the credential is returned.- The hostname or port that your web server is using isn't listed in the Authorized JavaScript origins for your OAuth Client ID. You'll see a console message: "When fetching the ID assertion endpoint, a 400 HTTP response code was received.". If you see this during this codelab check that both
http://localhost/andhttp://localhost:3000are listed.
5. Dynamic page
Now we'll display One Tap using a JavaScript call. In this example we'll always display One Tap when the page loads, but you could choose to display the prompt only when needed. For example, you might check if the user's session is over 28 days old and display the sign-in prompt again.
Add this code sample into a file named dynamic-page.html.
<!DOCTYPE html>
<html lang="en">
  <head>
    <script src="https://accounts.google.com/gsi/client" async></script>
    <link rel="icon" href="data:," />
  </head>
  <body>
    <h1>Google One Tap dynamic page</h1>
    <script>
      const generateRandomString = (length) => {
        const array = new Uint8Array(length / 2);
        window.crypto.getRandomValues(array);
        return Array.from(array, (byte) =>
          byte.toString(16).padStart(2, "0")
        ).join("");
      };

      const setCookie = (name, value) => {
        document.cookie = '${name}=${value};path=/;SameSite=Lax';
      };

      const getCookie = (name) => {
        const nameEQ = name + "=";
        const ca = document.cookie.split(";");
        for (let i = 0; i < ca.length; i++) {
          let c = ca[i];
          while (c.charAt(0) == " ") c = c.substring(1, c.length);
          if (c.indexOf(nameEQ) == 0)
            return c.substring(nameEQ.length, c.length);
        }
        return null;
      };

      function handleResponse(rsp) {
        console.log("ID Token received from Google: ", rsp.credential);
        console.log("Submitting token to server via dynamic form POST.");

        const form = document.createElement("form");
        form.method = "POST";
        form.action = "http://" + window.location.host + "/user-login";

        // Add the credential and CSRF cookie value asa hidden fields
        const hiddenField = document.createElement("input");
        hiddenField.type = "hidden";
        hiddenField.name = "credential";
        hiddenField.value = rsp.credential;
        form.appendChild(hiddenField);

        const csrfToken = getCookie("g_csrf_token");
        if (csrfToken) {
          console.log("Found g_csrf_token cookie, adding to form.");
          const csrfField = document.createElement("input");
          csrfField.type = "hidden";
          csrfField.name = "g_csrf_token";
          csrfField.value = csrfToken;
          form.appendChild(csrfField);
        } else {
          console.warn(
            "Warning: g_csrf_token cookie not found. POSTing without it."
          );
        }

        document.body.appendChild(form);
        form.submit();
      }

      window.onload = function () {
        const csrfToken = generateRandomString(12);
        setCookie("g_csrf_token", csrfToken);
        console.log("CSRF token cookie set on page load:", csrfToken);

        google.accounts.id.initialize({
          client_id: "PUT_YOUR_WEB_CLIENT_ID_HERE",
          ux_mode: "popup",
          callback: handleResponse,
        });

        google.accounts.id.prompt(); // Display the One Tap prompt
      };
    </script>
  </body>
</html>
Open dynamic-page.html and replace PUT_YOUR_WEB_CLIENT_ID_HERE with the Client ID you used in the previous Sign In With Google button codelab.
This code is a mixture of HTML and JavaScript, it does a several things:
- configures the Google Identity Services library (
gsi/client) by callinggoogle.accounts.id.initialize(), - generates a Cross-Site Request Forgery (CSRF) cookie,
- adds a callback handler to receive the encoded JWT from Google and submit it using a form POST to our Python script
/user-loginendpoint, and - displays the One Tap prompt using
google.accounts.id.prompt().
A full list of One Tap settings can be found in the JavaScript API reference.
Lets sign-in!
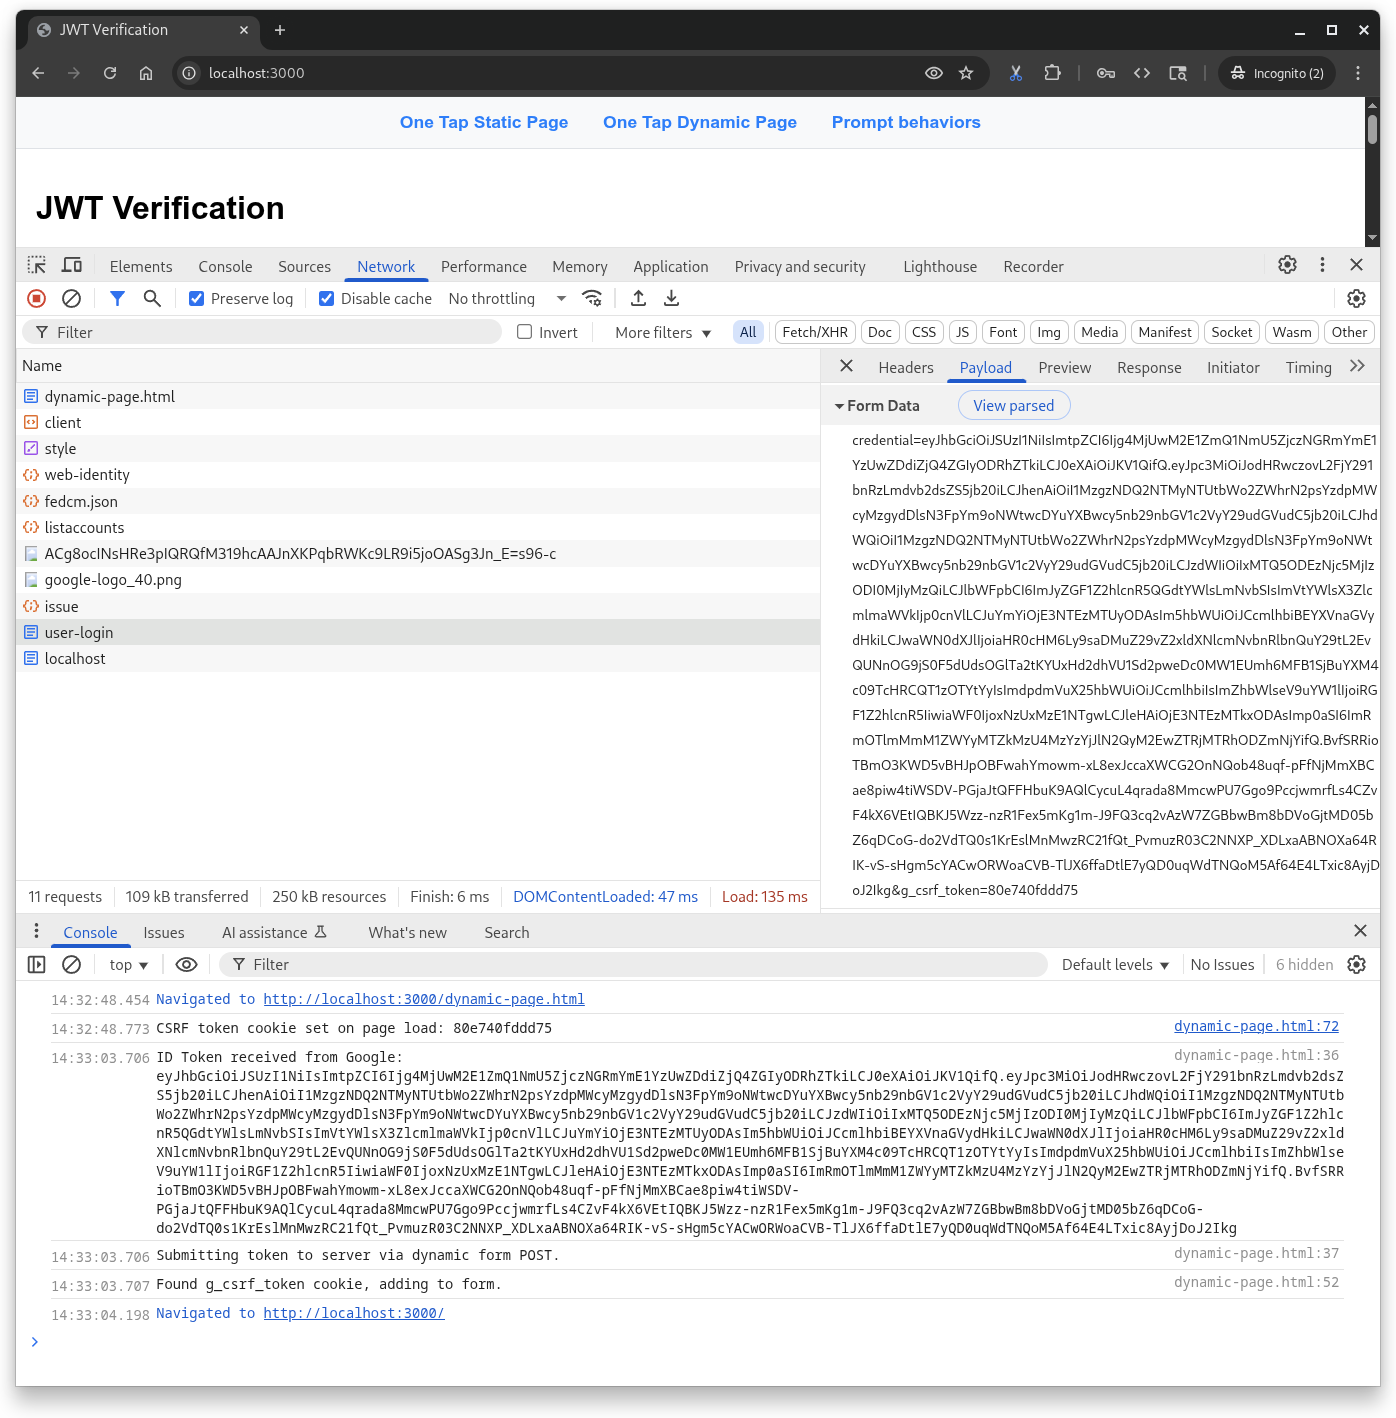
Open http://localhost:3000/dynamic-page.html in your browser.
The One Tap prompt behavior is the same as the static HTML scenario, except this page defines a JavaScript callback handler to create a CSRF cookie, receive the JWT from Google, and POST it to the Python server's user-login endpoint. The HTML API does these steps automatically for you.
6. Prompt behaviors
So lets try some things with One Tap, because unlike the button the prompt is not always displayed. It can dismissed, closed, or disabled by the browser and the user.
First, save this in a file named prompt-outcomes.html:
<!doctype html>
<html lang="en">
  <head>
    <meta charset="UTF-8" />
    <meta name="viewport" content="width=device-width, initial-scale=1.0" />
    <title>Google One Tap Prompt behaviors</title>
    <style>
      body { font-family: sans-serif; padding: 20px; }
      #log {
        border: 1px solid #ccc; background-color: #f0f0f0;
        padding: 15px; margin-top: 20px;
        white-space: pre-wrap; font-family: monospace;
      }
      .success { color: green; }
      .error { color: red; }
      .info { color: blue; }
      .warning { color: orange; }
    </style>
  </head>
  <body>
    <h1>One Tap behaviors</h1>
    <p>Open the developer console to see detailed logs.</p>
    <div id="log">Awaiting events...</div>

    <script src="https://accounts.google.com/gsi/client" async defer></script>

    <script>
      // logging utility to display event and notification info
      const logElement = document.getElementById("log");
      function log(message, type = "info") {
        const timestamp = new Date().toLocaleTimeString();
        logElement.innerHTML +=
          `\n<span class="${type}">[${timestamp}] ${message}</span>`;
        console.log(`[${type.toUpperCase()}] ${message}`);
      }

      function decodeJwt(jwt) {
        try {
          const parts = jwt.split(".");
          if (parts.length !== 3) {
            throw new Error("Invalid JWT structure");
          }
          const base64Url = parts[1];
          const base64 = base64Url.replace(/-/g, "+").replace(/_/g, "/");
          const jsonPayload = decodeURIComponent(
            atob(base64)
              .split("")
              .map(function (c) {
                return "%" + ("00" + c.charCodeAt(0).toString(16)).slice(-2);
              })
              .join(""),
          );
          return JSON.parse(jsonPayload);
        } catch (e) {
          log(`Error decoding JWT: ${e.message}`, "error");
          return null;
        }
      }

      /* Handles the credential response after a user signs in. */
      function handleCredentialResponse(credentialResponse) {
        log("Credential Response received.", "success");

        const credential = credentialResponse.credential;
        log(`Credential JWT: ${credential.substring(0, 30)}...`);

        // For demonstration, we decode the JWT on the client side.
        // REMEMBER: Always verify the token on your backend server!
        const payload = decodeJwt(credential);
        if (payload) {
          log(`Welcome, ${payload.name}! (Email: ${payload.email})`);
          log("Decoded JWT Payload: " + JSON.stringify(payload, null, 2));
        }
      }

      /* Handles notifications about the One-Tap prompt's UI status. */
      function handlePromptMomentNotification(notification) {
        log(`Prompt Moment Notification received.`, "info");

        if (notification.isNotDisplayed()) {
          const reason = notification.getNotDisplayedReason();
          log(`Prompt not displayed. Reason: <strong>${reason}</strong>`,
              "error");
        }
        if (notification.isSkippedMoment()) {
          const reason = notification.getSkippedReason();
          log(`Prompt was skipped. Reason: <strong>${reason}</strong>`,
              "warning");
          if (reason === "auto_cancel") {
            log("may have called prompt() multiple times in a row.");
          } else if (reason === "user_cancel") {
            log("The user manually closed the prompt.");
          }
        }
        if (notification.isDismissedMoment()) {
          const reason = notification.getDismissedReason();
          log(`Prompt dismissed. Reason: <strong>${reason}</strong>`, "info");
          if (reason === "credential_returned") {
            log("Expected, credential sent to the JS handler.");
          } else if (reason === "cancel_called") {
            log("programmatic call to google.accounts.id.cancel().");
          }
        }
      }

      window.onload = function () {
        try {
          google.accounts.id.initialize({
            client_id: "PUT_YOUR_WEB_CLIENT_ID_HERE",
            callback: handleCredentialResponse,
            ux_mode: "popup",
          });

          google.accounts.id.prompt(handlePromptMomentNotification);
          log("One Tap initialized. Waiting for prompt...");
        } catch (e) {
          log(`Initialization Error: ${e.message}`, "error");
        }
      };
    </script>
  </body>
</html>
Next, open prompt-outcomes.html, replace PUT_YOUR_WEB_CLIENT_ID_HERE with your Client ID, and then save the file.
In your browser, open http://localhost:3000/prompt-outcomes.html
Page clicks
Start by clicking anywhere outside the One Tap prompt. You should see "The request has been aborted." logged to both the page and console.
Sign-In
Next, just sign-in normally. You'll see logging and notification updates that can be used to trigger something like establishing or refreshing a user session.
Close the prompt
Now reload the page and after One Tap is shown, press on the ‘X' in its' title bar. This message should be logged to the console:
- "User declined or dismissed prompt. API exponential cool down triggered."
During testing you'll trigger the cool down. During the cool down period the One Tap prompt is not displayed. During testing you'll probably want to reset it instead than waiting for it to reset automatically... unless you really want to go for a coffee or to go home and get some sleep. To reset the cooldown:
- Click the "site information" icon in the left side of the browser's address bar,
- press the "Reset Permissions" button, and
- reload the page.
After resetting the cooldown and reloading the page the One Tap prompt will be displayed.
7. Conclusion
So in this codelab you've learned a few things, like how to display One Tap using just static HTML or dynamically with JavaScript.
You set up a very basic Python web server for local testing and learned the steps necessary to decode and validate ID tokens.
You've played with the most common ways users interact with and dismiss the One Tap prompt and have a web page that can be used to debug prompt behavior.
Congratulations!
For extra credit, try going back through and using One Tap in the different browsers that it supports.
These links may help you with next steps:
- Google Identity Services HTML API
- Google Identity Services JavaScript API
- How to Setup Sign in with Google for web
- Verify a Google ID token
- Learn more about Google Cloud Projects
- Google Identity authentication methods