
1. Introduction
Spring Framework 5.0 added dedicated Kotlin support making it easy for Kotlin developers to use Spring. Consequently, these changes meant that the Google Cloud integrations provided by Spring Cloud GCP also work seamlessly in Kotlin. In this codelab you will see how easy it is to begin using Google Cloud services in your Kotlin applications!
This codelab walks through setting up a simple registration application in Kotlin which demonstrates using GCP services including: Cloud Pub/Sub and Cloud SQL.
What you'll build
In this codelab, you will setup a Kotlin Spring Boot application which accepts registrant information, publishes this to a Cloud Pub/Sub topic, and persists this to a Cloud MySQL database.
What you'll learn
How to integrate with Google Cloud services in your Kotlin Spring application.
What you'll need
- A Google Cloud Platform Project
- A Browser, such Chrome or Firefox
How will you use use this tutorial?
How would you rate your experience with building HTML/CSS web apps?
How would you rate your experience with using Google Cloud Platform services?
2. Setup and Requirements
Self-paced environment setup
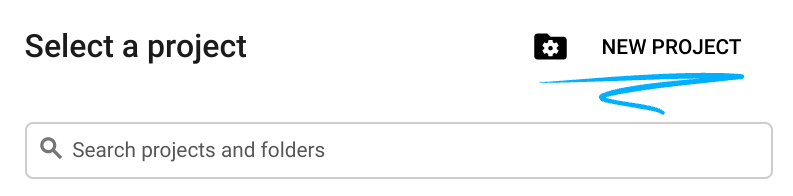
- Sign in to Cloud Console and create a new project or reuse an existing one. (If you don't already have a Gmail or G Suite account, you must create one.)

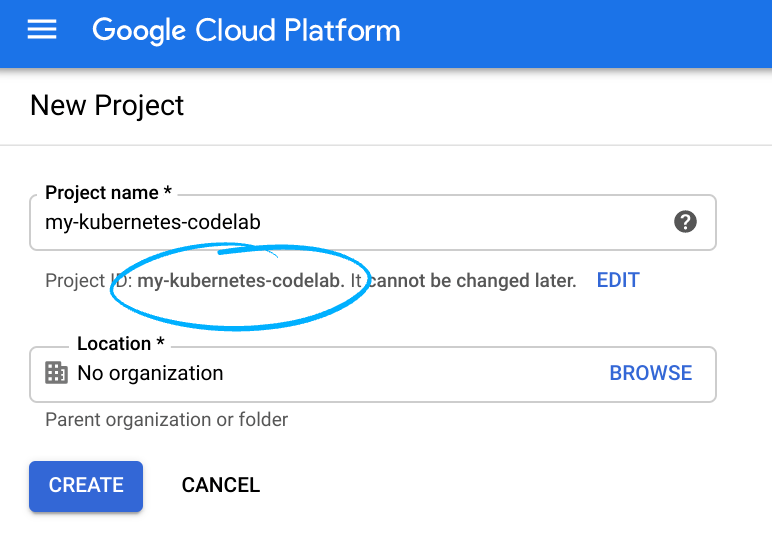
Remember the project ID, a unique name across all Google Cloud projects (the name above has already been taken and will not work for you, sorry!). It will be referred to later in this codelab as PROJECT_ID.
- Next, you'll need to enable billing in Cloud Console in order to use Google Cloud resources.
Running through this codelab shouldn't cost much, if anything at all. Be sure to to follow any instructions in the "Cleaning up" section which advises you how to shut down resources so you don't incur billing beyond this tutorial. New users of Google Cloud are eligible for the $300USD Free Trial program.
Google Cloud Shell
While Google Cloud can be operated remotely from your laptop, in this codelab we will be using Google Cloud Shell, a command line environment running in the Cloud.
Activate Cloud Shell
- From the Cloud Console, click Activate Cloud Shell
.

If you've never started Cloud Shell before, you'll be presented with an intermediate screen (below the fold) describing what it is. If that's the case, click Continue (and you won't ever see it again). Here's what that one-time screen looks like:

It should only take a few moments to provision and connect to Cloud Shell.

This virtual machine is loaded with all the development tools you'll need. It offers a persistent 5GB home directory and runs in Google Cloud, greatly enhancing network performance and authentication. Much, if not all, of your work in this codelab can be done with simply a browser or your Chromebook.
Once connected to Cloud Shell, you should see that you are already authenticated and that the project is already set to your project ID.
- Run the following command in Cloud Shell to confirm that you are authenticated:
gcloud auth list
Command output
 Credentialed Accounts
ACTIVE  ACCOUNT
*       <my_account>@<my_domain.com>

To set the active account, run:
    $ gcloud config set account `ACCOUNT`
gcloud config list project
Command output
[core]
project = <PROJECT_ID>
If it is not, you can set it with this command:
gcloud config set project <PROJECT_ID>
Command output
Updated property [core/project].
3. Provision Pub/Sub resources
First, we'll need to setup a Cloud Pub/Sub topic and subscription. In this application, we will be publishing registration info to a Pub/Sub topic; the information is then read from this topic and persisted to a database.
In this tutorial, we will rely on the Cloud Shell to provision our resources. Note that one may also configure Pub/Sub resources through the Cloud Pub/Sub section in Google Cloud Console.
In your Cloud Shell terminal, first enable the Pub/Sub API.
$ gcloud services enable pubsub.googleapis.com
Next, we will create a Pub/Sub topic named registrations for this application. The registration info submitted through the application will be published to this topic.
$ gcloud pubsub topics create registrations
Finally, create a subscription for the topic. A Pub/Sub subscription enables you to receive messages from a topic.
$ gcloud pubsub subscriptions create registrations-sub --topic=registrations
You have now completed creating a Cloud Pub/Sub topic and subscription for your application.
4. Create a Cloud SQL (MySQL) Instance and Database
For our sample application, we also need to setup a database instance to hold the registrant information. This step will also rely on the Cloud Shell terminal to provision Cloud SQL resources. Note that you may view and configure your Cloud SQL instances through the Google Cloud Console as well.
First, enable the Cloud SQL Admin API.
$ gcloud services enable sqladmin.googleapis.com
Next, we will provision a Cloud SQL (MySQL) instance. This command may take some time.
$ gcloud sql instances create codelab-instance --region=us-east1
After you successfully created your Cloud SQL instance, create a new database in your instance called registrants.
$ gcloud sql databases create registrants --instance codelab-instance
You have now completed the Cloud SQL instance and database setup for your application.
5. Initialize a Spring Boot Application
We are now ready to begin writing the application. The next steps will continue using the Cloud Shell described in the setup steps.
First, we will use Initializr to generate the scaffolding code for the project. In your Cloud Shell window, run:
$ cd ~
$ curl https://start.spring.io/starter.tgz \
  -d language=kotlin \
  -d bootVersion=2.4.0 \
  -d dependencies=web,data-jpa,integration,cloud-gcp-pubsub,thymeleaf \
  -d baseDir=registrations-codelab | tar -xzvf -
$ cd registrations-codelab
This command generates an initial Maven project setup as well as scaffolding code for your application in the registrations-codelab/ directory. The following sections describe code edits necessary to produce a working application.
Cloud Shell Code Editor
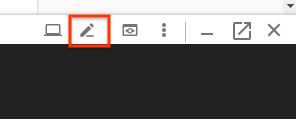
The easiest way to begin modifying and viewing code in the Cloud Shell environment is to use the built-in Cloud Shell Code Editor.
Once you have opened a Cloud Shell instance, click on the Pencil icon to open the code editor. The editor should allow you to directly modify the project files produced by Initialzr.
6. Database Configuration
First, configure your application so that it can connect to the Cloud MySQL database that you set up. The Spring Cloud GCP libraries offer a Cloud MySQL starter which provides the necessary dependencies for connecting to a Cloud MySQL instance.
Add the spring-cloud-gcp-starter-sql-mysql dependency to the project pom.xml:
registrations-codelab/pom.xml
...
<dependencies>

  ... Other dependencies above ...

  <!-- Add the MySQL starter to the list of dependencies -->
  <dependency>
    <groupId>com.google.cloud</groupId>
    <artifactId>spring-cloud-gcp-starter-sql-mysql</artifactId>
  </dependency>
</dependencies>
In addition, you need to modify the application.properties configuration file to describe your database configuration. Copy the following properties into your application.properties file.
Find the instance connection name to your database:
$ gcloud sql instances describe codelab-instance \
  --format 'value(connectionName)'
The output of this will be used in application.properties file to configure the connection information.
src/main/resources/application.properties
# Modify this property using the output from the previous command line.
spring.cloud.gcp.sql.instance-connection-name=INSTANCE_CONNECTION_NAME

# Your database name
spring.cloud.gcp.sql.database-name=registrants

# So app starts despite "table already exists" errors.
spring.datasource.continue-on-error=true

# Enforces database initialization
spring.datasource.initialization-mode=always

# Cloud SQL (MySQL) only supports InnoDB, not MyISAM
spring.jpa.database-platform=org.hibernate.dialect.MySQL55Dialect
spring.jpa.hibernate.ddl-auto=create-drop

# This is used if you want to connect to a different database instance
# user other than root; not used in codelab.
# spring.datasource.username=root

# This is used to specify the password of the database user;
# not used in codelab.
# spring.datasource.password=password
The only property you must modify is the instance connection name. This value must be formatted as a colon-separated value with the form: YOUR_GCP_PROJECT_ID:REGION:DATABASE_INSTANCE_NAME.
7. Creating the Static Content
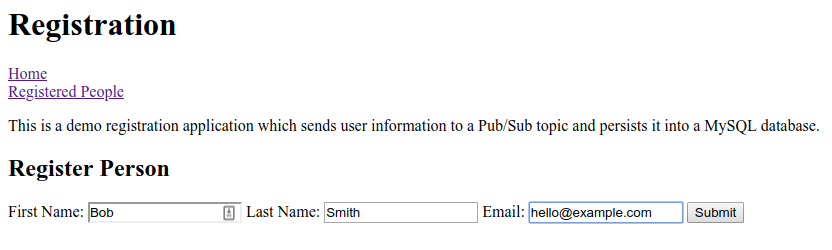
First, we will create the frontend for our application. The application should have a form allowing someone to register individuals and also a view which displays all successful registrants.
For the home page, create an index.html containing the registration form.
src/main/resources/static/index.html
<!DOCTYPE html>
<html lang="en">
<head>
  <meta charset="UTF-8">
  <title>Registration Sample Application</title>
</head>
<body>

<h1>Registration</h1>

<div>
  <nav>
    <a href="/">Home</a><br>
    <a href="/registrants">Registered People</a><br>
  </nav>

  <p>
    This is a demo registration application which sends user information to a Pub/Sub topic and
    persists it into a MySQL database.
  </p>

  <h2>Register Person</h2>
  <div>
    <form action="/registerPerson" method="post">
      First Name: <input type="text" name="firstName" />
      Last Name: <input type="text" name="lastName" />
      Email: <input type="text" name="email" />
      <input type="submit" value="Submit"/>
    </form>
  </div>
</div>

</body>
</html>
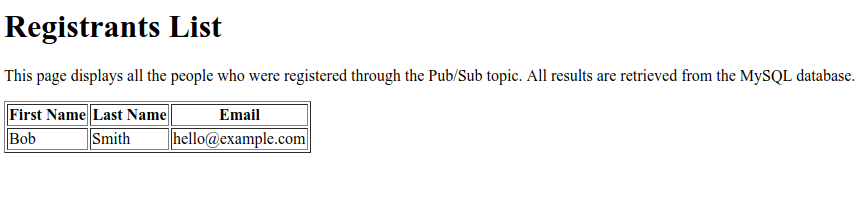
Next, we will create a Thymeleaf template named registrants.html for displaying the registered users. Thymeleaf is a templating framework which we use to construct and serve dynamically-created HTML. You will see that the template looks like HTML, except that it has some additional markdown elements to handle dynamic content. This template accepts a single parameter called personsList which contains all registrants who were registered through the application.
src/main/resources/templates/registrants.html
<!DOCTYPE HTML>
<html xmlns:th="http://www.thymeleaf.org">
<head>
  <title>Registrants List</title>
  <meta http-equiv="Content-Type" content="text/html; charset=UTF-8"/>
</head>
<body>
<h1>Registrants List</h1>
<p>
  This page displays all the people who were registered through the Pub/Sub topic.
  All results are retrieved from the MySQL database.
</p>
<table border="1">
  <tr>
    <th>First Name</th>
    <th>Last Name</th>
    <th>Email</th>
  </tr>
  <tr th:each="person : ${personsList}">
    <td>[[${person.firstName}]]</td>
    <td>[[${person.lastName}]]</td>
    <td>[[${person.email}]]</td>
  </tr>
</table>

</body>
</html>
At this point, you can verify that the static content is being served.
Build and run the app using Maven:
$ ./mvnw spring-boot:run
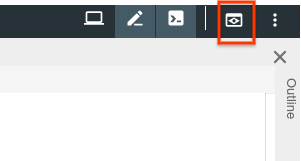
Click on the preview button in Cloud Shell window and verify that you see the home page being rendered. None of the functionality on the UI will work though because we are missing a web controller. This will be added in the next step.
After previewing the application, press CTRL+C to terminate the application.
8. Sending the Registrants to a Pub/Sub Topic
In this step, we will implement the feature where registrants submitted through the webform will be published to a Cloud Pub/Sub topic.
Add the Data Classes
First, we will be creating some Kotlin data classes; these will be our JPA entities and also act as our intermediate representation of the registrants submitted through the form.
In the demo package, add two new files: a Person class and a Spring Data PersonRepository. These two classes will allow us to easily store and retrieve registration entries from our MySQL database using Spring Data JPA.
src/main/kotlin/com/example/demo/Person.kt
package com.example.demo

import javax.persistence.Entity
import javax.persistence.GeneratedValue
import javax.persistence.Id

@Entity
data class Person(
    val firstName: String,
    val lastName: String,
    val email: String,
    @Id @GeneratedValue
    var id: Long? = 0)
src/main/kotlin/com/example/demo/PersonRepository.kt
package com.example.demo

import org.springframework.data.repository.CrudRepository

interface PersonRepository : CrudRepository<Person, Long>
Add the Web Controller
Next, we will create a Controller class which processes registrants from the form and sends the information to the Cloud Pub/Sub topic you created earlier. This controller creates two endpoints:
/registerPerson: The POST endpoint in which registrant info is submitted and then sent to the Pub/Sub topic. In theregisterPerson(..)function, registrant info is sent to the Pub/Sub topic usingPubSubTemplate, a convenience class from the Spring Cloud GCP Pub/Sub integrations which minimizes the boilerplate code needed to begin interacting with Cloud Pub/Sub./registrants: Displays all the registrants successfully registered in the database. This information is retrieved from the MySQL instance using the Spring Data repository that we created in the previous step.
Create the following Controller class in the demo package:
src/main/kotlin/com/example/demo/Controller.kt
package com.example.demo

import com.google.cloud.spring.pubsub.core.PubSubTemplate
import org.springframework.web.bind.annotation.GetMapping
import org.springframework.web.bind.annotation.PostMapping
import org.springframework.web.bind.annotation.RequestParam
import org.springframework.web.bind.annotation.RestController
import org.springframework.web.servlet.ModelAndView
import org.springframework.web.servlet.view.RedirectView

@RestController
class Controller(val pubSubTemplate: PubSubTemplate, val personRepository: PersonRepository) {

  // The Pub/Sub topic name created earlier.
  val REGISTRATION_TOPIC = "registrations"

  @PostMapping("/registerPerson")
  fun registerPerson(
    @RequestParam("firstName") firstName: String,
    @RequestParam("lastName") lastName: String,
    @RequestParam("email") email: String): RedirectView {

    pubSubTemplate.publish(
        REGISTRATION_TOPIC,
        Person(firstName, lastName, email))
    return RedirectView("/")
  }

  @GetMapping("/registrants")
  fun getRegistrants(): ModelAndView {
    val personsList = personRepository.findAll().toList()
    return ModelAndView("registrants", mapOf("personsList" to personsList))
  }
}
The controller reads the registrant information submitted through the web form and then publishes the information to the Pub/Sub topic.
Adding the JSON Object Mapper Bean
You might have noticed in the Controller that we publish a Person object to the Pub/Sub topic and not a String. This is possible because we take advantage of Spring Cloud GCP support for custom JSON payloads to be sent to topics - the libraries allow you to serialize objects to JSON, send JSON payloads to a topic, and deserialize the payload when it is received.
In order to take advantage of this feature, we must add an ObjectMapper bean to your application context. This ObjectMapper bean will be used to serialize objects to and from JSON when your application sends and receives messages. In the DemoApplication.kt class, add the JacksonPubSubMessageConverter Spring bean:
src/main/kotlin/com/example/demo/DemoApplication.kt
package com.example.demo

import org.springframework.boot.autoconfigure.SpringBootApplication
import org.springframework.boot.runApplication

// new imports to add
import org.springframework.context.annotation.Bean
import com.fasterxml.jackson.databind.ObjectMapper
import com.google.cloud.spring.pubsub.support.converter.JacksonPubSubMessageConverter

@SpringBootApplication
class DemoApplication {
  // This bean enables serialization/deserialization of
  // Java objects to JSON for Pub/Sub payloads
  @Bean
  fun jacksonPubSubMessageConverter(objectMapper: ObjectMapper) =
      JacksonPubSubMessageConverter(objectMapper)
}

fun main(args: Array<String>) {
        runApplication<DemoApplication>(*args)
}
At this point, you can try running the application again by running:
$ ./mvnw spring-boot:run
From the web form on the main page, the application will now send the information to the Pub/Sub topic that you created. However, it's still not doing anything useful yet because we still need to read from that Pub/Sub topic! This is accomplished in the next step.
9. Reading Registrants from the Pub/Sub Topic
In the final step, we will be processing registrant info from the Pub/Sub topic and persisting the information to the Cloud MySQL database. This will complete the application, allowing you to submit new registrants through the form and view all registered users through the /registrants endpoint.
This application will take advantage of Spring Integration, which offers many convenient abstractions for dealing with messaging. We will add a PubSubInboundChannelAdapter to enable us to read messages from the Pub/Sub topic and put them on the pubsubInputChannel for further processing. We will then configure the messageReceiver function using @ServiceActivator to be invoked with the messages arriving on the pubsubInputChannel.
src/main/kotlin/com/example/demo/DemoApplication.kt
package com.example.demo

import org.springframework.boot.autoconfigure.SpringBootApplication
import org.springframework.boot.runApplication

import org.springframework.context.annotation.Bean
import com.fasterxml.jackson.databind.ObjectMapper
import org.springframework.cloud.gcp.pubsub.support.converter.JacksonPubSubMessageConverter

// new imports to add
import com.google.cloud.spring.pubsub.core.PubSubTemplate
import com.google.cloud.spring.pubsub.integration.AckMode
import com.google.cloud.spring.pubsub.integration.inbound.PubSubInboundChannelAdapter
import com.google.cloud.spring.pubsub.support.BasicAcknowledgeablePubsubMessage
import com.google.cloud.spring.pubsub.support.GcpPubSubHeaders
import org.springframework.beans.factory.annotation.Autowired
import org.springframework.beans.factory.annotation.Qualifier
import org.springframework.integration.annotation.ServiceActivator
import org.springframework.integration.channel.DirectChannel
import org.springframework.messaging.MessageChannel
import org.springframework.messaging.handler.annotation.Header

@SpringBootApplication
class DemoApplication {

  private val REGISTRANT_SUBSCRIPTION = "registrations-sub"

  @Autowired
  private lateinit var personRepository: PersonRepository

  // New Spring Beans to add
  @Bean
  fun pubsubInputChannel() = DirectChannel()

  @Bean
  fun messageChannelAdapter(
      @Qualifier("pubsubInputChannel") inputChannel: MessageChannel,
      pubSubTemplate: PubSubTemplate): PubSubInboundChannelAdapter {

    val adapter = PubSubInboundChannelAdapter(
        pubSubTemplate, REGISTRANT_SUBSCRIPTION)
    adapter.outputChannel = inputChannel
    adapter.ackMode = AckMode.MANUAL
    adapter.payloadType = Person::class.java
    return adapter
  }

  @ServiceActivator(inputChannel = "pubsubInputChannel")
  fun messageReceiver(
      payload: Person,
      @Header(GcpPubSubHeaders.ORIGINAL_MESSAGE) message: BasicAcknowledgeablePubsubMessage) {
    personRepository.save(payload)
    print("Message arrived! Payload: $payload")
    message.ack()
  }

  // ObjectMapper bean from previous step
  @Bean
  fun jacksonPubSubMessageConverter(objectMapper: ObjectMapper) = JacksonPubSubMessageConverter(objectMapper)
}

fun main(args: Array<String>) {
        runApplication<DemoApplication>(*args)
}
At this point, you have completed the setup for the application. To verify that the app works properly, run:
$ ./mvnw spring-boot:run
Click on the Preview button again and try registering a user by filling out the form and submitting.
Click on the Registered People link to verify that the new registrant appears in the table.
Congratulations, you are now done! Terminate the application by pressing CTRL+C in the terminal window.
10. Cleanup
To clean up your environment, you need to delete the Pub/Sub topic and Cloud MySQL instance you created.
Deleting the Cloud MySQL Instance
$ gcloud sql instances delete codelab-instance
Deleting the Pub/Sub Resources
$ gcloud pubsub subscriptions delete registrations-sub
$ gcloud pubsub topics delete registrations
11. Congratulations!
You have now completed writing a Spring Kotlin application which integrates with Cloud Pub/Sub and Cloud SQL (MySQL).
Learn More
- Spring on GCP project: http://cloud.spring.io/spring-cloud-gcp/
- Spring on GCP GitHub repository: https://github.com/GoogleCloudPlatform/spring-cloud-gcp
- Java on Google Cloud Platform: https://cloud.google.com/java/
- Sample Kotlin Applications using GCP: https://github.com/GoogleCloudPlatform/spring-cloud-gcp/tree/master/spring-cloud-gcp-kotlin-samples
License
This work is licensed under a Creative Commons Attribution 2.0 Generic License.