1. Overview

What is Document AI?
Document AI is a platform that lets you extract insights from your documents. At heart, it offers a growing list of document processors (also called parsers or splitters, depending on their functionality).
There are two ways you can manage Document AI processors:
- manually, from the web console;
- programmatically, using the Document AI API.
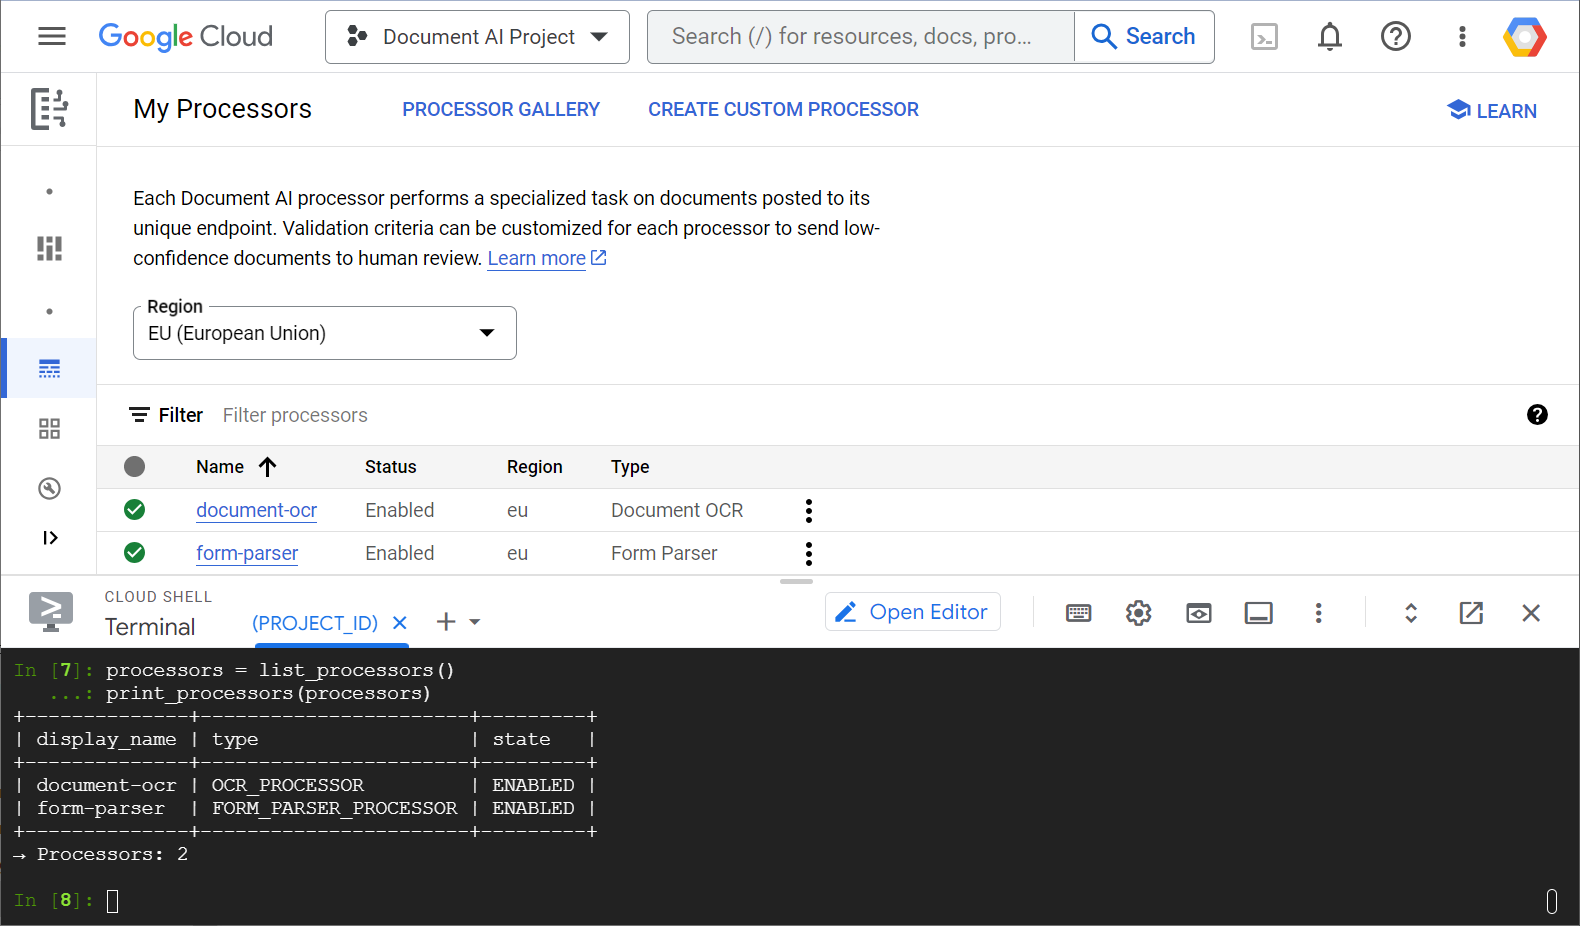
Here is an example screenshot showing your processor list, both from the web console and from Python code:

In this lab, you will focus on managing Document AI processors programmatically with the Python client library.
What you'll see
- How to set up your environment
- How to fetch processor types
- How to create processors
- How to list project processors
- How to use processors
- How to enable/disable processors
- How to manage processor versions
- How to delete processors
What you'll need
Survey
How will you use this tutorial?
How would you rate your experience with Python?
How would you rate your experience with Google Cloud services?
2. Setup and requirements
Self-paced environment setup
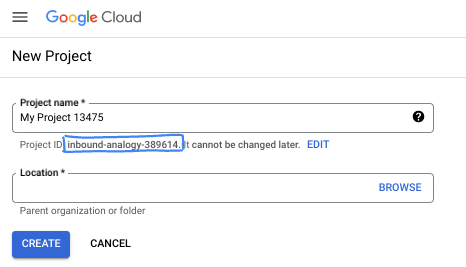
- Sign-in to the Google Cloud Console and create a new project or reuse an existing one. If you don't already have a Gmail or Google Workspace account, you must create one.


- The Project name is the display name for this project's participants. It is a character string not used by Google APIs. You can always update it.
- The Project ID is unique across all Google Cloud projects and is immutable (cannot be changed after it has been set). The Cloud Console auto-generates a unique string; usually you don't care what it is. In most codelabs, you'll need to reference your Project ID (typically identified as
PROJECT_ID). If you don't like the generated ID, you might generate another random one. Alternatively, you can try your own, and see if it's available. It can't be changed after this step and remains for the duration of the project. - For your information, there is a third value, a Project Number, which some APIs use. Learn more about all three of these values in the documentation.
- Next, you'll need to enable billing in the Cloud Console to use Cloud resources/APIs. Running through this codelab won't cost much, if anything at all. To shut down resources to avoid incurring billing beyond this tutorial, you can delete the resources you created or delete the project. New Google Cloud users are eligible for the $300 USD Free Trial program.
Start Cloud Shell
While Google Cloud can be operated remotely from your laptop, in this lab you are using Cloud Shell, a command line environment running in the Cloud.
Activate Cloud Shell
- From the Cloud Console, click Activate Cloud Shell
 .
.

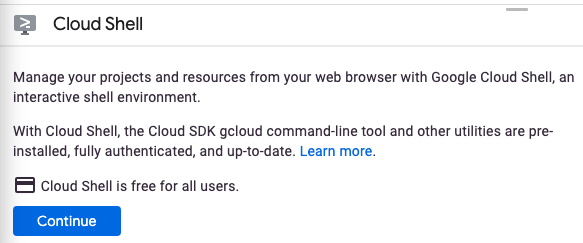
If this is your first time starting Cloud Shell, you're presented with an intermediate screen describing what it is. If you were presented with an intermediate screen, click Continue.

It should only take a few moments to provision and connect to Cloud Shell.

This virtual machine is loaded with all the development tools needed. It offers a persistent 5 GB home directory and runs in Google Cloud, greatly enhancing network performance and authentication. Much, if not all, of your work in this codelab can be done with a browser.
Once connected to Cloud Shell, you should see that you are authenticated and that the project is set to your project ID.
- Run the following command in Cloud Shell to confirm that you are authenticated:
gcloud auth list
Command output
 Credentialed Accounts
ACTIVE  ACCOUNT
*       <my_account>@<my_domain.com>

To set the active account, run:
    $ gcloud config set account `ACCOUNT`
- Run the following command in Cloud Shell to confirm that the gcloud command knows about your project:
gcloud config list project
Command output
[core]
project = <PROJECT_ID>
If it is not, you can set it with this command:
gcloud config set project <PROJECT_ID>
Command output
Updated property [core/project].
3. Environment setup
Before you can begin using Document AI, run the following command in Cloud Shell to enable the Document AI API:
gcloud services enable documentai.googleapis.com
You should see something like this:
Operation "operations/..." finished successfully.
Now, you can use Document AI!
Navigate to your home directory:
cd ~
Create a Python virtual environment to isolate the dependencies:
virtualenv venv-docai
Activate the virtual environment:
source venv-docai/bin/activate
Install IPython, the Document AI client library, and python-tabulate (which you'll use to pretty-print the request results):
pip install ipython google-cloud-documentai tabulate
You should see something like this:
...
Installing collected packages: ..., tabulate, ipython, google-cloud-documentai
Successfully installed ... google-cloud-documentai-2.15.0 ...
Now, you're ready to use the Document AI client library!
Set the following environment variables:
export PROJECT_ID=$(gcloud config get-value core/project)
# Choose "us" or "eu"
export API_LOCATION="us"
From now on, all steps should be completed in the same session.
Make sure your environment variables are properly defined:
echo $PROJECT_ID
echo $API_LOCATION
In the next steps, you'll use an interactive Python interpreter called IPython, which you just installed. Start a session by running ipython in Cloud Shell:
ipython
You should see something like this:
Python 3.12.3 (main, Feb  4 2025, 14:48:35) [GCC 13.3.0]
Type 'copyright', 'credits' or 'license' for more information
IPython 9.1.0 -- An enhanced Interactive Python. Type '?' for help.

In [1]:
Copy the following code into your IPython session:
import os
from typing import Iterator, MutableSequence, Optional, Sequence, Tuple

import google.cloud.documentai_v1 as docai
from tabulate import tabulate

PROJECT_ID = os.getenv("PROJECT_ID", "")
API_LOCATION = os.getenv("API_LOCATION", "")

assert PROJECT_ID, "PROJECT_ID is undefined"
assert API_LOCATION in ("us", "eu"), "API_LOCATION is incorrect"

# Test processors
document_ocr_display_name = "document-ocr"
form_parser_display_name = "form-parser"

test_processor_display_names_and_types = (
    (document_ocr_display_name, "OCR_PROCESSOR"),
    (form_parser_display_name, "FORM_PARSER_PROCESSOR"),
)

def get_client() -> docai.DocumentProcessorServiceClient:
    client_options = {"api_endpoint": f"{API_LOCATION}-documentai.googleapis.com"}
    return docai.DocumentProcessorServiceClient(client_options=client_options)

def get_parent(client: docai.DocumentProcessorServiceClient) -> str:
    return client.common_location_path(PROJECT_ID, API_LOCATION)

def get_client_and_parent() -> Tuple[docai.DocumentProcessorServiceClient, str]:
    client = get_client()
    parent = get_parent(client)
    return client, parent
You're ready to make your first request and fetch the processor types.
4. Fetching processor types
Before creating a processor in the next step, fetch the available processor types. You can retrieve this list with fetch_processor_types.
Add the following functions into your IPython session:
def fetch_processor_types() -> MutableSequence[docai.ProcessorType]:
    client, parent = get_client_and_parent()
    response = client.fetch_processor_types(parent=parent)

    return response.processor_types

def print_processor_types(processor_types: Sequence[docai.ProcessorType]):
    def sort_key(pt):
        return (not pt.allow_creation, pt.category, pt.type_)

    sorted_processor_types = sorted(processor_types, key=sort_key)
    data = processor_type_tabular_data(sorted_processor_types)
    headers = next(data)
    colalign = next(data)

    print(tabulate(data, headers, tablefmt="pretty", colalign=colalign))
    print(f"→ Processor types: {len(sorted_processor_types)}")

def processor_type_tabular_data(
    processor_types: Sequence[docai.ProcessorType],
) -> Iterator[Tuple[str, str, str, str]]:
    def locations(pt):
        return ", ".join(sorted(loc.location_id for loc in pt.available_locations))

    yield ("type", "category", "allow_creation", "locations")
    yield ("left", "left", "left", "left")
    if not processor_types:
        yield ("-", "-", "-", "-")
        return
    for pt in processor_types:
        yield (pt.type_, pt.category, f"{pt.allow_creation}", locations(pt))
List the processor types:
processor_types = fetch_processor_types()
print_processor_types(processor_types)
You should get something like the following:
+--------------------------------------+-------------+----------------+-----------+
| type                                 | category    | allow_creation | locations |
+--------------------------------------+-------------+----------------+-----------+
| CUSTOM_CLASSIFICATION_PROCESSOR      | CUSTOM      | True           | eu, us    |
...
| FORM_PARSER_PROCESSOR                | GENERAL     | True           | eu, us    |
| LAYOUT_PARSER_PROCESSOR              | GENERAL     | True           | eu, us    |
| OCR_PROCESSOR                        | GENERAL     | True           | eu, us    |
| BANK_STATEMENT_PROCESSOR             | SPECIALIZED | True           | eu, us    |
| EXPENSE_PROCESSOR                    | SPECIALIZED | True           | eu, us    |
...
+--------------------------------------+-------------+----------------+-----------+
→ Processor types: 19
Now, you have all the info needed to create processors in the next step.
5. Creating processors
To create a processor, call create_processor with a display name and a processor type.
Add the following function:
def create_processor(display_name: str, type: str) -> docai.Processor:
    client, parent = get_client_and_parent()
    processor = docai.Processor(display_name=display_name, type_=type)

    return client.create_processor(parent=parent, processor=processor)
Create the test processors:
separator = "=" * 80
for display_name, type in test_processor_display_names_and_types:
    print(separator)
    print(f"Creating {display_name} ({type})...")
    try:
        create_processor(display_name, type)
    except Exception as err:
        print(err)
print(separator)
print("Done")
You should get the following:
================================================================================
Creating document-ocr (OCR_PROCESSOR)...
================================================================================
Creating form-parser (FORM_PARSER_PROCESSOR)...
================================================================================
Done
You have created new processors!
Next, see how to list the processors.
6. Listing project processors
list_processors returns the list of all the processors belonging to your project.
Add the following functions:
def list_processors() -> MutableSequence[docai.Processor]:
    client, parent = get_client_and_parent()
    response = client.list_processors(parent=parent)

    return list(response.processors)

def print_processors(processors: Optional[Sequence[docai.Processor]] = None):
    def sort_key(processor):
        return processor.display_name

    if processors is None:
        processors = list_processors()
    sorted_processors = sorted(processors, key=sort_key)
    data = processor_tabular_data(sorted_processors)
    headers = next(data)
    colalign = next(data)

    print(tabulate(data, headers, tablefmt="pretty", colalign=colalign))
    print(f"→ Processors: {len(sorted_processors)}")

def processor_tabular_data(
    processors: Sequence[docai.Processor],
) -> Iterator[Tuple[str, str, str]]:
    yield ("display_name", "type", "state")
    yield ("left", "left", "left")
    if not processors:
        yield ("-", "-", "-")
        return
    for processor in processors:
        yield (processor.display_name, processor.type_, processor.state.name)
Call the functions:
processors = list_processors()
print_processors(processors)
You should get the following:
+--------------+-----------------------+---------+
| display_name | type                  | state   |
+--------------+-----------------------+---------+
| document-ocr | OCR_PROCESSOR         | ENABLED |
| form-parser  | FORM_PARSER_PROCESSOR | ENABLED |
+--------------+-----------------------+---------+
→ Processors: 2
To retrieve a processor by its display name, add the following function:
def get_processor(
    display_name: str,
    processors: Optional[Sequence[docai.Processor]] = None,
) -> Optional[docai.Processor]:
    if processors is None:
        processors = list_processors()
    for processor in processors:
        if processor.display_name == display_name:
            return processor
    return None
Test the function:
processor = get_processor(document_ocr_display_name, processors)

assert processor is not None
print(processor)
You should see something like this:
name: "projects/PROJECT_NUM/locations/LOCATION/processors/PROCESSOR_ID"
type_: "OCR_PROCESSOR"
display_name: "document-ocr"
state: ENABLED
...
Now, you know how to list your project processors and retrieve them by their display names. Next, see how to use a processor.
7. Using processors
Documents can be processed in two ways:
- Synchronously: Call
process_documentto analyze a single document and directly use the results. - Asynchronously: Call
batch_process_documentsto launch a batch processing on multiple or large documents.
Your test document ( PDF) is a scanned questionnaire completed with handwritten answers. Download it into your working directory, directly from your IPython session:
!gsutil cp gs://cloud-samples-data/documentai/form.pdf .
Check the content of your working directory:
!ls
You should have the following:
... form.pdf ... venv-docai ...
You can use the synchronous process_document method to analyze a local file. Add the following function:
def process_file(
    processor: docai.Processor,
    file_path: str,
    mime_type: str,
) -> docai.Document:
    client = get_client()
    with open(file_path, "rb") as document_file:
        document_content = document_file.read()
    document = docai.RawDocument(content=document_content, mime_type=mime_type)
    request = docai.ProcessRequest(raw_document=document, name=processor.name)

    response = client.process_document(request)

    return response.document
Because your document is a questionnaire, choose the form parser. In addition to extracting the text (printed and handwritten), which all processors do, this general processor detects form fields.
Analyze the document:
processor = get_processor(form_parser_display_name)
assert processor is not None

file_path = "./form.pdf"
mime_type = "application/pdf"

document = process_file(processor, file_path, mime_type)
All processors run an Optical Character Recognition (OCR) first pass on the document. Review the text detected by the OCR pass:
document.text.split("\n")
You should see something like the following:
['FakeDoc M.D.',
 'HEALTH INTAKE FORM',
 'Please fill out the questionnaire carefully. The information you provide will be used to complete',
 'your health profile and will be kept confidential.',
 'Date:',
 '9/14/19',
 'Name:',
 'Sally Walker',
 'DOB: 09/04/1986',
 'Address: 24 Barney Lane',
 'City: Towaco',
 'State: NJ Zip: 07082',
 'Email: Sally, walker@cmail.com',
 '_Phone #: (906) 917-3486',
 'Gender: F',
 'Marital Status:',
  ...
]
Add the following functions to print out the detected form fields:
def print_form_fields(document: docai.Document):
    sorted_form_fields = form_fields_sorted_by_ocr_order(document)
    data = form_field_tabular_data(sorted_form_fields, document)
    headers = next(data)
    colalign = next(data)

    print(tabulate(data, headers, tablefmt="pretty", colalign=colalign))
    print(f"→ Form fields: {len(sorted_form_fields)}")

def form_field_tabular_data(
    form_fields: Sequence[docai.Document.Page.FormField],
    document: docai.Document,
) -> Iterator[Tuple[str, str, str]]:
    yield ("name", "value", "confidence")
    yield ("right", "left", "right")
    if not form_fields:
        yield ("-", "-", "-")
        return
    for form_field in form_fields:
        name_layout = form_field.field_name
        value_layout = form_field.field_value
        name = text_from_layout(name_layout, document)
        value = text_from_layout(value_layout, document)
        confidence = value_layout.confidence
        yield (name, value, f"{confidence:.1%}")
Also add these utility functions:
def form_fields_sorted_by_ocr_order(
    document: docai.Document,
) -> MutableSequence[docai.Document.Page.FormField]:
    def sort_key(form_field):
        # Sort according to the field name detected position
        text_anchor = form_field.field_name.text_anchor
        return text_anchor.text_segments[0].start_index if text_anchor else 0

    fields = (field for page in document.pages for field in page.form_fields)

    return sorted(fields, key=sort_key)


def text_from_layout(
    layout: docai.Document.Page.Layout,
    document: docai.Document,
) -> str:
    full_text = document.text
    segs = layout.text_anchor.text_segments
    text = "".join(full_text[seg.start_index : seg.end_index] for seg in segs)
    if text.endswith("\n"):
        text = text[:-1]

    return text
Print the detected form fields:
print_form_fields(document)
You should get a printout like the following:
+-----------------+-------------------------+------------+
|            name | value                   | confidence |
+-----------------+-------------------------+------------+
|           Date: | 9/14/19                 |      83.0% |
|           Name: | Sally Walker            |      87.3% |
|            DOB: | 09/04/1986              |      88.5% |
|        Address: | 24 Barney Lane          |      82.4% |
|           City: | Towaco                  |      90.0% |
|          State: | NJ                      |      89.4% |
|            Zip: | 07082                   |      91.4% |
|          Email: | Sally, walker@cmail.com |      79.7% |
|       _Phone #: | walker@cmail.com        |      93.2% |
|                 | (906                    |            |
|         Gender: | F                       |      88.2% |
| Marital Status: | Single                  |      85.2% |
|     Occupation: | Software Engineer       |      81.5% |
|    Referred By: | None                    |      76.9% |
...
+-----------------+-------------------------+------------+
→ Form fields: 17
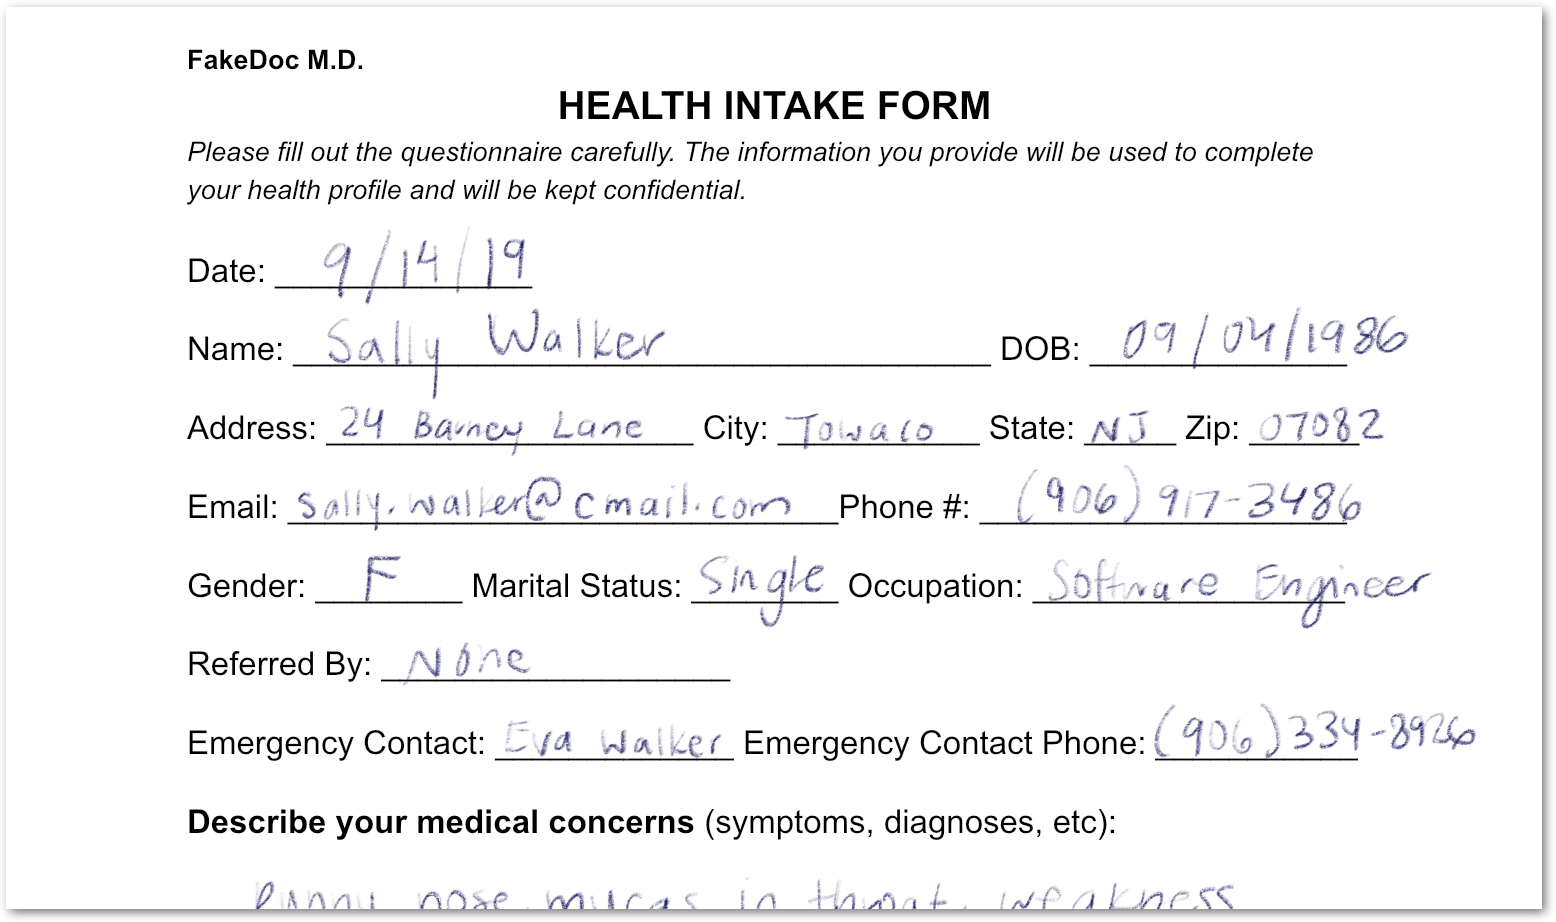
Review the field names and values that have been detected ( PDF). Here is the top half of the questionnaire:

You have analyzed a form that contains both printed and handwritten text. You have also detected its fields with high confidence. The result is that your pixels have been transformed into structured data!
8. Enabling and disabling processors
With disable_processor and enable_processor, you can control whether a processor can be used.
Add the following functions:
def update_processor_state(processor: docai.Processor, enable_processor: bool):
    client = get_client()
    if enable_processor:
        request = docai.EnableProcessorRequest(name=processor.name)
        operation = client.enable_processor(request)
    else:
        request = docai.DisableProcessorRequest(name=processor.name)
        operation = client.disable_processor(request)
    operation.result()  # Wait for operation to complete

def enable_processor(processor: docai.Processor):
    update_processor_state(processor, True)

def disable_processor(processor: docai.Processor):
    update_processor_state(processor, False)
Disable the form parser processor, and check the state of your processors:
processor = get_processor(form_parser_display_name)
assert processor is not None

disable_processor(processor)
print_processors()
You should get the following:
+--------------+-----------------------+----------+
| display_name | type                  | state    |
+--------------+-----------------------+----------+
| document-ocr | OCR_PROCESSOR         | ENABLED  |
| form-parser  | FORM_PARSER_PROCESSOR | DISABLED |
+--------------+-----------------------+----------+
→ Processors: 2
Re-enable the form parser processor:
enable_processor(processor)
print_processors()
You should get the following:
+--------------+-----------------------+---------+
| display_name | type                  | state   |
+--------------+-----------------------+---------+
| document-ocr | OCR_PROCESSOR         | ENABLED |
| form-parser  | FORM_PARSER_PROCESSOR | ENABLED |
+--------------+-----------------------+---------+
→ Processors: 2
Next, see how to manage processor versions.
9. Managing processor versions
Processors can be available in multiple versions. Check out how to use the list_processor_versions and set_default_processor_version methods.
Add the following functions:
def list_processor_versions(
    processor: docai.Processor,
) -> MutableSequence[docai.ProcessorVersion]:
    client = get_client()
    response = client.list_processor_versions(parent=processor.name)

    return list(response)


def get_sorted_processor_versions(
    processor: docai.Processor,
) -> MutableSequence[docai.ProcessorVersion]:
    def sort_key(processor_version: docai.ProcessorVersion):
        return processor_version.name

    versions = list_processor_versions(processor)

    return sorted(versions, key=sort_key)


def print_processor_versions(processor: docai.Processor):
    versions = get_sorted_processor_versions(processor)
    default_version_name = processor.default_processor_version
    data = processor_versions_tabular_data(versions, default_version_name)
    headers = next(data)
    colalign = next(data)

    print(tabulate(data, headers, tablefmt="pretty", colalign=colalign))
    print(f"→ Processor versions: {len(versions)}")


def processor_versions_tabular_data(
    versions: Sequence[docai.ProcessorVersion],
    default_version_name: str,
) -> Iterator[Tuple[str, str, str]]:
    yield ("version", "display name", "default")
    yield ("left", "left", "left")
    if not versions:
        yield ("-", "-", "-")
        return
    for version in versions:
        mapping = docai.DocumentProcessorServiceClient.parse_processor_version_path(
            version.name
        )
        processor_version = mapping["processor_version"]
        is_default = "Y" if version.name == default_version_name else ""
        yield (processor_version, version.display_name, is_default)
List the available versions for the OCR processor:
processor = get_processor(document_ocr_display_name)
assert processor is not None
print_processor_versions(processor)
You get the processor versions:
+--------------------------------+--------------------------+---------+
| version                        | display name             | default |
+--------------------------------+--------------------------+---------+
| pretrained-ocr-v1.0-2020-09-23 | Google Stable            |         |
| pretrained-ocr-v1.1-2022-09-12 | Google Release Candidate |         |
| pretrained-ocr-v1.2-2022-11-10 | Google Release Candidate |         |
| pretrained-ocr-v2.0-2023-06-02 | Google Stable            | Y       |
| pretrained-ocr-v2.1-2024-08-07 | Google Release Candidate |         |
+--------------------------------+--------------------------+---------+
→ Processor versions: 5
Now, add a function to change the default processor version:
def set_default_processor_version(processor: docai.Processor, version_name: str):
    client = get_client()
    request = docai.SetDefaultProcessorVersionRequest(
        processor=processor.name,
        default_processor_version=version_name,
    )

    operation = client.set_default_processor_version(request)
    operation.result()  # Wait for operation to complete
Switch to the latest processor version:
processor = get_processor(document_ocr_display_name)
assert processor is not None
versions = get_sorted_processor_versions(processor)

new_version = versions[-1]  # Latest version
set_default_processor_version(processor, new_version.name)

# Update the processor info
processor = get_processor(document_ocr_display_name)
assert processor is not None
print_processor_versions(processor)
You get the new version configuration:
+--------------------------------+--------------------------+---------+
| version                        | display name             | default |
+--------------------------------+--------------------------+---------+
| pretrained-ocr-v1.0-2020-09-23 | Google Stable            |         |
| pretrained-ocr-v1.1-2022-09-12 | Google Release Candidate |         |
| pretrained-ocr-v1.2-2022-11-10 | Google Release Candidate |         |
| pretrained-ocr-v2.0-2023-06-02 | Google Stable            |         |
| pretrained-ocr-v2.1-2024-08-07 | Google Release Candidate | Y       |
+--------------------------------+--------------------------+---------+
→ Processor versions: 5
And next, the ultimate processor management method (deletion).
10. Deleting processors
Finally, check out how to use the delete_processor method.
Add the following function:
def delete_processor(processor: docai.Processor):
    client = get_client()
    operation = client.delete_processor(name=processor.name)
    operation.result()  # Wait for operation to complete
Delete your test processors:
processors_to_delete = [dn for dn, _ in test_processor_display_names_and_types]
print("Deleting processors...")

for processor in list_processors():
    if processor.display_name not in processors_to_delete:
        continue
    print(f"  Deleting {processor.display_name}...")
    delete_processor(processor)

print("Done\n")
print_processors()
You should get the following:
Deleting processors...
  Deleting form-parser...
  Deleting document-ocr...
Done

+--------------+------+-------+
| display_name | type | state |
+--------------+------+-------+
| -            | -    | -     |
+--------------+------+-------+
→ Processors: 0
You've covered all the processor management methods! You're almost done...
11. Congratulations!

You learned how to manage Document AI processors using Python!
Clean up
To clean up your development environment, from Cloud Shell:
- If you're still in your IPython session, go back to the shell:
exit - Stop using the Python virtual environment:
deactivate - Delete your virtual environment folder:
cd ~ ; rm -rf ./venv-docai
To delete your Google Cloud project, from Cloud Shell:
- Retrieve your current project ID:
PROJECT_ID=$(gcloud config get-value core/project) - Make sure this is the project you want to delete:
echo $PROJECT_ID - Delete the project:
gcloud projects delete $PROJECT_ID
Learn more
- Try Document AI in your browser: https://cloud.google.com/document-ai/docs/drag-and-drop
- Document AI processor details: https://cloud.google.com/document-ai/docs/processors-list
- Python on Google Cloud: https://cloud.google.com/python
- Cloud Client Libraries for Python: https://github.com/googleapis/google-cloud-python
License
This work is licensed under a Creative Commons Attribution 2.0 Generic License.
