
1. ภาพรวม

Document AI คืออะไร
Document AI เป็นแพลตฟอร์มที่ช่วยให้คุณดึงข้อมูลเชิงลึกจากเอกสารได้ โดยหลักๆ แล้ว เครื่องมือนี้มีรายการโปรแกรมประมวลผลเอกสารที่เพิ่มขึ้นเรื่อยๆ (หรือที่เรียกว่าตัวแยกวิเคราะห์หรือตัวแยก ขึ้นอยู่กับฟังก์ชันการทำงาน)
คุณจัดการโปรเซสเซอร์ Document AI ได้ 2 วิธีดังนี้
- ด้วยตนเองจากคอนโซลบนเว็บ
- โดยใช้ Document AI API แบบเป็นโปรแกรม
ต่อไปนี้คือภาพหน้าจอตัวอย่างที่แสดงรายการโปรเซสเซอร์จากทั้งคอนโซลบนเว็บและจากโค้ด Python
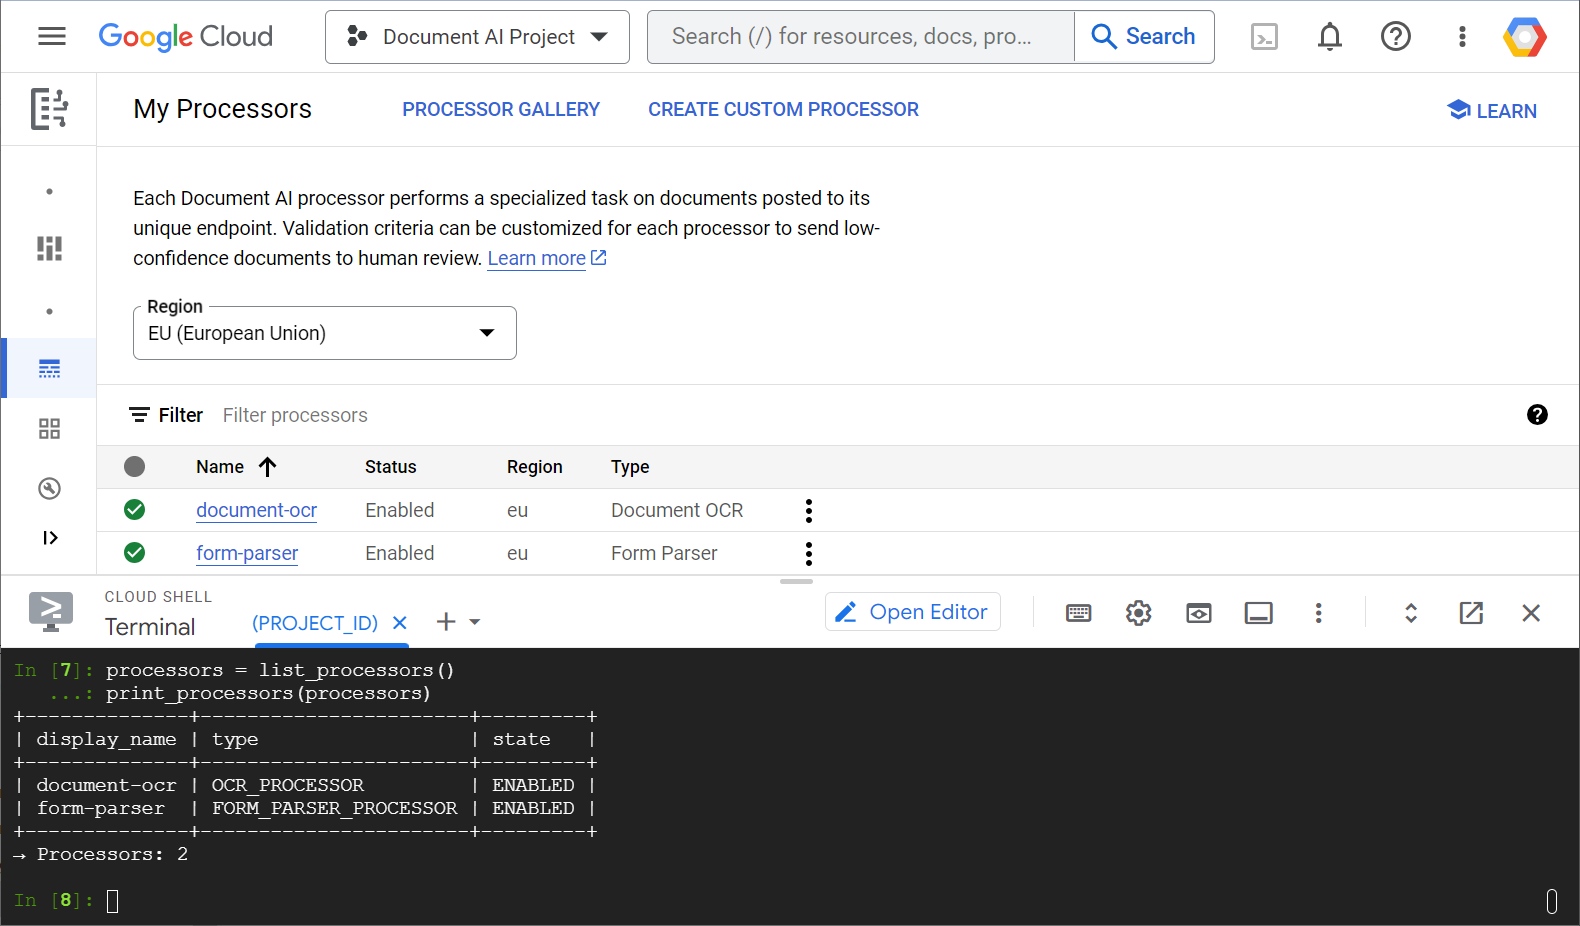
ในแล็บนี้ คุณจะมุ่งเน้นที่การจัดการโปรเซสเซอร์ Document AI โดยใช้โปรแกรมด้วยไลบรารีของไคลเอ็นต์ Python
สิ่งที่คุณจะเห็น
- วิธีตั้งค่าสภาพแวดล้อม
- วิธีดึงข้อมูลประเภทโปรเซสเซอร์
- วิธีสร้างโปรเซสเซอร์
- วิธีแสดงรายการผู้ประมวลผลข้อมูลของโปรเจ็กต์
- วิธีใช้โปรเซสเซอร์
- วิธีเปิด/ปิดใช้โปรเซสเซอร์
- วิธีจัดการเวอร์ชันของโปรเซสเซอร์
- วิธีลบโปรเซสเซอร์
สิ่งที่คุณต้องมี
แบบสำรวจ
คุณจะใช้บทแนะนำนี้อย่างไร
คุณจะให้คะแนนประสบการณ์การใช้งาน Python เท่าใด
คุณจะให้คะแนนประสบการณ์การใช้งานบริการของ Google Cloud เท่าไร
2. การตั้งค่าและข้อกำหนด
การตั้งค่าสภาพแวดล้อมแบบเรียนรู้ด้วยตนเอง
- ลงชื่อเข้าใช้ Google Cloud Console แล้วสร้างโปรเจ็กต์ใหม่หรือใช้โปรเจ็กต์ที่มีอยู่ซ้ำ หากยังไม่มีบัญชี Gmail หรือ Google Workspace คุณต้องสร้างบัญชี


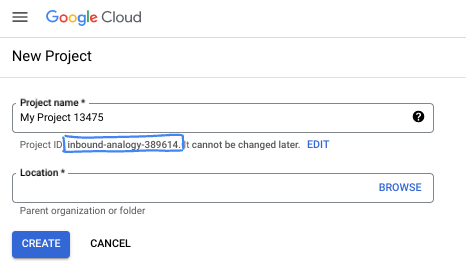
- ชื่อโปรเจ็กต์คือชื่อที่แสดงสำหรับผู้เข้าร่วมโปรเจ็กต์นี้ ซึ่งเป็นสตริงอักขระที่ Google APIs ไม่ได้ใช้ คุณอัปเดตได้ทุกเมื่อ
- รหัสโปรเจ็กต์จะไม่ซ้ำกันในโปรเจ็กต์ Google Cloud ทั้งหมดและเปลี่ยนแปลงไม่ได้ (เปลี่ยนไม่ได้หลังจากตั้งค่าแล้ว) Cloud Console จะสร้างสตริงที่ไม่ซ้ำกันโดยอัตโนมัติ ซึ่งโดยปกติแล้วคุณไม่จำเป็นต้องสนใจว่าสตริงนั้นคืออะไร ใน Codelab ส่วนใหญ่ คุณจะต้องอ้างอิงรหัสโปรเจ็กต์ (โดยทั่วไปจะระบุเป็น
PROJECT_ID) หากไม่ชอบรหัสที่สร้างขึ้น คุณอาจสร้างรหัสแบบสุ่มอีกรหัสหนึ่งได้ หรือคุณอาจลองใช้ชื่อของคุณเองและดูว่ามีชื่อนั้นหรือไม่ คุณจะเปลี่ยนแปลงรหัสนี้หลังจากขั้นตอนนี้ไม่ได้ และรหัสจะคงอยู่ตลอดระยะเวลาของโปรเจ็กต์ - โปรดทราบว่ายังมีค่าที่ 3 ซึ่งคือหมายเลขโปรเจ็กต์ที่ API บางตัวใช้ ดูข้อมูลเพิ่มเติมเกี่ยวกับค่าทั้ง 3 นี้ได้ในเอกสารประกอบ
- จากนั้นคุณจะต้องเปิดใช้การเรียกเก็บเงินใน Cloud Console เพื่อใช้ทรัพยากร/API ของ Cloud การทำตาม Codelab นี้จะไม่มีค่าใช้จ่ายมากนัก หรืออาจไม่มีค่าใช้จ่ายเลย หากต้องการปิดทรัพยากรเพื่อหลีกเลี่ยงการเรียกเก็บเงินนอกเหนือจากบทแนะนำนี้ คุณสามารถลบทรัพยากรที่สร้างขึ้นหรือลบโปรเจ็กต์ได้ ผู้ใช้ Google Cloud รายใหม่มีสิทธิ์เข้าร่วมโปรแกรมช่วงทดลองใช้ฟรีมูลค่า$300 USD
เริ่มต้น Cloud Shell
แม้ว่าคุณจะใช้งาน Google Cloud จากแล็ปท็อประยะไกลได้ แต่ในแล็บนี้คุณจะใช้ Cloud Shell ซึ่งเป็นสภาพแวดล้อมบรรทัดคำสั่งที่ทำงานในระบบคลาวด์
เปิดใช้งาน Cloud Shell
- จาก Cloud Console ให้คลิกเปิดใช้งาน Cloud Shell


หากคุณเริ่มใช้ Cloud Shell เป็นครั้งแรก คุณจะเห็นหน้าจอระดับกลางที่อธิบายว่า Cloud Shell คืออะไร หากเห็นหน้าจอระดับกลาง ให้คลิกต่อไป

การจัดสรรและเชื่อมต่อกับ Cloud Shell จะใช้เวลาไม่นาน

เครื่องเสมือนนี้โหลดเครื่องมือพัฒนาซอฟต์แวร์ทั้งหมดที่จำเป็นไว้แล้ว โดยมีไดเรกทอรีหลักแบบถาวรขนาด 5 GB และทำงานใน Google Cloud ซึ่งช่วยเพิ่มประสิทธิภาพเครือข่ายและการตรวจสอบสิทธิ์ได้อย่างมาก คุณสามารถทำงานส่วนใหญ่หรือทั้งหมดในโค้ดแล็บนี้ได้ด้วยเบราว์เซอร์
เมื่อเชื่อมต่อกับ Cloud Shell แล้ว คุณควรเห็นว่าคุณได้รับการตรวจสอบสิทธิ์และระบบได้ตั้งค่าโปรเจ็กต์เป็นรหัสโปรเจ็กต์ของคุณ
- เรียกใช้คำสั่งต่อไปนี้ใน Cloud Shell เพื่อยืนยันว่าคุณได้รับการตรวจสอบสิทธิ์แล้ว
gcloud auth list
เอาต์พุตของคำสั่ง
 Credentialed Accounts
ACTIVE  ACCOUNT
*       <my_account>@<my_domain.com>

To set the active account, run:
    $ gcloud config set account `ACCOUNT`
- เรียกใช้คำสั่งต่อไปนี้ใน Cloud Shell เพื่อยืนยันว่าคำสั่ง gcloud รู้จักโปรเจ็กต์ของคุณ
gcloud config list project
เอาต์พุตของคำสั่ง
[core]
project = <PROJECT_ID>
หากไม่ได้ตั้งค่าไว้ คุณตั้งค่าได้ด้วยคำสั่งนี้
gcloud config set project <PROJECT_ID>
เอาต์พุตของคำสั่ง
Updated property [core/project].
3. การตั้งค่าสภาพแวดล้อม
ก่อนที่จะเริ่มใช้ Document AI ได้ ให้เรียกใช้คำสั่งต่อไปนี้ใน Cloud Shell เพื่อเปิดใช้ Document AI API
gcloud services enable documentai.googleapis.com
คุณควรเห็นข้อความคล้ายกับข้อความต่อไปนี้
Operation "operations/..." finished successfully.
ตอนนี้คุณใช้ Document AI ได้แล้ว
ไปที่ไดเรกทอรีหลักโดยใช้คำสั่งต่อไปนี้
cd ~
สร้างสภาพแวดล้อมเสมือนของ Python เพื่อแยกการอ้างอิง
virtualenv venv-docai
เปิดใช้งานสภาพแวดล้อมเสมือน
source venv-docai/bin/activate
ติดตั้ง IPython, ไลบรารีของไคลเอ็นต์ Document AI และ python-tabulate (ซึ่งคุณจะใช้เพื่อจัดรูปแบบผลลัพธ์ของคำขอให้สวยงาม) โดยทำดังนี้
pip install ipython google-cloud-documentai tabulate
คุณควรเห็นข้อความคล้ายกับข้อความต่อไปนี้
...
Installing collected packages: ..., tabulate, ipython, google-cloud-documentai
Successfully installed ... google-cloud-documentai-2.15.0 ...
ตอนนี้คุณก็พร้อมใช้ไลบรารีของไคลเอ็นต์ Document AI แล้ว
ตั้งค่าตัวแปรสภาพแวดล้อมต่อไปนี้
export PROJECT_ID=$(gcloud config get-value core/project)
# Choose "us" or "eu"
export API_LOCATION="us"
นับจากนี้ไป คุณควรทำตามขั้นตอนทั้งหมดในเซสชันเดียวกัน
ตรวจสอบว่าได้กำหนดตัวแปรสภาพแวดล้อมอย่างถูกต้อง
echo $PROJECT_ID
echo $API_LOCATION
ในขั้นตอนถัดไป คุณจะได้ใช้ตัวแปลภาษา Python แบบอินเทอร์แอกทีฟที่เรียกว่า IPython ซึ่งคุณเพิ่งติดตั้งไป เริ่มเซสชันโดยเรียกใช้ ipython ใน Cloud Shell
ipython
คุณควรเห็นข้อความคล้ายกับข้อความต่อไปนี้
Python 3.12.3 (main, Feb  4 2025, 14:48:35) [GCC 13.3.0]
Type 'copyright', 'credits' or 'license' for more information
IPython 9.1.0 -- An enhanced Interactive Python. Type '?' for help.

In [1]:
คัดลอกโค้ดต่อไปนี้ลงในเซสชัน IPython
import os
from typing import Iterator, MutableSequence, Optional, Sequence, Tuple

import google.cloud.documentai_v1 as docai
from tabulate import tabulate

PROJECT_ID = os.getenv("PROJECT_ID", "")
API_LOCATION = os.getenv("API_LOCATION", "")

assert PROJECT_ID, "PROJECT_ID is undefined"
assert API_LOCATION in ("us", "eu"), "API_LOCATION is incorrect"

# Test processors
document_ocr_display_name = "document-ocr"
form_parser_display_name = "form-parser"

test_processor_display_names_and_types = (
    (document_ocr_display_name, "OCR_PROCESSOR"),
    (form_parser_display_name, "FORM_PARSER_PROCESSOR"),
)

def get_client() -> docai.DocumentProcessorServiceClient:
    client_options = {"api_endpoint": f"{API_LOCATION}-documentai.googleapis.com"}
    return docai.DocumentProcessorServiceClient(client_options=client_options)

def get_parent(client: docai.DocumentProcessorServiceClient) -> str:
    return client.common_location_path(PROJECT_ID, API_LOCATION)

def get_client_and_parent() -> Tuple[docai.DocumentProcessorServiceClient, str]:
    client = get_client()
    parent = get_parent(client)
    return client, parent
คุณพร้อมที่จะส่งคำขอแรกและดึงข้อมูลประเภทโปรเซสเซอร์แล้ว
4. กำลังดึงข้อมูลประเภทโปรเซสเซอร์
ก่อนสร้างโปรเซสเซอร์ในขั้นตอนถัดไป ให้ดึงข้อมูลประเภทโปรเซสเซอร์ที่ใช้ได้ คุณดูรายการนี้ได้โดยใช้ fetch_processor_types
เพิ่มฟังก์ชันต่อไปนี้ลงในเซสชัน IPython
def fetch_processor_types() -> MutableSequence[docai.ProcessorType]:
    client, parent = get_client_and_parent()
    response = client.fetch_processor_types(parent=parent)

    return response.processor_types

def print_processor_types(processor_types: Sequence[docai.ProcessorType]):
    def sort_key(pt):
        return (not pt.allow_creation, pt.category, pt.type_)

    sorted_processor_types = sorted(processor_types, key=sort_key)
    data = processor_type_tabular_data(sorted_processor_types)
    headers = next(data)
    colalign = next(data)

    print(tabulate(data, headers, tablefmt="pretty", colalign=colalign))
    print(f"→ Processor types: {len(sorted_processor_types)}")

def processor_type_tabular_data(
    processor_types: Sequence[docai.ProcessorType],
) -> Iterator[Tuple[str, str, str, str]]:
    def locations(pt):
        return ", ".join(sorted(loc.location_id for loc in pt.available_locations))

    yield ("type", "category", "allow_creation", "locations")
    yield ("left", "left", "left", "left")
    if not processor_types:
        yield ("-", "-", "-", "-")
        return
    for pt in processor_types:
        yield (pt.type_, pt.category, f"{pt.allow_creation}", locations(pt))
แสดงรายการประเภทโปรเซสเซอร์
processor_types = fetch_processor_types()
print_processor_types(processor_types)
คุณควรได้รับผลลัพธ์คล้ายกับตัวอย่างต่อไปนี้
+--------------------------------------+-------------+----------------+-----------+
| type                                 | category    | allow_creation | locations |
+--------------------------------------+-------------+----------------+-----------+
| CUSTOM_CLASSIFICATION_PROCESSOR      | CUSTOM      | True           | eu, us    |
...
| FORM_PARSER_PROCESSOR                | GENERAL     | True           | eu, us    |
| LAYOUT_PARSER_PROCESSOR              | GENERAL     | True           | eu, us    |
| OCR_PROCESSOR                        | GENERAL     | True           | eu, us    |
| BANK_STATEMENT_PROCESSOR             | SPECIALIZED | True           | eu, us    |
| EXPENSE_PROCESSOR                    | SPECIALIZED | True           | eu, us    |
...
+--------------------------------------+-------------+----------------+-----------+
→ Processor types: 19
ตอนนี้คุณมีข้อมูลทั้งหมดที่จำเป็นในการสร้างโปรเซสเซอร์ในขั้นตอนถัดไปแล้ว
5. การสร้างโปรเซสเซอร์
หากต้องการสร้างโปรเซสเซอร์ ให้เรียกใช้ create_processor โดยระบุชื่อที่แสดงและประเภทโปรเซสเซอร์
เพิ่มฟังก์ชันต่อไปนี้
def create_processor(display_name: str, type: str) -> docai.Processor:
    client, parent = get_client_and_parent()
    processor = docai.Processor(display_name=display_name, type_=type)

    return client.create_processor(parent=parent, processor=processor)
สร้างโปรเซสเซอร์ทดสอบ
separator = "=" * 80
for display_name, type in test_processor_display_names_and_types:
    print(separator)
    print(f"Creating {display_name} ({type})...")
    try:
        create_processor(display_name, type)
    except Exception as err:
        print(err)
print(separator)
print("Done")
คุณควรได้รับสิ่งต่อไปนี้
================================================================================
Creating document-ocr (OCR_PROCESSOR)...
================================================================================
Creating form-parser (FORM_PARSER_PROCESSOR)...
================================================================================
Done
คุณได้สร้างโปรเซสเซอร์ใหม่แล้ว
จากนั้นดูวิธีแสดงรายการโปรเซสเซอร์
6. แสดงรายการโปรเซสเซอร์ของโปรเจ็กต์
list_processors จะแสดงรายการโปรเซสเซอร์ทั้งหมดที่เป็นของโปรเจ็กต์ของคุณ
เพิ่มฟังก์ชันต่อไปนี้
def list_processors() -> MutableSequence[docai.Processor]:
    client, parent = get_client_and_parent()
    response = client.list_processors(parent=parent)

    return list(response.processors)

def print_processors(processors: Optional[Sequence[docai.Processor]] = None):
    def sort_key(processor):
        return processor.display_name

    if processors is None:
        processors = list_processors()
    sorted_processors = sorted(processors, key=sort_key)
    data = processor_tabular_data(sorted_processors)
    headers = next(data)
    colalign = next(data)

    print(tabulate(data, headers, tablefmt="pretty", colalign=colalign))
    print(f"→ Processors: {len(sorted_processors)}")

def processor_tabular_data(
    processors: Sequence[docai.Processor],
) -> Iterator[Tuple[str, str, str]]:
    yield ("display_name", "type", "state")
    yield ("left", "left", "left")
    if not processors:
        yield ("-", "-", "-")
        return
    for processor in processors:
        yield (processor.display_name, processor.type_, processor.state.name)
เรียกใช้ฟังก์ชัน
processors = list_processors()
print_processors(processors)
คุณควรได้รับสิ่งต่อไปนี้
+--------------+-----------------------+---------+
| display_name | type                  | state   |
+--------------+-----------------------+---------+
| document-ocr | OCR_PROCESSOR         | ENABLED |
| form-parser  | FORM_PARSER_PROCESSOR | ENABLED |
+--------------+-----------------------+---------+
→ Processors: 2
หากต้องการดึงข้อมูลโปรเซสเซอร์ตามชื่อที่แสดง ให้เพิ่มฟังก์ชันต่อไปนี้
def get_processor(
    display_name: str,
    processors: Optional[Sequence[docai.Processor]] = None,
) -> Optional[docai.Processor]:
    if processors is None:
        processors = list_processors()
    for processor in processors:
        if processor.display_name == display_name:
            return processor
    return None
ทดสอบฟังก์ชัน
processor = get_processor(document_ocr_display_name, processors)

assert processor is not None
print(processor)
คุณควรเห็นข้อความคล้ายกับข้อความต่อไปนี้
name: "projects/PROJECT_NUM/locations/LOCATION/processors/PROCESSOR_ID"
type_: "OCR_PROCESSOR"
display_name: "document-ocr"
state: ENABLED
...
ตอนนี้คุณทราบวิธีแสดงรายการโปรเซสเซอร์ของโปรเจ็กต์และเรียกข้อมูลโปรเซสเซอร์ตามชื่อที่แสดงแล้ว จากนั้นดูวิธีใช้โปรเซสเซอร์
7. การใช้โปรเซสเซอร์
เอกสารสามารถประมวลผลได้ 2 วิธี ดังนี้
- แบบซิงโครนัส: เรียกใช้
process_documentเพื่อวิเคราะห์เอกสารเดียวและใช้ผลลัพธ์โดยตรง - แบบอะซิงโครนัส: เรียกใช้
batch_process_documentsเพื่อเปิดใช้การประมวลผลแบบกลุ่มในเอกสารหลายรายการหรือเอกสารขนาดใหญ่
เอกสารทดสอบ ( PDF) เป็นแบบสอบถามที่สแกนแล้วซึ่งกรอกคำตอบด้วยลายมือ ดาวน์โหลดลงในไดเรกทอรีการทำงานจากเซสชัน IPython โดยตรง
!gsutil cp gs://cloud-samples-data/documentai/form.pdf .
ตรวจสอบเนื้อหาของไดเรกทอรีการทำงาน
!ls
คุณควรมีสิ่งต่อไปนี้
... form.pdf ... venv-docai ...
คุณสามารถใช้วิธี process_document แบบซิงโครนัสเพื่อวิเคราะห์ไฟล์ในเครื่องได้ เพิ่มฟังก์ชันต่อไปนี้
def process_file(
    processor: docai.Processor,
    file_path: str,
    mime_type: str,
) -> docai.Document:
    client = get_client()
    with open(file_path, "rb") as document_file:
        document_content = document_file.read()
    document = docai.RawDocument(content=document_content, mime_type=mime_type)
    request = docai.ProcessRequest(raw_document=document, name=processor.name)

    response = client.process_document(request)

    return response.document
เนื่องจากเอกสารเป็นแบบสอบถาม ให้เลือกตัวแยกวิเคราะห์แบบฟอร์ม นอกเหนือจากการดึงข้อความ (ที่พิมพ์และเขียนด้วยลายมือ) ซึ่งโปรเซสเซอร์ทุกตัวทำได้แล้ว โปรเซสเซอร์ทั่วไปนี้ยังตรวจหาช่องแบบฟอร์มได้ด้วย
วิเคราะห์เอกสาร
processor = get_processor(form_parser_display_name)
assert processor is not None

file_path = "./form.pdf"
mime_type = "application/pdf"

document = process_file(processor, file_path, mime_type)
โปรเซสเซอร์ทั้งหมดจะเรียกใช้การรู้จำอักขระด้วยภาพ (OCR) รอบแรกในเอกสาร ตรวจสอบข้อความที่ตรวจพบโดยการส่งผ่าน OCR
document.text.split("\n")
คุณควรเห็นข้อความคล้ายกับข้อความต่อไปนี้
['FakeDoc M.D.',
 'HEALTH INTAKE FORM',
 'Please fill out the questionnaire carefully. The information you provide will be used to complete',
 'your health profile and will be kept confidential.',
 'Date:',
 '9/14/19',
 'Name:',
 'Sally Walker',
 'DOB: 09/04/1986',
 'Address: 24 Barney Lane',
 'City: Towaco',
 'State: NJ Zip: 07082',
 'Email: Sally, walker@cmail.com',
 '_Phone #: (906) 917-3486',
 'Gender: F',
 'Marital Status:',
  ...
]
เพิ่มฟังก์ชันต่อไปนี้เพื่อพิมพ์ช่องแบบฟอร์มที่ตรวจพบ
def print_form_fields(document: docai.Document):
    sorted_form_fields = form_fields_sorted_by_ocr_order(document)
    data = form_field_tabular_data(sorted_form_fields, document)
    headers = next(data)
    colalign = next(data)

    print(tabulate(data, headers, tablefmt="pretty", colalign=colalign))
    print(f"→ Form fields: {len(sorted_form_fields)}")

def form_field_tabular_data(
    form_fields: Sequence[docai.Document.Page.FormField],
    document: docai.Document,
) -> Iterator[Tuple[str, str, str]]:
    yield ("name", "value", "confidence")
    yield ("right", "left", "right")
    if not form_fields:
        yield ("-", "-", "-")
        return
    for form_field in form_fields:
        name_layout = form_field.field_name
        value_layout = form_field.field_value
        name = text_from_layout(name_layout, document)
        value = text_from_layout(value_layout, document)
        confidence = value_layout.confidence
        yield (name, value, f"{confidence:.1%}")
นอกจากนี้ ให้เพิ่มฟังก์ชันยูทิลิตีต่อไปนี้ด้วย
def form_fields_sorted_by_ocr_order(
    document: docai.Document,
) -> MutableSequence[docai.Document.Page.FormField]:
    def sort_key(form_field):
        # Sort according to the field name detected position
        text_anchor = form_field.field_name.text_anchor
        return text_anchor.text_segments[0].start_index if text_anchor else 0

    fields = (field for page in document.pages for field in page.form_fields)

    return sorted(fields, key=sort_key)


def text_from_layout(
    layout: docai.Document.Page.Layout,
    document: docai.Document,
) -> str:
    full_text = document.text
    segs = layout.text_anchor.text_segments
    text = "".join(full_text[seg.start_index : seg.end_index] for seg in segs)
    if text.endswith("\n"):
        text = text[:-1]

    return text
พิมพ์ช่องในแบบฟอร์มที่ตรวจพบ
print_form_fields(document)
คุณควรได้รับเอกสารที่พิมพ์ออกมาดังต่อไปนี้
+-----------------+-------------------------+------------+
|            name | value                   | confidence |
+-----------------+-------------------------+------------+
|           Date: | 9/14/19                 |      83.0% |
|           Name: | Sally Walker            |      87.3% |
|            DOB: | 09/04/1986              |      88.5% |
|        Address: | 24 Barney Lane          |      82.4% |
|           City: | Towaco                  |      90.0% |
|          State: | NJ                      |      89.4% |
|            Zip: | 07082                   |      91.4% |
|          Email: | Sally, walker@cmail.com |      79.7% |
|       _Phone #: | walker@cmail.com        |      93.2% |
|                 | (906                    |            |
|         Gender: | F                       |      88.2% |
| Marital Status: | Single                  |      85.2% |
|     Occupation: | Software Engineer       |      81.5% |
|    Referred By: | None                    |      76.9% |
...
+-----------------+-------------------------+------------+
→ Form fields: 17
ตรวจสอบชื่อช่องและค่าที่ตรวจพบ ( PDF) ส่วนครึ่งบนของแบบสอบถามมีดังนี้

คุณวิเคราะห์แบบฟอร์มที่มีทั้งข้อความที่พิมพ์และข้อความที่เขียนด้วยลายมือ นอกจากนี้ คุณยังตรวจพบฟิลด์ของฟอร์มด้วยความเชื่อมั่นสูง ผลลัพธ์คือพิกเซลของคุณจะเปลี่ยนเป็น Structured Data
8. การเปิดและปิดใช้โปรเซสเซอร์
disable_processor และ enable_processor ช่วยให้คุณควบคุมได้ว่าจะใช้โปรเซสเซอร์ได้หรือไม่
เพิ่มฟังก์ชันต่อไปนี้
def update_processor_state(processor: docai.Processor, enable_processor: bool):
    client = get_client()
    if enable_processor:
        request = docai.EnableProcessorRequest(name=processor.name)
        operation = client.enable_processor(request)
    else:
        request = docai.DisableProcessorRequest(name=processor.name)
        operation = client.disable_processor(request)
    operation.result()  # Wait for operation to complete

def enable_processor(processor: docai.Processor):
    update_processor_state(processor, True)

def disable_processor(processor: docai.Processor):
    update_processor_state(processor, False)
ปิดใช้โปรแกรมประมวลผลตัวแยกวิเคราะห์แบบฟอร์ม แล้วตรวจสอบสถานะของโปรแกรมประมวลผล
processor = get_processor(form_parser_display_name)
assert processor is not None

disable_processor(processor)
print_processors()
คุณควรได้รับสิ่งต่อไปนี้
+--------------+-----------------------+----------+
| display_name | type                  | state    |
+--------------+-----------------------+----------+
| document-ocr | OCR_PROCESSOR         | ENABLED  |
| form-parser  | FORM_PARSER_PROCESSOR | DISABLED |
+--------------+-----------------------+----------+
→ Processors: 2
เปิดใช้ตัวประมวลผลตัวแยกวิเคราะห์แบบฟอร์มอีกครั้ง
enable_processor(processor)
print_processors()
คุณควรได้รับสิ่งต่อไปนี้
+--------------+-----------------------+---------+
| display_name | type                  | state   |
+--------------+-----------------------+---------+
| document-ocr | OCR_PROCESSOR         | ENABLED |
| form-parser  | FORM_PARSER_PROCESSOR | ENABLED |
+--------------+-----------------------+---------+
→ Processors: 2
จากนั้นดูวิธีจัดการเวอร์ชันของโปรเซสเซอร์
9. การจัดการเวอร์ชันของโปรเซสเซอร์
โปรเซสเซอร์อาจมีหลายเวอร์ชัน ดูวิธีใช้เมธอด list_processor_versions และ set_default_processor_version
เพิ่มฟังก์ชันต่อไปนี้
def list_processor_versions(
    processor: docai.Processor,
) -> MutableSequence[docai.ProcessorVersion]:
    client = get_client()
    response = client.list_processor_versions(parent=processor.name)

    return list(response)


def get_sorted_processor_versions(
    processor: docai.Processor,
) -> MutableSequence[docai.ProcessorVersion]:
    def sort_key(processor_version: docai.ProcessorVersion):
        return processor_version.name

    versions = list_processor_versions(processor)

    return sorted(versions, key=sort_key)


def print_processor_versions(processor: docai.Processor):
    versions = get_sorted_processor_versions(processor)
    default_version_name = processor.default_processor_version
    data = processor_versions_tabular_data(versions, default_version_name)
    headers = next(data)
    colalign = next(data)

    print(tabulate(data, headers, tablefmt="pretty", colalign=colalign))
    print(f"→ Processor versions: {len(versions)}")


def processor_versions_tabular_data(
    versions: Sequence[docai.ProcessorVersion],
    default_version_name: str,
) -> Iterator[Tuple[str, str, str]]:
    yield ("version", "display name", "default")
    yield ("left", "left", "left")
    if not versions:
        yield ("-", "-", "-")
        return
    for version in versions:
        mapping = docai.DocumentProcessorServiceClient.parse_processor_version_path(
            version.name
        )
        processor_version = mapping["processor_version"]
        is_default = "Y" if version.name == default_version_name else ""
        yield (processor_version, version.display_name, is_default)
แสดงรายการเวอร์ชันที่พร้อมใช้งานสำหรับโปรเซสเซอร์ OCR
processor = get_processor(document_ocr_display_name)
assert processor is not None
print_processor_versions(processor)
คุณจะได้รับเวอร์ชันโปรเซสเซอร์ดังนี้
+--------------------------------+--------------------------+---------+
| version                        | display name             | default |
+--------------------------------+--------------------------+---------+
| pretrained-ocr-v1.0-2020-09-23 | Google Stable            |         |
| pretrained-ocr-v1.1-2022-09-12 | Google Release Candidate |         |
| pretrained-ocr-v1.2-2022-11-10 | Google Release Candidate |         |
| pretrained-ocr-v2.0-2023-06-02 | Google Stable            | Y       |
| pretrained-ocr-v2.1-2024-08-07 | Google Release Candidate |         |
+--------------------------------+--------------------------+---------+
→ Processor versions: 5
ตอนนี้ให้เพิ่มฟังก์ชันเพื่อเปลี่ยนเวอร์ชันโปรเซสเซอร์เริ่มต้น
def set_default_processor_version(processor: docai.Processor, version_name: str):
    client = get_client()
    request = docai.SetDefaultProcessorVersionRequest(
        processor=processor.name,
        default_processor_version=version_name,
    )

    operation = client.set_default_processor_version(request)
    operation.result()  # Wait for operation to complete
เปลี่ยนไปใช้โปรเซสเซอร์เวอร์ชันล่าสุด
processor = get_processor(document_ocr_display_name)
assert processor is not None
versions = get_sorted_processor_versions(processor)

new_version = versions[-1]  # Latest version
set_default_processor_version(processor, new_version.name)

# Update the processor info
processor = get_processor(document_ocr_display_name)
assert processor is not None
print_processor_versions(processor)
คุณจะได้รับการกำหนดค่าเวอร์ชันใหม่ดังนี้
+--------------------------------+--------------------------+---------+
| version                        | display name             | default |
+--------------------------------+--------------------------+---------+
| pretrained-ocr-v1.0-2020-09-23 | Google Stable            |         |
| pretrained-ocr-v1.1-2022-09-12 | Google Release Candidate |         |
| pretrained-ocr-v1.2-2022-11-10 | Google Release Candidate |         |
| pretrained-ocr-v2.0-2023-06-02 | Google Stable            |         |
| pretrained-ocr-v2.1-2024-08-07 | Google Release Candidate | Y       |
+--------------------------------+--------------------------+---------+
→ Processor versions: 5
และสุดท้ายคือวิธีการจัดการโปรเซสเซอร์ขั้นสูงสุด (การลบ)
10. การลบโปรเซสเซอร์
สุดท้ายนี้ โปรดดูวิธีใช้delete_processor
เพิ่มฟังก์ชันต่อไปนี้
def delete_processor(processor: docai.Processor):
    client = get_client()
    operation = client.delete_processor(name=processor.name)
    operation.result()  # Wait for operation to complete
ลบโปรเซสเซอร์ทดสอบ
processors_to_delete = [dn for dn, _ in test_processor_display_names_and_types]
print("Deleting processors...")

for processor in list_processors():
    if processor.display_name not in processors_to_delete:
        continue
    print(f"  Deleting {processor.display_name}...")
    delete_processor(processor)

print("Done\n")
print_processors()
คุณควรได้รับสิ่งต่อไปนี้
Deleting processors...
  Deleting form-parser...
  Deleting document-ocr...
Done

+--------------+------+-------+
| display_name | type | state |
+--------------+------+-------+
| -            | -    | -     |
+--------------+------+-------+
→ Processors: 0
คุณได้เรียนรู้วิธีการจัดการโปรเซสเซอร์ทั้งหมดแล้ว เกือบเสร็จแล้ว...
11. ยินดีด้วย
คุณได้เรียนรู้วิธีจัดการโปรเซสเซอร์ Document AI โดยใช้ Python แล้ว
ล้างข้อมูล
หากต้องการล้างข้อมูลสภาพแวดล้อมในการพัฒนา ให้ทำดังนี้จาก Cloud Shell
- หากยังอยู่ในเซสชัน IPython ให้กลับไปที่เชลล์โดยทำดังนี้
exit - หยุดใช้สภาพแวดล้อมเสมือนของ Python:
deactivate - ลบโฟลเดอร์สภาพแวดล้อมเสมือน
cd ~ ; rm -rf ./venv-docai
หากต้องการลบโปรเจ็กต์ Google Cloud ให้ทำดังนี้จาก Cloud Shell
- ดึงรหัสโปรเจ็กต์ปัจจุบัน:
PROJECT_ID=$(gcloud config get-value core/project) - โปรดตรวจสอบว่าโปรเจ็กต์ที่คุณต้องการลบคือ
echo $PROJECT_ID - ลบโปรเจ็กต์:
gcloud projects delete $PROJECT_ID
ดูข้อมูลเพิ่มเติม
- ลองใช้ Document AI ในเบราว์เซอร์ได้ที่ https://cloud.google.com/document-ai/docs/drag-and-drop
- รายละเอียดโปรเซสเซอร์ของ Document AI: https://cloud.google.com/document-ai/docs/processors-list
- Python ใน Google Cloud: https://cloud.google.com/python
- ไลบรารีของไคลเอ็นต์ Cloud สำหรับ Python: https://github.com/googleapis/google-cloud-python
ใบอนุญาต
ผลงานนี้ได้รับอนุญาตภายใต้สัญญาอนุญาตครีเอทีฟคอมมอนส์สำหรับยอมรับสิทธิของผู้สร้าง (Creative Commons Attribution License) 2.0 แบบทั่วไป