
1. Introduction
Spanner is a fully managed, horizontally scalable, globally distributed database service that is great for both relational and non-relational workloads.
Spanner's Cassandra interface lets you take advantage of Spanner's fully managed, scalable, and highly available infrastructure using familiar Cassandra tools and syntax.
What you'll learn
- How to set up a Spanner instance and database.
- How to convert your Cassandra schema and data model.
- How to bulk export your historical data from Cassandra to Spanner.
- How to point your application to Spanner instead of Cassandra.
What you'll need
- A Google Cloud project that is connected to a billing account.
- Access to a machine with the
gcloudCLI installed and configured, or use the Google Cloud Shell. - A web browser, such as Chrome or Firefox.
2. Setup and requirements
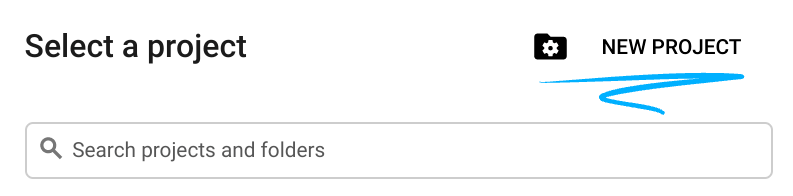
Create a GCP project
Sign in to the Google Cloud Console and create a new project or reuse an existing one. If you don't already have a Gmail or Google Workspace account, you must create one.

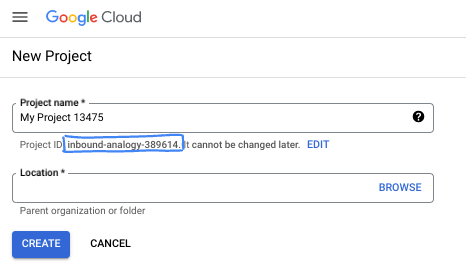
- The Project name is the display name for this project's participants. It is a character string not used by Google APIs. You can always update it.
- The Project ID is unique across all Google Cloud projects and is immutable (cannot be changed after it has been set). The Cloud Console auto-generates a unique string; usually you don't care what it is. In most codelabs, you'll need to reference your Project ID (typically identified as
PROJECT_ID). If you don't like the generated ID, you might generate another random one. Alternatively, you can try your own, and see if it's available. It can't be changed after this step and remains for the duration of the project. - For your information, there is a third value, a Project Number, which some APIs use. Learn more about all three of these values in the documentation.
Billing setup
Next, you'll need to follow the manage billing user guide and enable billing in the Cloud Console. New Google Cloud users are eligible for the $300 USD Free Trial program. To avoid incurring billing beyond this tutorial, you can shut down the Spanner instance at the end of the codelab by following "Step 9 Cleaning up".
Start Cloud Shell
While Google Cloud can be operated remotely from your laptop, in this codelab you will be using Google Cloud Shell, a command line environment running in the Cloud.
From the Google Cloud Console, click the Cloud Shell icon on the top-right toolbar:

It should only take a few moments to provision and connect to the environment. When it is finished, you should see something like this:

This virtual machine is loaded with all the development tools you'll need. It offers a persistent 5GB home directory, and runs on Google Cloud, greatly enhancing network performance and authentication. All of your work in this codelab can be done within a browser. You do not need to install anything.
Next up
Next, you will deploy Cassandra cluster.
3. Deploy Cassandra cluster (Origin)
For this codelab, we'll set up a single-node Cassandra cluster on Compute Engine.
1. Create a GCE VM for Cassandra
To create an instance, use the gcloud compute instances create command from the cloud shell provisioned before.
gcloud compute instances create cassandra-origin \
--machine-type=e2-medium \
--image-family=ubuntu-2204-lts \
--image-project=ubuntu-os-cloud \
--tags=cassandra-migration \
--boot-disk-size=20GB \
--zone=us-central1-a
2. Install Cassandra
Navigate into the VM Instances from the Navigation menu page by following the instructions below: 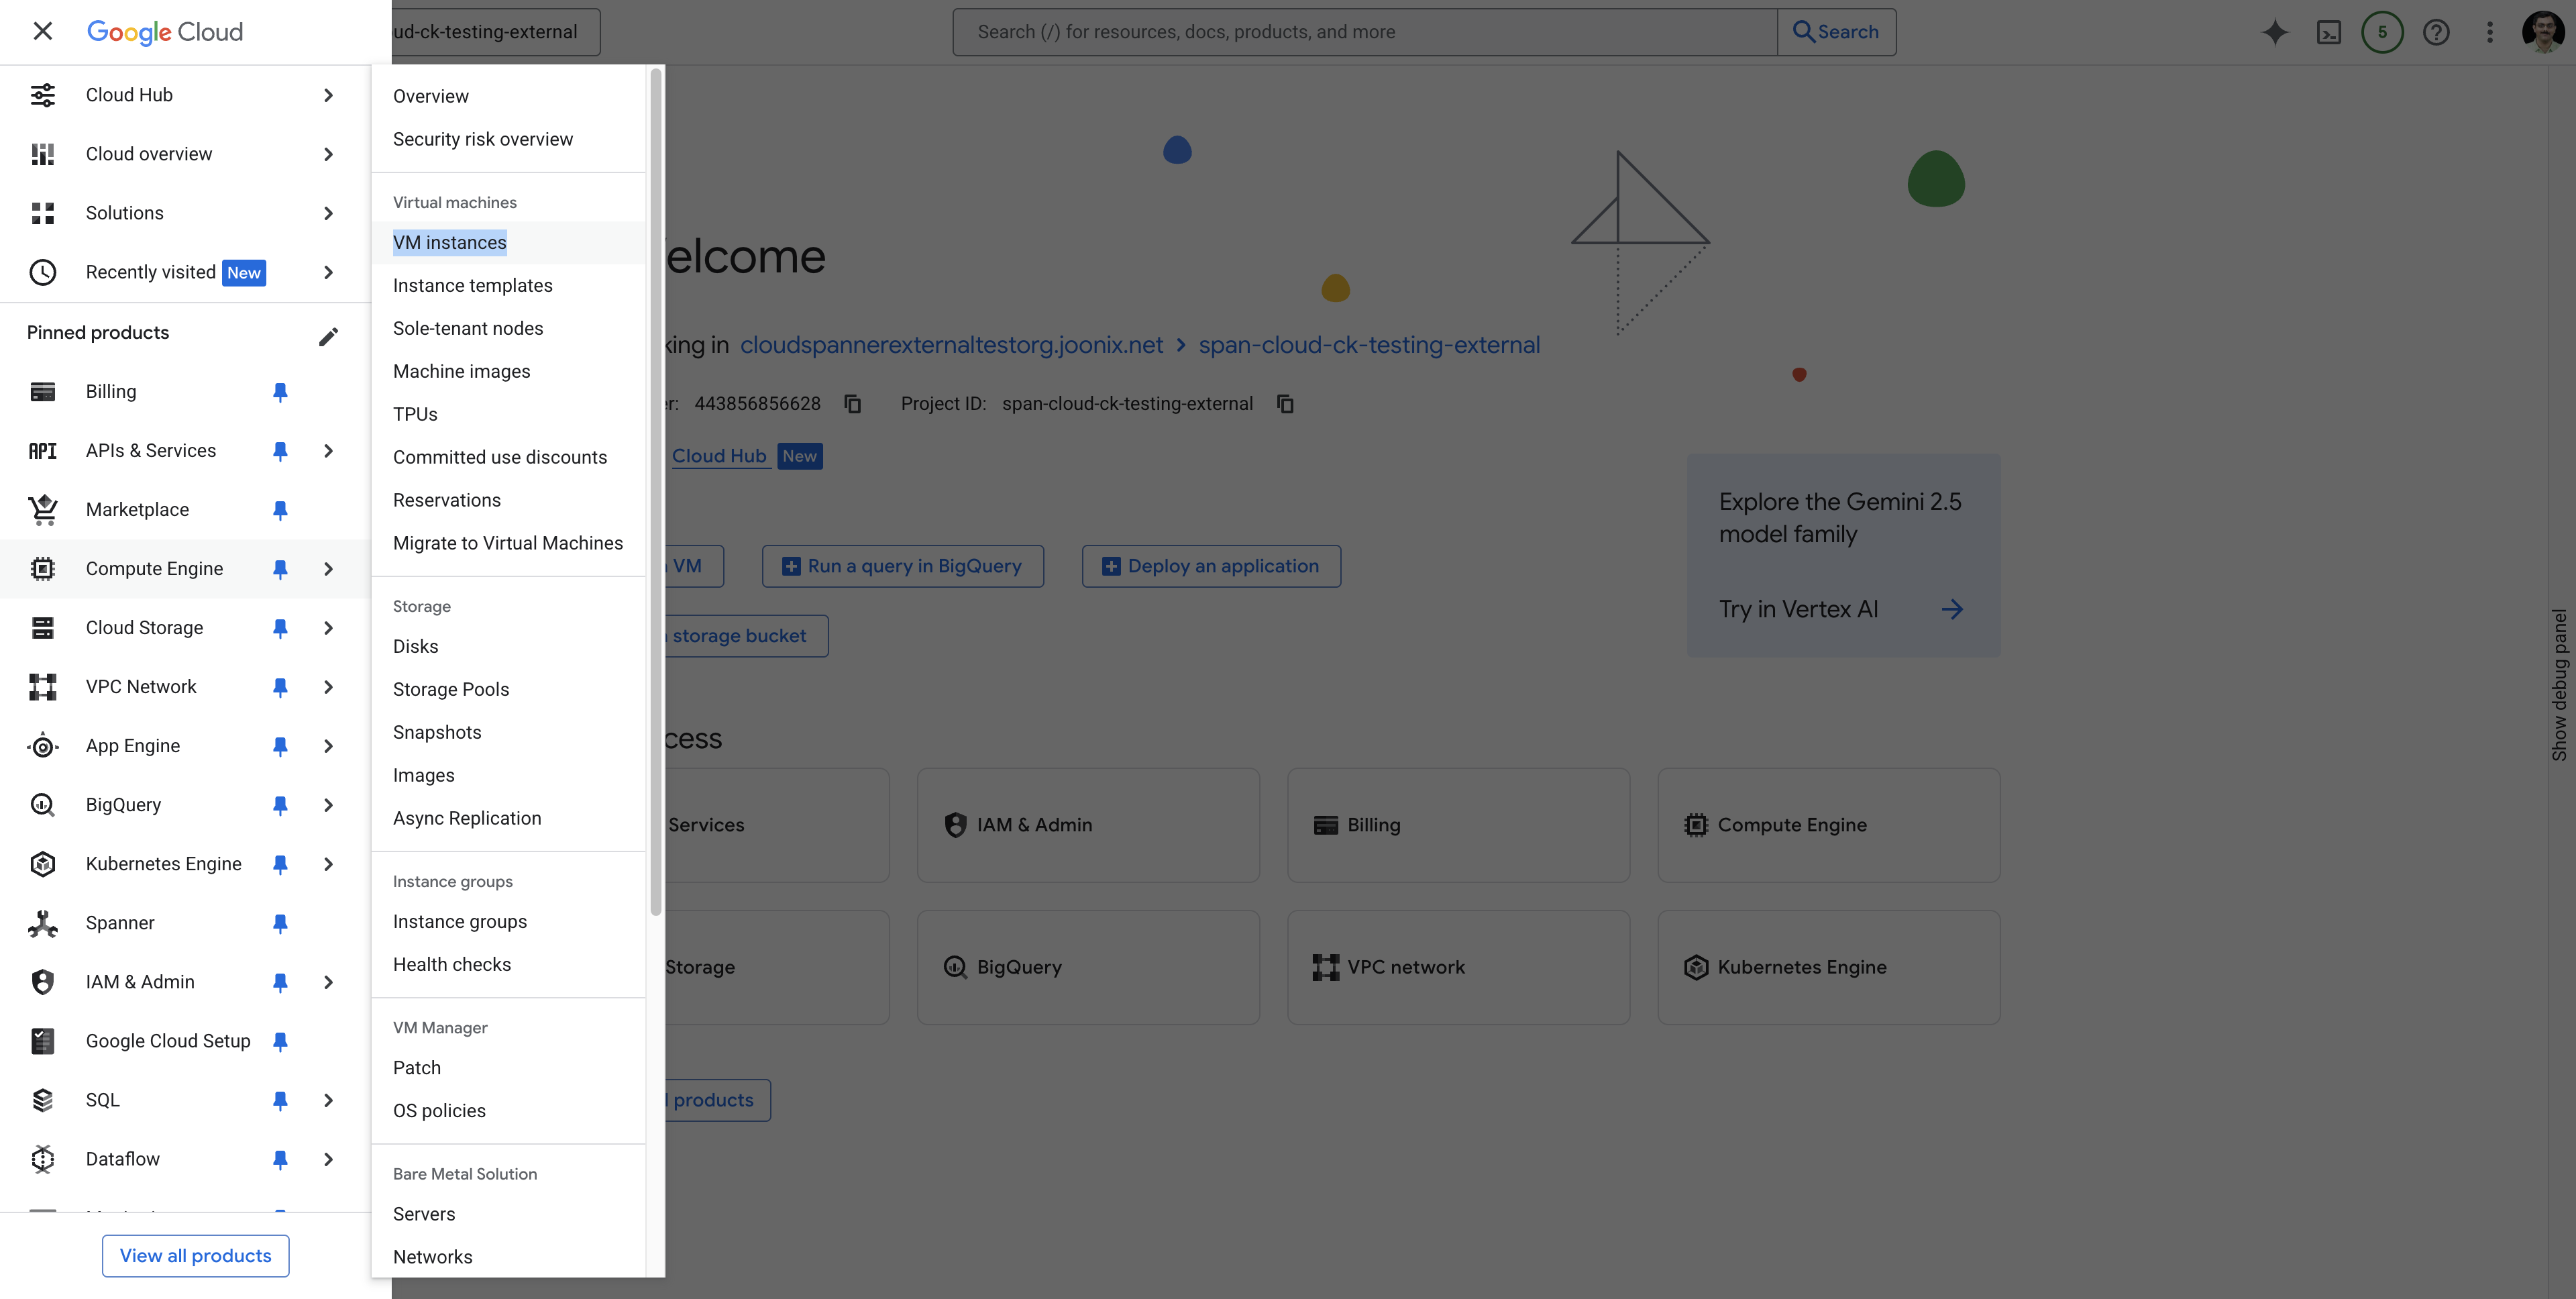 .
.
Search for the cassandra-origin VM and connect to the VM using SSH as shown:
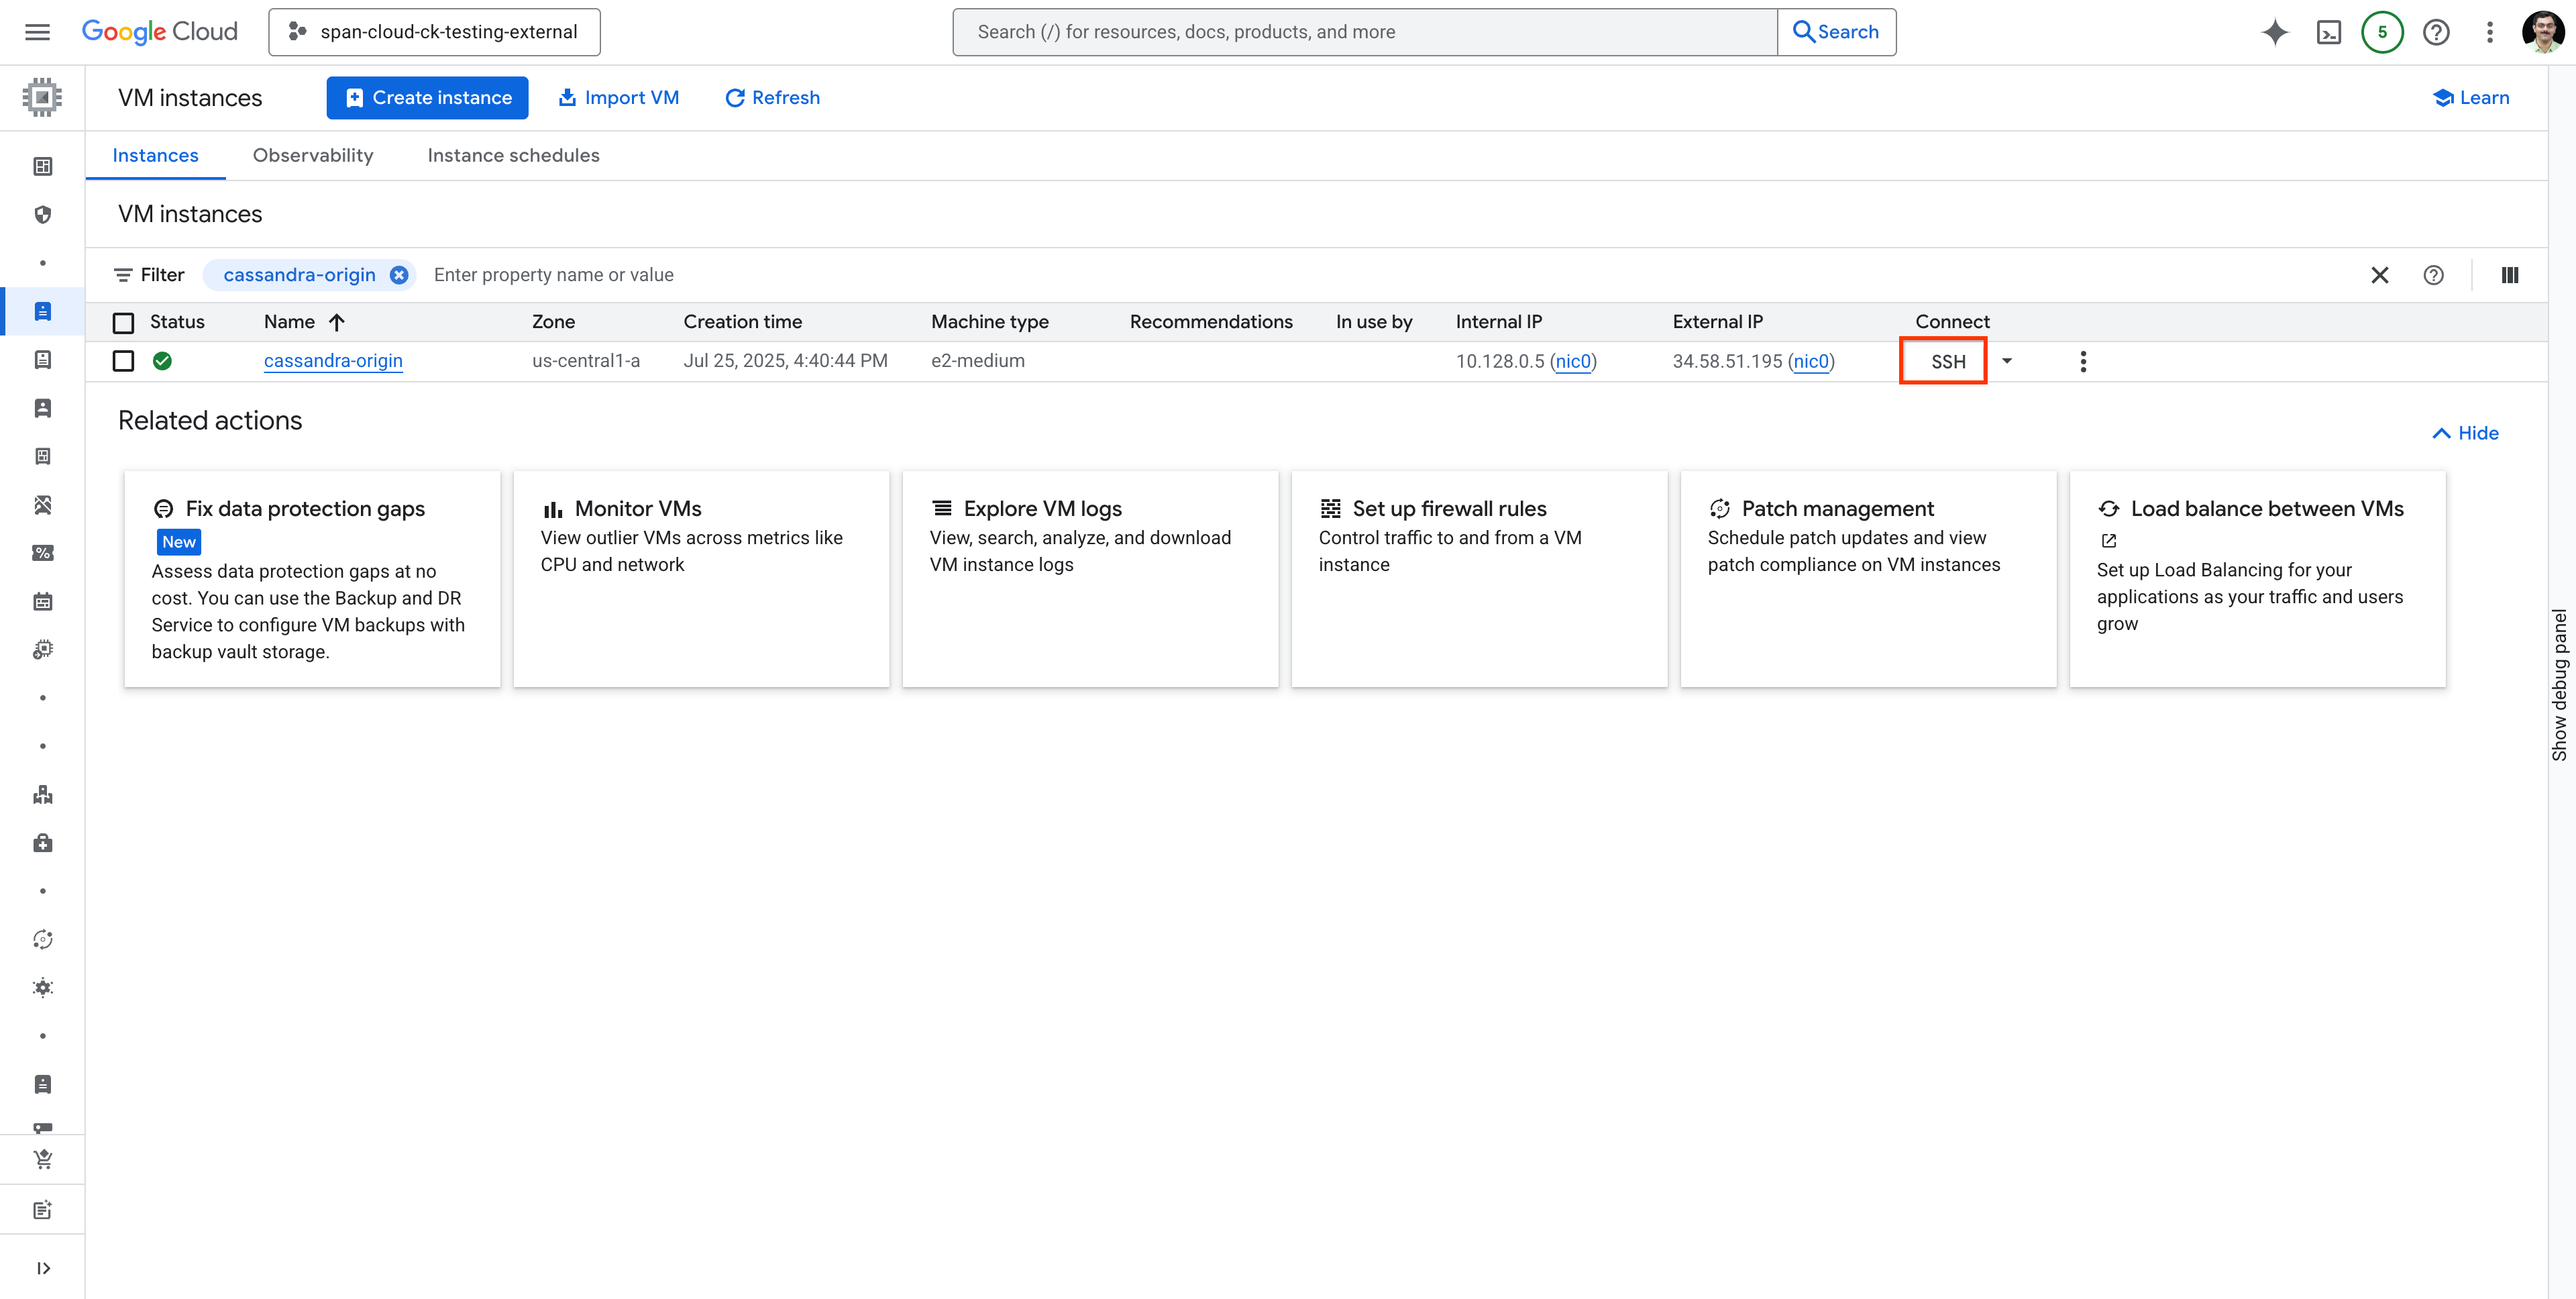 .
.
Run the following commands to install Cassandra on the VM you have created and sshed into.
Install Java (Cassandra dependency)
sudo apt-get update
sudo apt-get install -y openjdk-11-jre-headless
Add Cassandra repository
echo "deb [signed-by=/etc/apt/keyrings/apache-cassandra.asc] https://debian.cassandra.apache.org 41x main" | sudo tee -a /etc/apt/sources.list.d/cassandra.sources.list

sudo curl -o /etc/apt/keyrings/apache-cassandra.asc https://downloads.apache.org/cassandra/KEYS
Install Cassandra
sudo apt-get update
sudo apt-get install -y cassandra
Set the listen address for Cassandra service.
Here we use the internal IP address of the Cassandra VM for added security.
Note the IP address of your host machine
You can either use the following command on the cloud shell, or get it from the cloud console's VM Instances page.
gcloud compute instances describe cassandra-origin --format="get(networkInterfaces[0].networkIP)" --zone=us-central1-a
OR
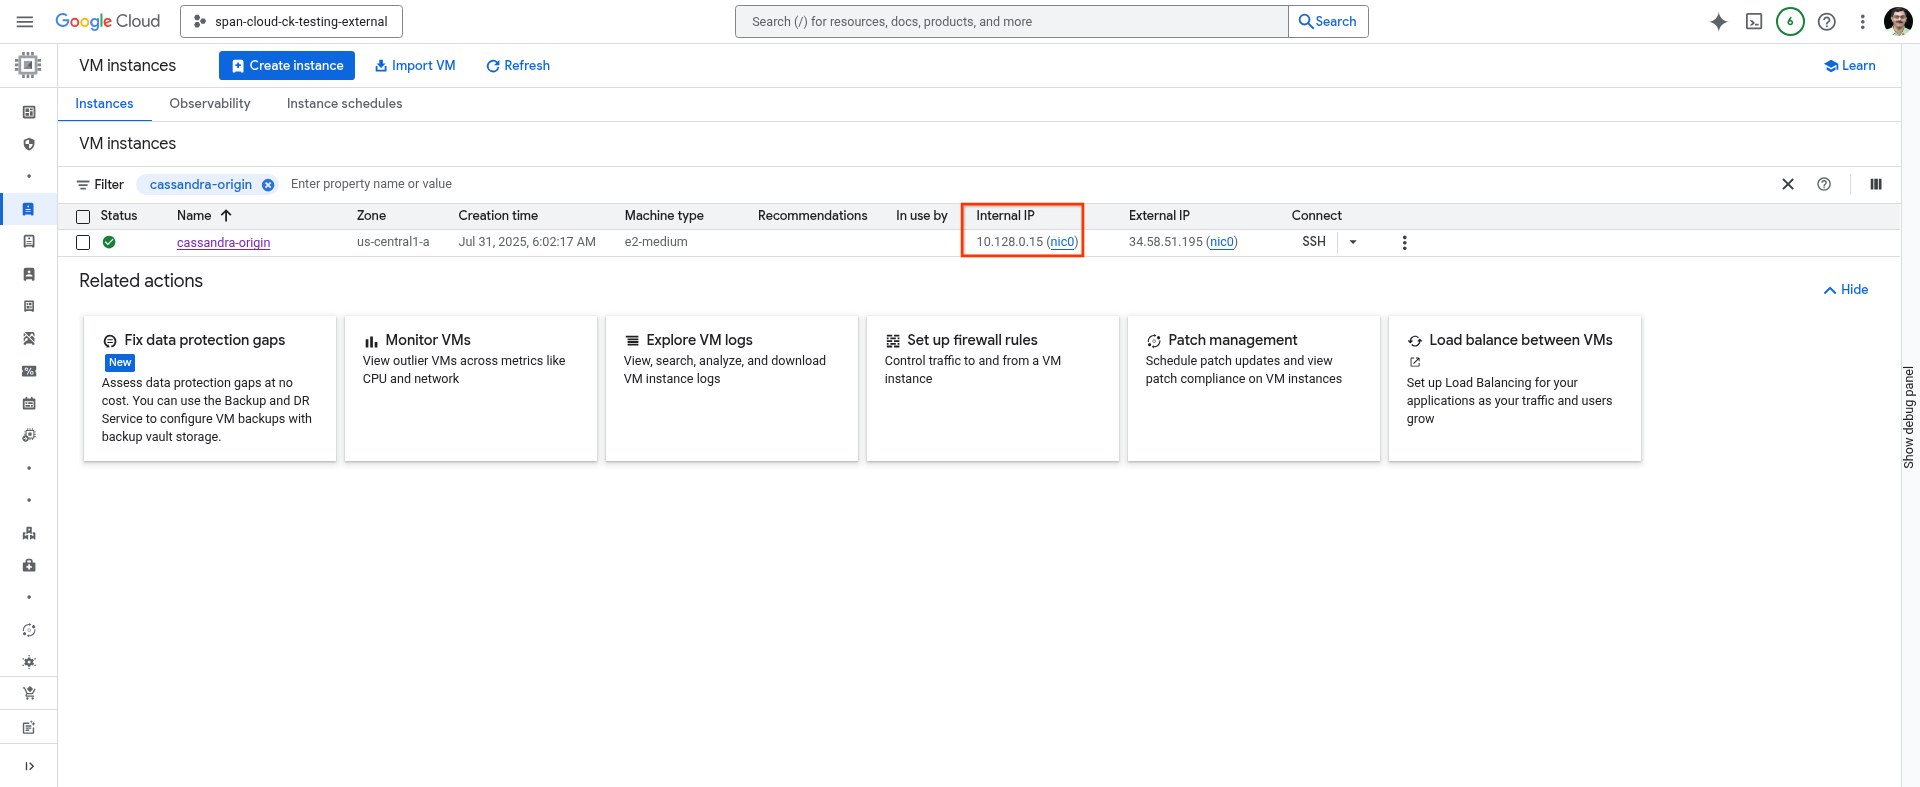 .
.
Update the address in the config file
You could use the editor of your choice to update the Cassandra config file
sudo vim /etc/cassandra/cassandra.yaml
change rpc_address: to the IP address of the VM, save and close the file.
Enable Cassandra Service on the VM
sudo systemctl enable cassandra
sudo systemctl stop cassandra
sudo systemctl start cassandra
sudo systemctl status cassandra
3. Create a keyspace and table {create-keyspace-and-table}
We'll use a "users" table example and create a keyspace called "analytics".
export CQLSH_HOST=<IP of the VM added as rpc_address>
/usr/bin/cqlsh
Inside cqlsh:
-- Create keyspace (adjust replication for production)
CREATE KEYSPACE analytics WITH replication = {'class':'SimpleStrategy', 'replication_factor':1};

-- Use the keyspace
USE analytics;

-- Create the users table
CREATE TABLE users (
    id  int PRIMARY KEY,
    active  boolean,
    username  text,
);

-- Insert 5 rows
INSERT INTO users (id, active, username) VALUES (1, true, 'd_knuth');
INSERT INTO users (id, active, username) VALUES (2, true, 'sanjay_ghemawat');
INSERT INTO users (id, active, username) VALUES (3, false, 'gracehopper');
INSERT INTO users (id, active, username) VALUES (4, true, 'brian_kernighan');
INSERT INTO users (id, active, username) VALUES (5, true, 'jeff_dean');
INSERT INTO users (id, active, username) VALUES (6, true, 'jaime_levy');
-- Select all users to verify the inserts.
SELECT * from users;
-- Exit cqlsh
EXIT;
Leave the SSH session open or note the IP address of this VM (hostname -I).
Next up
Next, you will set up a Cloud Spanner Instance and Database.
4. Create a Spanner instance (Target)
In Spanner, an instance is a cluster of computing and storage resources that hosts one or more Spanner databases. You will need at least 1 instance to host a Spanner database for this codelab.
Check gcloud SDK version
Before creating an instance, make sure that the gcloud SDK in the Google Cloud Shell has been updated to the version required - any version greater than gcloud SDK 531.0.0. You can find your gcloud SDK version by following the below command.
$ gcloud version | grep Google
Here's an example output:
Google Cloud SDK 489.0.0
If the version you're using is earlier than the required 531.0.0 version (489.0.0 in the previous example), then you need to upgrade your Google Cloud SDK by running the following command:
sudo apt-get update \
  && sudo apt-get --only-upgrade install google-cloud-cli-anthoscli google-cloud-cli-cloud-run-proxy kubectl google-cloud-cli-skaffold google-cloud-cli-cbt google-cloud-cli-docker-credential-gcr google-cloud-cli-spanner-migration-tool google-cloud-cli-cloud-build-local google-cloud-cli-pubsub-emulator google-cloud-cli-app-engine-python google-cloud-cli-kpt google-cloud-cli-bigtable-emulator google-cloud-cli-datastore-emulator google-cloud-cli-spanner-emulator google-cloud-cli-app-engine-go google-cloud-cli-app-engine-python-extras google-cloud-cli-config-connector google-cloud-cli-package-go-module google-cloud-cli-istioctl google-cloud-cli-anthos-auth google-cloud-cli-gke-gcloud-auth-plugin google-cloud-cli-app-engine-grpc google-cloud-cli-kubectl-oidc google-cloud-cli-terraform-tools google-cloud-cli-nomos google-cloud-cli-local-extract google-cloud-cli-firestore-emulator google-cloud-cli-harbourbridge google-cloud-cli-log-streaming google-cloud-cli-minikube google-cloud-cli-app-engine-java google-cloud-cli-enterprise-certificate-proxy google-cloud-cli
Enable the Spanner API
Inside Cloud Shell, make sure that your project ID is set up. Use the first command below to find the currently configured project ID. If the result is not expected, the second command below sets the right one.
gcloud config get-value project
gcloud config set project [YOUR-DESIRED-PROJECT-ID]
Configure your default region to us-central1. Feel free to change this to a different region supported by Spanner regional configurations.
gcloud config set compute/region us-central1
Enable the Spanner API:
gcloud services enable spanner.googleapis.com
Create the Spanner instance
In this section, you will create either a free trial instance or a provisioned instance. Throughout this codelab, the Spanner Cassandra Adapter Instance ID used is cassandra-adapter-demo, set as SPANNER_INSTANCE_ID variable using the export command line. Optionally, you can pick your own instance ID name.
Create a free-trial Spanner instance
A Spanner 90-day free trial instance is available to anyone with a Google Account who has Cloud Billing enabled in their project. You aren't charged unless you choose to upgrade your free trial instance to a paid instance. Spanner Cassandra Adapter is supported in the free trial instance. If eligible, create a free trial instance by opening up Cloud Shell and running this command:
export SPANNER_INSTANCE_ID=cassandra-adapter-demo
export SPANNER_REGION=regional-us-central1
gcloud spanner instances create $SPANNER_INSTANCE_ID \
  --config=$SPANNER_REGION \
  --instance-type=free-instance \
  --description="Spanner Cassandra Adapter demo"
Command output:
gcloud spanner instances create $SPANNER_INSTANCE_ID \
  --config=$SPANNER_REGION \
  --instance-type=free-instance \
  --description="Spanner Cassandra Adapter demo"
Creating instance...done.
5. Migrate Cassandra Schema and data model to Spanner
The initial and crucial phase of transitioning data from a Cassandra database to Spanner involves transforming the existing Cassandra schema to align with the structural and data type requirements of Spanner.
To streamline this complex schema migration process, use any one of the two valuable open source tools provided by Spanner:
- Spanner Migration Tool: This tool helps you migrate schema by connecting to an existing Cassandra database and migrating the schema to Spanner. This tool is available as part of
gcloud cli. - Spanner Cassandra Schema Tool: This tool helps you convert an exported DDL from Cassandra to Spanner. You could use any one of these two tools for the codelab. In this codelab, we will use the Spanner Migration Tool to migrate the schema.
Spanner Migration Tool
Spanner Migration Tool helps migrate schema from various data sources like MySQL, Postgres, Cassandra, etc.
While for the purpose of this codelab we will use the CLI of this tool, we highly recommend exploring and using the UI-based version of the tool, which also helps you to make modifications to your Spanner schema before it's applied.
Note that if the spanner-migration-tool is run on Cloud Shell, it might not have access to the internal IP address of your Cassandra VM. Hence, we recommend running the same on the VM where you installed Cassandra.
Execute the following on the VM where you installed Cassandra.
Install Spanner Migration Tool
sudo apt-get update
sudo apt-get install --upgrade google-cloud-sdk-spanner-migration-tool
If you face any problems with the installation, refer to installing-spanner-migration-tool for detailed steps.
Refresh Gcloud Credentials
gcloud auth login
gcloud auth application-default login
Migrate Schema
export CASSANDRA_HOST=`<ip address of the VM used as rpc_address above>`
export PROJECT=`<PROJECT_ID>`
gcloud alpha spanner migrate schema \
  --source=cassandra \
  --source-profile="host=${CASSANDRA_HOST},user=cassandra,password=cassandra,port=9042,keyspace=analytics,datacenter=datacenter1" \
  --target-profile="project=${PROJECT},instance=cassandra-adapter-demo,dbName=analytics" \
  --project=${PROJECT}
Verify Spanner DDL
gcloud spanner databases ddl describe analytics --instance=cassandra-adapter-demo
At the end of schema migration, the output of this command should be:
CREATE TABLE users (
  active BOOL OPTIONS (
    cassandra_type = 'boolean'
  ),
  id INT64 NOT NULL OPTIONS (
    cassandra_type = 'int'
  ),
  username STRING(MAX) OPTIONS (
    cassandra_type = 'text'
  ),
) PRIMARY KEY(id);
(Optional) See the converted DDL
You can see the converted DDL and reapply it on Spanner (if you need additional changes)
cat `ls -t cassandra_*schema.ddl.txt | head -n 1`
The output of this command would be
CREATE TABLE `users` (
        `active` BOOL OPTIONS (cassandra_type = 'boolean'),
        `id` INT64 NOT NULL  OPTIONS (cassandra_type = 'int'),
        `username` STRING(MAX) OPTIONS (cassandra_type = 'text'),
) PRIMARY KEY (`id`)
(Optional) See the conversion report
cat `ls -t cassandra_*report.txt | head -n 1`
The conversion report highlights the issues you should keep in mind. For example, if there's a mismatch in the maximum precision of a column between source and Spanner, it will be highlighted here.
6. Bulk export your historical data
In order to do the bulk migration, you will have to:
- Provision or reuse an existing GCS bucket.
- Upload Cassandra Driver configuration file to the bucket
- Launch bulk migration.
While you can launch the bulk migration either from the Cloud Shell or the newly provisioned VM, we recommend using the VM for this codelab as some of the steps like creating a config file would persist files on the local storage.
Provision a GCS bucket.
At the end of this step, you should have provisioned a GCS bucket and exported its path in a variable named CASSANDRA_BUCKET_NAME. If you would like to reuse an existing bucket, you can just proceed by exporting the path.
if [ -z ${CASSANDRA_BUCKET_NAME} ]; then
  export CASSANDRA_BUCKET_NAME="gs://cassandra-demo-$(date +%Y-%m-%d-%H-%M-%S)-$(head /dev/urandom | tr -dc a-z | head -c 20)"
  gcloud storage buckets create "${CASSANDRA_BUCKET_NAME}"
else
  echo "using existing bucket ${CASSANDRA_BUCKET_NAME}"
fi
Create and upload Driver configuration file
Here we upload a very basic Cassandra driver configuration file. Please refer to this for complete format of the file.
# Configuration for the Cassandra instance and GCS bucket
INSTANCE_NAME="cassandra-origin"
ZONE="us-central1-a"
CASSANDRA_PORT="9042"

# Retrieve the internal IP address of the Cassandra instance
CASSANDRA_IP=$(gcloud compute instances describe "${INSTANCE_NAME}" \
    --format="get(networkInterfaces[0].networkIP)" \
    --zone="${ZONE}")

# Check if the IP was successfully retrieved
if [[ -z "${CASSANDRA_IP}" ]]; then
    echo "Error: Could not retrieve Cassandra instance IP."
    exit 1
fi

# Define the full contact point
CONTACT_POINT="${CASSANDRA_IP}:${CASSANDRA_PORT}"

# Create a temporary file with the specified content
TMP_FILE=$(mktemp)
cat <<EOF > "${TMP_FILE}"
# Reference configuration for the DataStax Java driver for Apache Cassandra®.
# This file is in HOCON format, see https://github.com/typesafehub/config/blob/master/HOCON.md.
datastax-java-driver {
  basic.contact-points = ["${CONTACT_POINT}"]
  basic.session-keyspace = analytics
  basic.load-balancing-policy.local-datacenter = datacenter1
  advanced.auth-provider {
    class = PlainTextAuthProvider
    username = cassandra
    password = cassandra
  }
}
EOF

# Upload the temporary file to the specified GCS bucket
if gsutil cp "${TMP_FILE}" "${CASSANDRA_BUCKET_NAME}/cassandra.conf"; then
    echo "Successfully uploaded ${TMP_FILE} to ${CASSANDRA_BUCKET_NAME}/cassandra.conf"

    # Concatenate (cat) the uploaded file from GCS
    echo "Displaying the content of the uploaded file:"
    gsutil cat "${CASSANDRA_BUCKET_NAME}/cassandra.conf"
else
    echo "Error: Failed to upload file to GCS."
fi

# Clean up the temporary file
rm "${TMP_FILE}"
Run bulk migration
This is a sample command to run bulk migration of your data to Spanner. For actual production use cases, you would have to tweak the machine type and count as per your desired scale and throughput. Please visit README_Sourcedb_to_Spanner.md#cassandra-to-spanner-bulk-migration for complete list of options.
gcloud dataflow flex-template run "sourcedb-to-spanner-flex-job" \
  --project "`gcloud config get-value project`" \
  --region "us-central1" \
  --max-workers "2" \
  --num-workers "1" \
  --worker-machine-type "e2-standard-8" \
  --template-file-gcs-location "gs://dataflow-templates-us-central1/latest/flex/Sourcedb_to_Spanner_Flex" \
  --additional-experiments="[\"disable_runner_v2\"]" \
  --parameters "sourceDbDialect=CASSANDRA" \
  --parameters "insertOnlyModeForSpannerMutations=true" \
  --parameters "sourceConfigURL=$CASSANDRA_BUCKET_NAME/cassandra.conf" \
  --parameters "instanceId=cassandra-adapter-demo" \
  --parameters "databaseId=analytics" \
  --parameters "projectId=`gcloud config get-value project`" \
  --parameters "outputDirectory=$CASSANDRA_BUCKET_NAME/output" \
  --parameters "batchSizeForSpannerMutations=1"
This will generate output like the following. Note the id that is generated and use the same to query the status of the dataflow job.
job:
  createTime: '2025-08-08T09:41:09.820267Z'
  currentStateTime: '1970-01-01T00:00:00Z'
  id: 2025-08-08_02_41_09-17637291823018196600
  location: us-central1
  name: sourcedb-to-spanner-flex-job
  projectId: span-cloud-ck-testing-external
  startTime: '2025-08-08T09:41:09.820267Z'
Run the below command to check the status of the job and wait till the status changes to JOB_STATE_DONE.
gcloud dataflow jobs describe --region=us-central1 <dataflow job id> | grep "currentState:"
Initially, the job will be in a queued state like
currentState: JOB_STATE_QUEUED
While the job is queued/running, we highly recommend you to explore the Dataflow/Jobs page in the Cloud Console UI to monitor the job.
Once done, the state of the job will change to:
currentState: JOB_STATE_DONE
7. Point your application to Spanner (Cutover)
After meticulously validating the accuracy and integrity of your data following the migration phase, the pivotal step is to transition your application's operational focus from your legacy Cassandra system to the newly populated Spanner database. This critical transition period is commonly referred to as the "cutover".
The cutover phase marks the moment when live application traffic is redirected away from the original Cassandra cluster and directly connected to the robust and scalable Spanner infrastructure. This transition demonstrates the ease with which applications can leverage the power of Spanner, especially when utilizing the Spanner Cassandra interface.
With the Spanner Cassandra interface, the cutover process is streamlined. It primarily involves configuring your client applications to utilize the native Spanner Cassandra Client for all data interaction. Instead of communicating with your Cassandra (origin) database, your applications will seamlessly begin reading and writing data directly to Spanner (target). This fundamental shift in connectivity is typically achieved through the use of the SpannerCqlSessionBuilder, a key component of the Spanner Cassandra Client library that facilitates the establishment of connections to your Spanner instance. This effectively reroutes your application's entire data traffic flow to Spanner.
For Java applications already using the cassandra-java-driver library, integrating the Spanner Cassandra Java Client requires only minor changes to the CqlSession initialization.
Getting google-cloud-spanner-cassandra dependency
To begin using the Spanner Cassandra Client, you first need to incorporate its dependency into your project. The google-cloud-spanner-cassandra artifacts are published in Maven Central, under the group ID com.google.cloud. Add the following new dependency under the existing <dependencies> section in your Java project. Here's a simplified example of how you would include the google-cloud-spanner-cassandra dependency:
<!-- native Spanner Cassandra Client -->
<dependencies>
  <dependency>
    <groupId>com.google.cloud</groupId>
    <artifactId>google-cloud-spanner-cassandra</artifactId>
    <version>0.2.0</version>
  </dependency>
</dependencies>
Change connection configuration to connect to Spanner
Once you have added the necessary dependency, the next step is to change your connection configuration to connect to Spanner database.
A typical application interacting with a Cassandra cluster often employs code similar to the following to establish a connection:
CqlSession session = CqlSession.builder()
        .addContactPoint(new InetSocketAddress("127.0.0.1", 9042))
        .withLocalDatacenter("datacenter1")
        .withAuthCredentials("username", "password")
        .build();
To redirect this connection to Spanner, you need to modify your CqlSession creation logic. Instead of directly using the standard CqlSessionBuilder from the cassandra-java-driver, you will utilize the SpannerCqlSession.builder() provided by the Spanner Cassandra Client. Here's an illustrative example of how to modify your connection code:
String databaseUri = "projects/<your-gcp-project>/instances/<your-spanner-instance>/databases/<your-spanner-database>";

CqlSession session = SpannerCqlSession.builder()
        .setDatabaseUri(databaseUri)
        .addContactPoint(new InetSocketAddress("localhost", 9042))
        .withLocalDatacenter("datacenter1")
        .build();
By instantiating the CqlSession using SpannerCqlSession.builder() and providing the correct databaseUri, your application will now establish a connection through the Spanner Cassandra Client to your target Spanner database. This pivotal change ensures that all subsequent read and write operations performed by your application will be directed to and served by Spanner, effectively completing the initial cutover. At this point, your application should continue to function as expected, now powered by the scalability and reliability of Spanner.
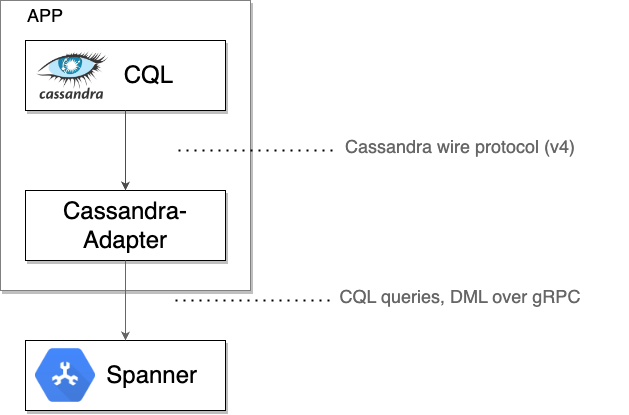
Under the Hood: How the Spanner Cassandra Client Operates
The Spanner Cassandra client acts as a local TCP proxy, intercepting the raw Cassandra protocol bytes sent by a driver or client tool. It then wraps these bytes along with necessary metadata into gRPC messages for communication with Spanner. Responses from Spanner are translated back into the Cassandra wire format and sent back to the originating driver or tool.
Once you are confident that Spanner is serving all traffic correctly, you can eventually:
- Decommission the original Cassandra cluster.
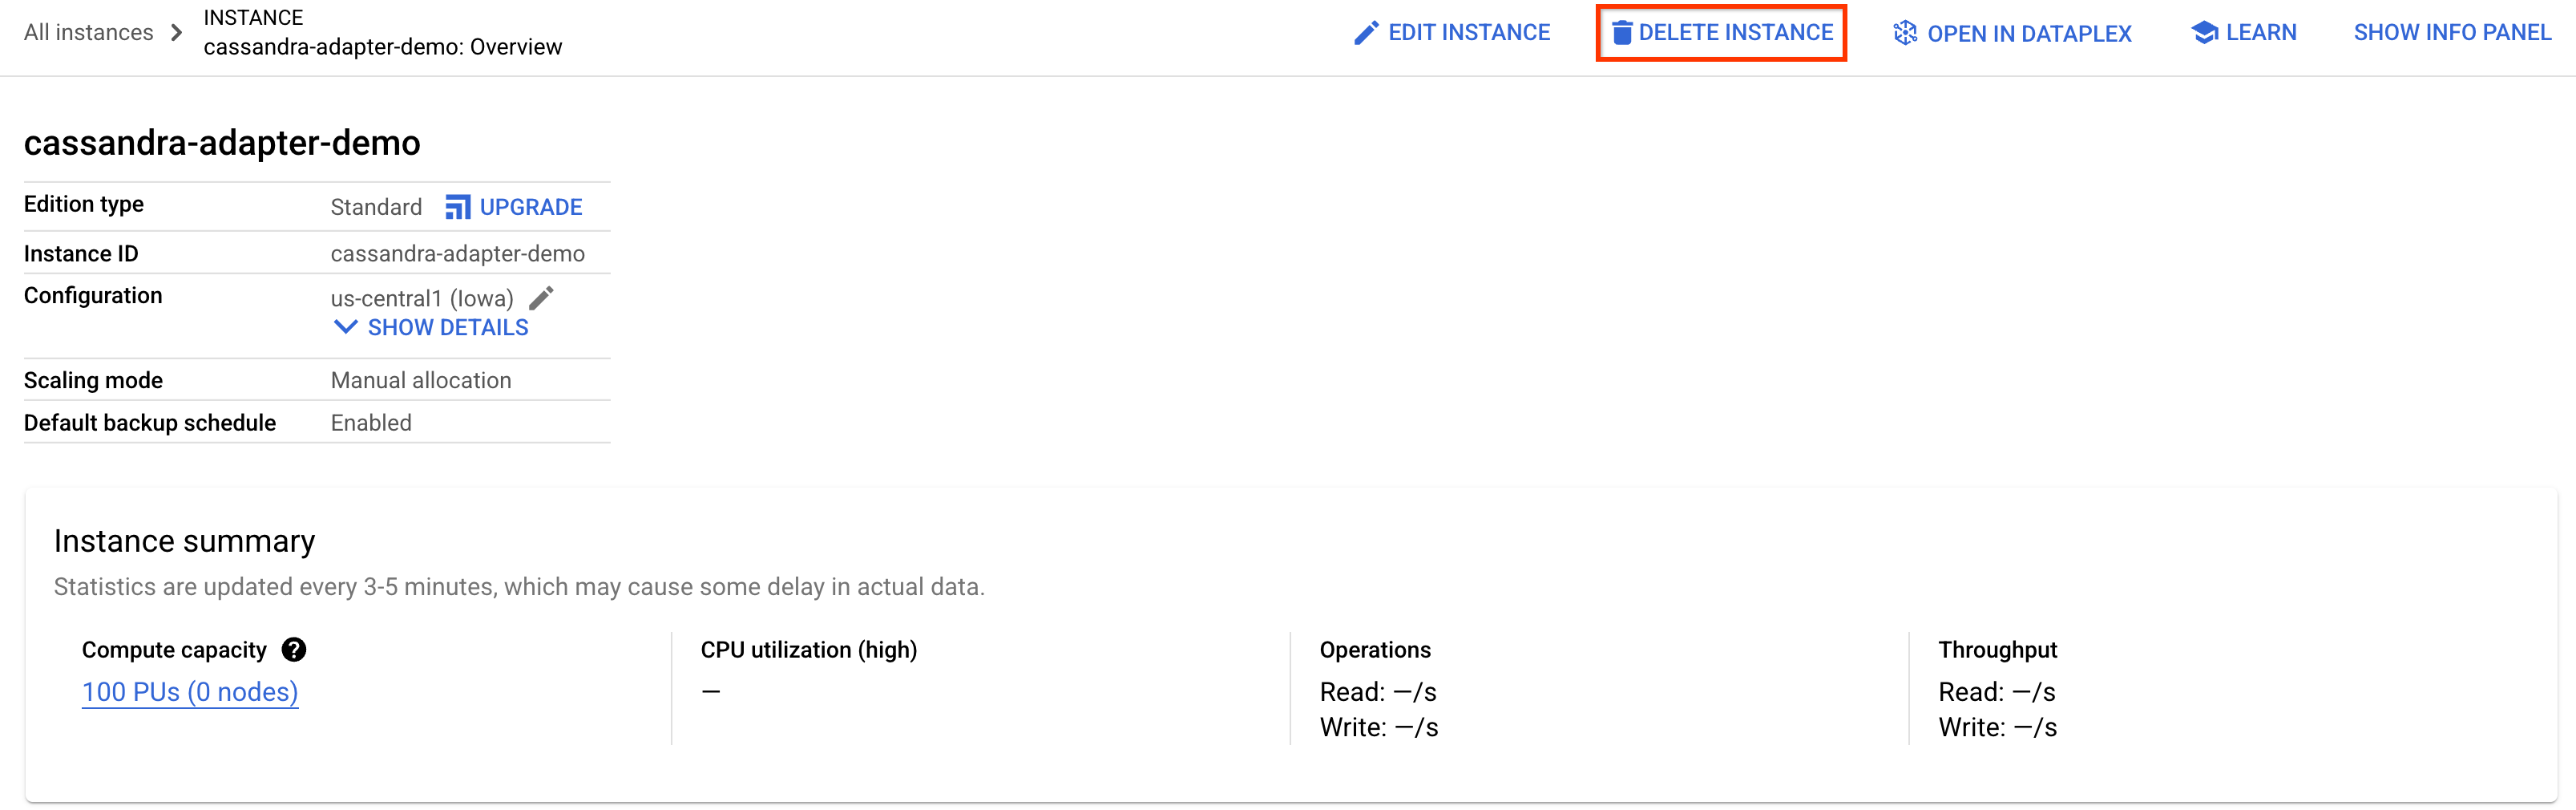
8. Cleaning up (optional)
To clean up, just go into the Spanner section of the Cloud Console and delete the cassandra-adapter-demo instance we created in the codelab.
Delete Cassandra database (if installed locally or persisted)
If you installed Cassandra outside of a Compute Engine VM created here, follow appropriate steps to remove the data or uninstall Cassandra.
9. Congratulations!
What's next?
- Learn more about Spanner.
- Learn more about Cassandra Interface.